Adding Playful Scallop and Beaded Trim

When I started my daughter’s room makeover, I wanted to go all in on color and charm. I ended up using three different paint colors to give the space depth and personality, but I also wanted to add some whimsical texture to make the room feel even more special. That’s where the trim came in.
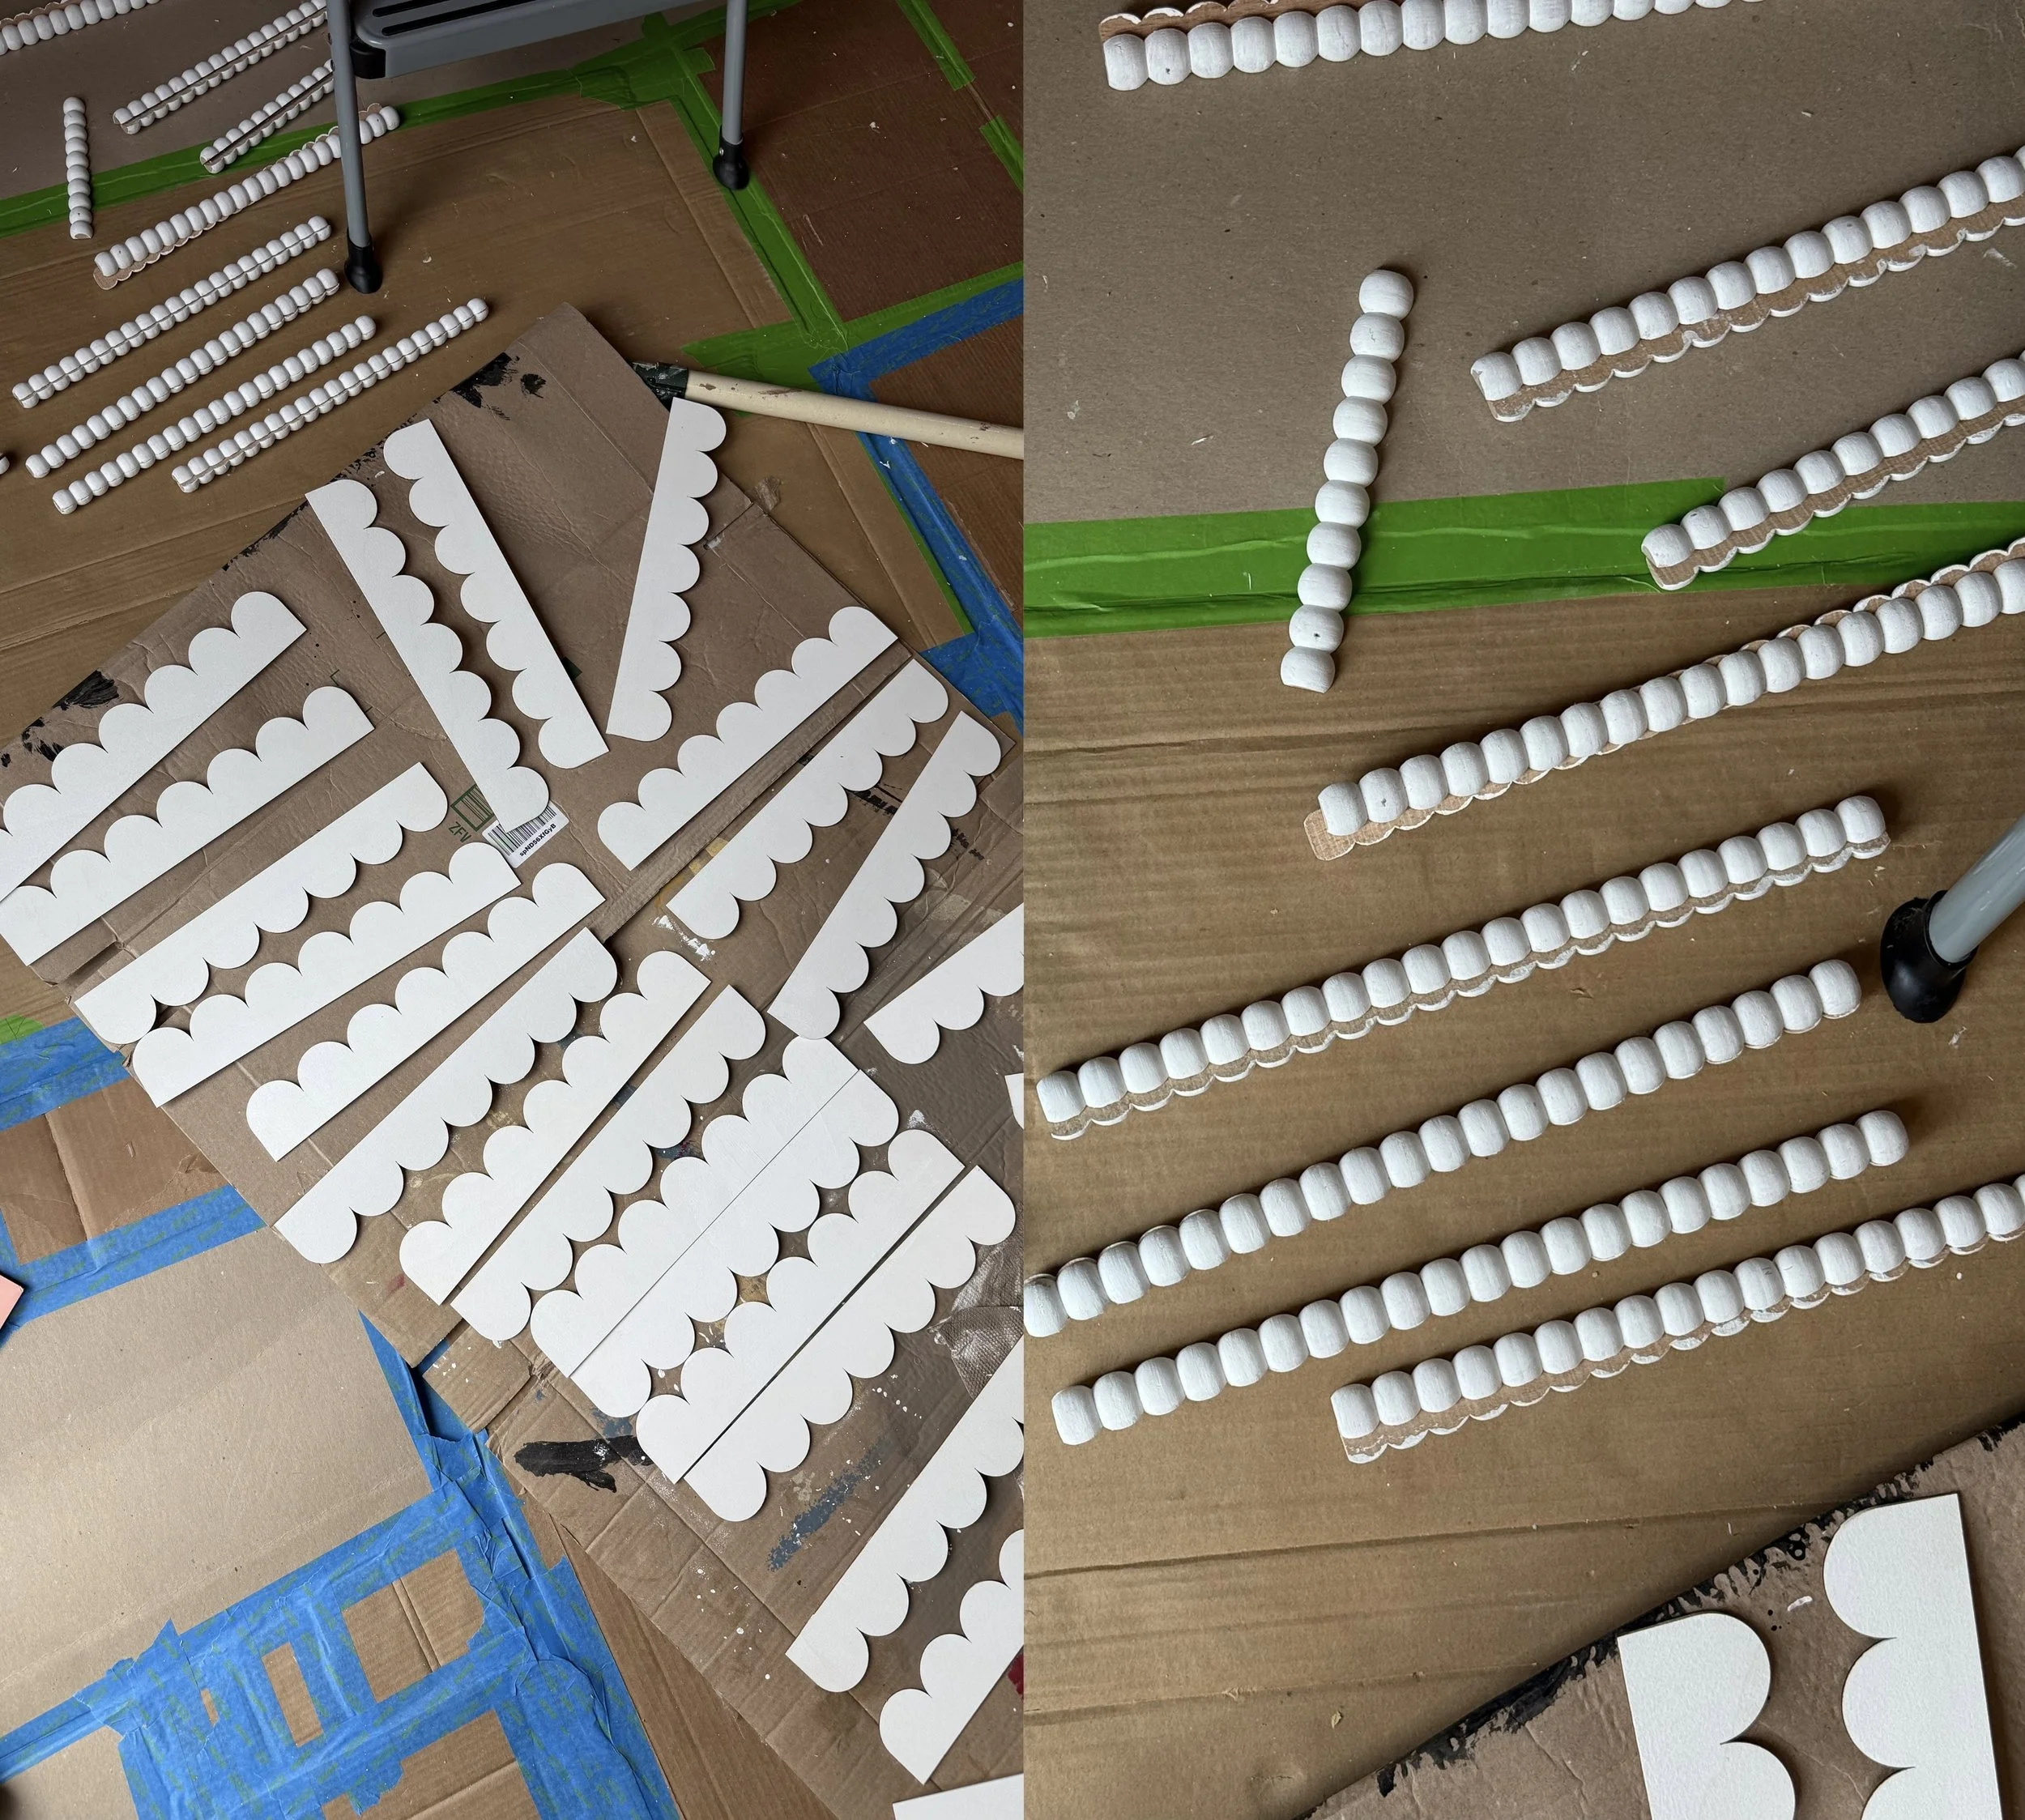
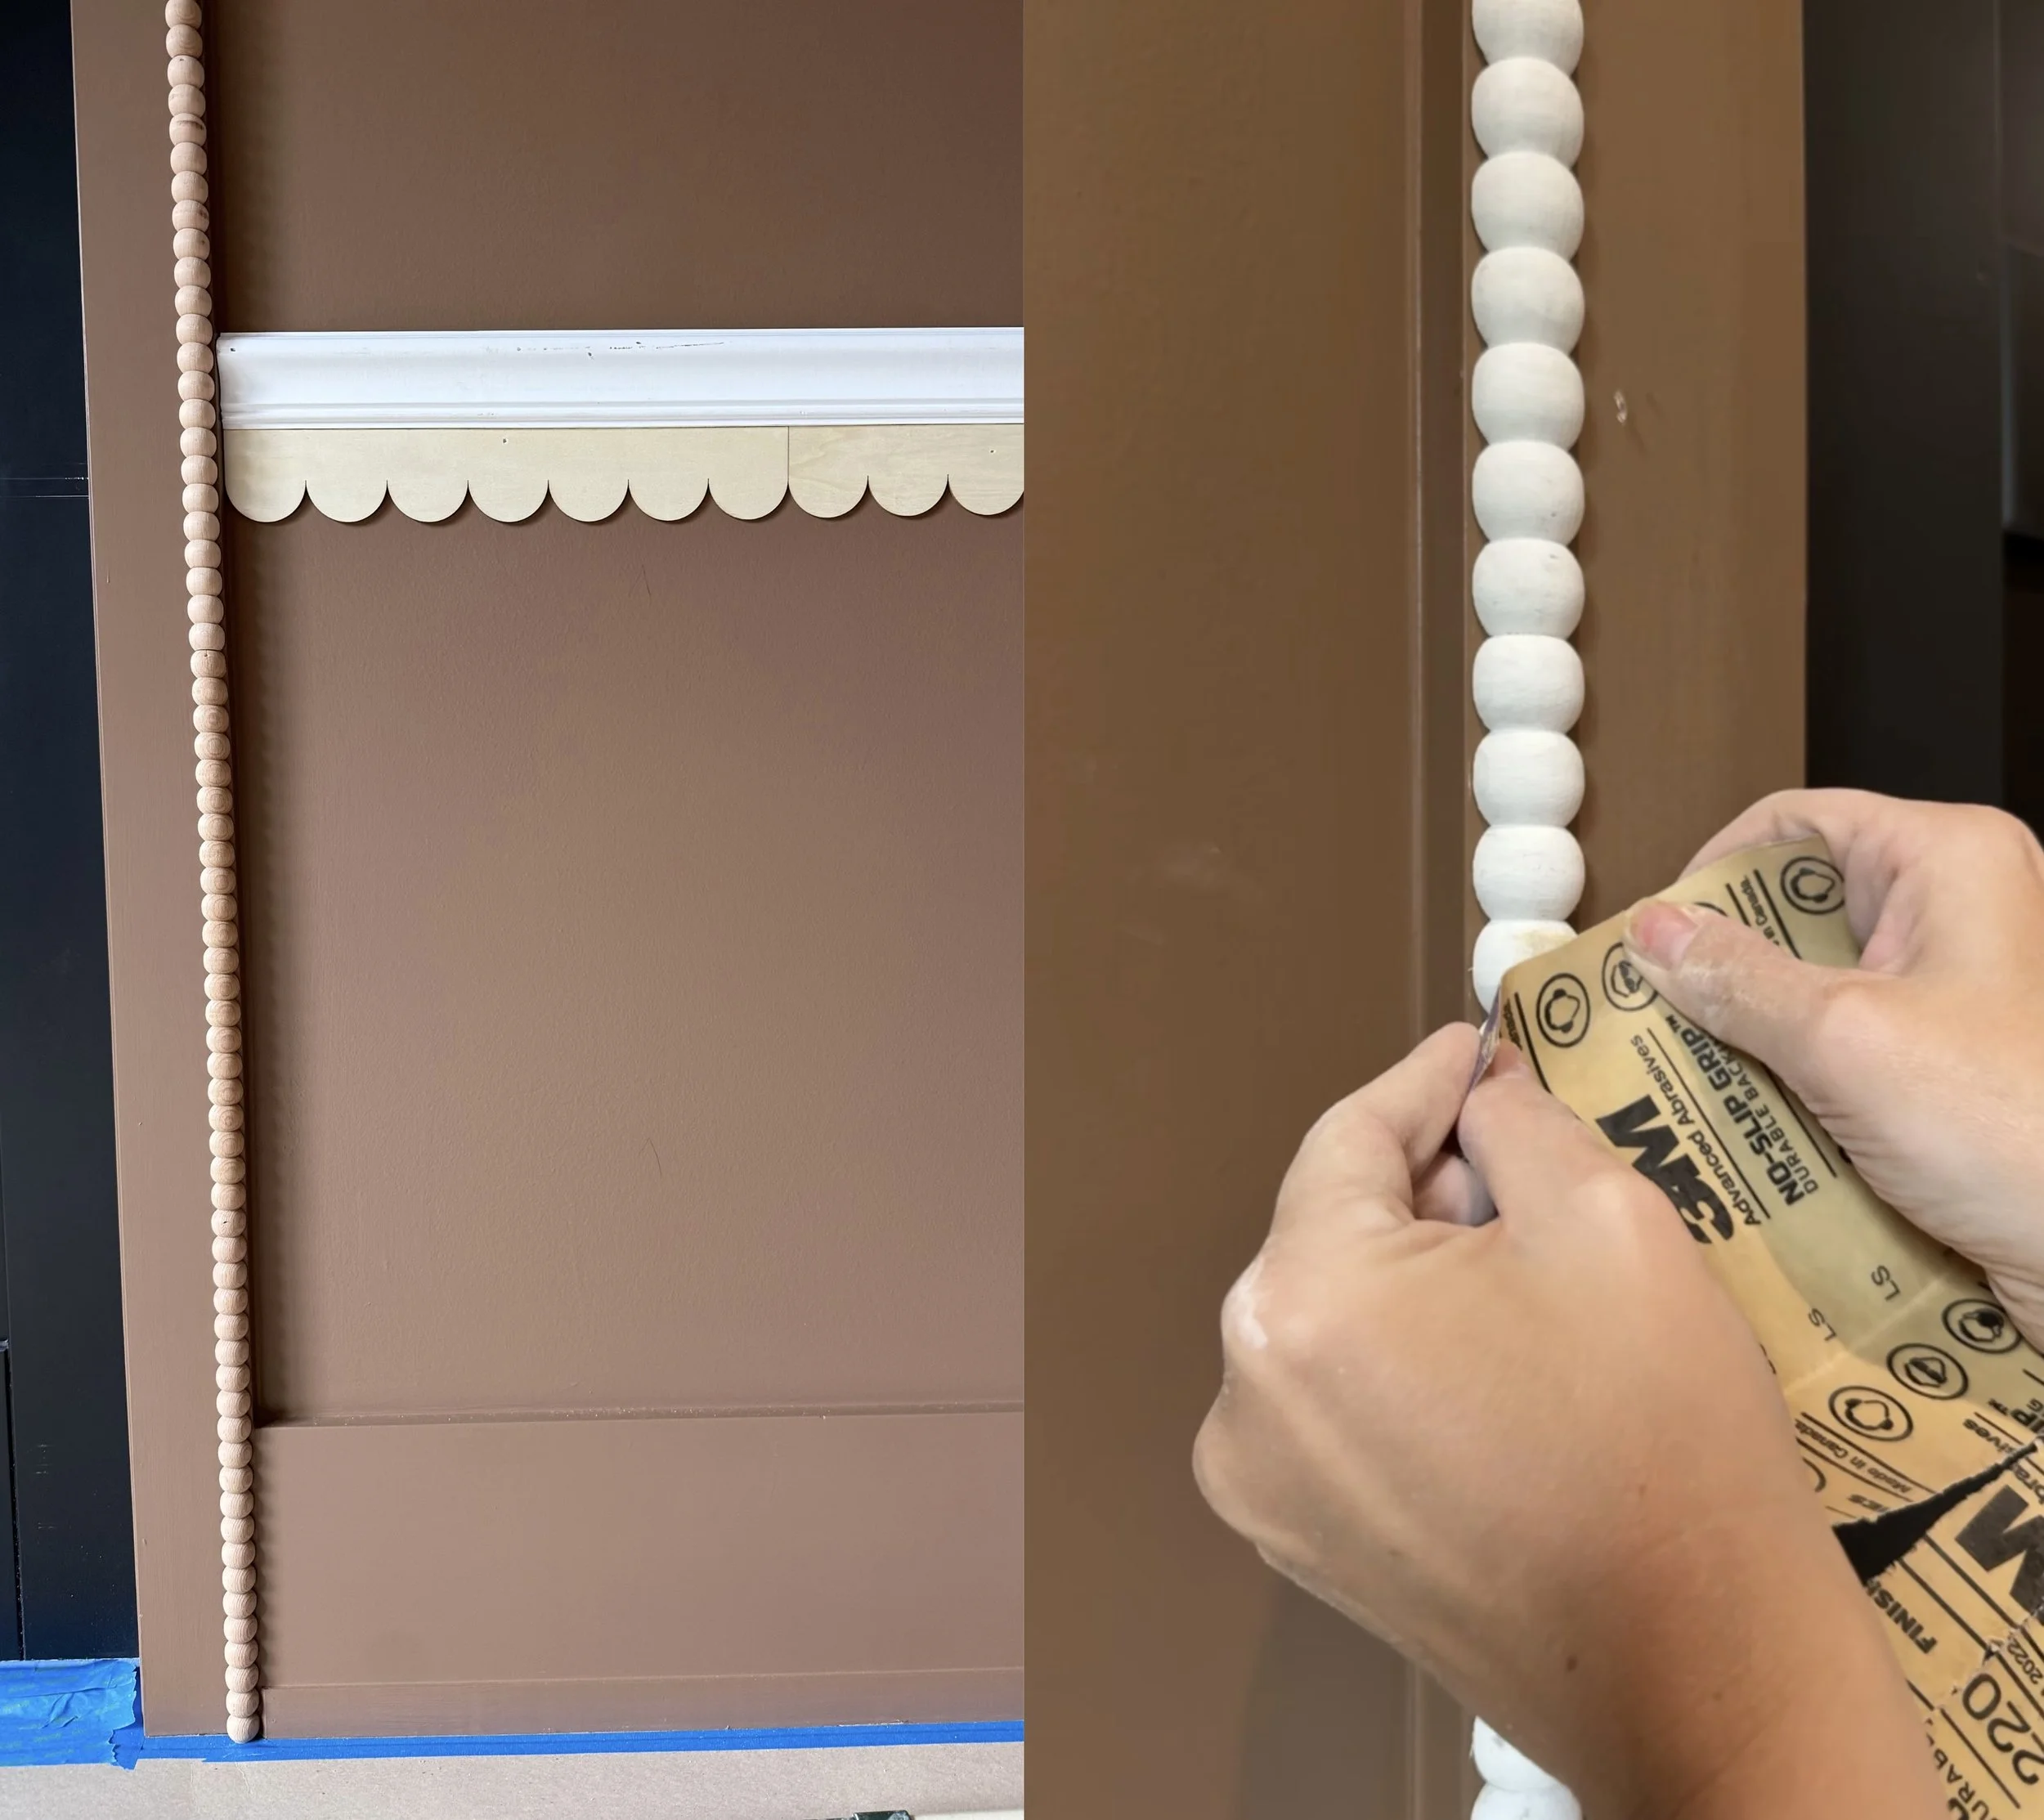
I started with my usual crown moulding, chair rail, and added base cap to the baseboards to give the room that polished, layered look I love. To make the space feel a little more magical, I added two extra details: scallop trim beneath the chair rail and beaded trim framing the doors.
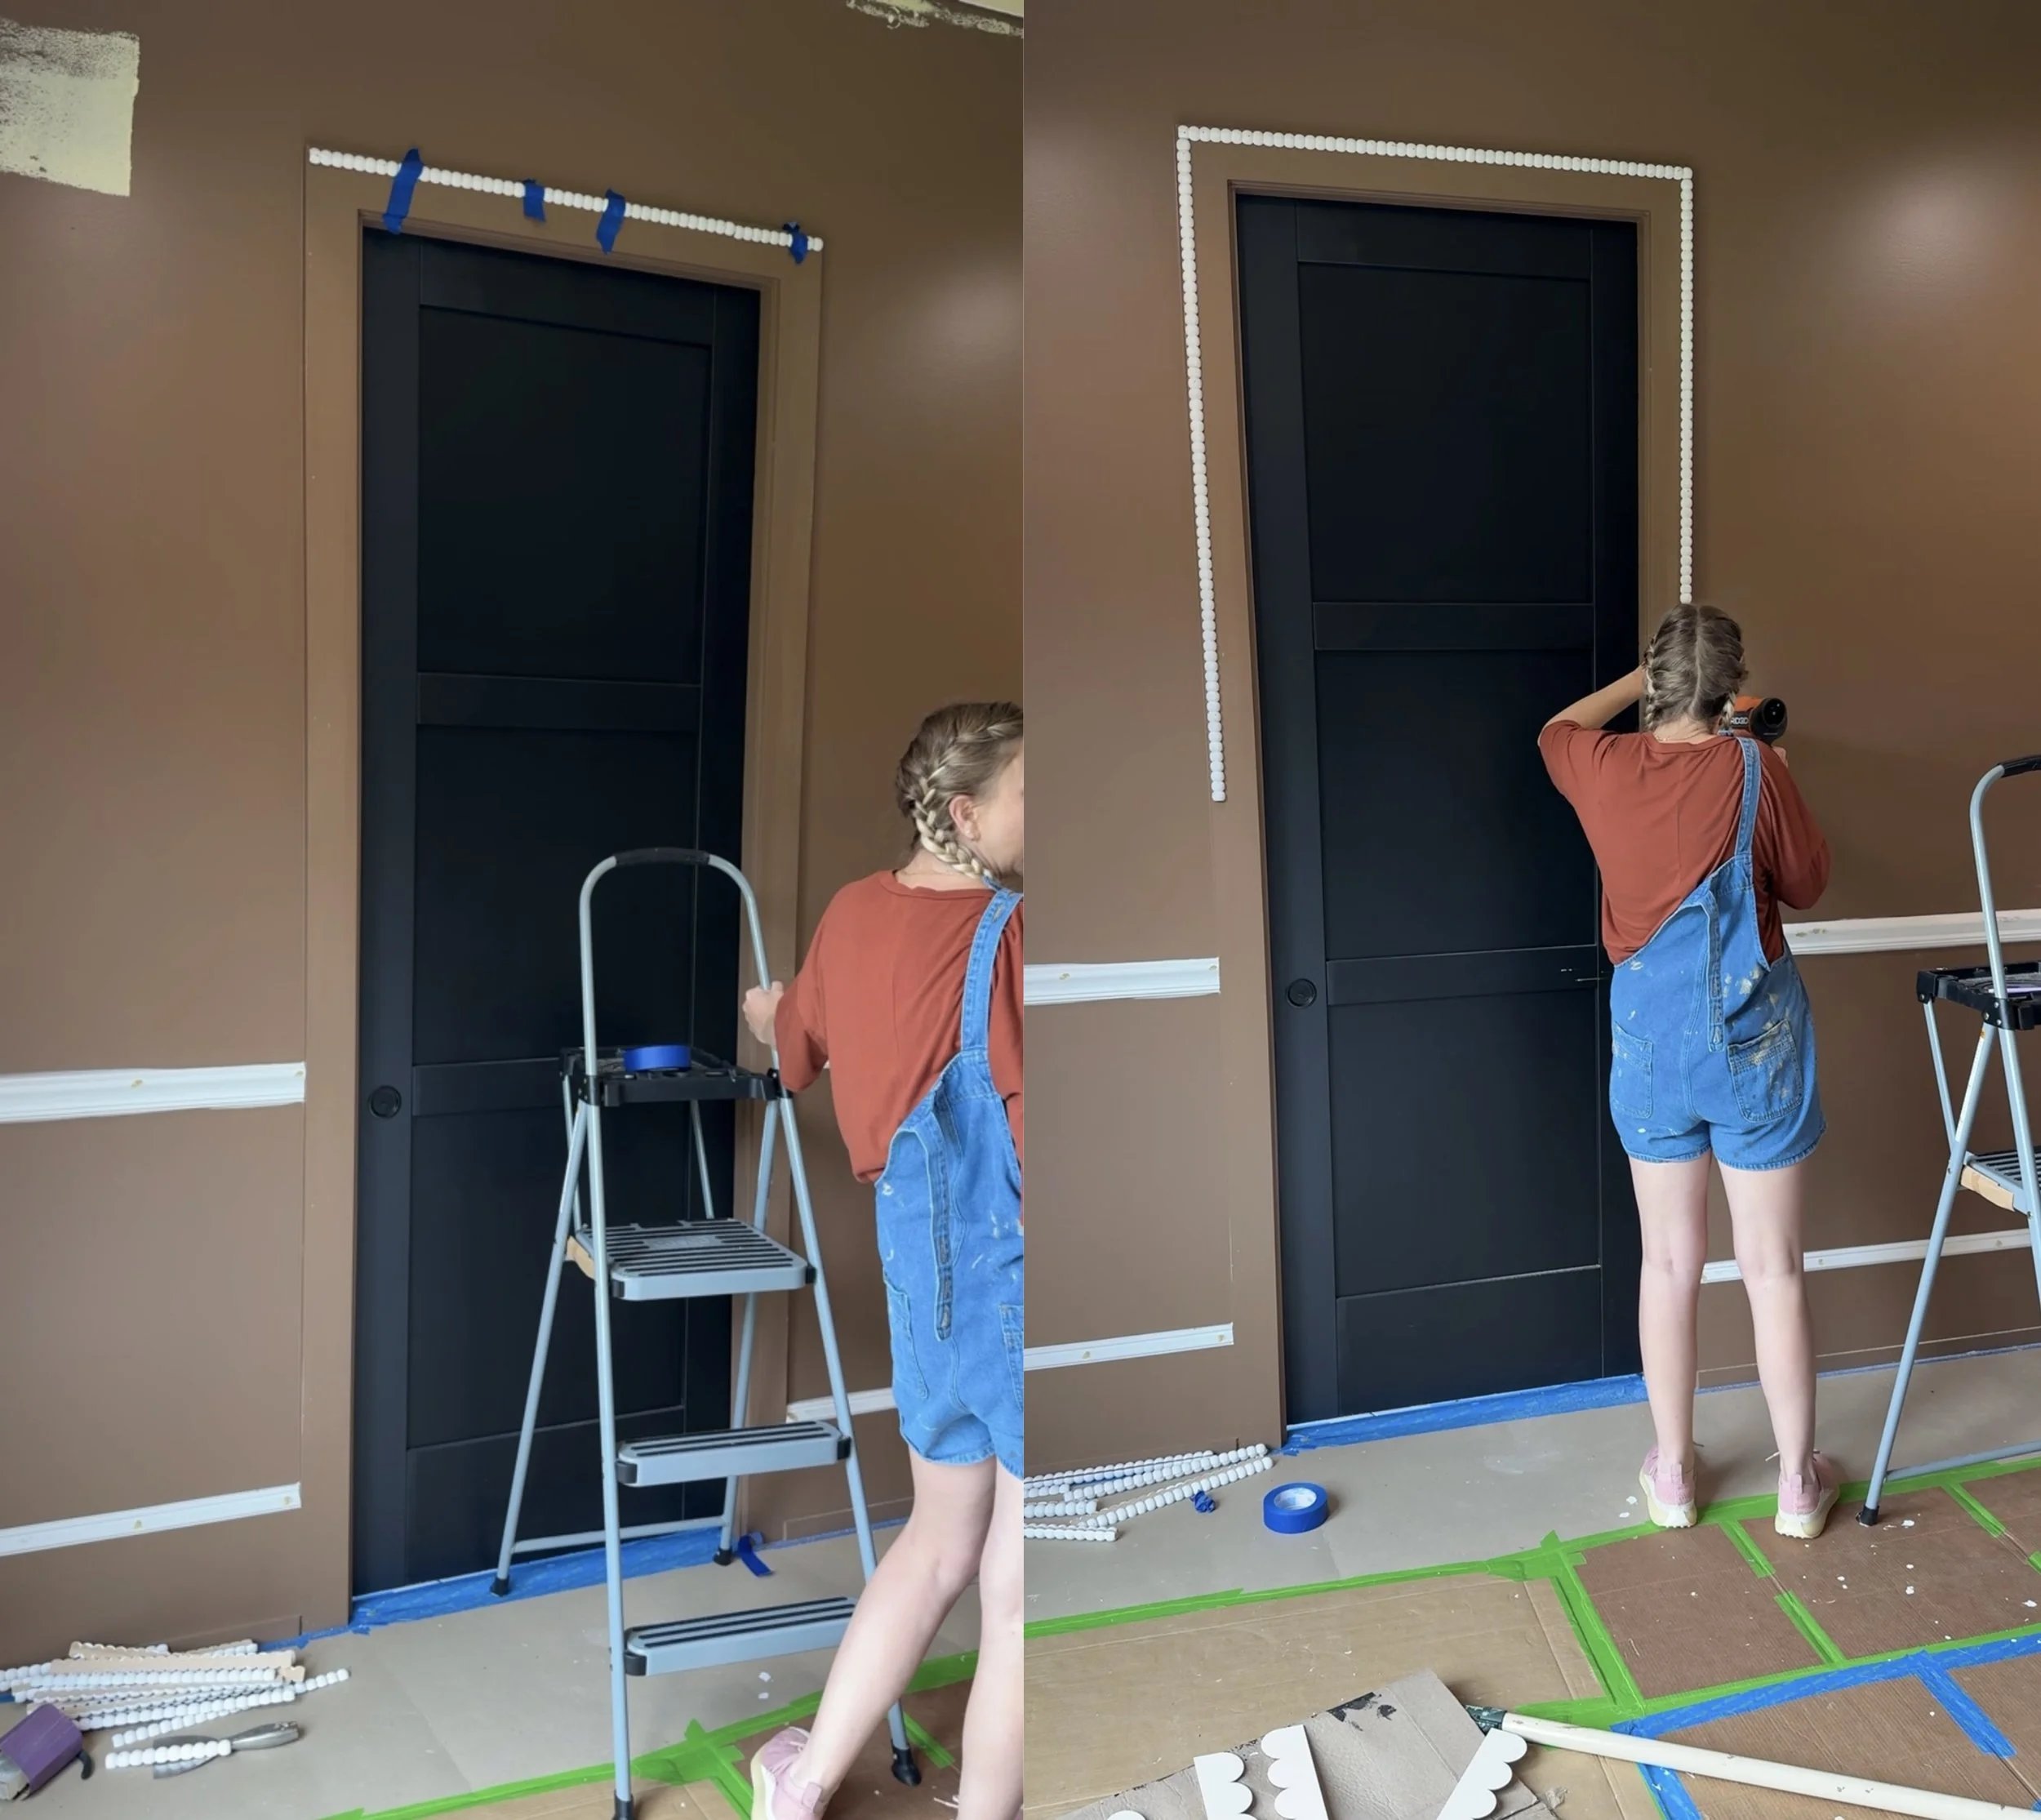
Both were installed using only brad nails so they can be easily removed in the future if we ever decide to change things up. Normally, I would caulk trim for a seamless finish, but I skipped that step here so the pieces would stay flexible and easy to swap out later. The scalloped trim adds such a fun, storybook touch to the walls, while the beaded trim gives the doorways a sweet, old-fashioned feel that ties everything together.
One quick tip: I highly recommend pre-painting the scallop and beaded trim before installing. As cute as they are, those tiny curves and grooves are insanely tedious to paint once they’re up on the wall. Painting them ahead of time will save you a ton of time and frustration later.
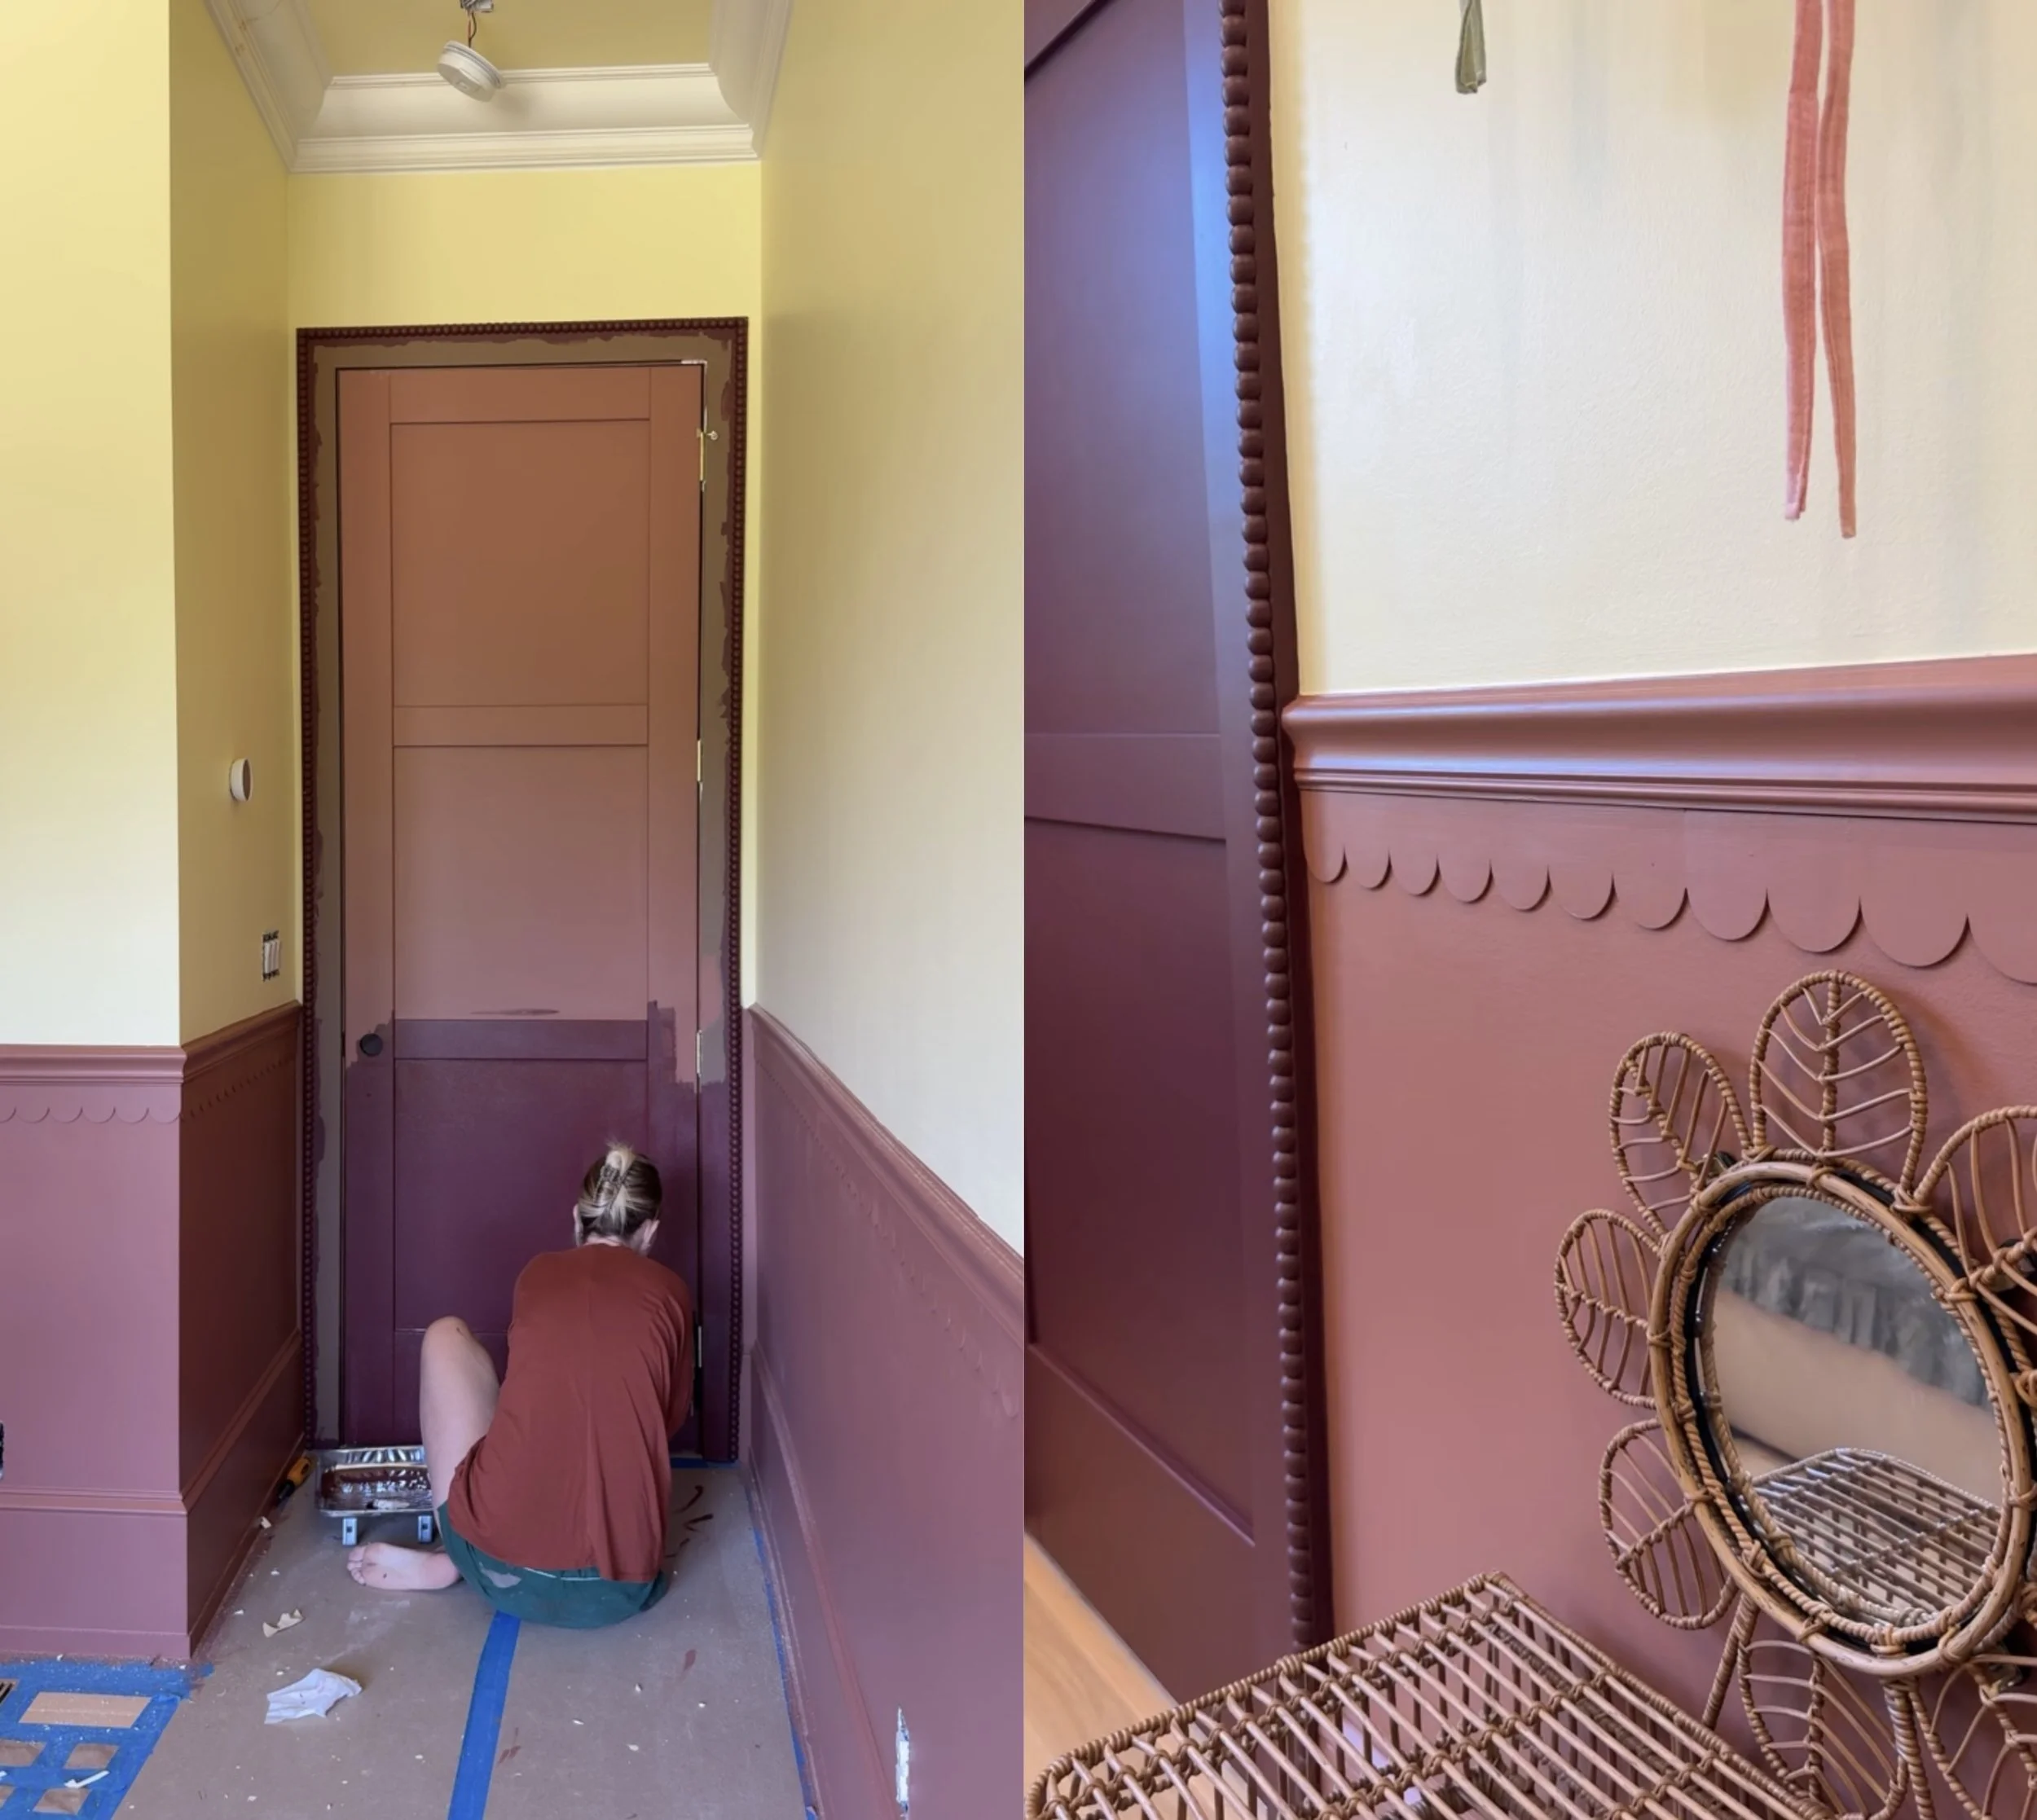
It’s a reminder that the extra details really do make a difference. The added shapes and textures give the space personality and make it feel thoughtfully designed, while still leaving room for it to grow and change right along with her.

Links At A Glance
Hanging Rattan Hot Air Balloon