
How to Make Your String Lights Smart

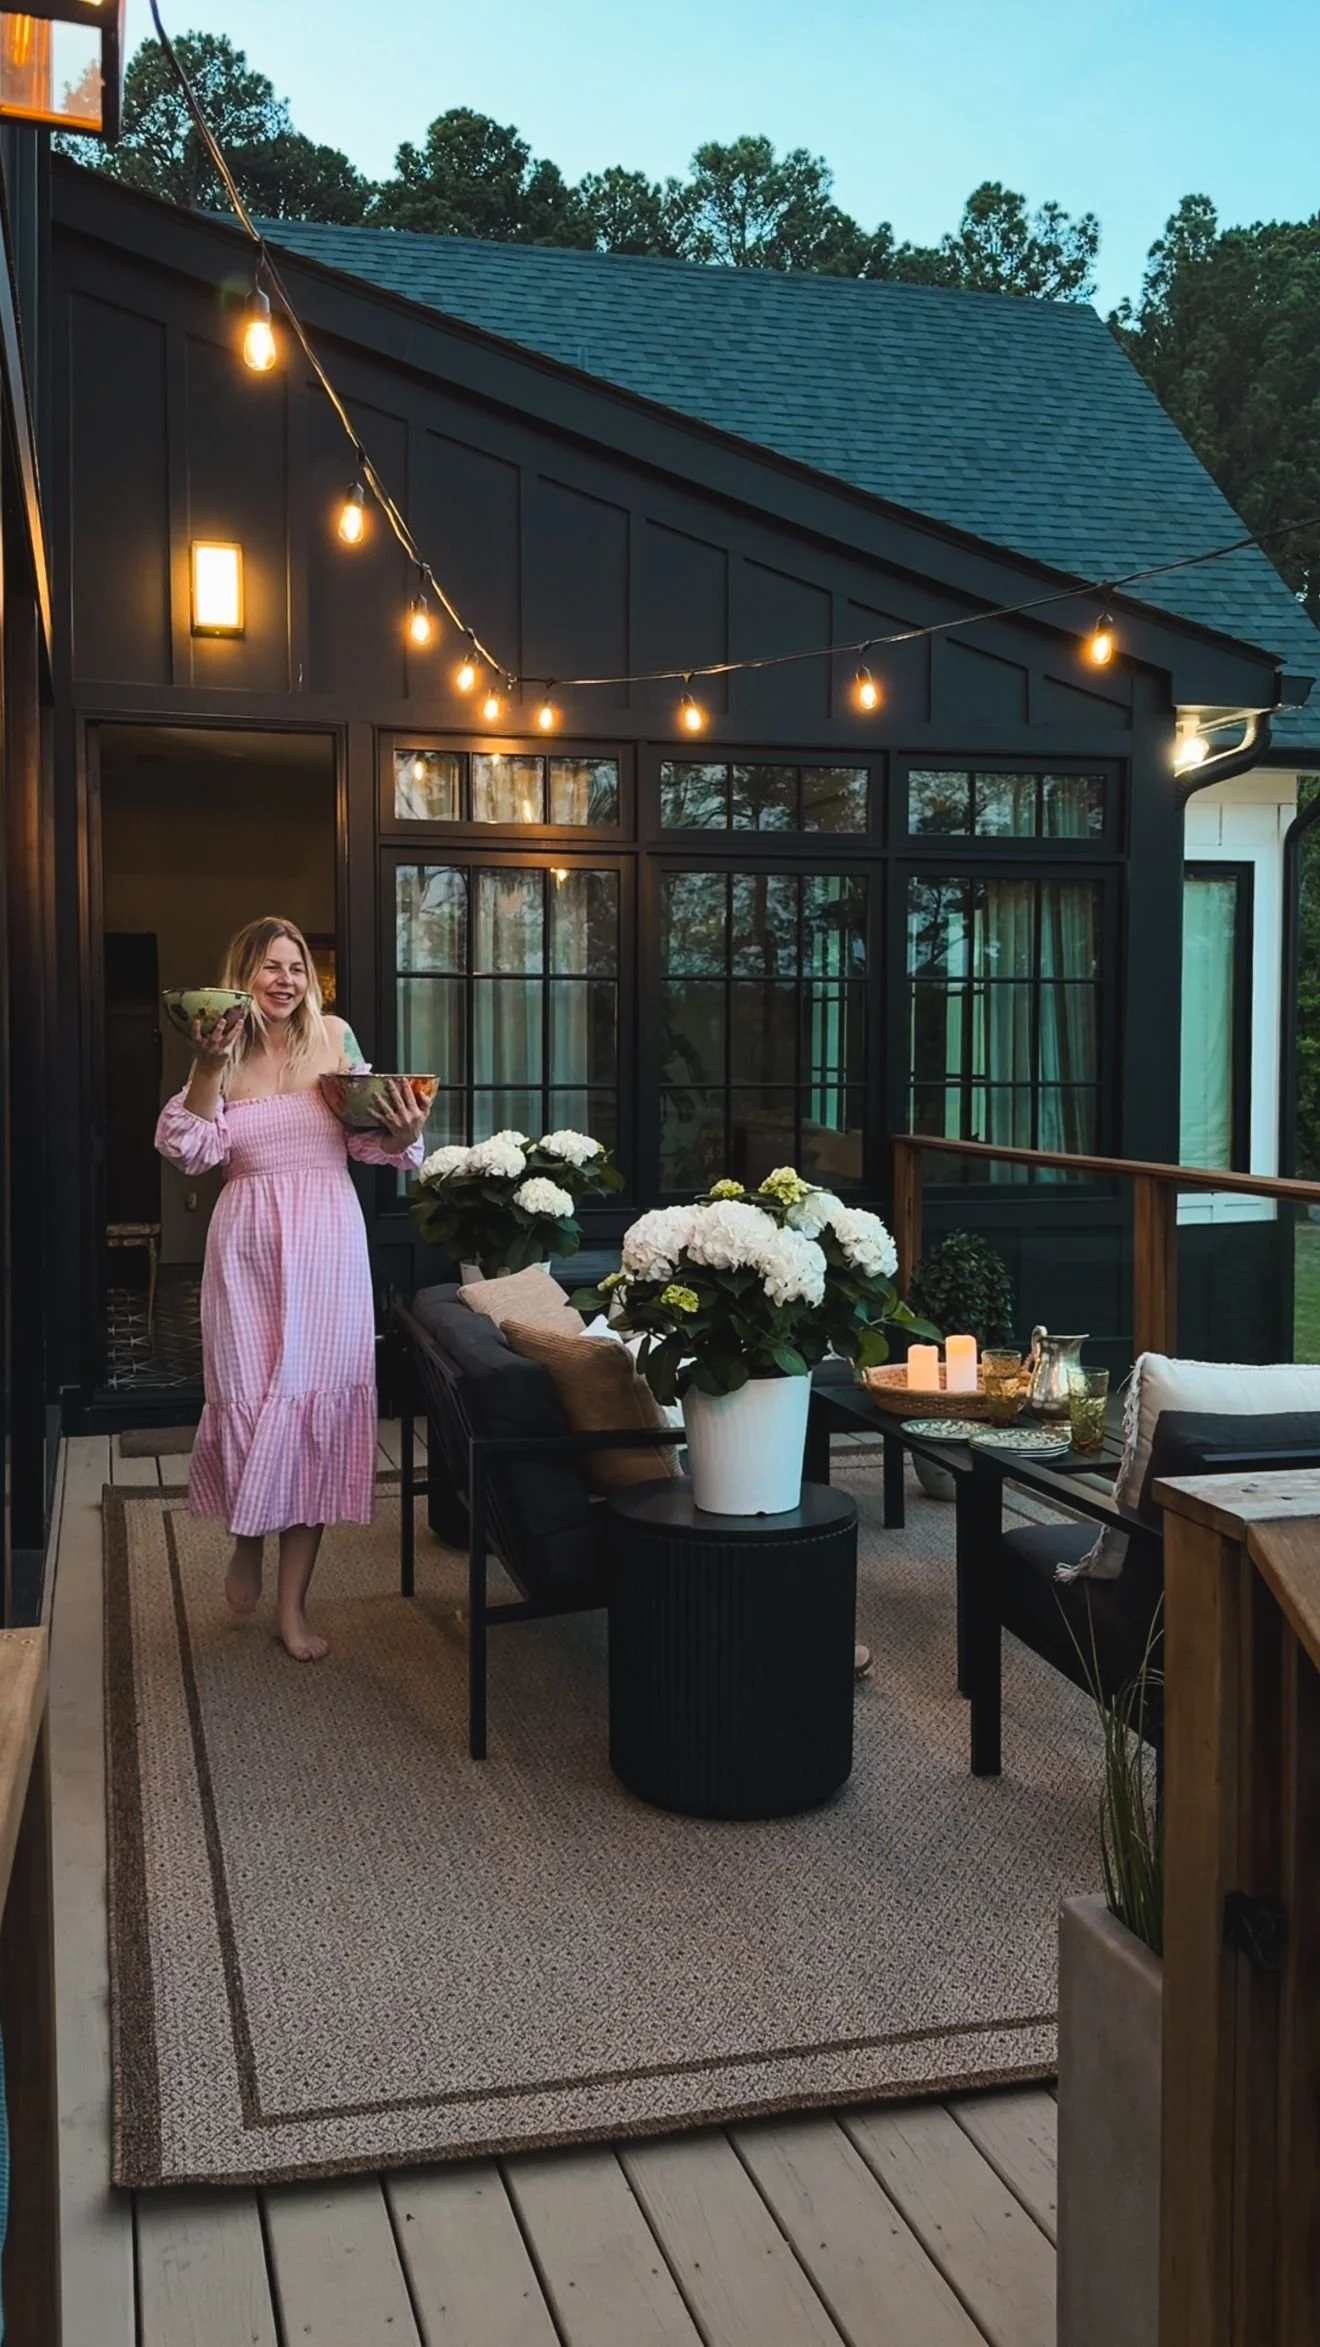
How to Make Your String Lights Smart (and Your Patio Way More Magical)
If you’ve ever wrestled with plugging and unplugging your string lights every night—or just wish you could control them from your cozy spot on the couch—this post is for you.
I finally made the switch to smart outdoor lighting, and let me just say: game changer. Not only do our string lights turn on with a tap from my phone, but I can also schedule them to come on automatically whenever I want, control them from my smart home device (Google Home, Alexa, etc) or use the Pico remote that also doubles as a switch.
Here’s exactly what I used and how easy it was to set up:


Step 1: Get the Right Smart Plug
This is the magic behind it all. I’m using the Lutron Caséta Outdoor Smart Plug, which is made for outdoor use and built to withstand the elements. It’s heavy-duty, reliable, and works seamlessly with the Lutron app and Smart Hub.
Step 2: Download the Lutron App
Once your plug is connected (mine lives tucked under the deck), just download the Lutron app and follow the prompts to add your new smart plug. I named mine “Deck String Lights,” and now I can turn them on/off, create schedules, or pair it with other smart home systems like Alexa or Google Home.


Step 3: Add Your String Lights
Plug in any ordinary string lights directly into the Lutron smart plug (that is paired with your Lutron Smart Hub) and you're done. Seriously—it’s that easy. Now I can set them to turn on automatically every evening or manually control them when we’re hosting or having a quiet night in.
Why I Love This Setup
No more crawling around under furniture to unplug lights.
Can automate lights to turn on and off at whatever time you want.
Looks super impressive when you “magically” turn them on from your phone.
Great for entertaining (especially when your dog looks this relaxed under a warm glow).
If you’re ready to level up your patio lighting, grab this smart outdoor plug, and thank me later. Whether you’re winding down after work or throwing a summer party, smart lighting totally changes the vibe.

Links at a Glance
To complete the look and functionality of your smart patio, consider these additional items:
IF YOU ENJOYED THIS POST, YOU MIGHT BE INTERESTED my Blog post about how to create the nancy Meyers aesthetic

How to Bring the Nancy Meyers Aesthetic to Your Outdoor Space

If you’ve ever watched a Nancy Meyers movie and found yourself swooning over the kitchens, the cozy lighting, the layered neutrals, and the inviting, lived-in feel of every space—then you’re in good company. There’s something effortlessly elevated about the “Nancy Meyers aesthetic,” and the good news is, you don’t have to move to the Hamptons or own a coastal villa to bring a little of that charm home.
I recently gave our back patio a little refresh, and let me tell you—it’s giving Something’s Gotta Give meets It’s Complicated in the best way. Here’s how I leaned into the look:


1. Keep It Classic with Neutrals
A neutral base sets the tone. I already own an inexpensive black furniture set that I’m not willing to replace right now, so I chose a brown rug, soft beige and brown pillows and a textured throw to warm up the black metal furniture. Remember this look is all about timeless comfort, not trends.
2. Add Fresh Flowers (Always)
Nancy’s worlds are always filled with lush hydrangeas, fresh peonies, and plenty of greenery. I went with faux shrubs in concrete planters and real hydrangeas in white pots placed on my side tables to anchor the space and instantly add that soft, romantic charm. Bonus: I ended up planting the hydrangeas in the yard so now I’ll get years of beauty from them.


3. Set the Scene with Simple, Elegant Entertaining
Whether it’s sparkling water, lemonade, or just a bowl of strawberries, a pretty tray and glassware make even the smallest gathering feel special. I set our coffee table with a rattan tray, vintage-style plates, thrifted glass cups, and a thrifted silver pitcher —nothing fancy, but it feels intentional and a little luxurious.
5. Include a Little Personality
The little details bring it all to life. For us, that means letting our dog lounge wherever he pleases and keeping a pair of sandals kicked off nearby. It’s supposed to feel lived-in, after all—not staged.
6. Soft Lighting is a Must
While these photos were taken in the daylight, string lights overhead give off that dreamy glow once the sun goes down. You can’t go wrong with warm-toned bulbs and just enough sparkle to make the space magical. I also used a few battery powered candles on the coffee table.


The result? A patio that feels like a movie set—but still totally livable. Whether you're sipping coffee in the morning or hosting friends for evening drinks, it’s become my favorite place to exhale.
If you're craving a little Nancy Meyers magic, just start with a comfy seat, a hydrangea or two, and something to sip—your outdoor sanctuary is just a few cozy touches away.
Links at a Glance
Here’s everything I used to bring this cozy outdoor vibe to life:
IF YOU ENJOYED THIS POST, YOU MIGHT BE INTERESTED IN how i refreshed my porch to spring!
FOLLOW ME ON MY SOCIALS!

DIY Flower Bar
How to Create a DIY Flower Bar for Your Next Event
A flower bar is a fun and interactive way to let guests create their own bouquets to take home as a party favor. It’s a beautiful addition to any event, from birthdays to bridal showers. Here's a step-by-step tutorial, complete with a price breakdown, to help you set up your own flower bar with ease.

Materials Needed for 20 guests
Fresh flowers/greenery in a cohesive color palette (purchased from Trader Joe’s)
Buckets and/or vases for flowers (we used the free buckets from Trader Joe’s and several clear vases)

Step 1: Buying the Flowers
I purchased my flowers from Trader Joe’s at opening the day before the event. There was already a line of people, all there for flowers, and the best selections go fast! I highly recommend arriving at opening to get the best options.
Since I had 20 guests RSVP, I calculated how many flowers I needed based on the recommended 8-10 stems per person including a “thriller, some filler, and a spiller of greenery” guideline. This ensured I had enough for everyone while preventing guests from taking too many stems and leaving others without enough options. Planning this way made budgeting easier and kept the flower bar fair for all attendees. I also recommend using a cohesive color palette so no matter what each guest chooses or what is left towards the end of the event, all of the flowers are usable together.
I would also recommend buying more “thriller” flowers than I did, as people will gravitate to them first.
Flower Selection & Cost (Spring 2024):
Premium Assorted Greens – $3.99 each (bought 7) → $27.93
Eucalyptus – $3.99 each (bought 3) → $11.97
Raffine Dianthus – $4.99
Tulips (Seasonal, Big Bunch) – $9.99 each (bought 2) → $19.98
Rose DZ Yellow/Orange – $9.99
Chrysanthemums (Big Bunch) – $4.99
Carnation Mini Novelty – $4.99
Rose DZ Pink/Purple/Bicolor – $9.99
Baby’s Breath (Gypsophila) – 4 @ $3.99 → $15.96
Jumbo Mum Balls – $4.99 each (bought 2) → $9.98
Lily Calla Mini – $5.99 each (bought 2) → $11.98
Total flower cost: $131.75


Step 2: Setting Up the Flower Bar
Prep the Flowers – Trim the stems at an angle and place them in buckets of water to keep them fresh.
Organizing the Table – Arrange the flowers in separate vases or buckets, grouping them by type to make selection easy.
Precut Materials – Cut kraft paper and twine in advance to make wrapping easy.
Display & Signage – I purchased a themed sign from Etsy to guide guests. The sign suggested:
Choose 8-10 stems, including a thriller, some filler, and a spiller of greenery.
Wrap in paper and tie your bouquet up.
Take it home to enjoy!
Wrapping Station – Set up a space with kraft paper, twine, and scissors so guests can wrap their bouquets.
Again, I loved that the 8-10 stem recommendation on the sign helped guide people on how many to take, preventing anyone from making oversized bouquets and ensuring there were enough flowers for everyone to enjoy.


Step 3: Assembling Bouquets
Guests can mix and match stems, following the signage suggestion for how many stems to take.
Suggested Bouquet Formula :
2-3 focal flowers (like roses or peonies)
2-3 filler flowers (like daisies or carnations)
3-4 greenery stems (like eucalyptus or ferns)
After picking their flowers, guests can wrap them in kraft paper and secure them with twine or ribbon
Final Tips
Buy flowers a day in advance and keep them in water overnight.
Use an Etsy sign to guide guests on the amount of flowers to use.
Have plenty of scissors and twine so multiple guests can wrap their bouquets at once.
Buy more “thriller” flowers and less greenery than I did. No matter what your sign says, people gravitate to the prettiest flowers first.


This DIY flower bar was such a hit at my event and added a special touch. Have you ever tried a flower bar? Let me know in the comments!