
DIY Turtle Sandbox Makeover: From Thrifted to Adorable


How to Give a Faded Sandbox Turtle a Fresh New Look
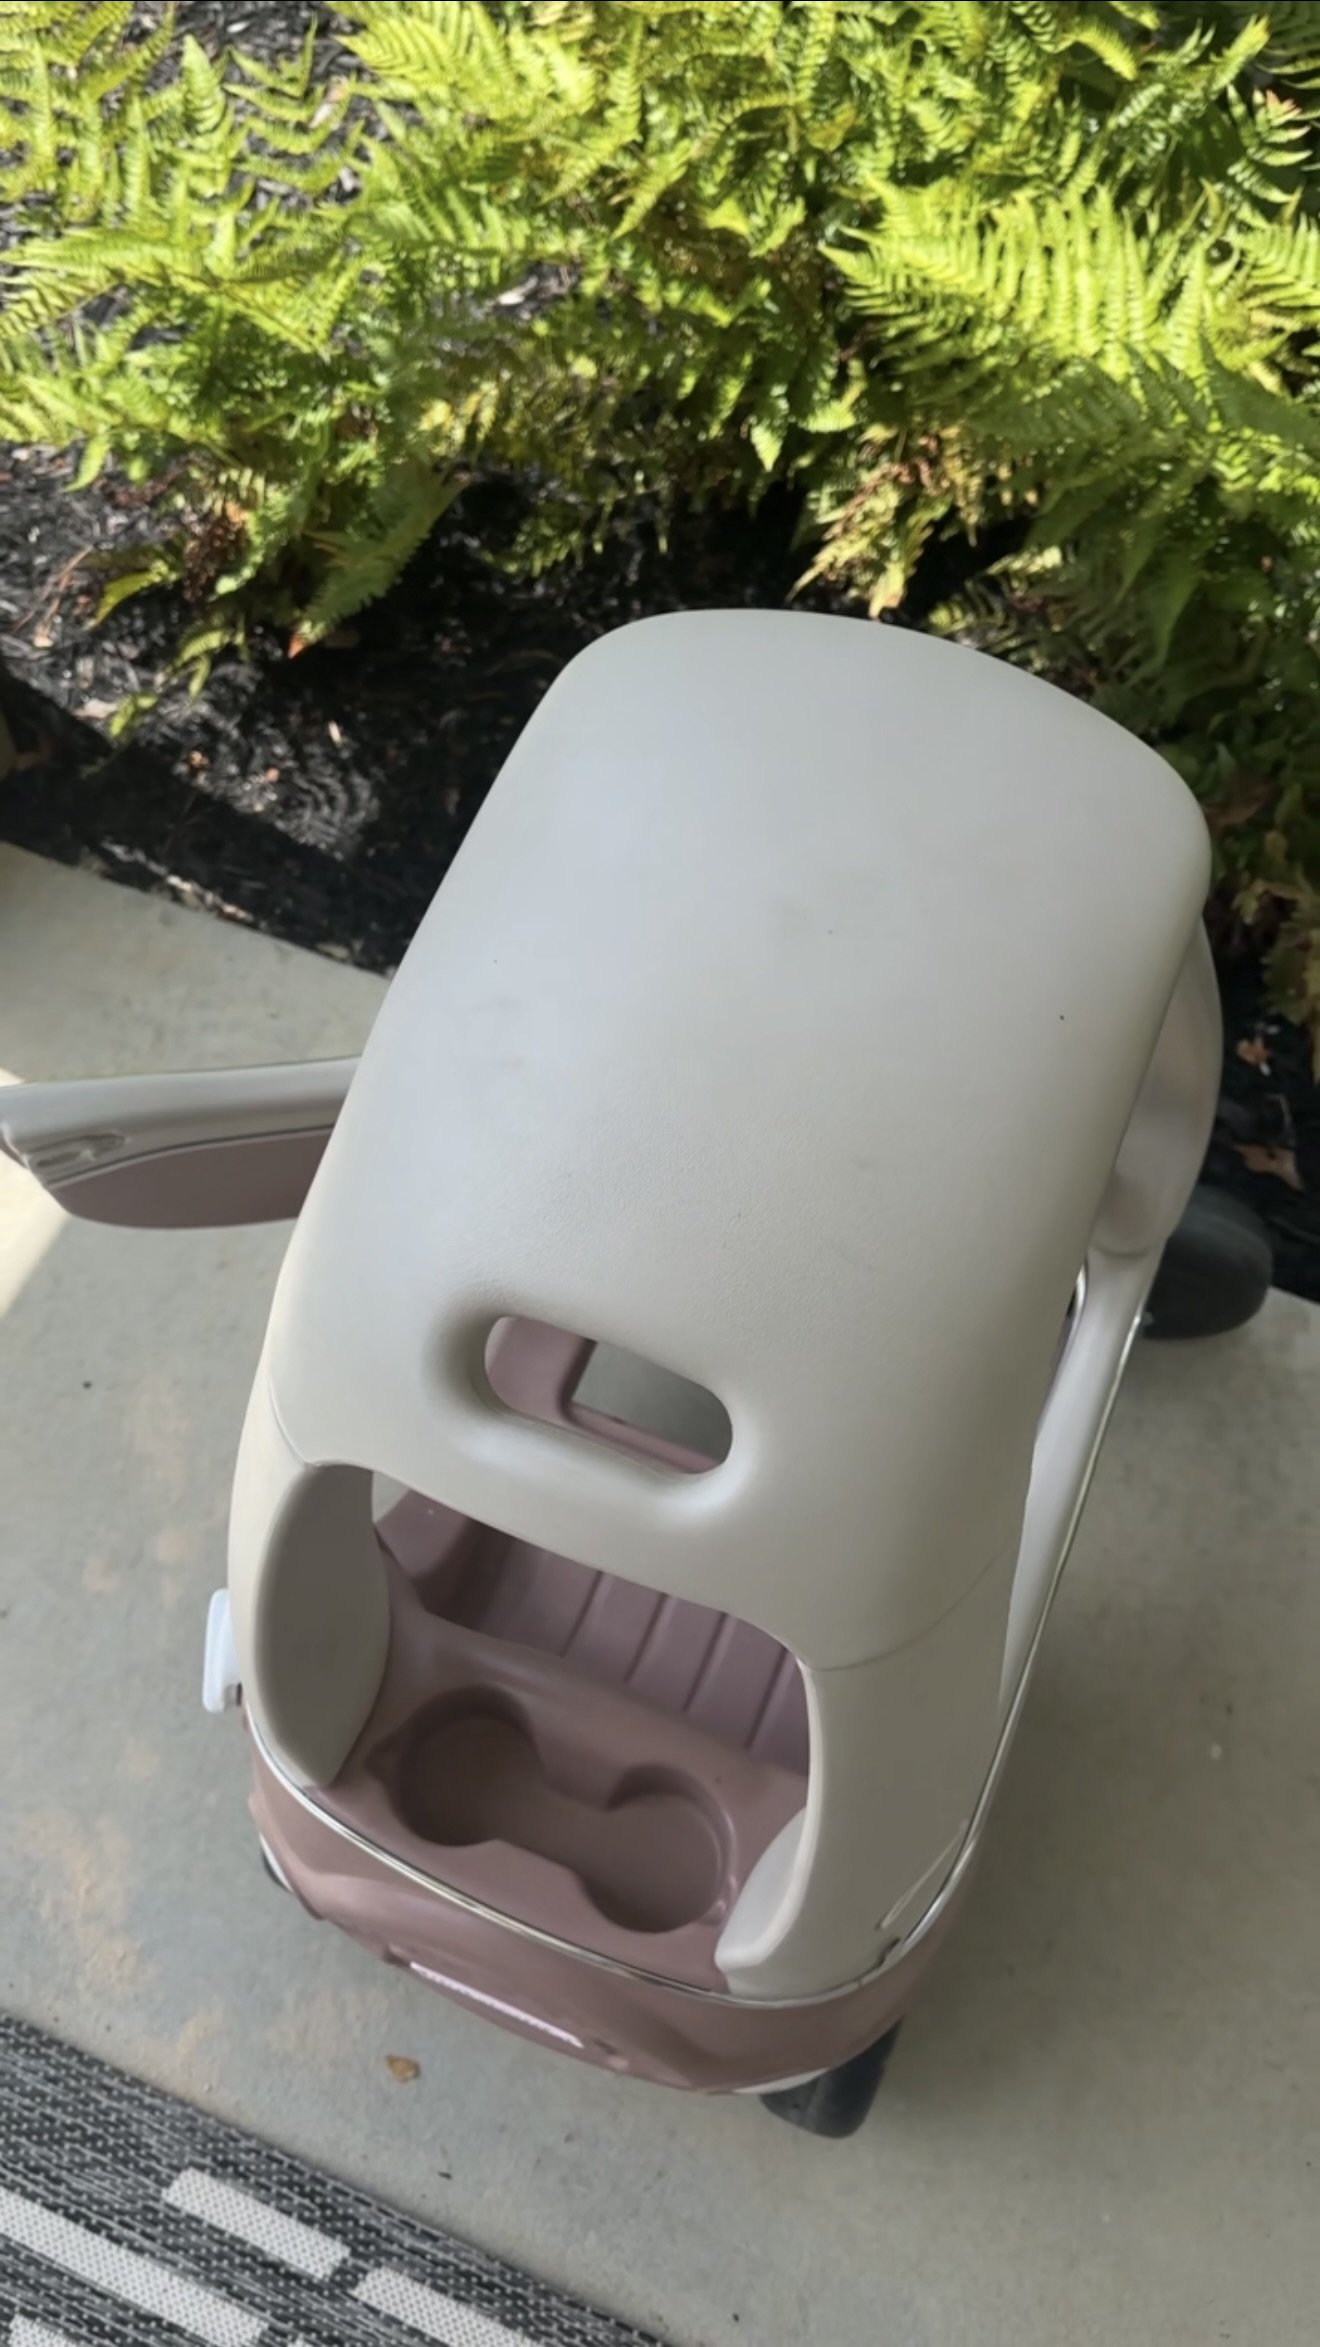
I found this classic turtle sandbox at Goodwill for $5, and I knew right away it had potential. Sure, it was faded, scratched, and looked like it had lived a full life, but the shape was iconic, and I love a good transformation project. A few hours and a couple cans of spray paint later, this little guy got a whole new lease on life.
What You’ll Need:
Scrub brush and soap (for cleaning)
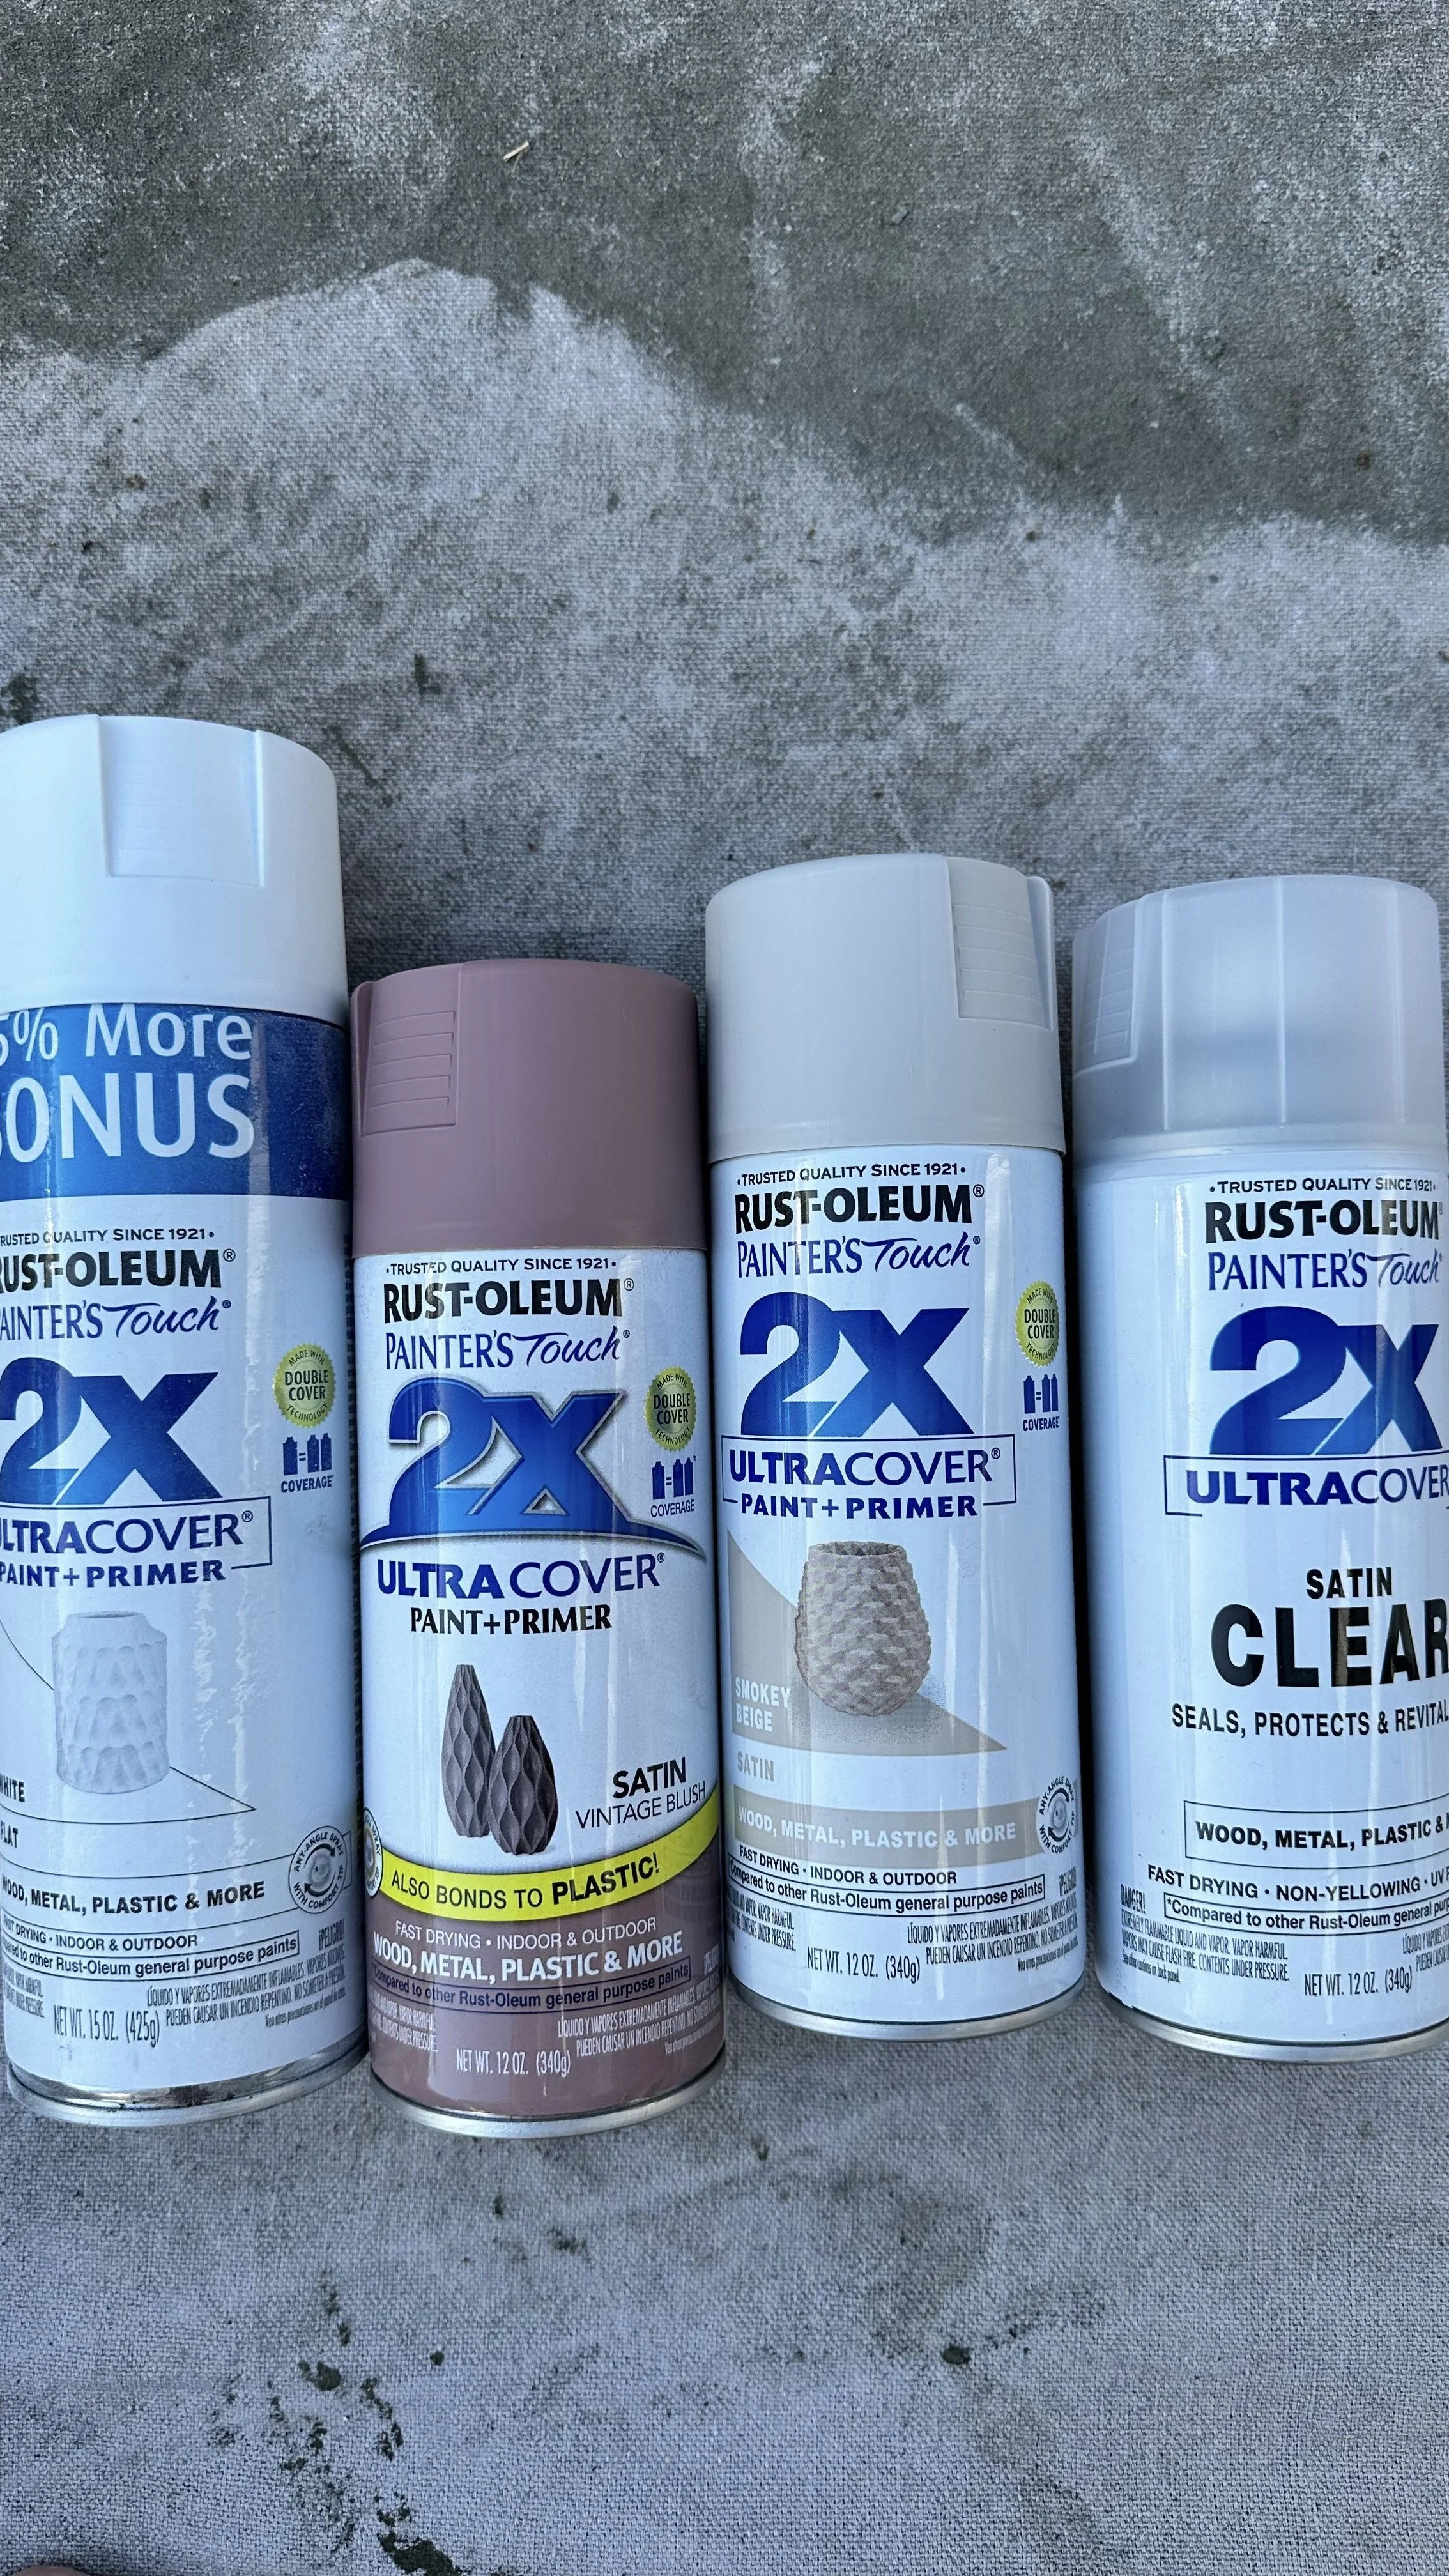
Spray paint made for plastic (I used two coordinating colors: one for the body and one for the lid)
Contrasting paint for the shell details (I used some craft paint I already had)
Small paint brush for the shell details
Clear outdoor spray sealant (non-yellowing)
Painter’s tape (for detailing—especially the eyes!)
A comfort grip spray can handle (optional, but makes a huge difference for even coverage and avoiding finger fatigue)
A bag or two of sand (for the fun part)

How to Do It:
1. Clean it really well.
Start by giving the turtle a thorough scrub with warm soapy water. Mine was definitely showing its age, so I made sure to get into all the little nooks and rinse it really well. Once it was completely dry, I wiped it down again just to be sure there wasn’t any leftover grime or residue.
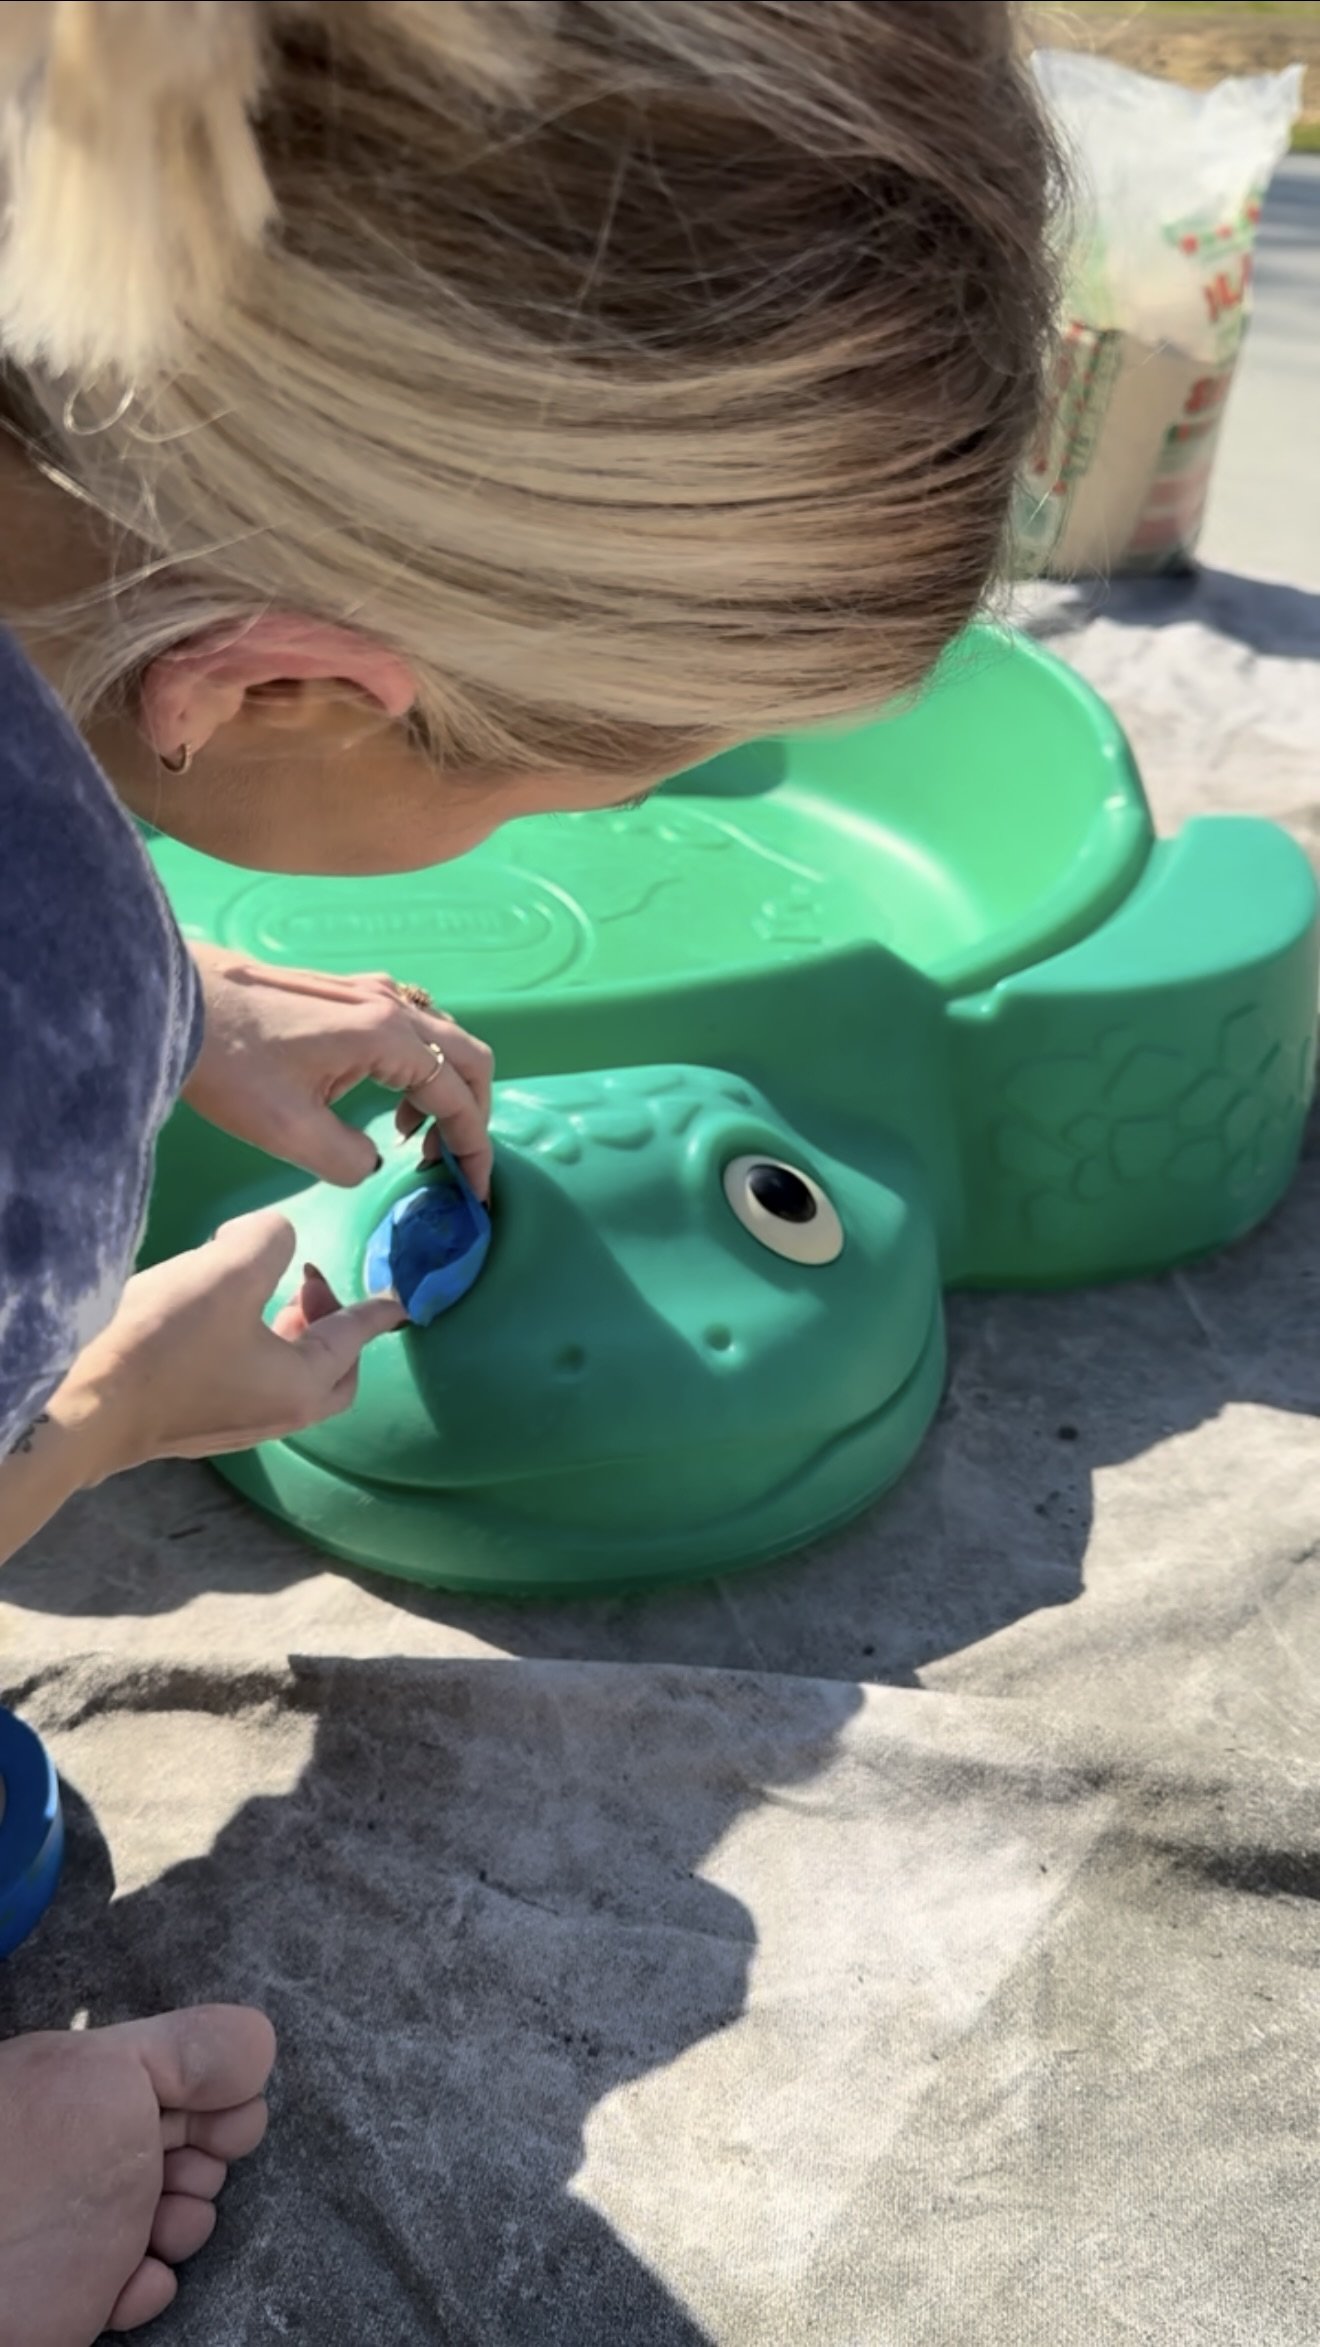
2. Protect the eyes.
Before painting, I used painter’s tape to cover the turtle’s little eyes. It’s a tiny detail, but keeping them paint-free helped preserve that classic, recognizable expression, and made the final result feel more polished.
3. Prime it.
This step is easy to skip, but so worth it. I used a spray primer that’s safe for plastic to help the paint stick better and last longer. A light, even coat is all you need—just be sure to let it dry fully before moving on to color.
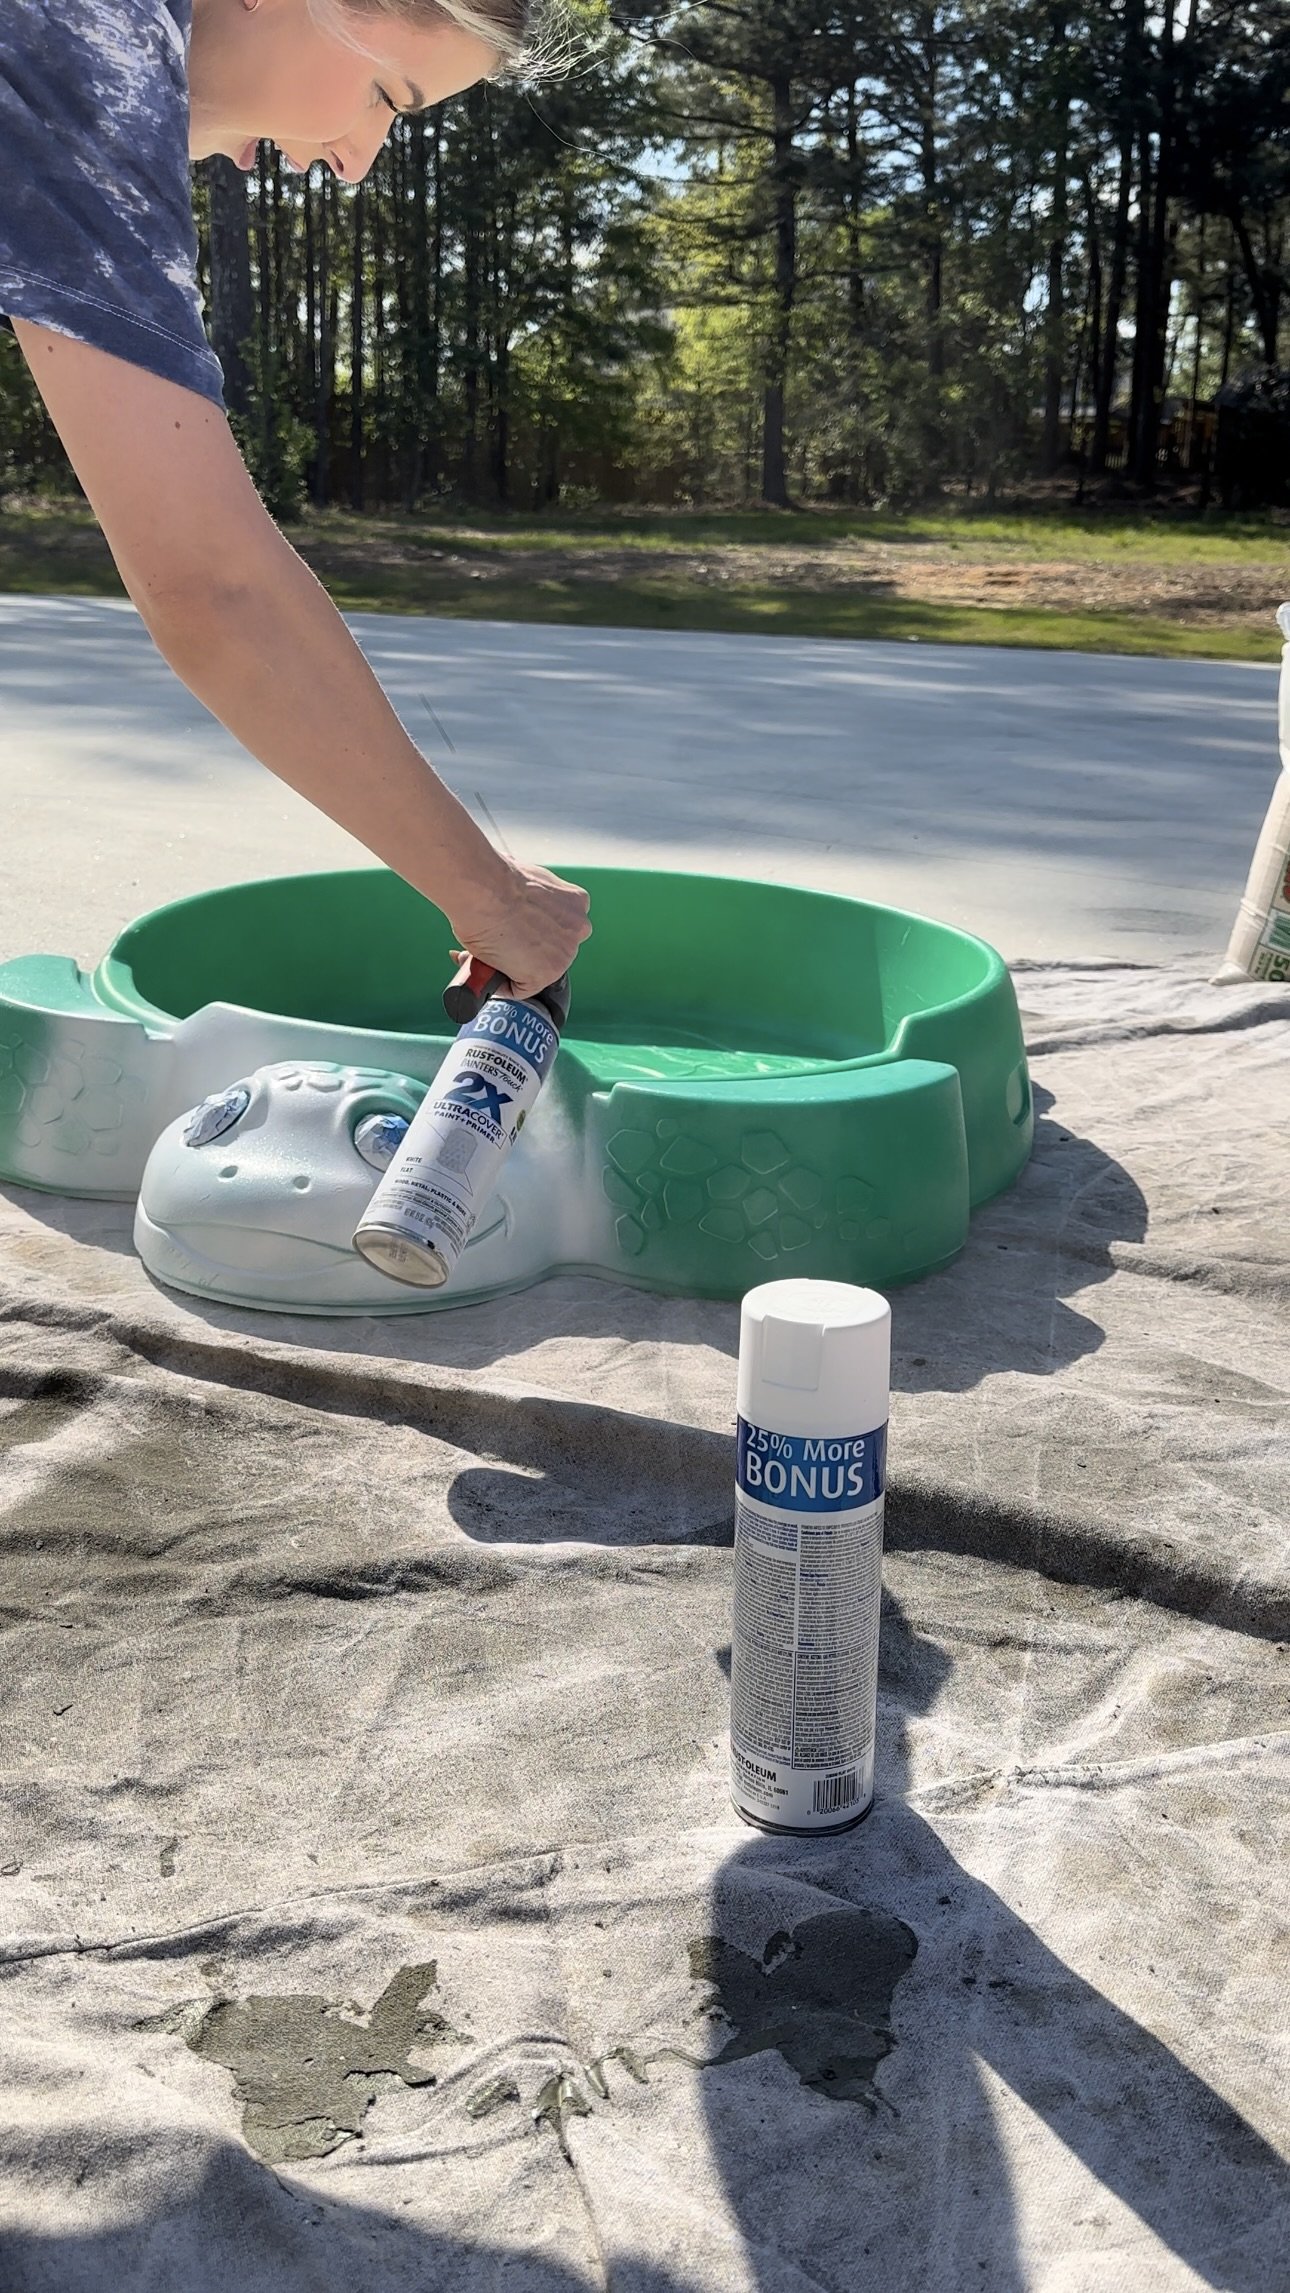
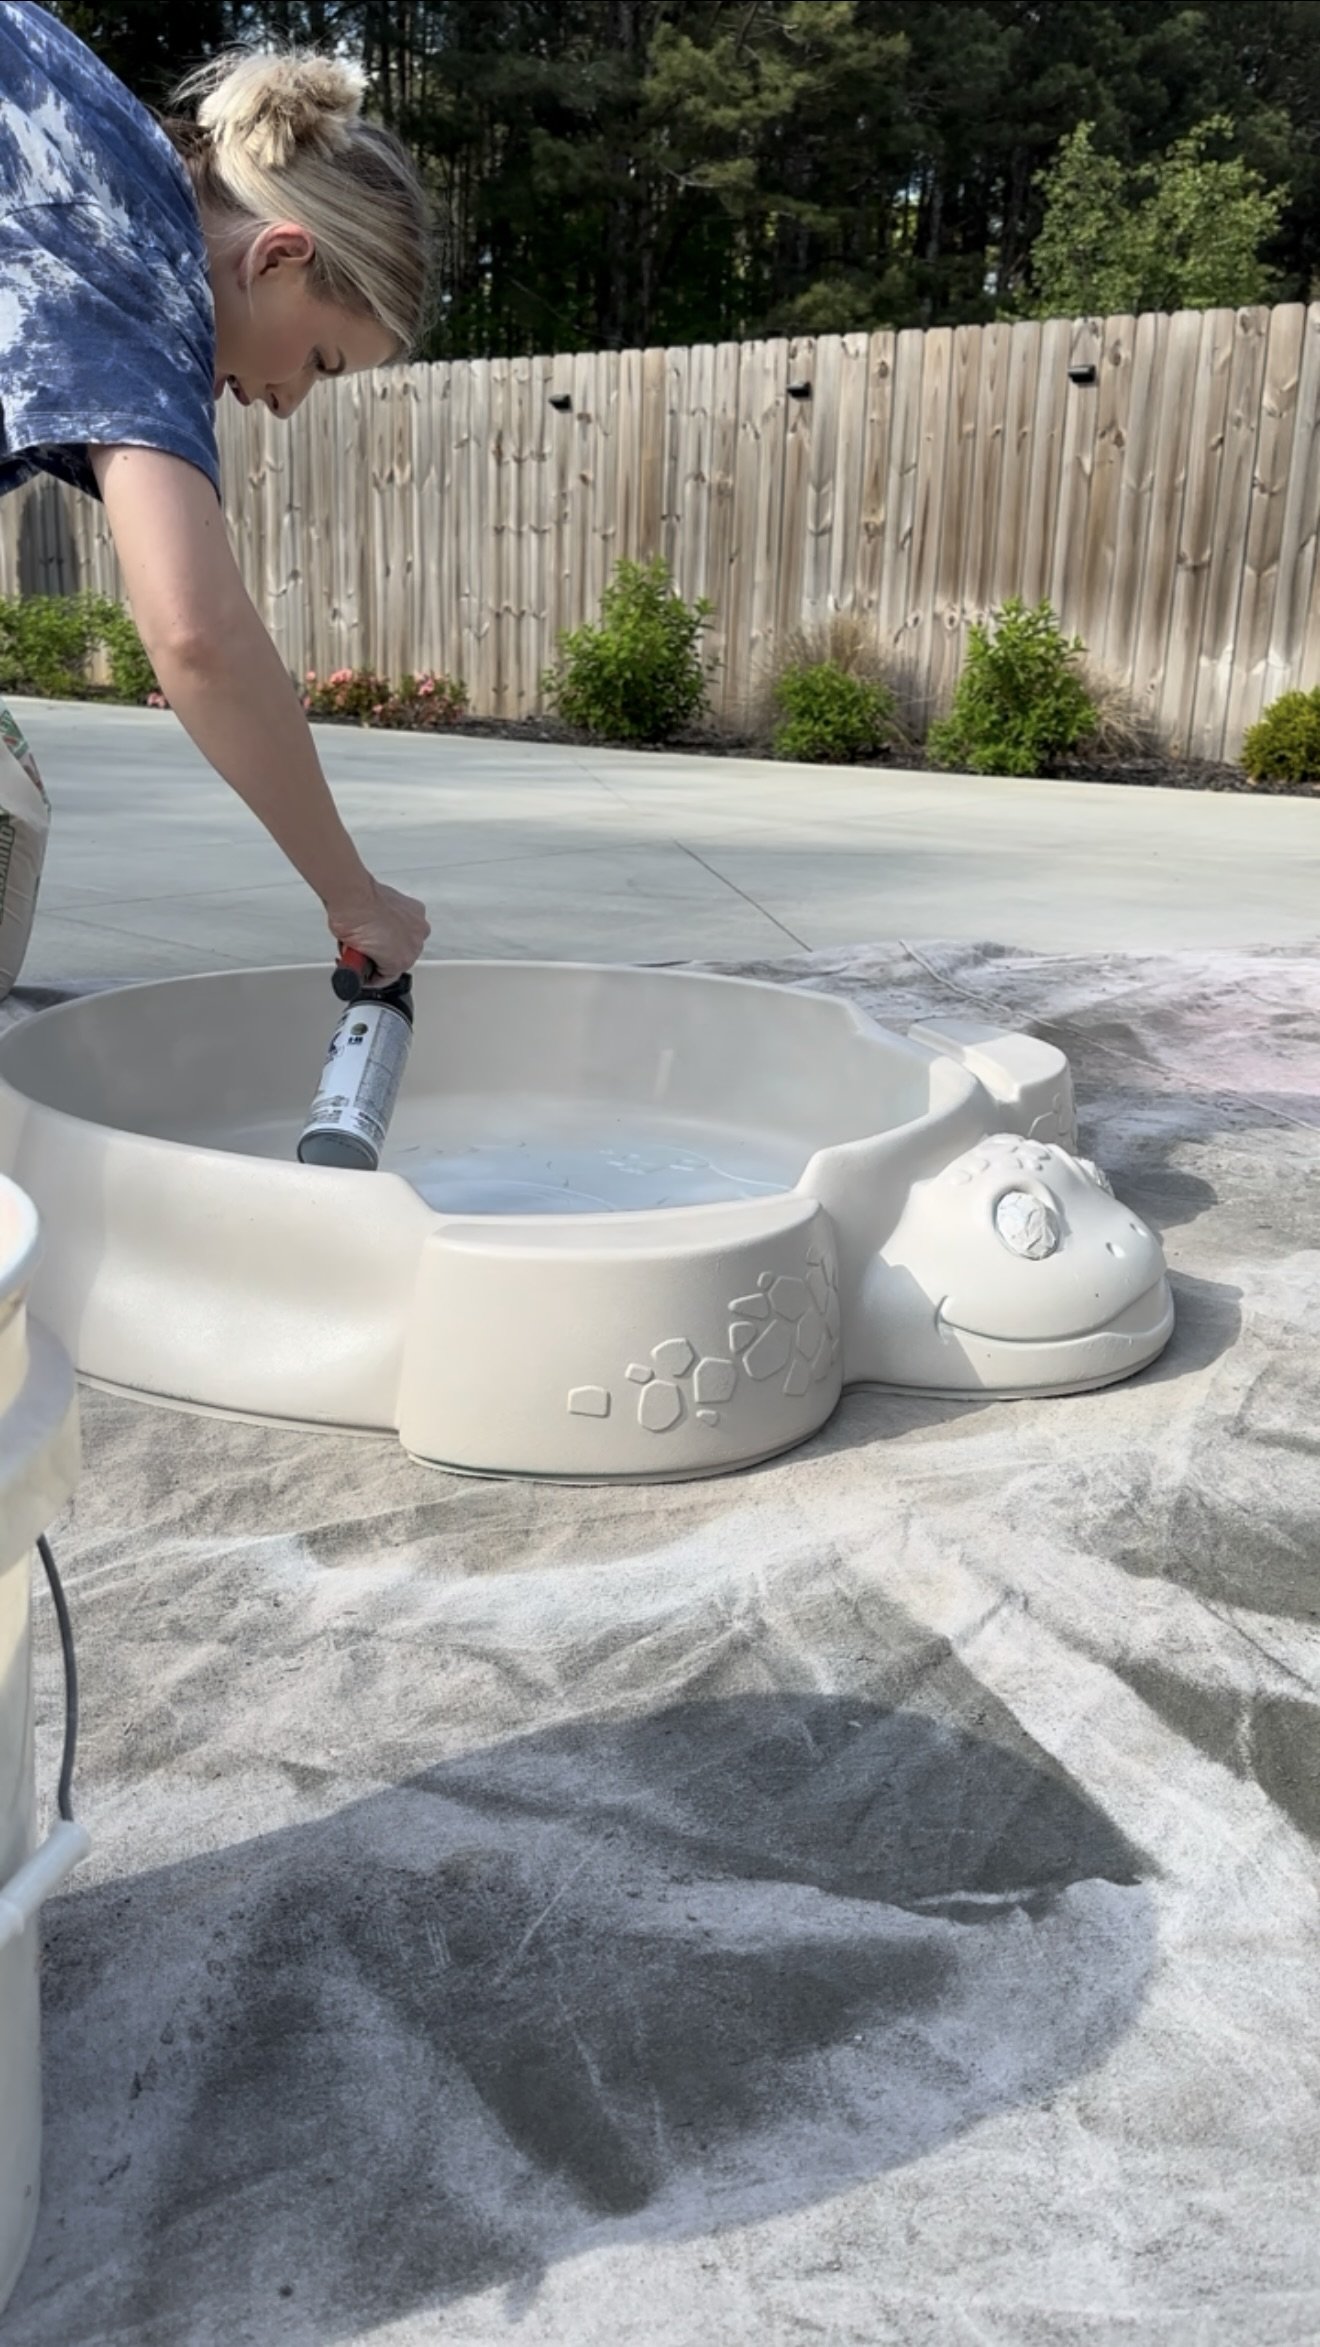
4. Spray the base and the lid.
Once the primer was dry, I sprayed the turtle’s body with a soft neutral beige and the lid with a warm blush pink. I stuck to light coats and let each one dry before adding the next. The contrast between the two colors gave it a fun but modern look that felt totally fresh.
5. Add shell detail.
After the base coat dried, I used some craft paint I already had, and a small paint brush to paint the little spots on his shell.
6. Seal it.
Once all the paint was dry and I was happy with the look, I finished it off with a few coats of clear spray sealant made for outdoor plastic. It adds a bit of shine, protects the paint from chips, and makes cleanup after play days so much easier.
7. Fill with sand!
After everything cured, I added fresh play sand and tossed in a few fun toys. Our toddler was in it immediately, and it’s easily become one of the most-used toys.

How It’s Holding Up:
Look, when you mix sand, spray paint, and an enthusiastic toddler, you’re obviously going to get a little chipping. And yep, we do have a few spots where the paint has worn off, especially around the edges where little feet climb in and out. But honestly? It’s held up way better than I expected.
The color is still vibrant, the shell details are intact, and the sealant has definitely helped protect it from full-on flaking or fading. It lives outside, gets played with constantly, and still manages to look cute. Considering it started as a $5 thrift find, that feels like a major win.
IF YOU ENJOYED THIS POST, YOU MIGHT BE INTERESTED IN my cozy coupe makeover!
FOLLOW ME ON MY SOCIALS!

How it held up: cozy coupe edition

Hey everyone!
A while back, I decided to get crafty and give our Cozy Coupe a little glow-up with some custom paint. If you’ve ever thought about painting one of these iconic ride-ons, you might be wondering—how does it actually hold up over time?
Here’s the honest rundown.


For the makeover, I used Rust-Oleum spray paint—a combination of their plastic-friendly primer and a couple of solid color choices to match the fun but neutral vibe I was going for. I finished it off with a clear protective topcoat to help it stand up to all the toddler adventures ahead.
And at first? It looked amazing. Clean, bold colors, a totally fresh look, and so much more stylish and playful than the classic red.
Fast forward to now, and it’s definitely gotten lots of love (and a good amount of use)!

The paint has held up decently, considering the amount of climbing, scooting, and driveway races it’s survived. There’s some wear in the high-touch spots—the edges, horn, and anywhere it gets ram into walls (lol)—but overall, it’s still going strong. Sure it has a few chips, which just add to its "well-loved" charm, but it’s paint on a flexible plastic toy so it’s to be expected.
Would I recommend painting a Cozy Coupe? Absolutely—especially if you’re looking to customize it for a more personal or aesthetic touch! Just keep in mind, if you have a high-energy kiddo who treats it like a monster truck (like mine does!), you’ll probably see some signs of wear over time. But honestly? Watching them enjoy it so much makes every little paint chip totally worth it.
If you’re set on customizing one, I do a complete breakdown in this blog post.
All in all, it was a fun DIY project!
Cozy Coupe Makeover

Supplies Used:
Orbital Sander (not required)
Sandpaper (220 grit)
1-2 cans of spray primer for plastic
2-3 cans of Vintage Blush Spray Paint
2-3 cans of Smokey Beige Spray Paint
1-2 cans of clear sealer spray paint
Comfort Grip for mess free and more comfortable spray (not required)
Frog tape painters tape
Automotive Trim 1/4”
Construction Adhesive for name plates
I had to order a new steering wheel because mine was broken. You can buy replacement parts here.
INSTRUCTIONS:
Remove any stickers and any removable plastic pieces with a flat head screw driver (gas tank cap, headlights, tail lights, hub caps, etc). If I could go back I would have disassembled the top from the bottom. There are step by step videos on Youtube for assembling the Cozy Coupe. If you don’t want to remove these things then cover them with plastic bags and painters tape.


2. Apply All Purpose Bondo (use directions on container) to any holes left behind from removing unwanted pieces. My cozy coupe was the lady bug so I filled in holes on the top of the car and on the dash where the attenas and eyes were.
3. Sand the All Purpose Bondo and give the entire car a once over with 220 grit Sandpaper.


4. Wash the car with soap and water. Let dry.
5. Cover the wheels, and anything else you don’t want to get paint on, with tape and plastic bags if you didn’t remove them.
6. Give the entire car a coat of spray primer for plastic.

7. Spray the entire car with the colors of your choice. Let dry, remove any tape you may have added. Touch up paint as needed.
8. Seal your masterpiece with several coats of clear sealer spray paint, allowing the car to dry between coats.
9. Remove the plastic bags from anything you were protecting (wheels, steering wheels, etc)


10. Apply automotive trim. This is such a nice touch! Highly recommend. TIP: Measure AND CUT the trim before applying, If you have to lift the trim up to cut it , you’ll peel back the paint.
11. Replace any plastic parts that you removed that you want back on the car like headlights, gas tank cap, etc.
12. Add special touches like VW logo, or in my case, I used custom name plates from Etsy using construction adhesive.


