
Our Primary Bathroom Glow-Up

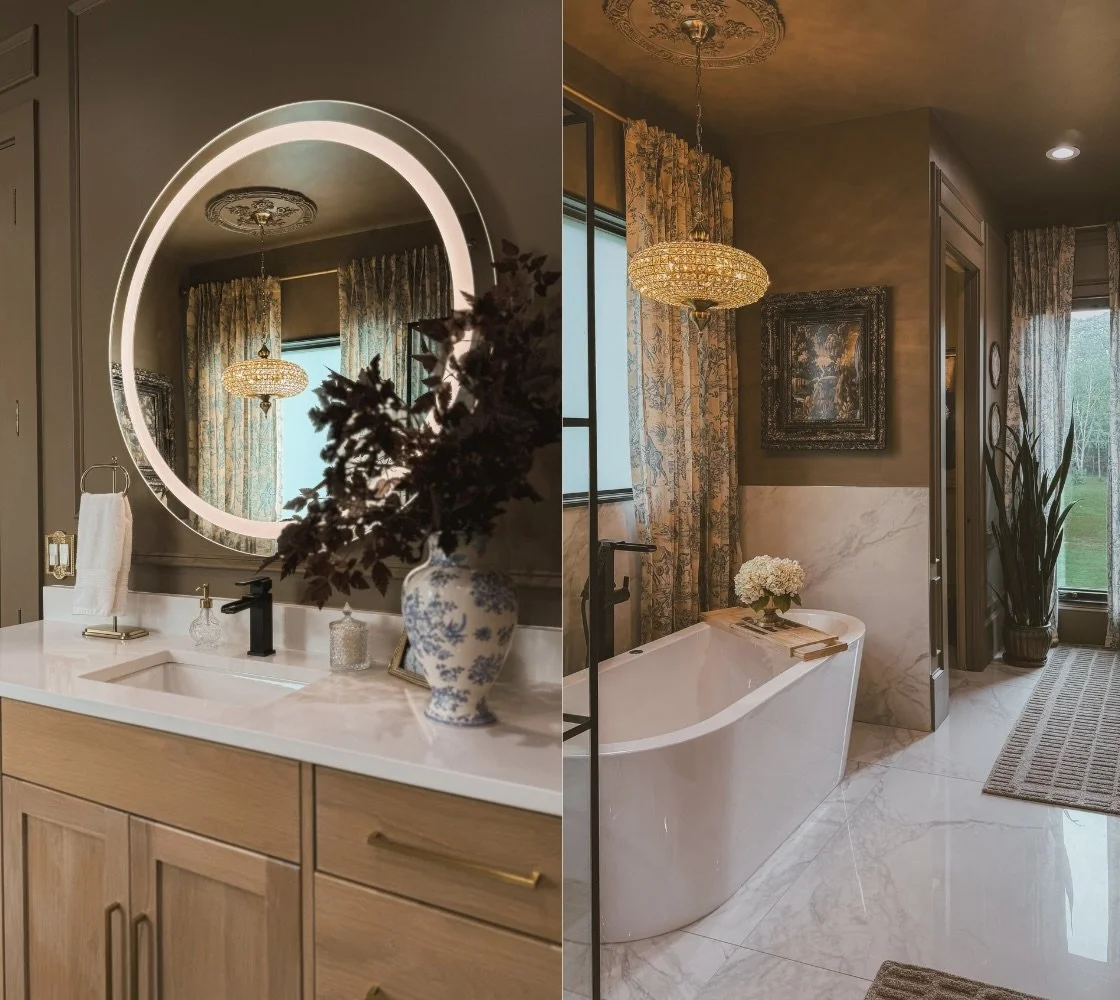
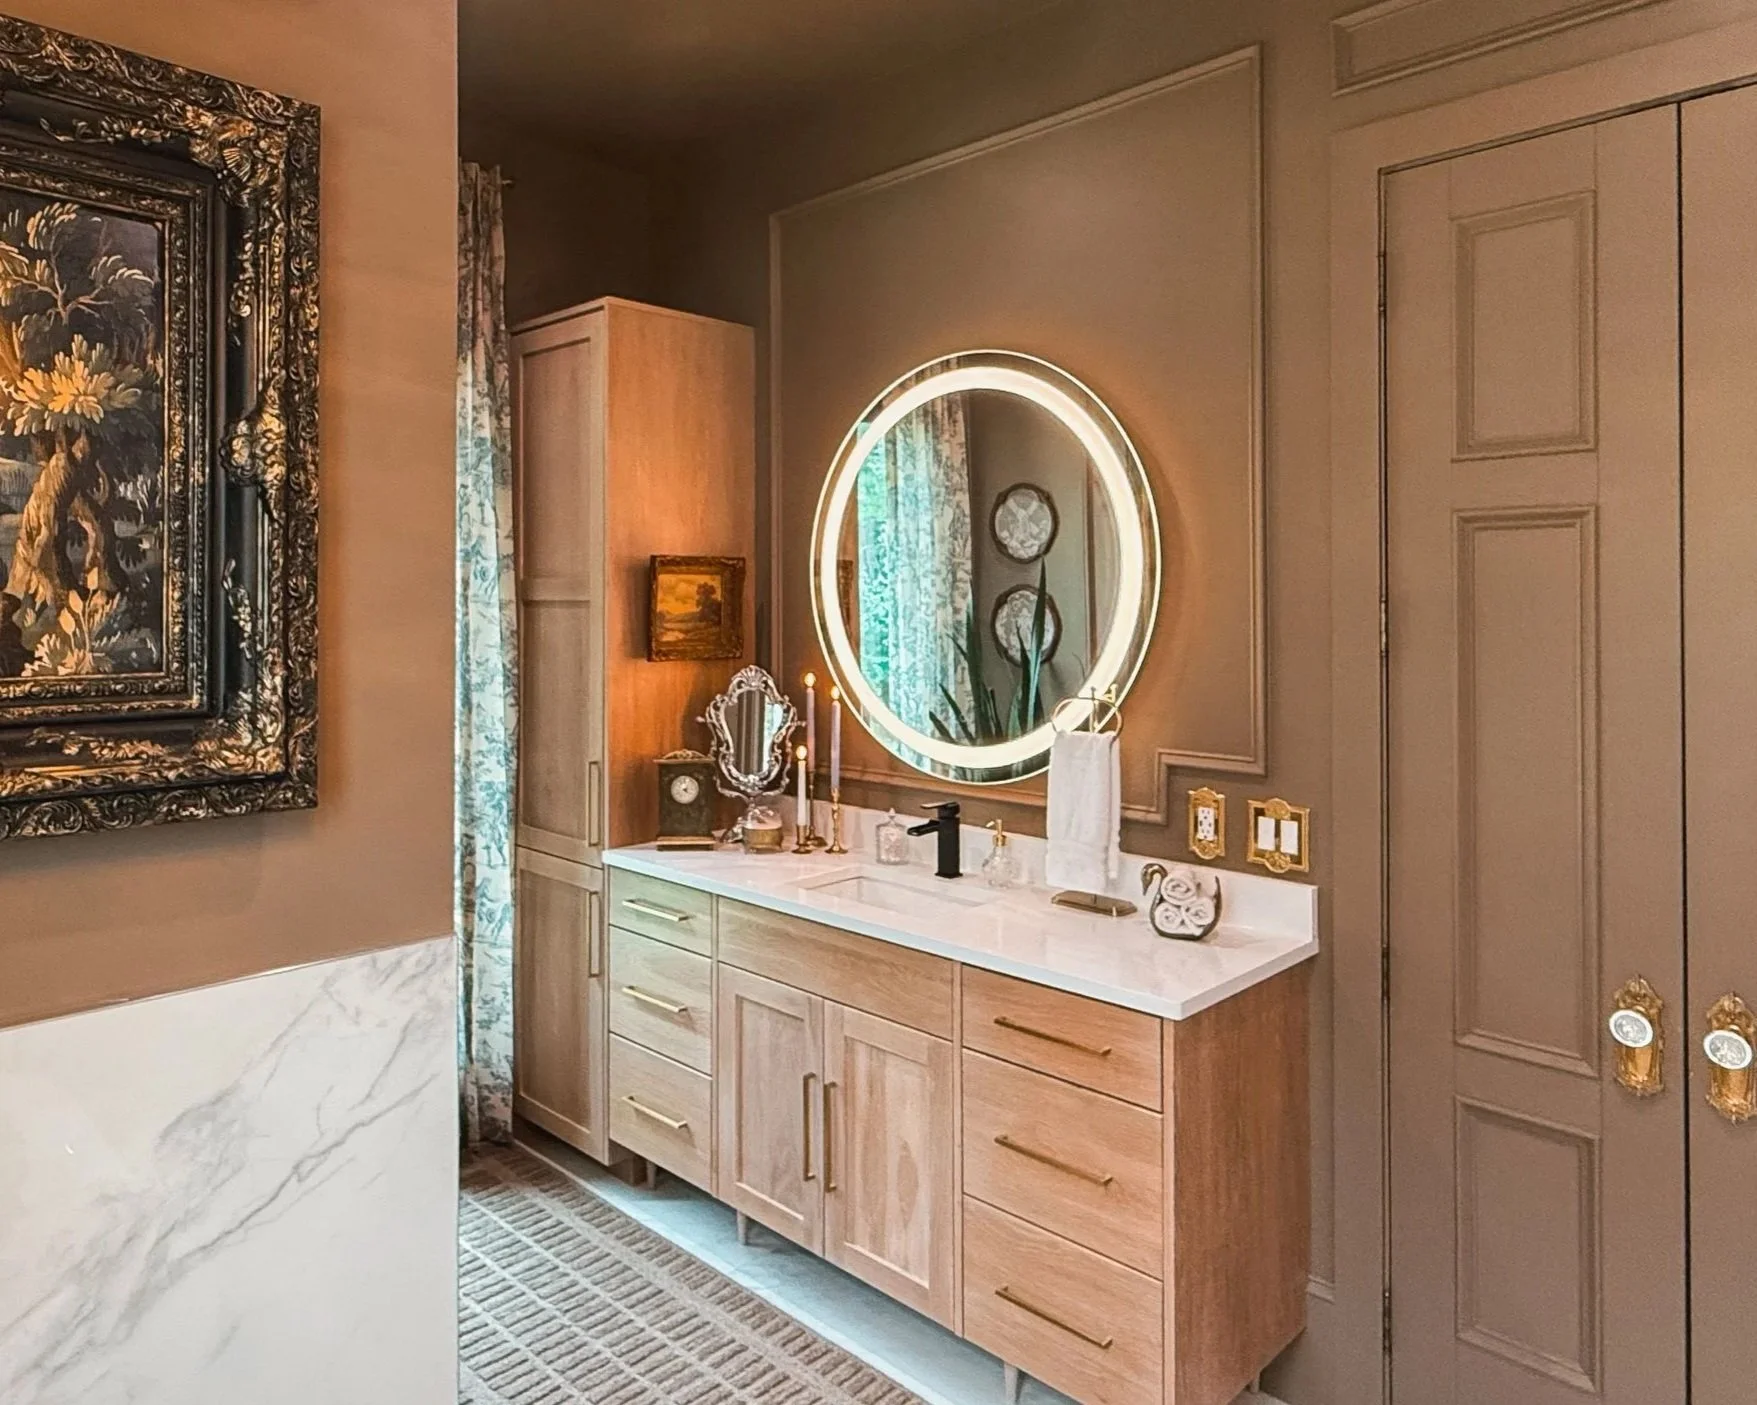
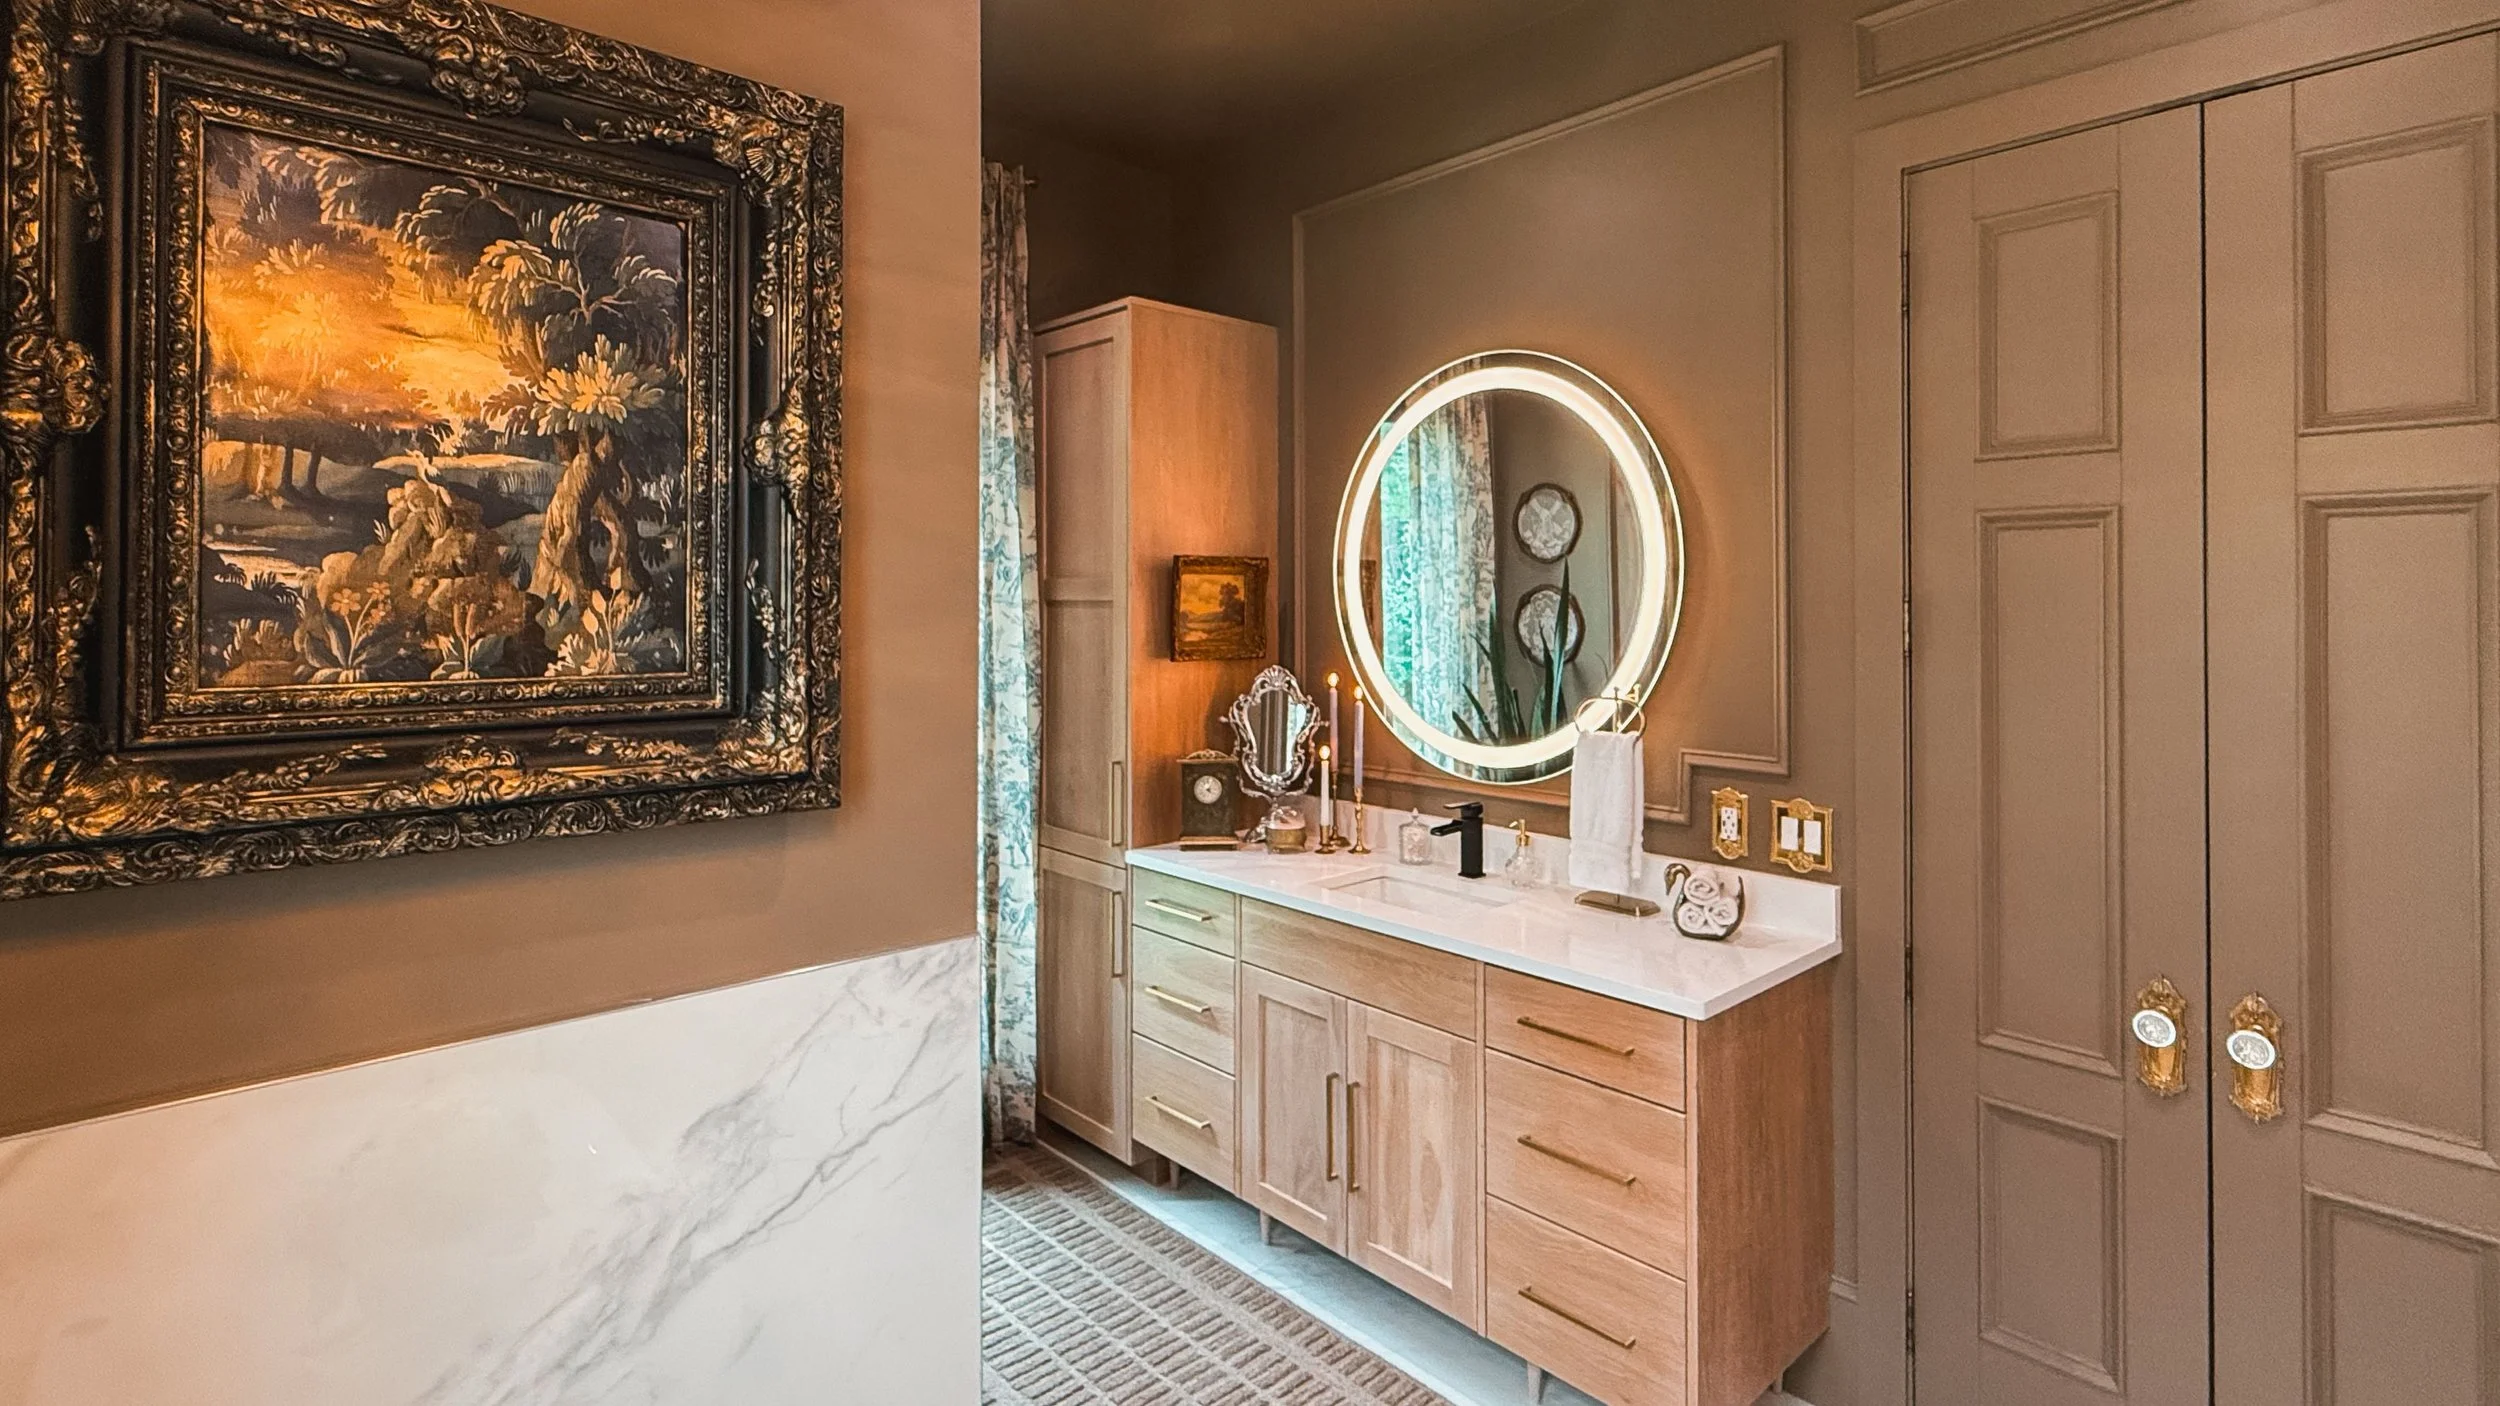
Our primary bathroom finally got the moody makeover it’s been begging for. I kept all of the plumbing fixtures and those round backlit mirrors, but everything else got a cozy, color-drenched upgrade.
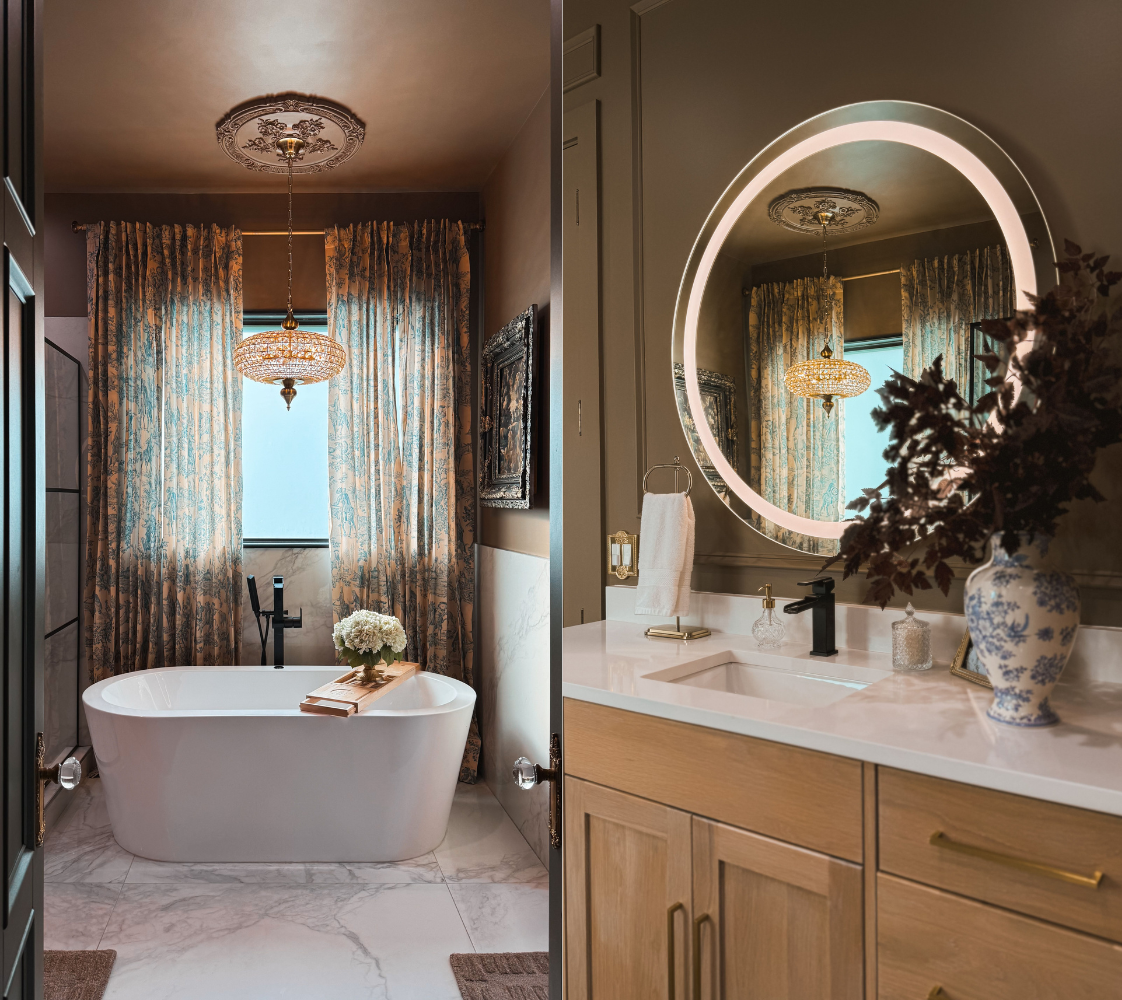
I painted the main space Virtual Taupe by HGTV Home by Sherwin-Williams and used Favorite Tan in the water closet for a subtle contrast. We added wall trim, and while the crown moulding is on backorder, I’m already loving the added character.
New rugs, toile blue curtains, and TWO chandeliers brought so much warmth and texture into the space. I also sprinkled in tons of Amazon finds: faux hydrangeas and red leaf stems, cute apothecary jars for Q-tips, soap dispensers, and pump bottles for the shower.
Without changing the cabinets or layout, the room now feels aligned with the rest of our home: moody, vintage-inspired, and full of soul. A few vintage touches like a silver mirror, a green clock, and a wood shelf in the water closet really finished it off. I’m officially done with all-white bathrooms.
Links At A Glance
If you liked this you might be interested in my primary bedroom makeover!

Mixing Faux & Real Plants indoors
If you’ve ever seem photos of the various rooms in my home and wondered, “Wait… is that real?” the answer is sometimes. I love plants and flowers for the life and texture they bring to a space, but let’s be honest, I can’t keep everything alive. So I’ve found a sweet spot by mixing real and faux greenery throughout my house based on one thing: how likely I am to actually take care of them.
In areas I frequent every day , I go with real plants because I’m much more likely to water them if I see them.
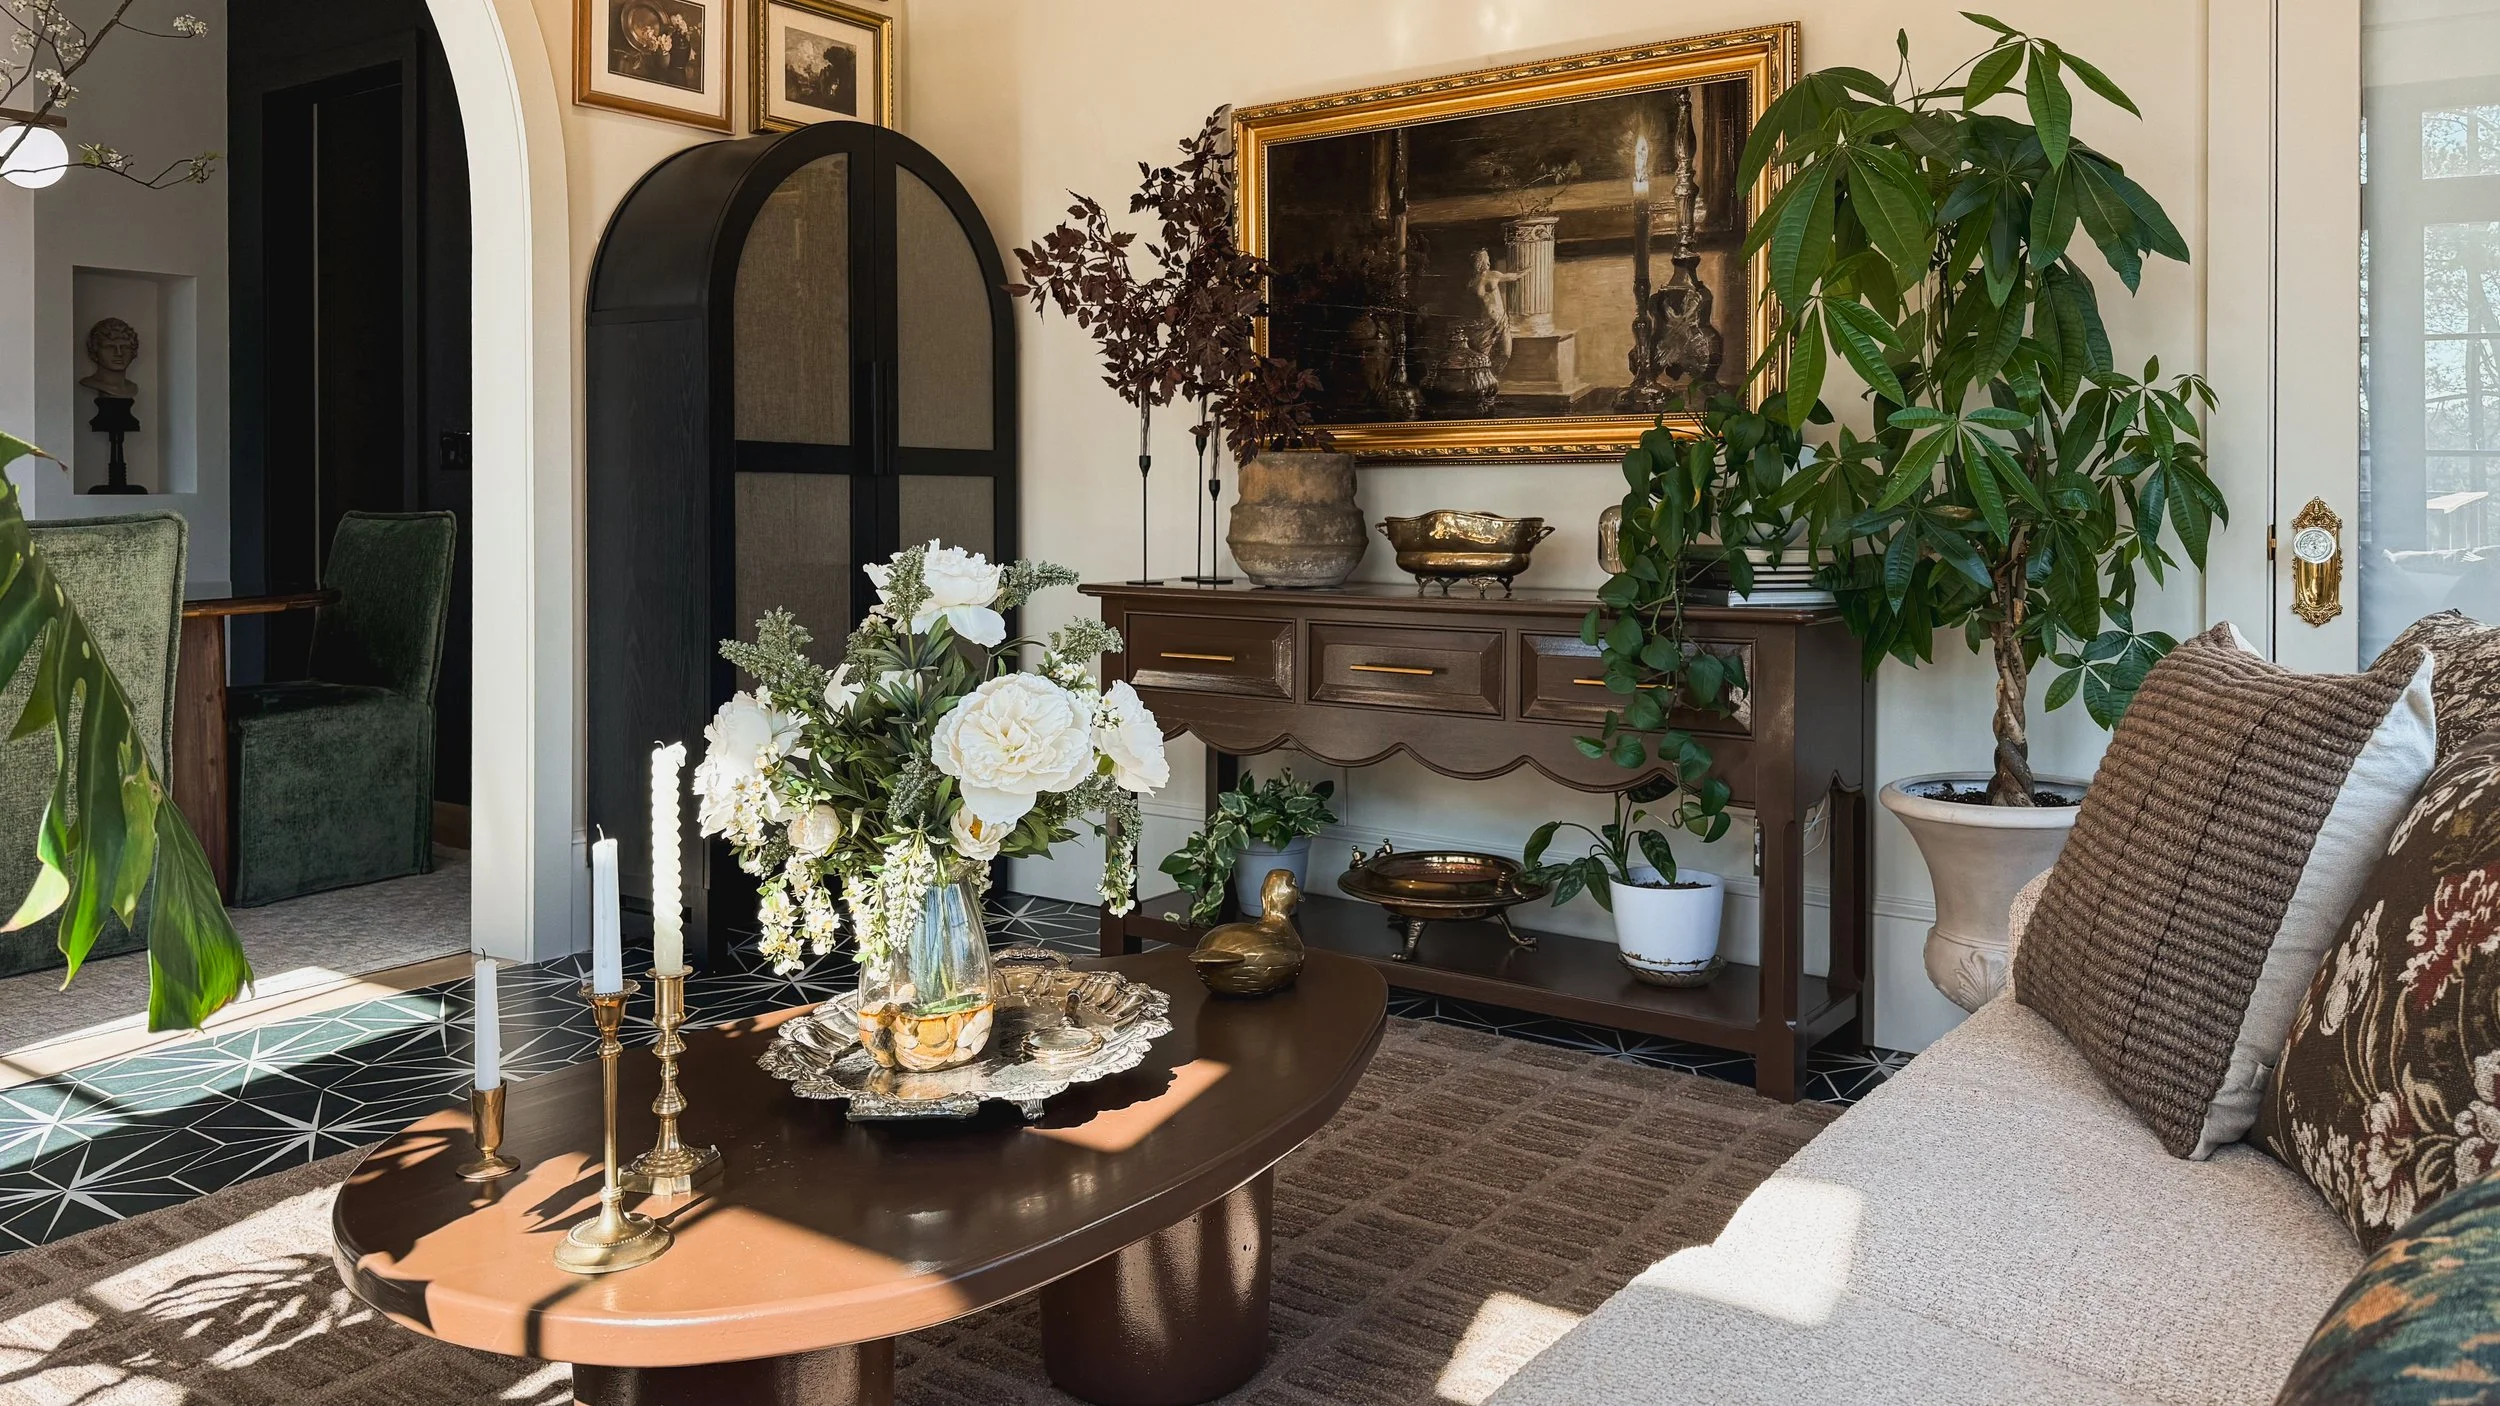
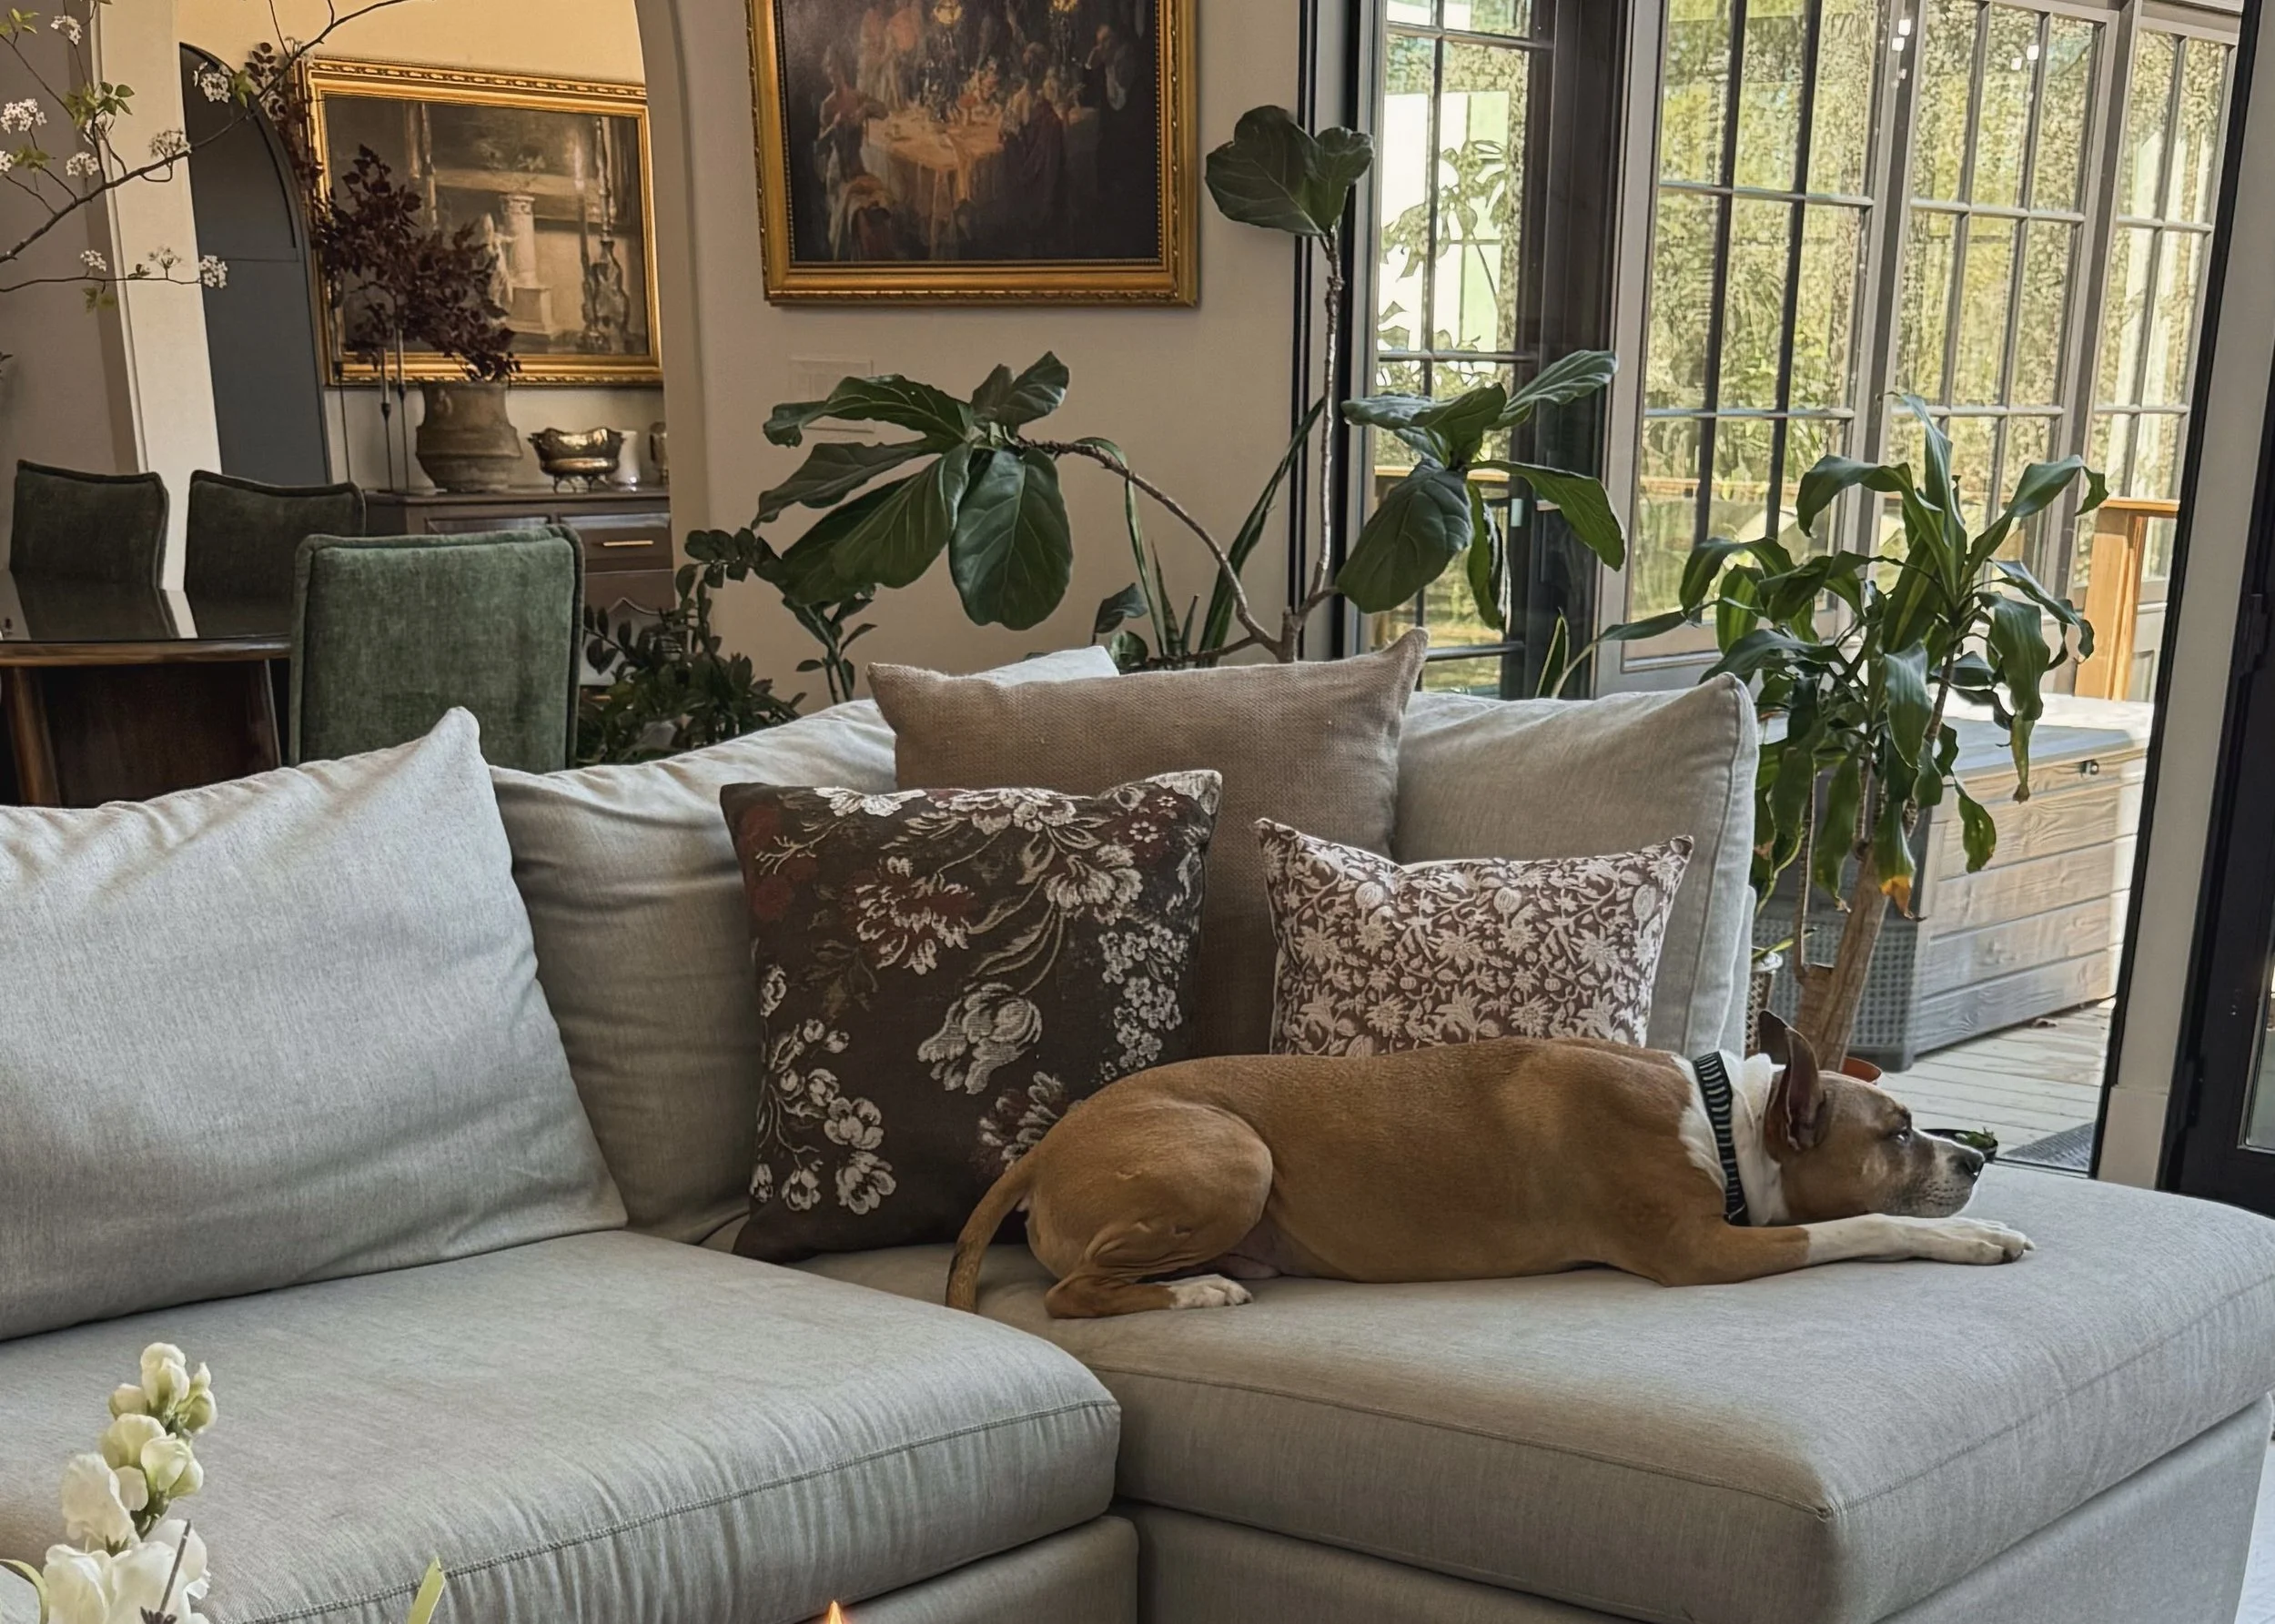
My sunroom is full of happy real plants like my monstera, snake plant, and money tree, and three small real plants under a console table that has a hidden grow light. They’re thriving, and I love seeing that little burst of green when I walk by. However, the white flower arrangement on the coffee table is faux from an estate sale.
The primary bathroom is a little mix of both. There’s a real snake plant soaking up the humidity, but the red leaf stems and hydrangeas are faux.

My primary bedroom is where the blinds are usually drawn, so it’s all faux in there. Most of the pieces came from estate sales and they give color and texture to the room.

The living room is mostly real plants except for the faux palm, because I’ve accepted I can’t keep palms alive no matter how hard I try, and a faux olive tree. Those are finicky and I’m not about that stress. Everything else in there is real and happy because of the massive amount of light this space gets.

My entryway has a sweet little real plant that makes me smile every time I walk in the door, and the office has a stunning faux floral arrangement I scored at an estate sale. It looks so good, it fools just about everyone.
So that’s my not-so-secret formula: real where I see them, faux where I forget them. Mixing the two lets me enjoy the beauty of plants without the guilt, and honestly, some of those faux ones are pulling their weight in a big way.
Shop the Rooms
If you liked this, then you might be interested in my vintage inspired finds from amazon!

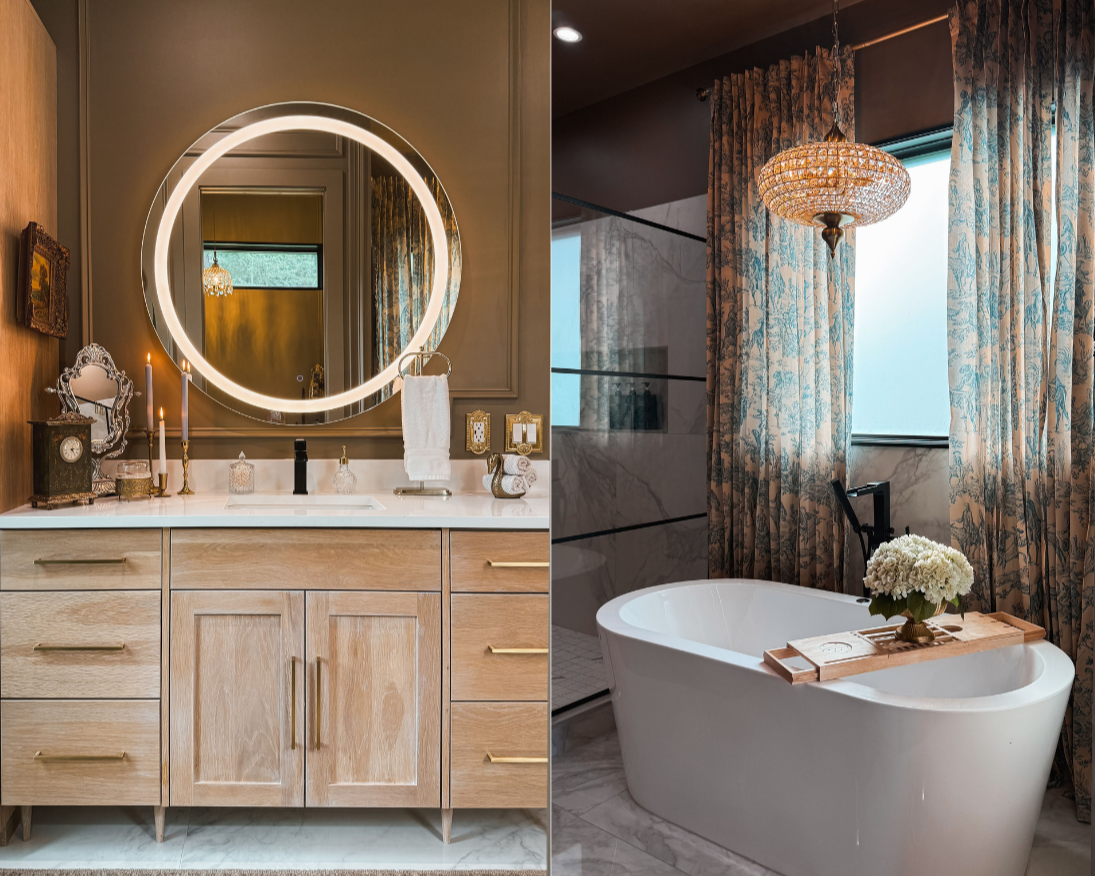
Primary Bathroom Lighting
One of my favorite parts of the bathroom makeover was swapping out the plain can lights and adding two chandeliers. We used a can light converter kit from Amazon (highly recommend) to hang them right where the old can lights were. Interested in a step-by-step tutorial on converting your can lights? Click here!
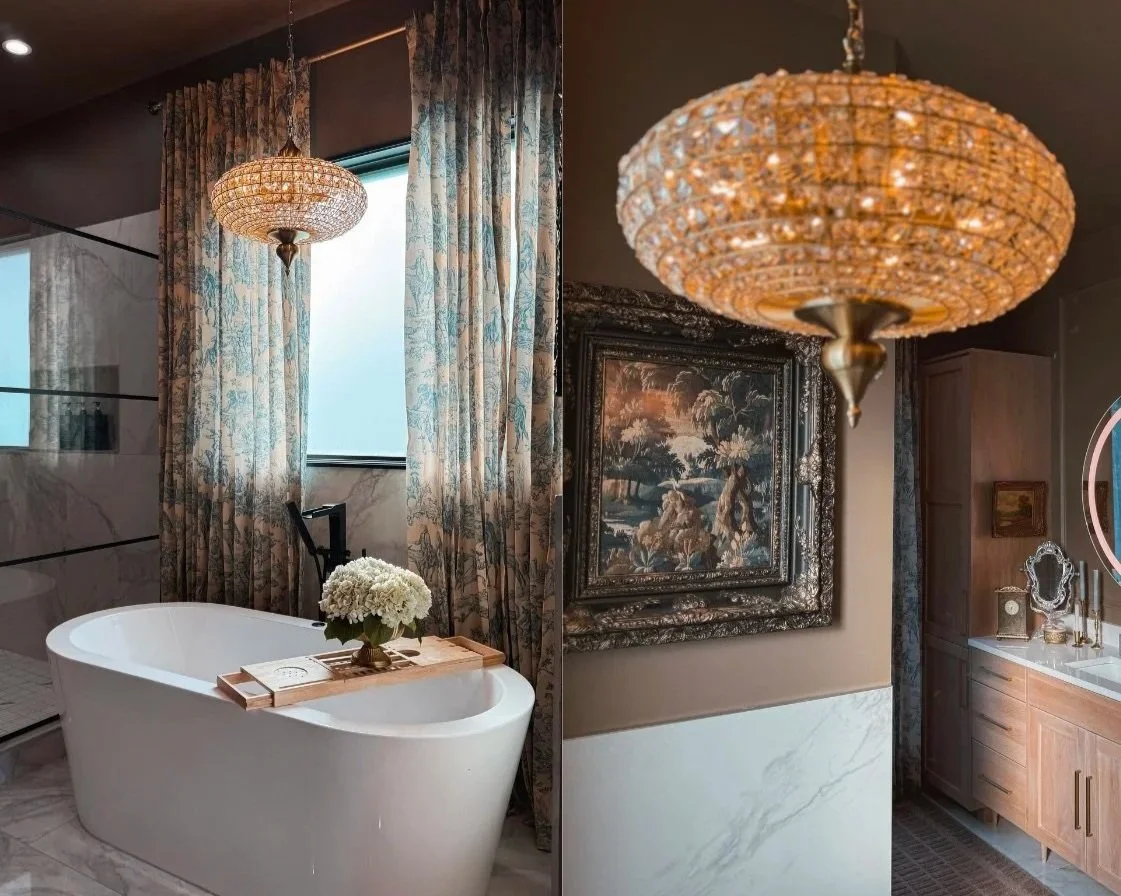
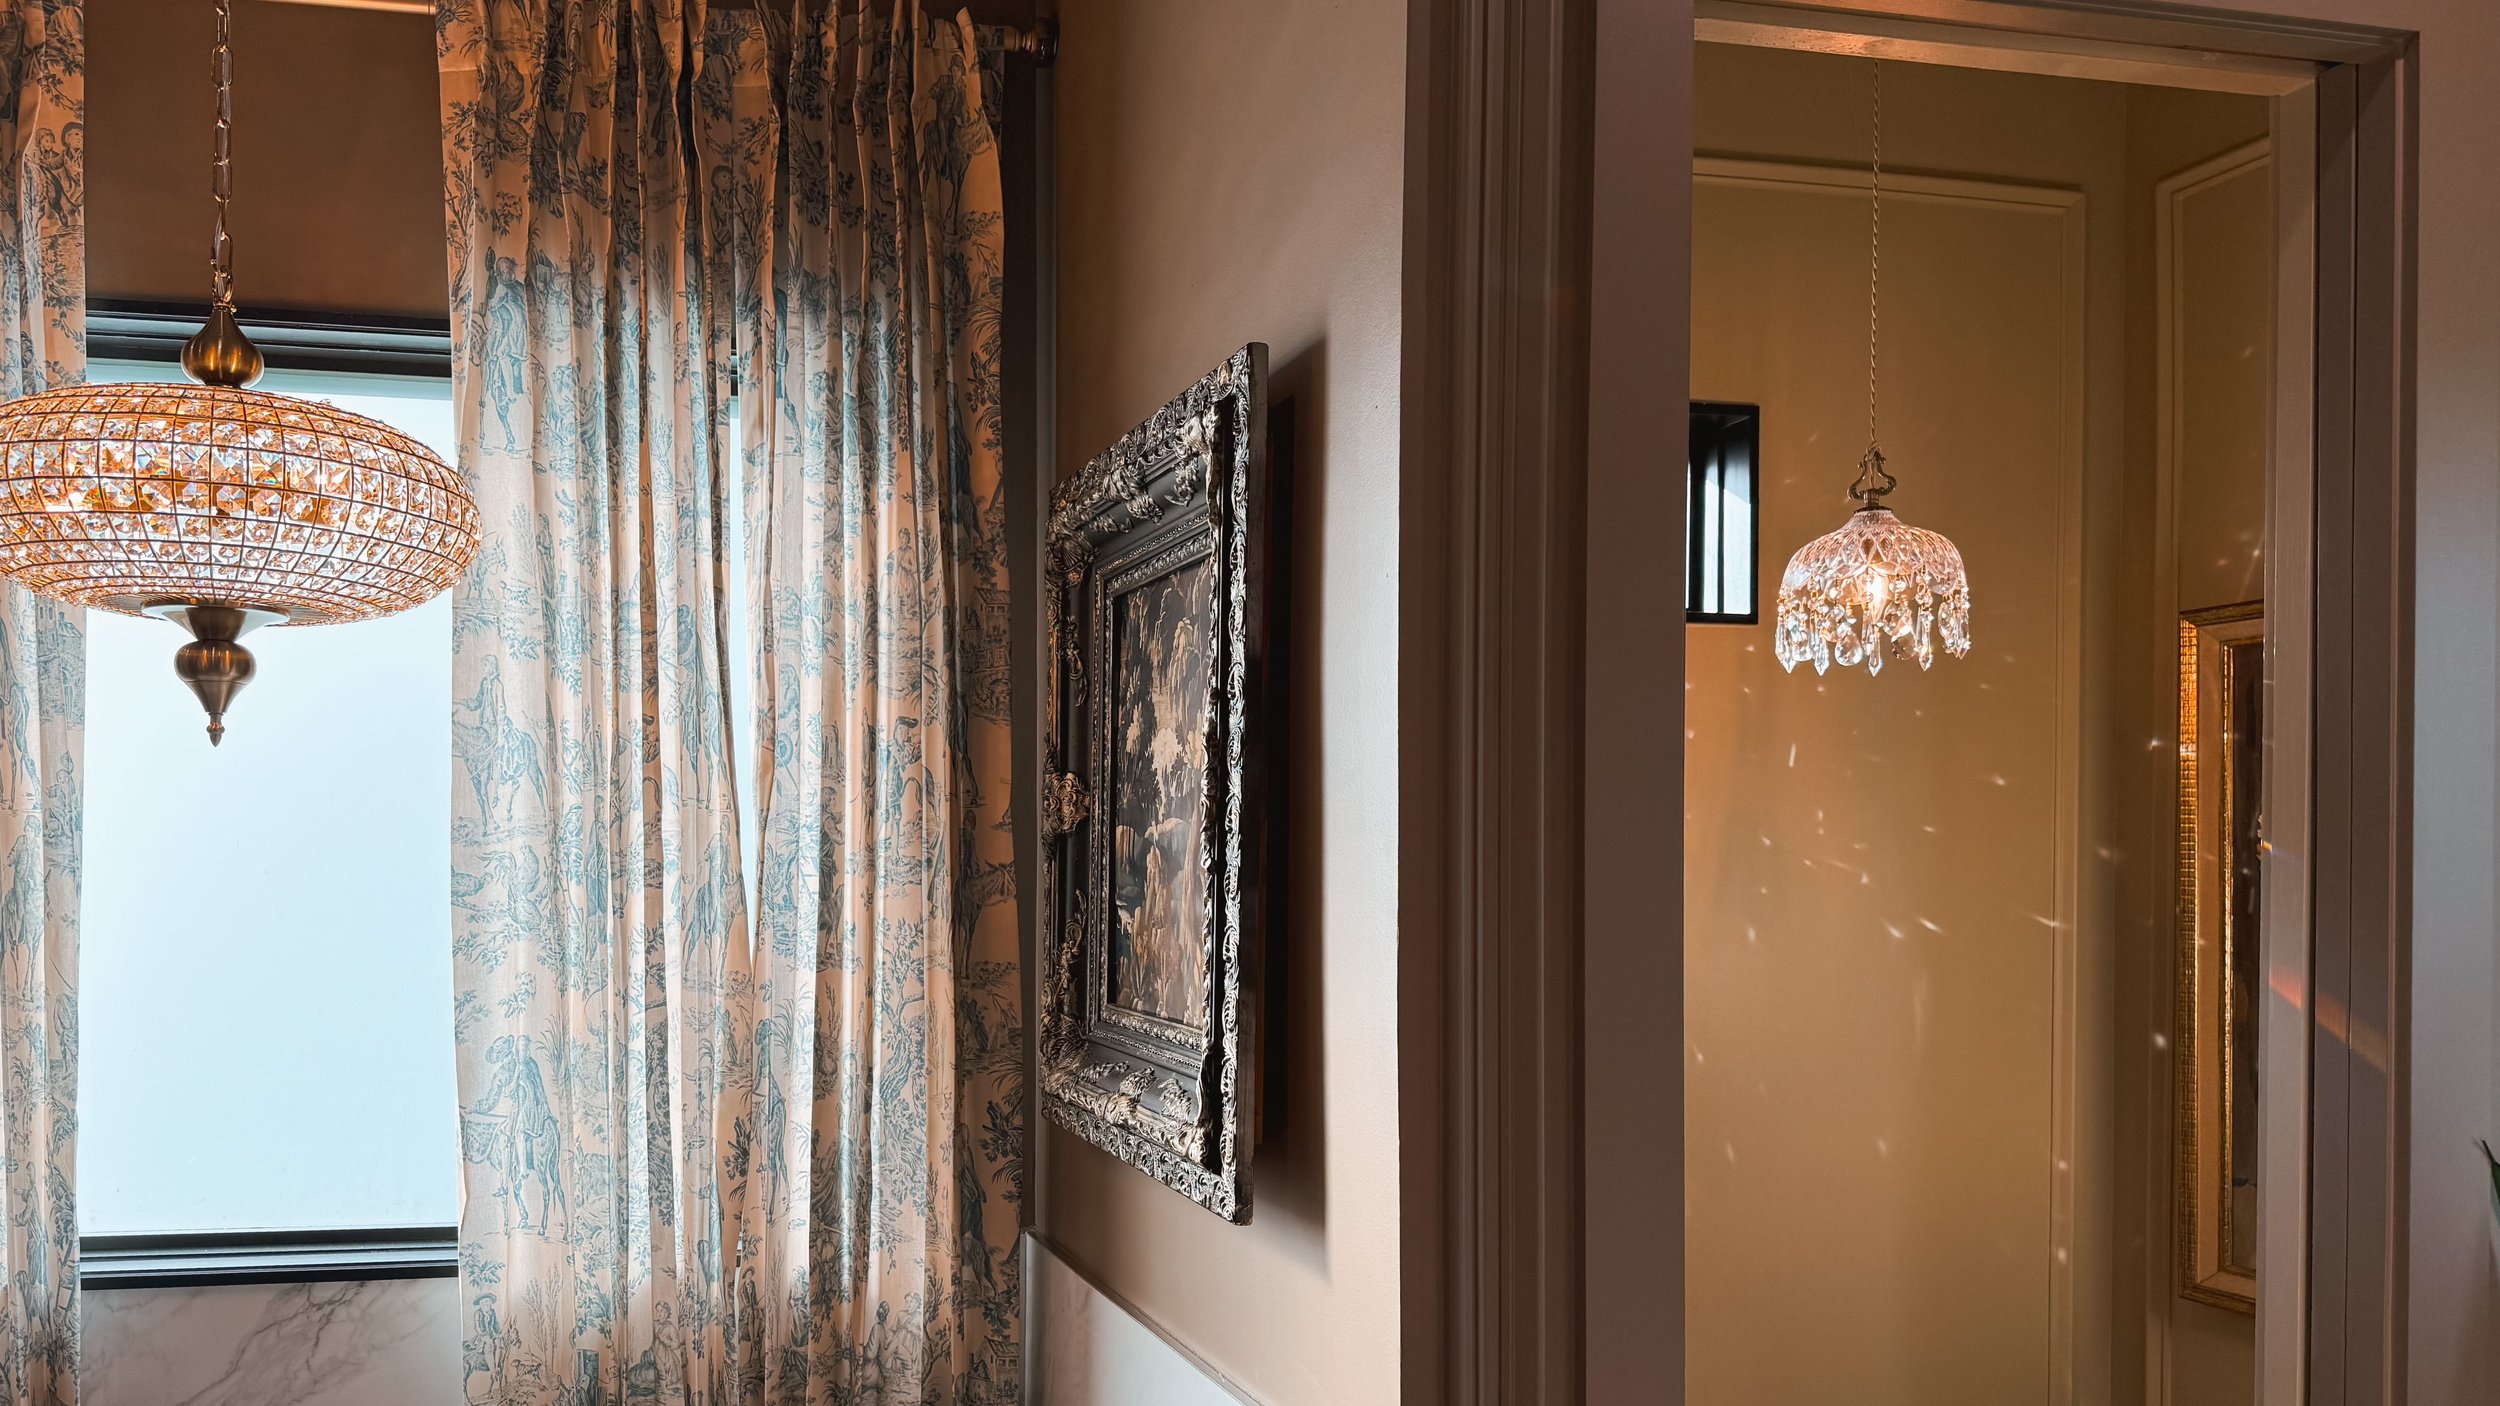
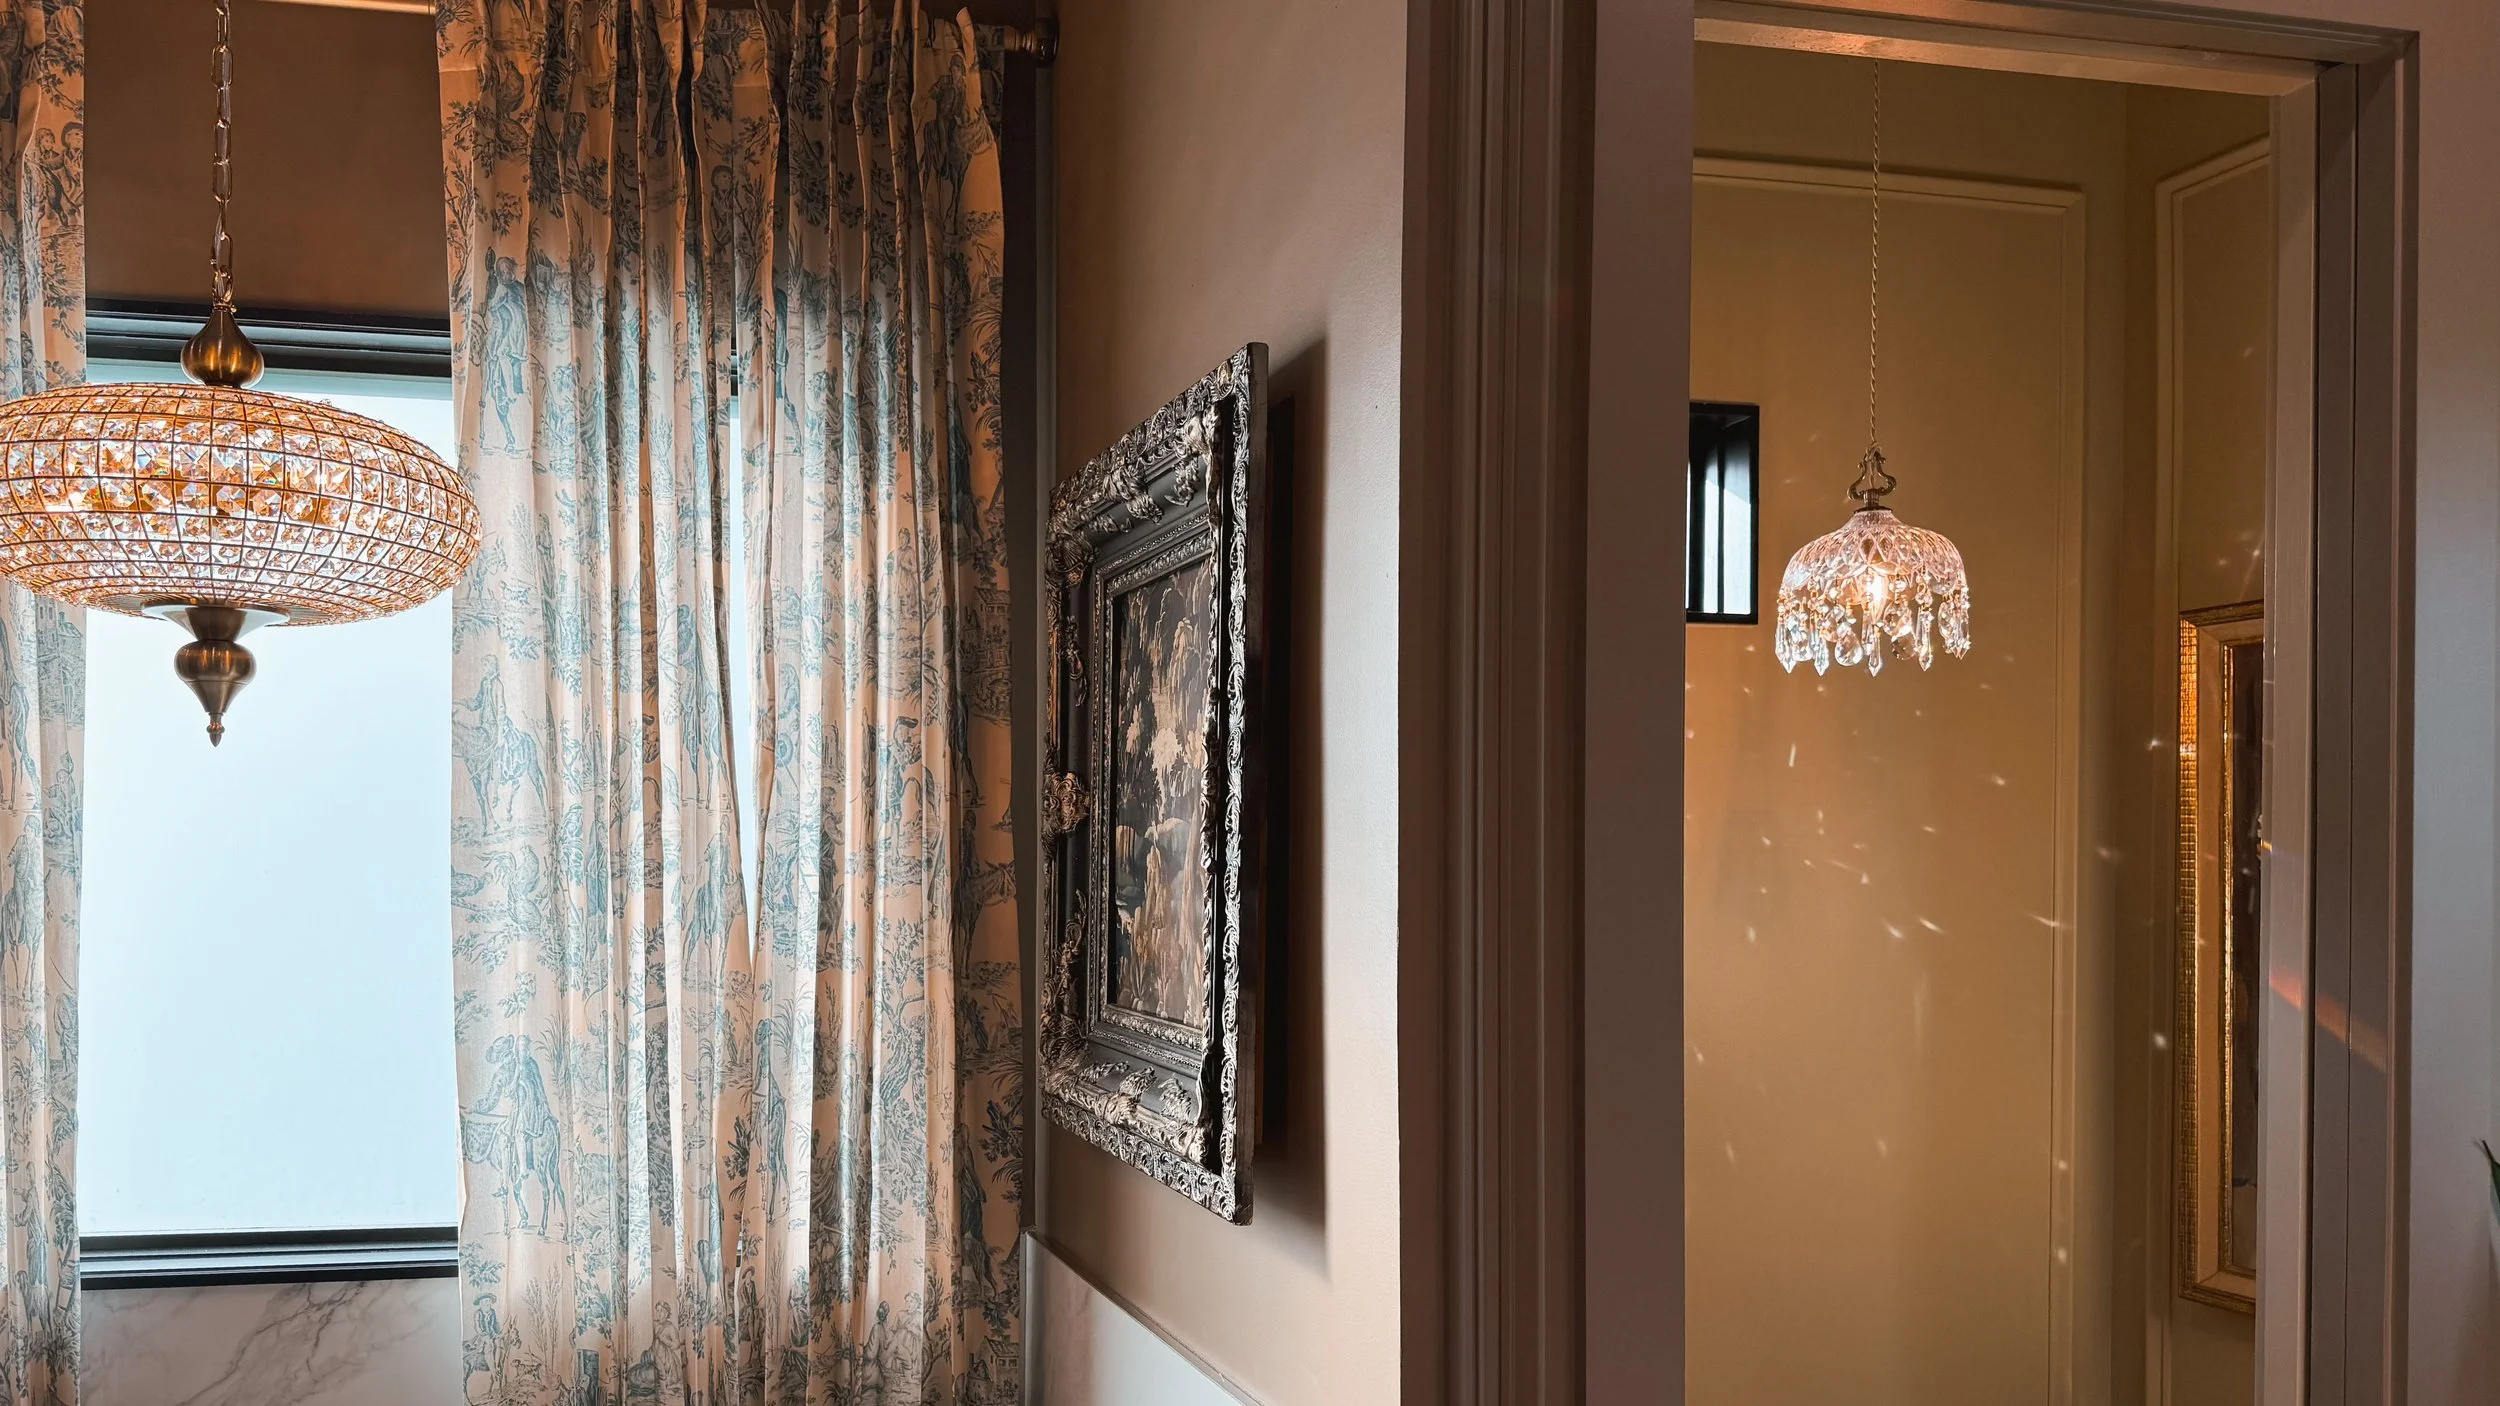
Over the tub, we added a beautiful chandelier paired with a large, ornate ceiling medallion (the same one that’s in the sunroom) that I painted to match the room. It instantly made the whole space feel more finished.

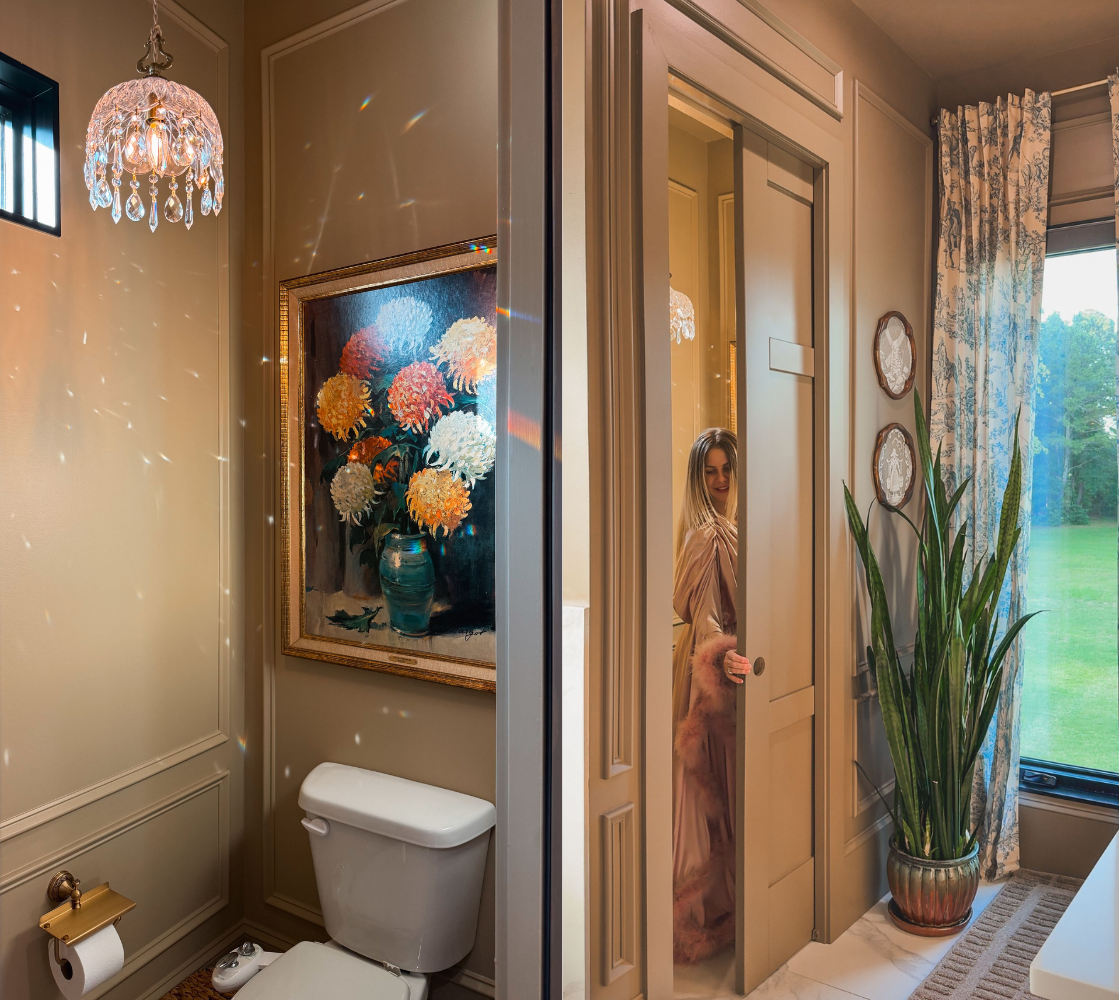
In the water closet, I went with a smaller chandelier that catches the sunset light in the prettiest way. It literally sparkles!! That one has a small ceiling medallion that came with the converter kit, and it worked perfectly. I’ve also used the ceiling medallions that came with the can-light converter kits in the hallway.
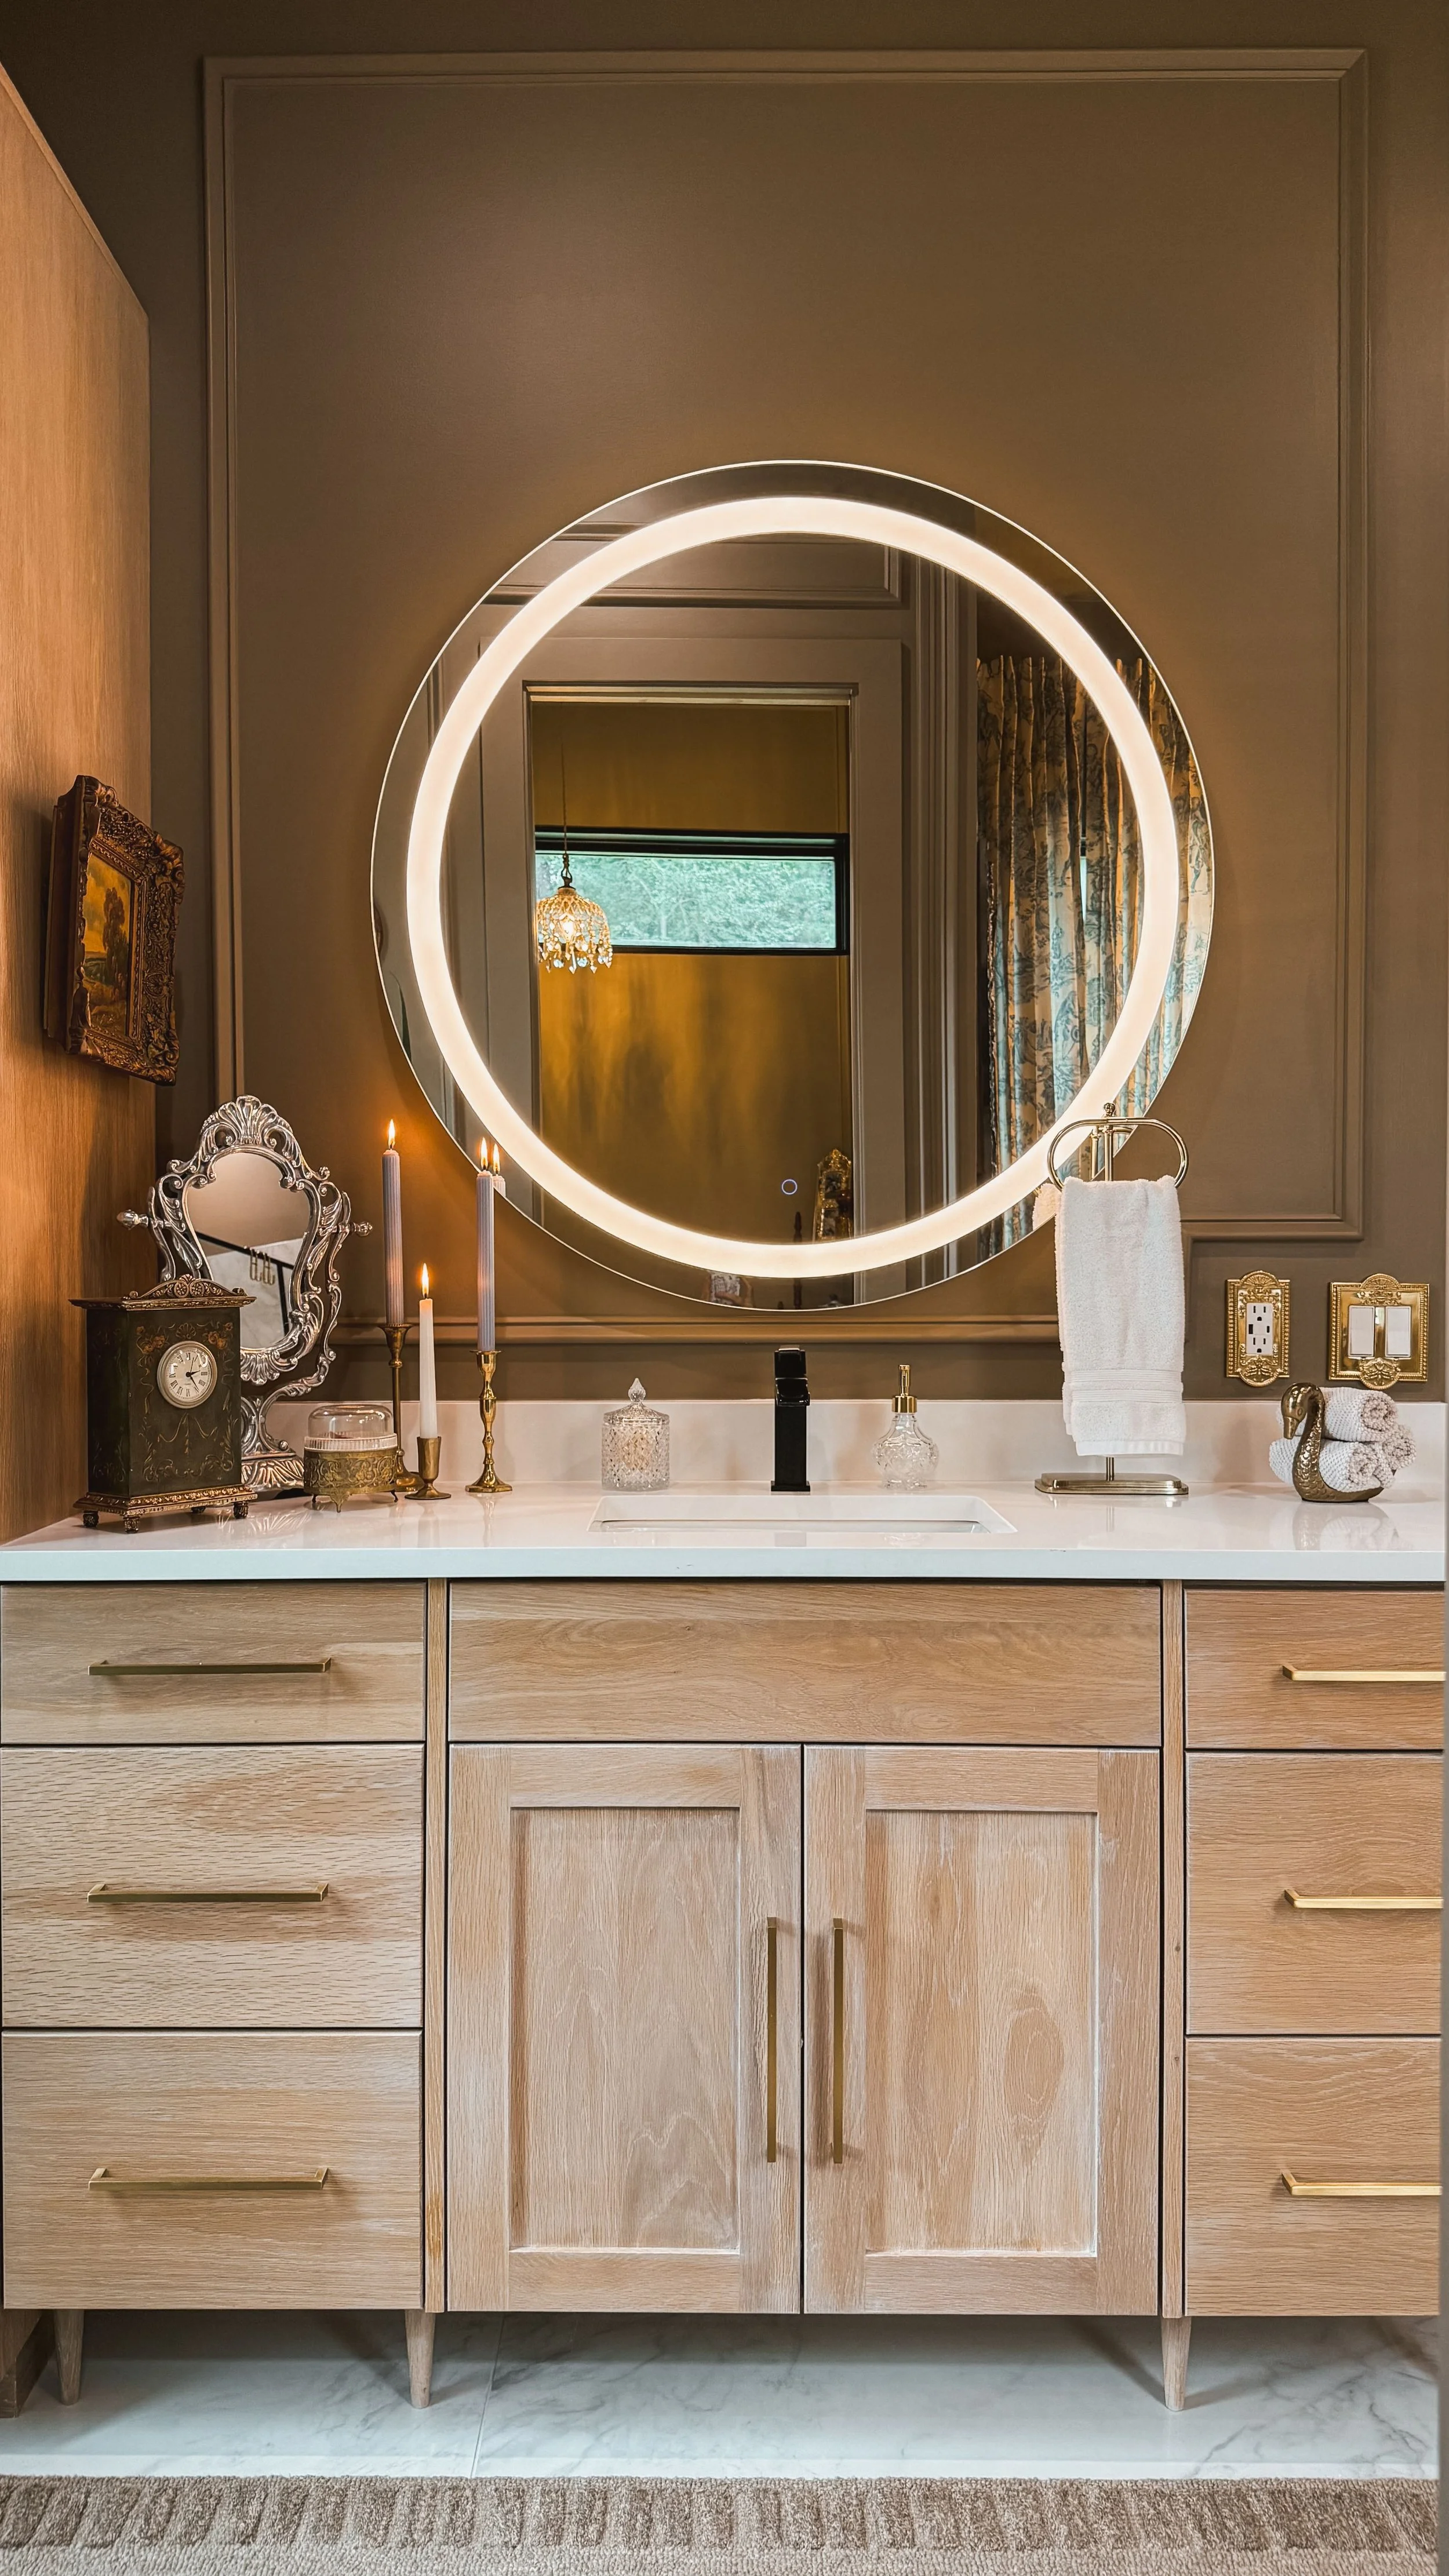
Besides the two chandeliers and the remaining can lights, each sink area also has a large round lit mirror. These are original to the bathroom and are perfect for doing makeup and getting ready.
It’s true what they say, lighting is the jewelry of the room. These lights bring just the right amount of charm and drama.
Links at a Glance
If you’re interested in this, check out my blog post about my Best selling lighting picks from Amazon!
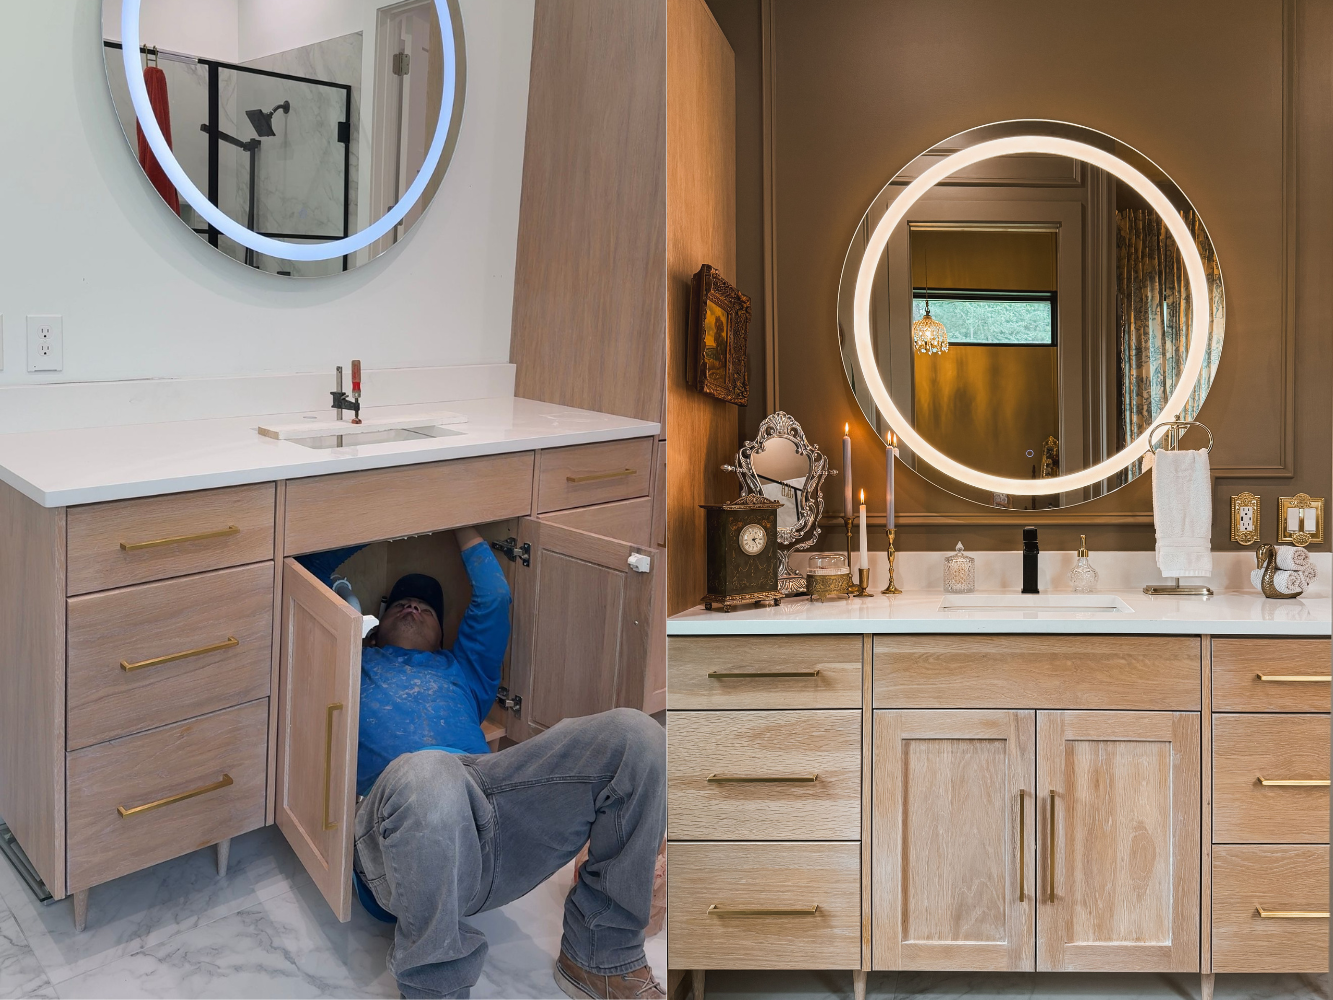
Our Bathroom Sink Mistake
When we built our house in 2020, I chose vessel sinks because I thought they were cute. What I didn’t consider was the height of our cabinets. Turns out, vessel sinks plus tall cabinets equal one very impractical setup. I’ve literally been standing on a step stool to wash my face for the past five years.

So during our recent bathroom makeover, I finally bit the bullet (begrudgingly) and swapped them out. Thankfully, our tall faucets were two-piece, so we were able to shorten them for the new undermount sinks. The old vessel sinks had left stains on the quartz, so we had the counters fully replaced by Atlantis Stone and Granite here in Atlanta, and I highly recommend them. They took the old stone, cut the new one to fit, and installed it all beautifully.
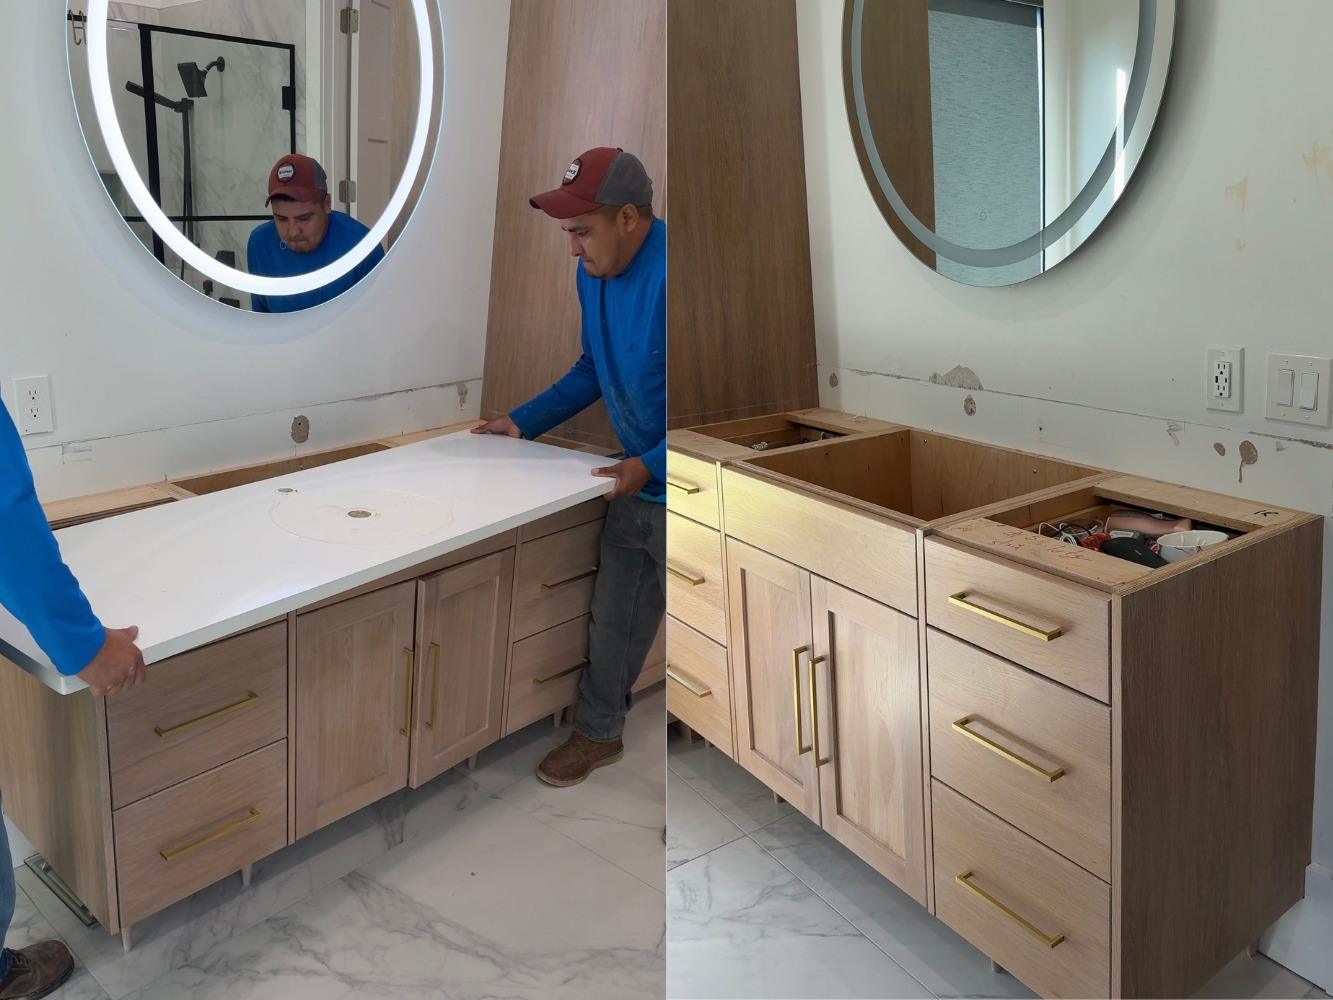
Zach handled the plumbing and faucet adjustments, and we also lowered our round backlit mirrors since they were hung way too high to accommodate the vessel sinks.
Lesson learned: I do not recommend vessel sinks. We still have them in the guest bathroom, but I’m not ready to mess with the wallpaper or spend more money, so they’ll stay. But for our bathroom? No more step stool required.
Links at a Glance
If you liked this, you might be interested in reading more about our Blue Floral Bathroom!

Primary Bathroom Decor From Amazon
I just wrapped up our primary bathroom makeover, and believe it or not, it’s packed with Amazon finds. This space went from white and basic to warm and moody with tons of thoughtful details that I was able to source quickly and affordably.
From the round backlit mirrors that I previously owned to the soap dispensers, shower pump bottles, and even the outlet and switch plate covers, Amazon really delivered. The water closet now has a chandelier (converted with a can light kit), plus a sleek little TP holder and storage to match.
All of the plumbing fixtures are the same, but I added toile curtains with a vintage-inspired curtain rod, faux hydrangeas (these are SO good) in a gold vase, and apothecary jars filled with Q-tips by the sink.
It's proof you don’t have to sacrifice style for convenience or wait forever for shipping. Everything came together so seamlessly, and I love how high-end it feels.


Primary Bathroom Makeover

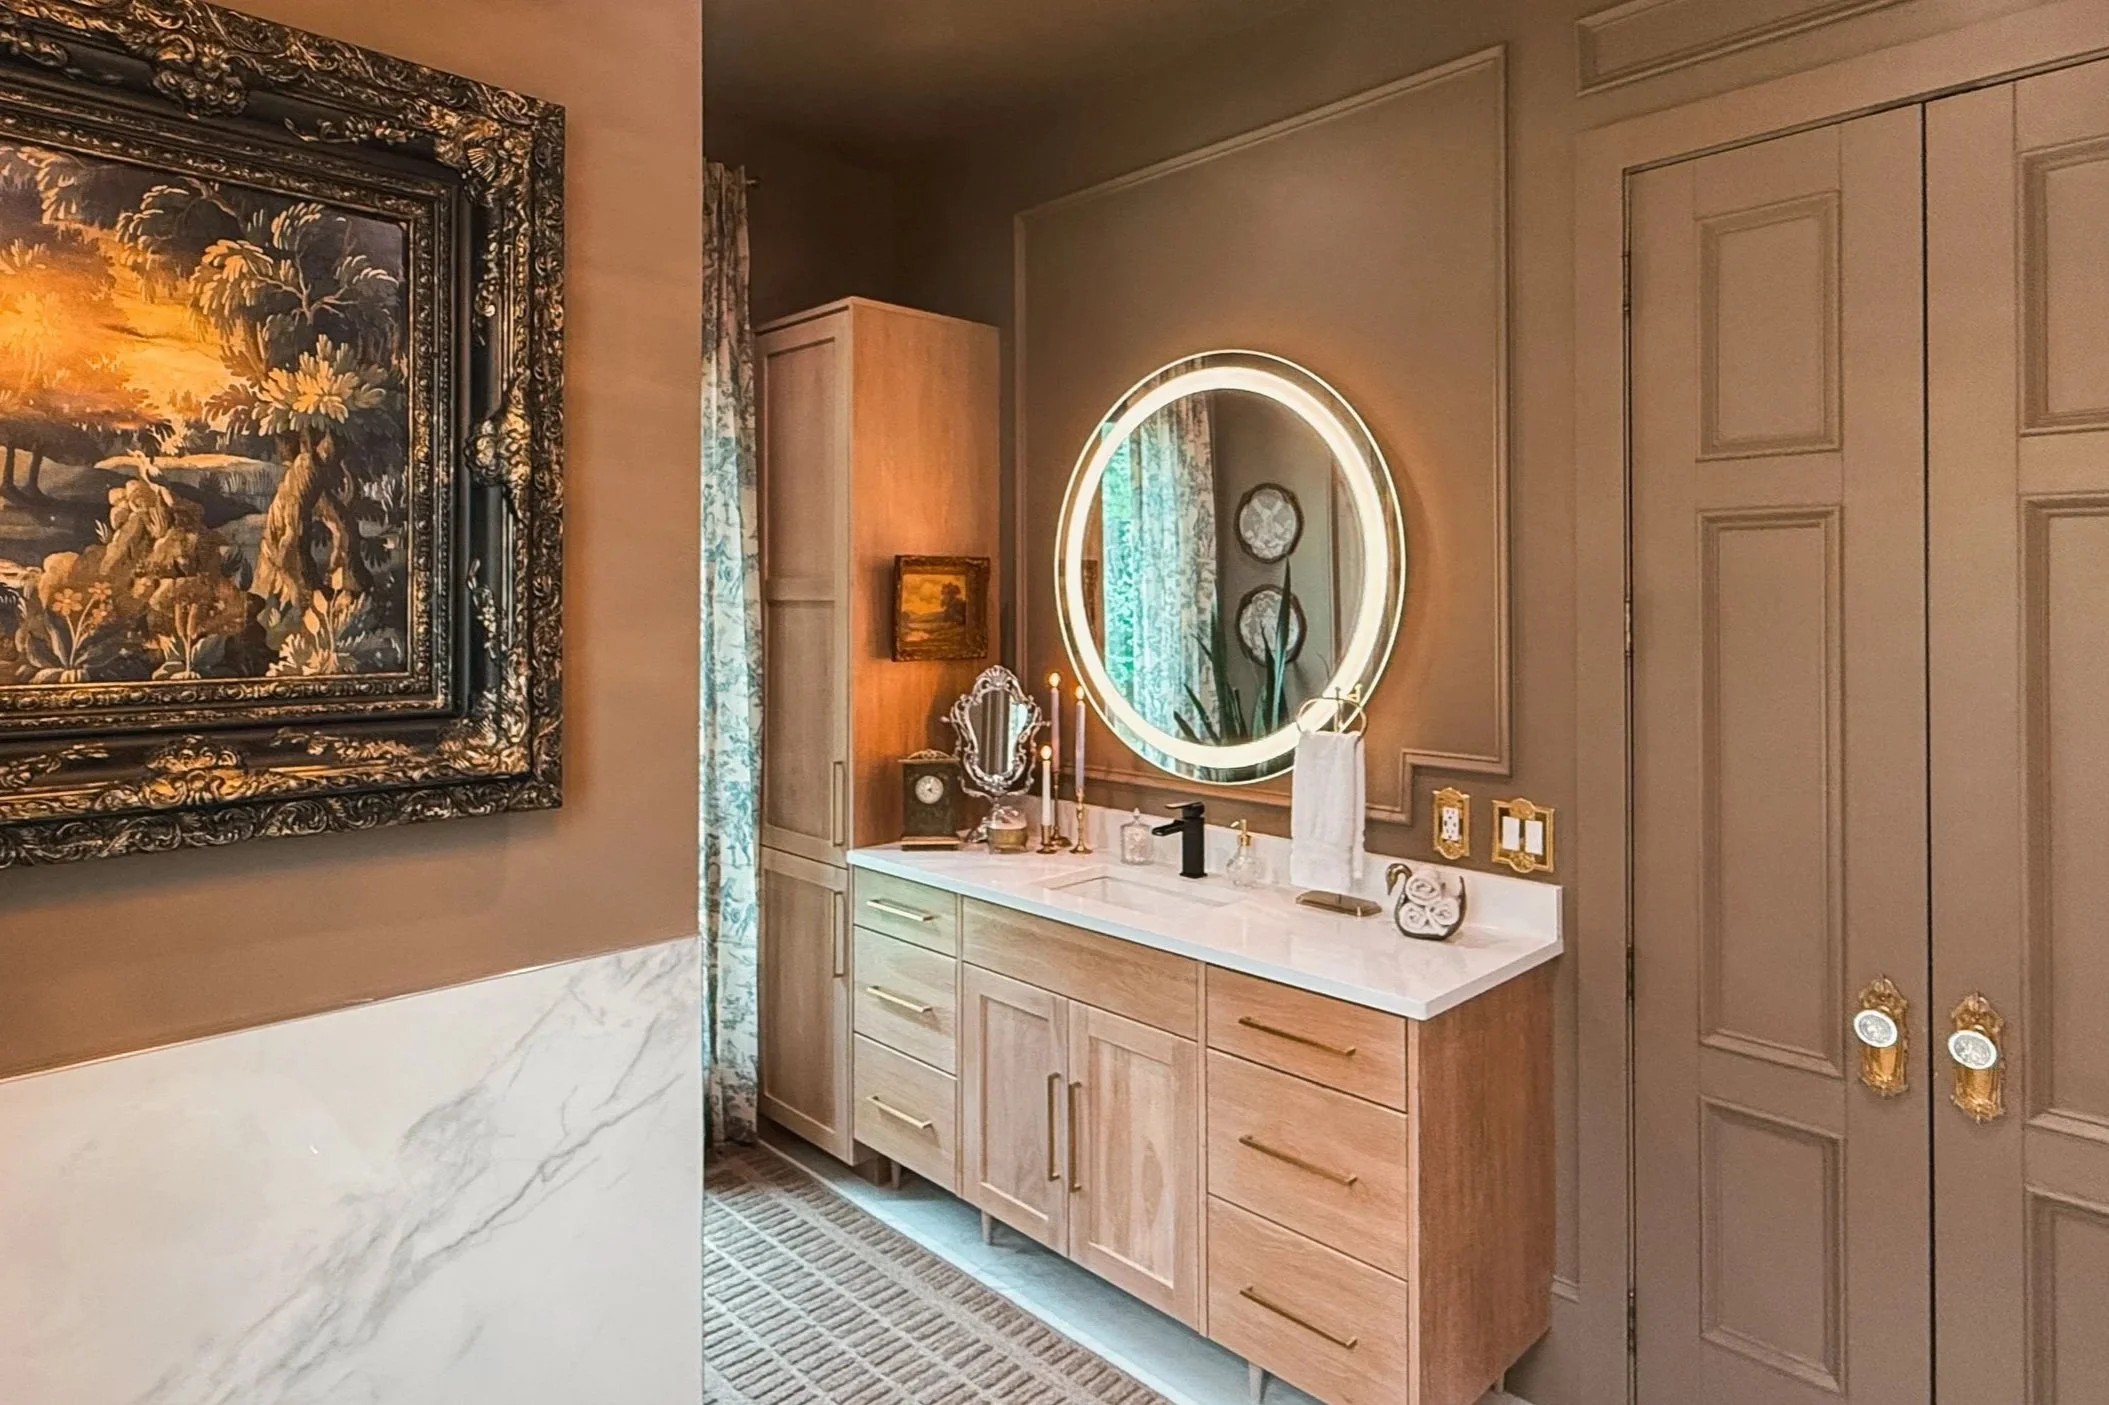
Our primary bathroom finally got the moody makeover it’s been begging for. I kept all of the plumbing fixtures and those round backlit mirrors the same, but everything else got a cozy, color-drenched upgrade.

I painted the main space Virtual Taupe by HGTV Home by Sherwin-Williams and used Favorite Tan in the water closet for a subtle contrast. I added wall trim, and while the crown moulding is on backorder, I’m already loving the added character.

New rugs, toile blue curtains, and TWO chandeliers brought so much warmth and texture into the space. I also sprinkled in tons of Amazon finds: faux hydrangeas and red leaf stems, cute apothecary jars for Q-tips, soap dispensers, pump bottles for the shower, and more.
Without changing the cabinets or layout, the room now feels aligned with the rest of our home. It’s moody, modern meets vintage, and full of character. A few vintage touches like the silver mirror next to the sink, a green clock, and the tiered wood shelf in the water closet really finished it off. I’m officially done with all-white bathrooms.

Shop the entire room here!
Links at a Glance

Using Canva to Plan My Primary Bathroom Design
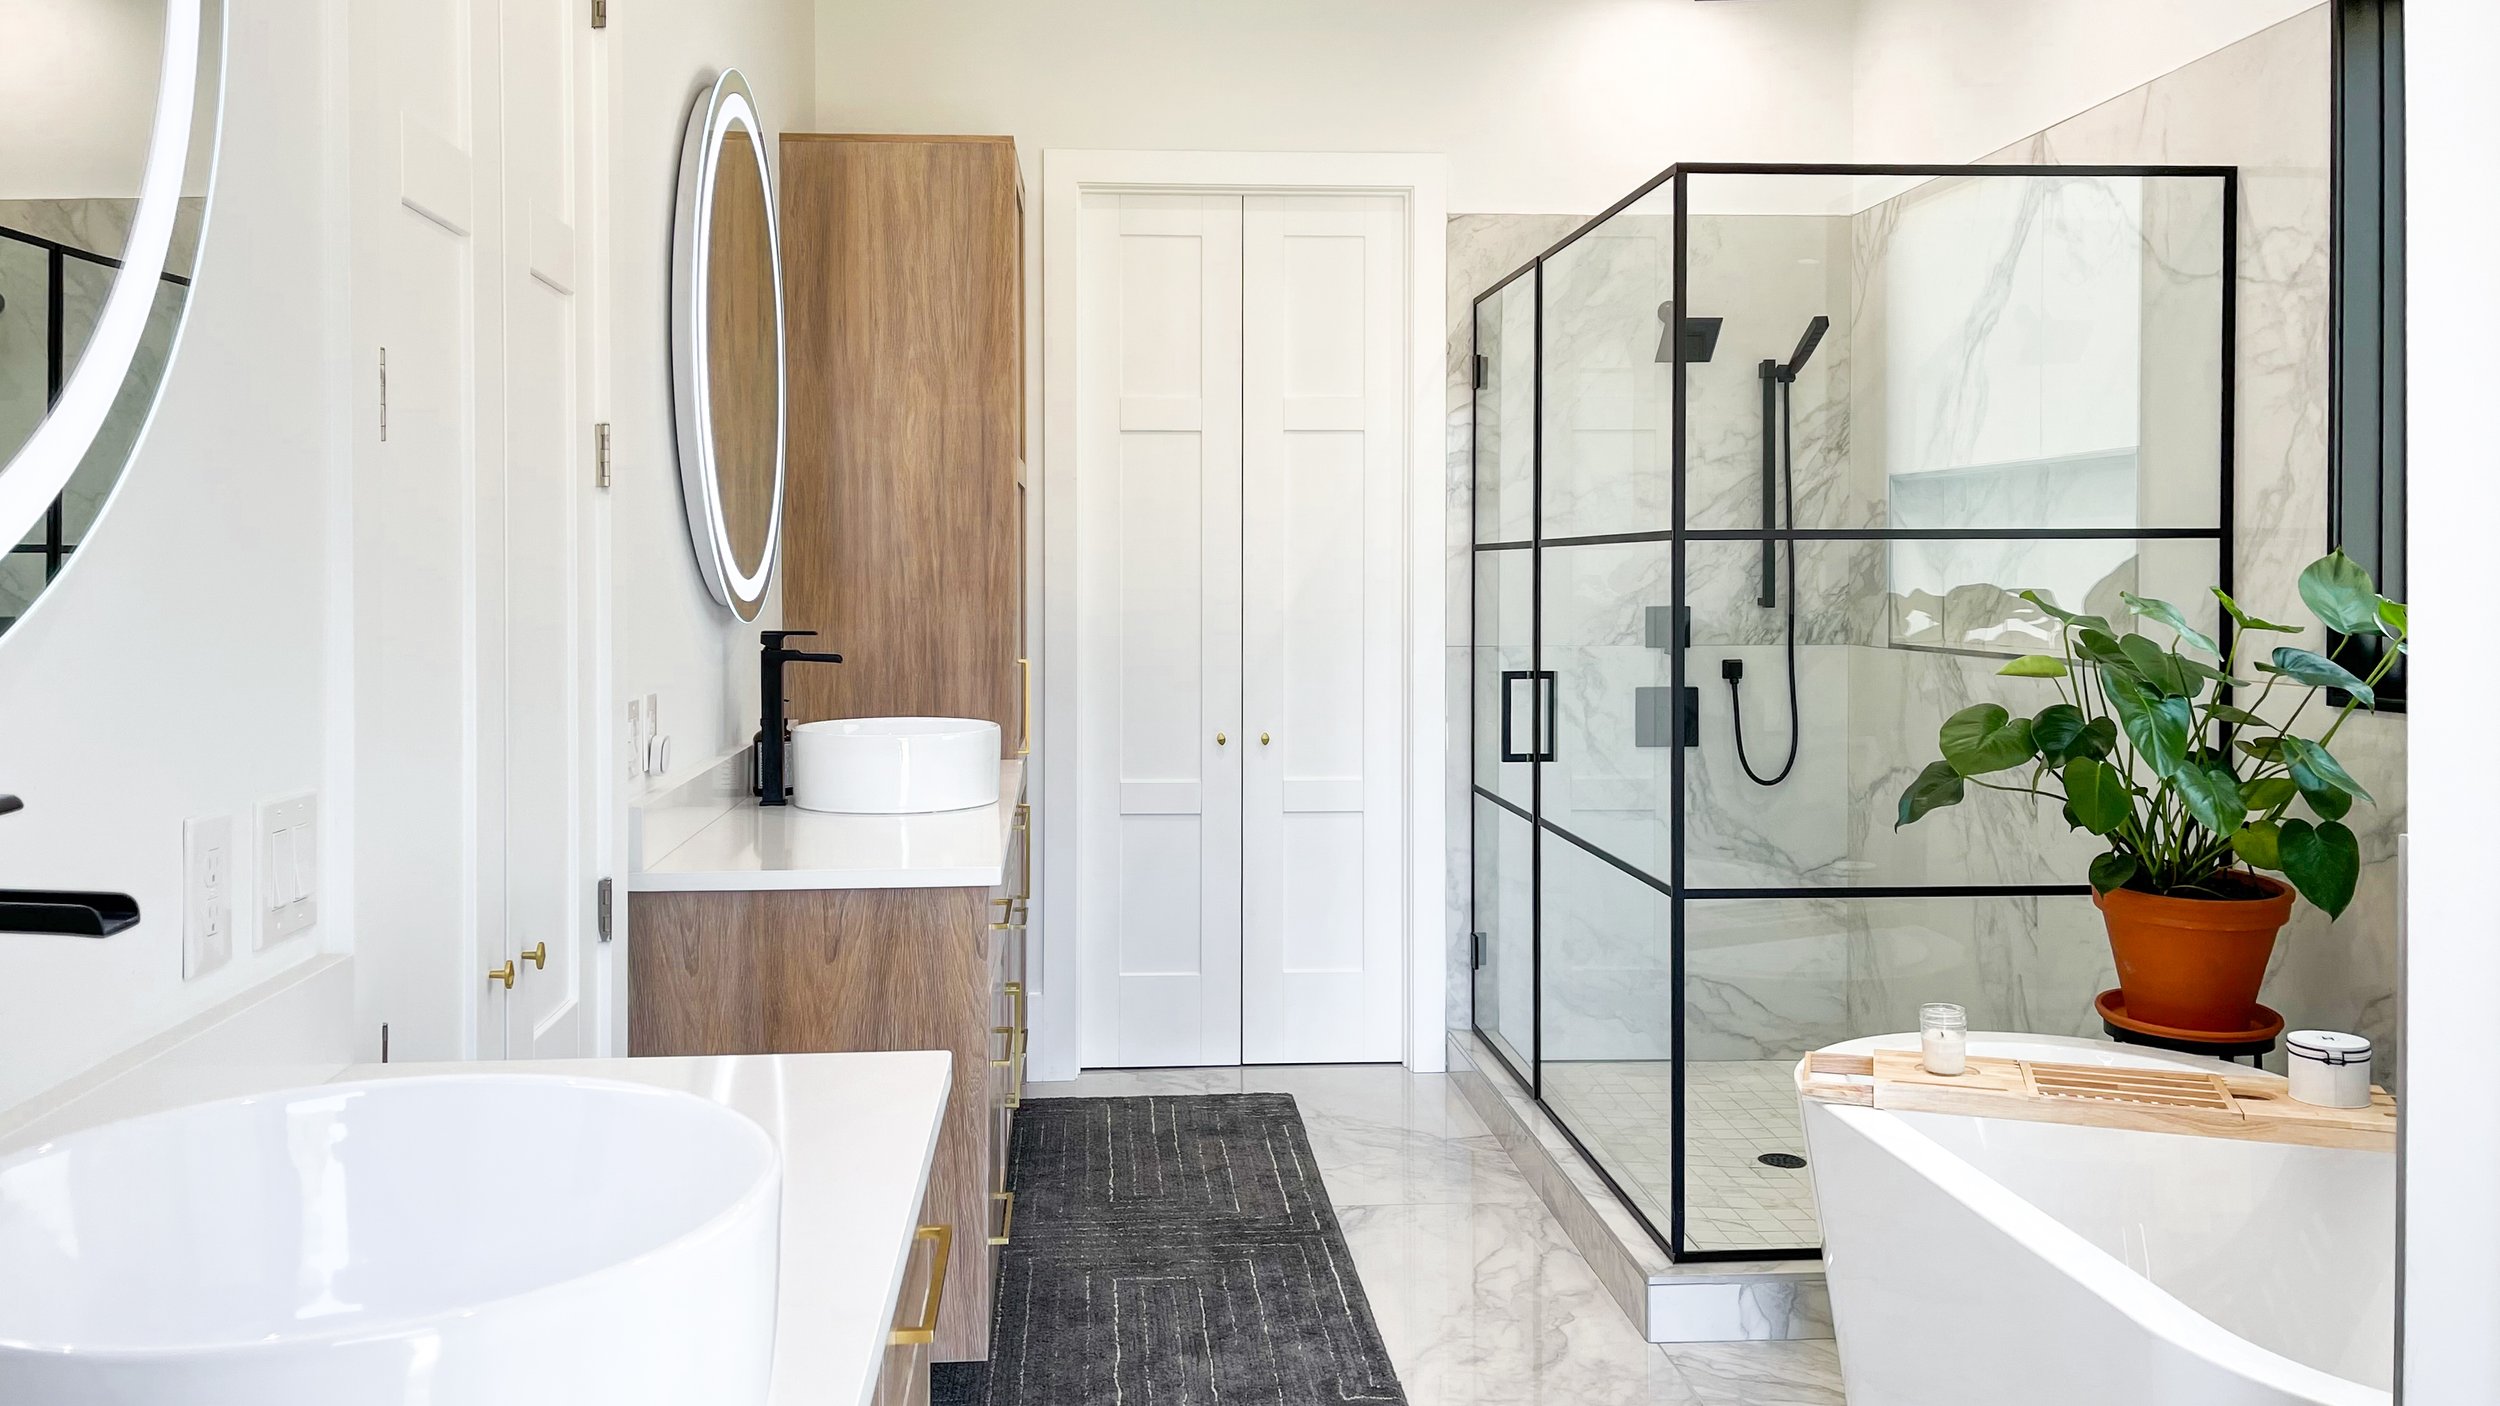
If you’re trying to pull a room together and want to make sure everything actually works, do yourself a favor and make a mood board in Canva. I use it all the time for room makeovers, and it never fails to bring clarity.
This project is a no-demo reno, so I needed a way to visualize the whole space. I dropped all my ideas into a Canva board and suddenly, it all started to make sense. I could instantly see what clashed, what felt too cold, and where I needed to pivot.
What’s on the Mood Board:
Here’s where things are at right now:
The black-framed shower that’s staying
My current custom wood vanities
Paint swatches I’m choosing between
the light fixture I like
Dragging it all into one space helped me quickly spot what was working and what wasn’t.

The Color Palette:
I also made a quick color guide to keep my vision focused.
I’m using Virtual Taupe for the main walls and Favorite Tan in the water closet. The rest of the palette comes through in decor and textiles.


Why Canva Makes Design So Much Easier:
Canva is such a game-changer for planning a space. It turns all your scattered screenshots and ideas into one clean, visual layout. It doesn’t have to be perfect. You just need enough to see what’s clicking.
Here’s why I love it:
It helps me see how colors, textures, and finishes actually work together
I can play around with bold choices without commitment
It keeps me from overthinking every tiny detail
It’s free and easy to use (but the Pro version let's you quickly remove the background of images which is nice)
If you’re feeling overwhelmed in the design process, try throwing together a mood board. It gave me clarity, helped me make confident decisions, and made the whole thing way more fun.
I’ll keep sharing updates as this room comes together. And if you’ve ever used Canva to plan a room, I’d love to hear how it worked for you too!
Links At A Glance