
DIY Turtle Sandbox Makeover: From Thrifted to Adorable


How to Give a Faded Sandbox Turtle a Fresh New Look
I found this classic turtle sandbox at Goodwill for $5, and I knew right away it had potential. Sure, it was faded, scratched, and looked like it had lived a full life, but the shape was iconic, and I love a good transformation project. A few hours and a couple cans of spray paint later, this little guy got a whole new lease on life.
What You’ll Need:
Scrub brush and soap (for cleaning)
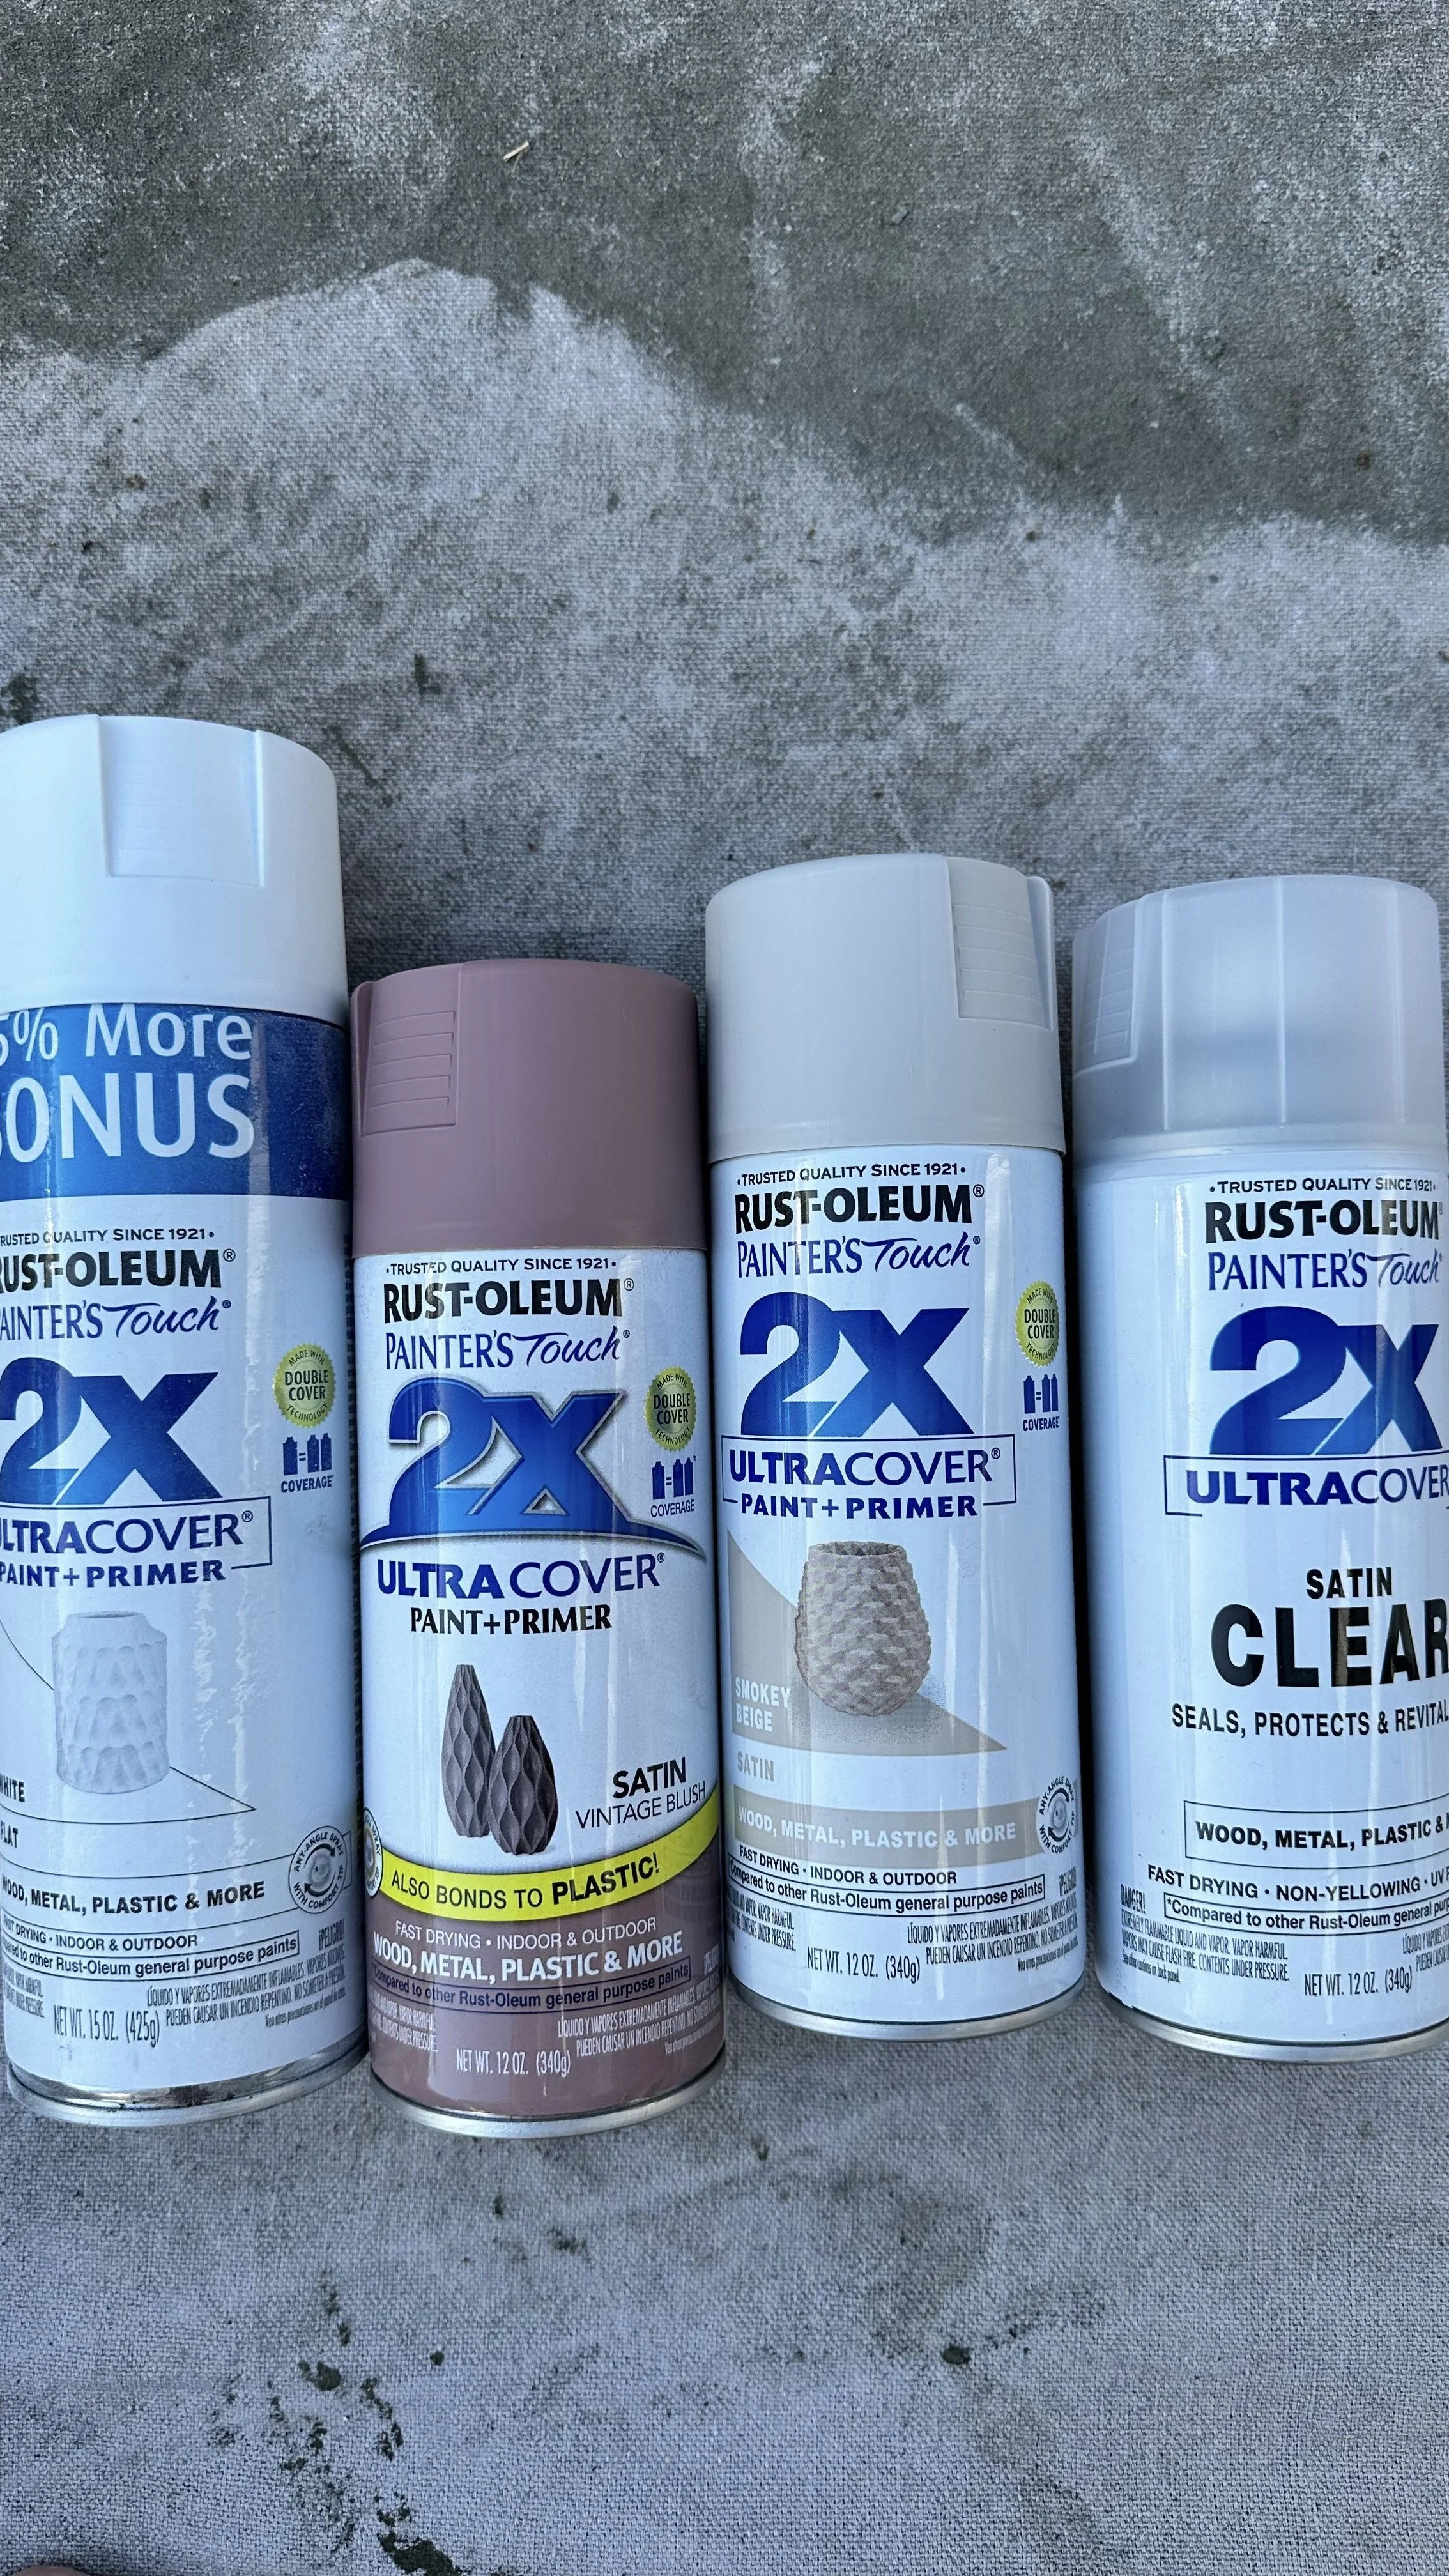
Spray paint made for plastic (I used two coordinating colors: one for the body and one for the lid)
Contrasting paint for the shell details (I used some craft paint I already had)
Small paint brush for the shell details
Clear outdoor spray sealant (non-yellowing)
Painter’s tape (for detailing—especially the eyes!)
A comfort grip spray can handle (optional, but makes a huge difference for even coverage and avoiding finger fatigue)
A bag or two of sand (for the fun part)

How to Do It:
1. Clean it really well.
Start by giving the turtle a thorough scrub with warm soapy water. Mine was definitely showing its age, so I made sure to get into all the little nooks and rinse it really well. Once it was completely dry, I wiped it down again just to be sure there wasn’t any leftover grime or residue.
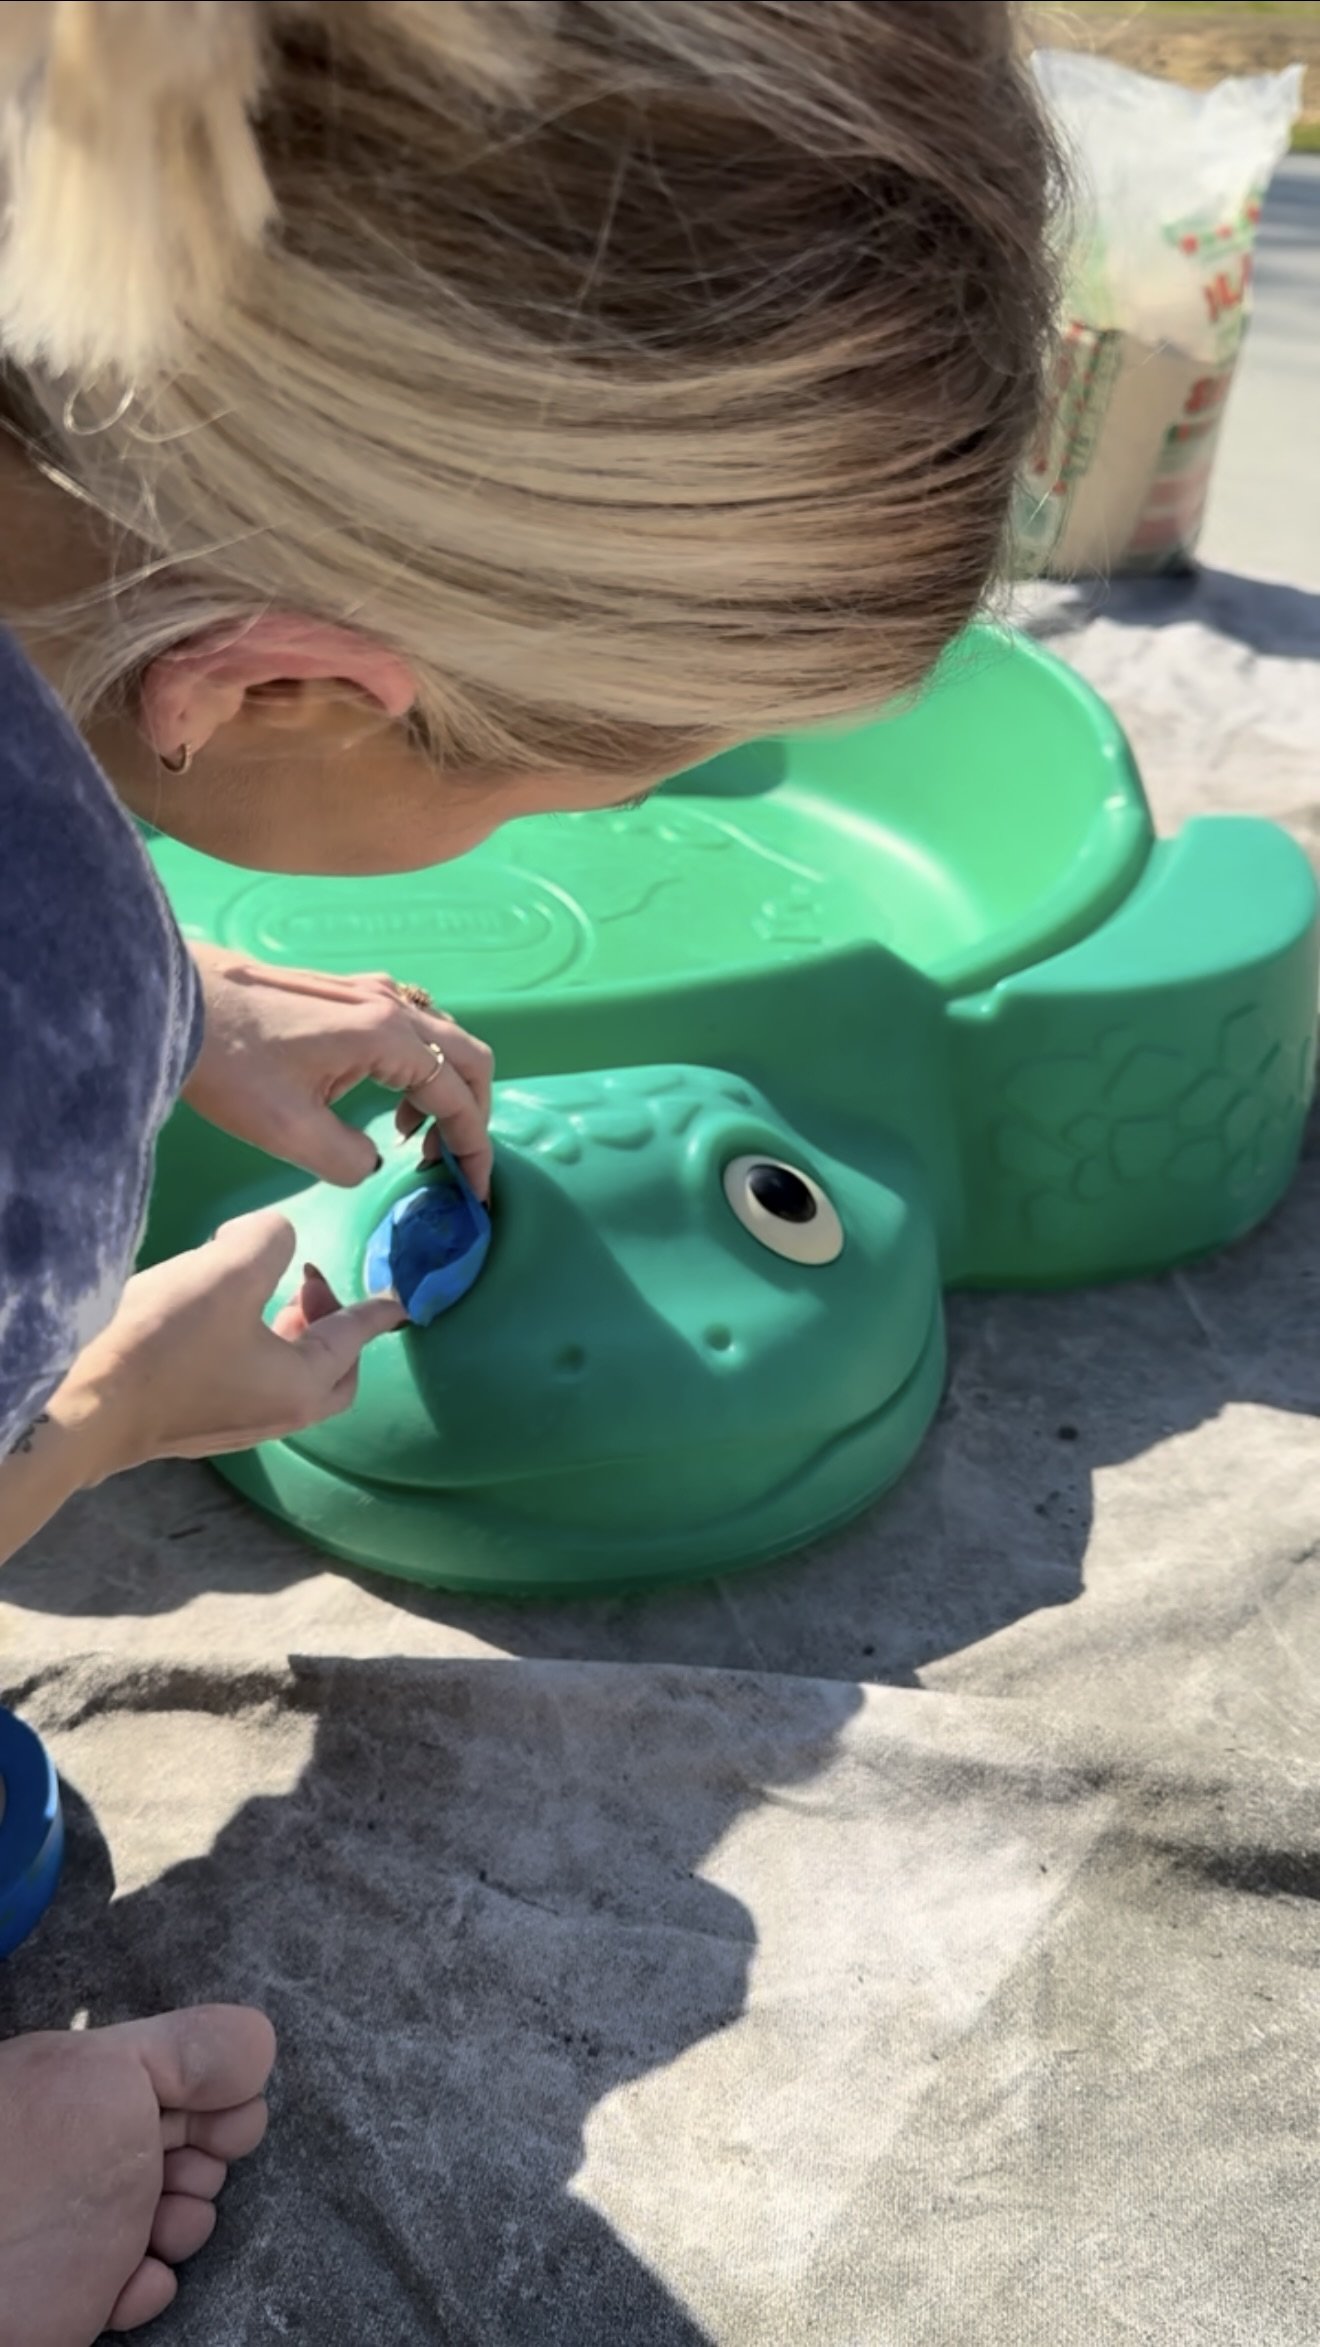
2. Protect the eyes.
Before painting, I used painter’s tape to cover the turtle’s little eyes. It’s a tiny detail, but keeping them paint-free helped preserve that classic, recognizable expression, and made the final result feel more polished.
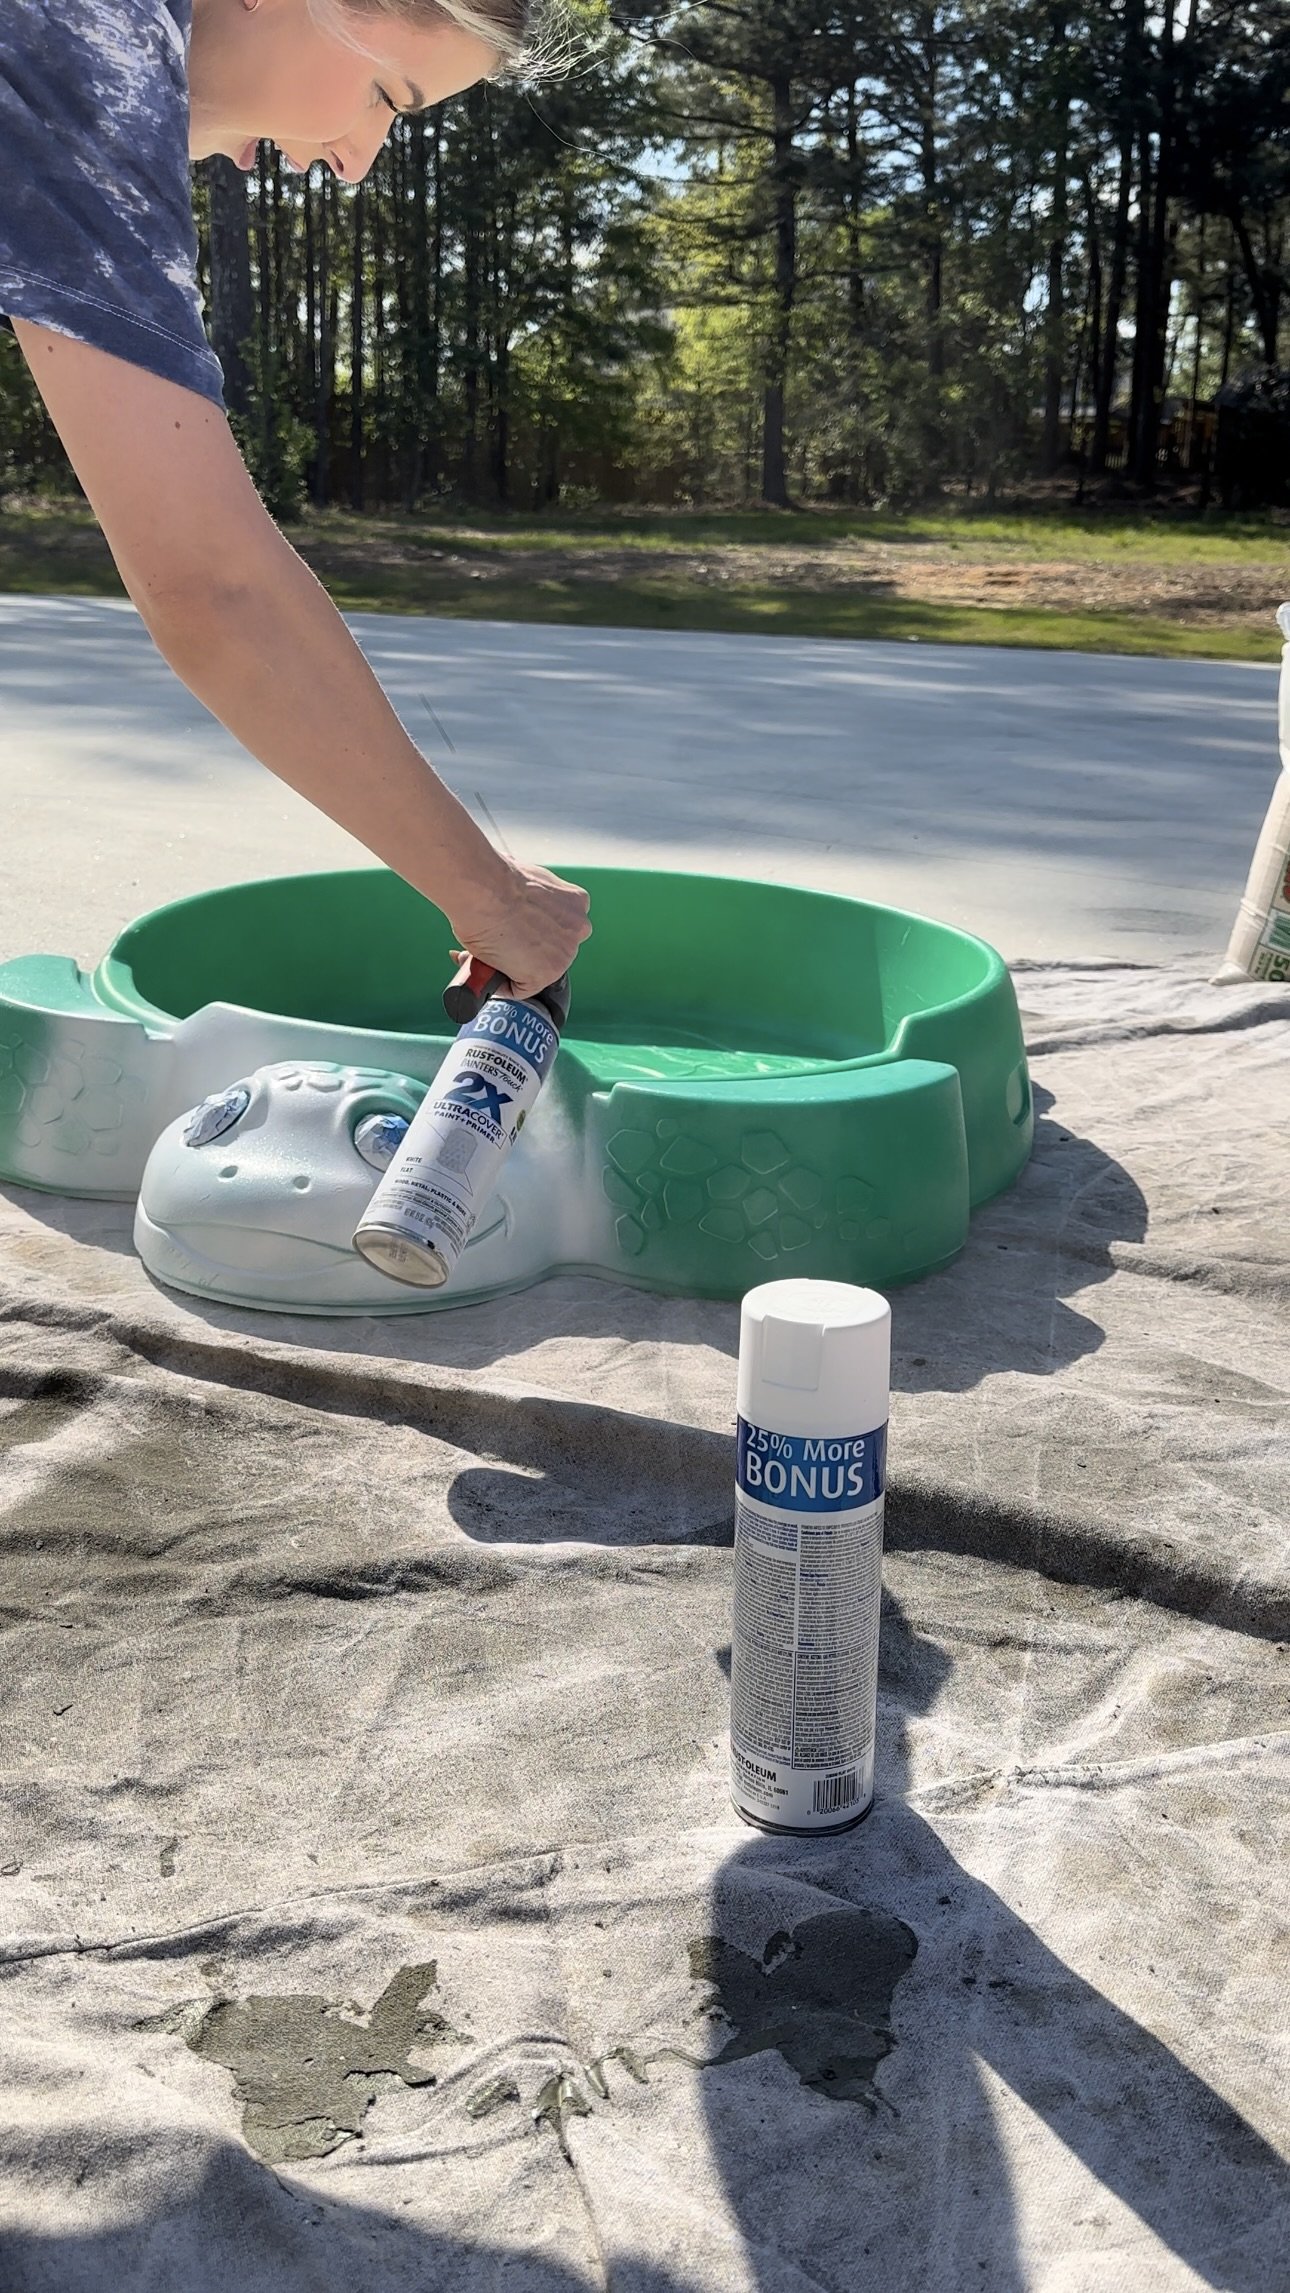
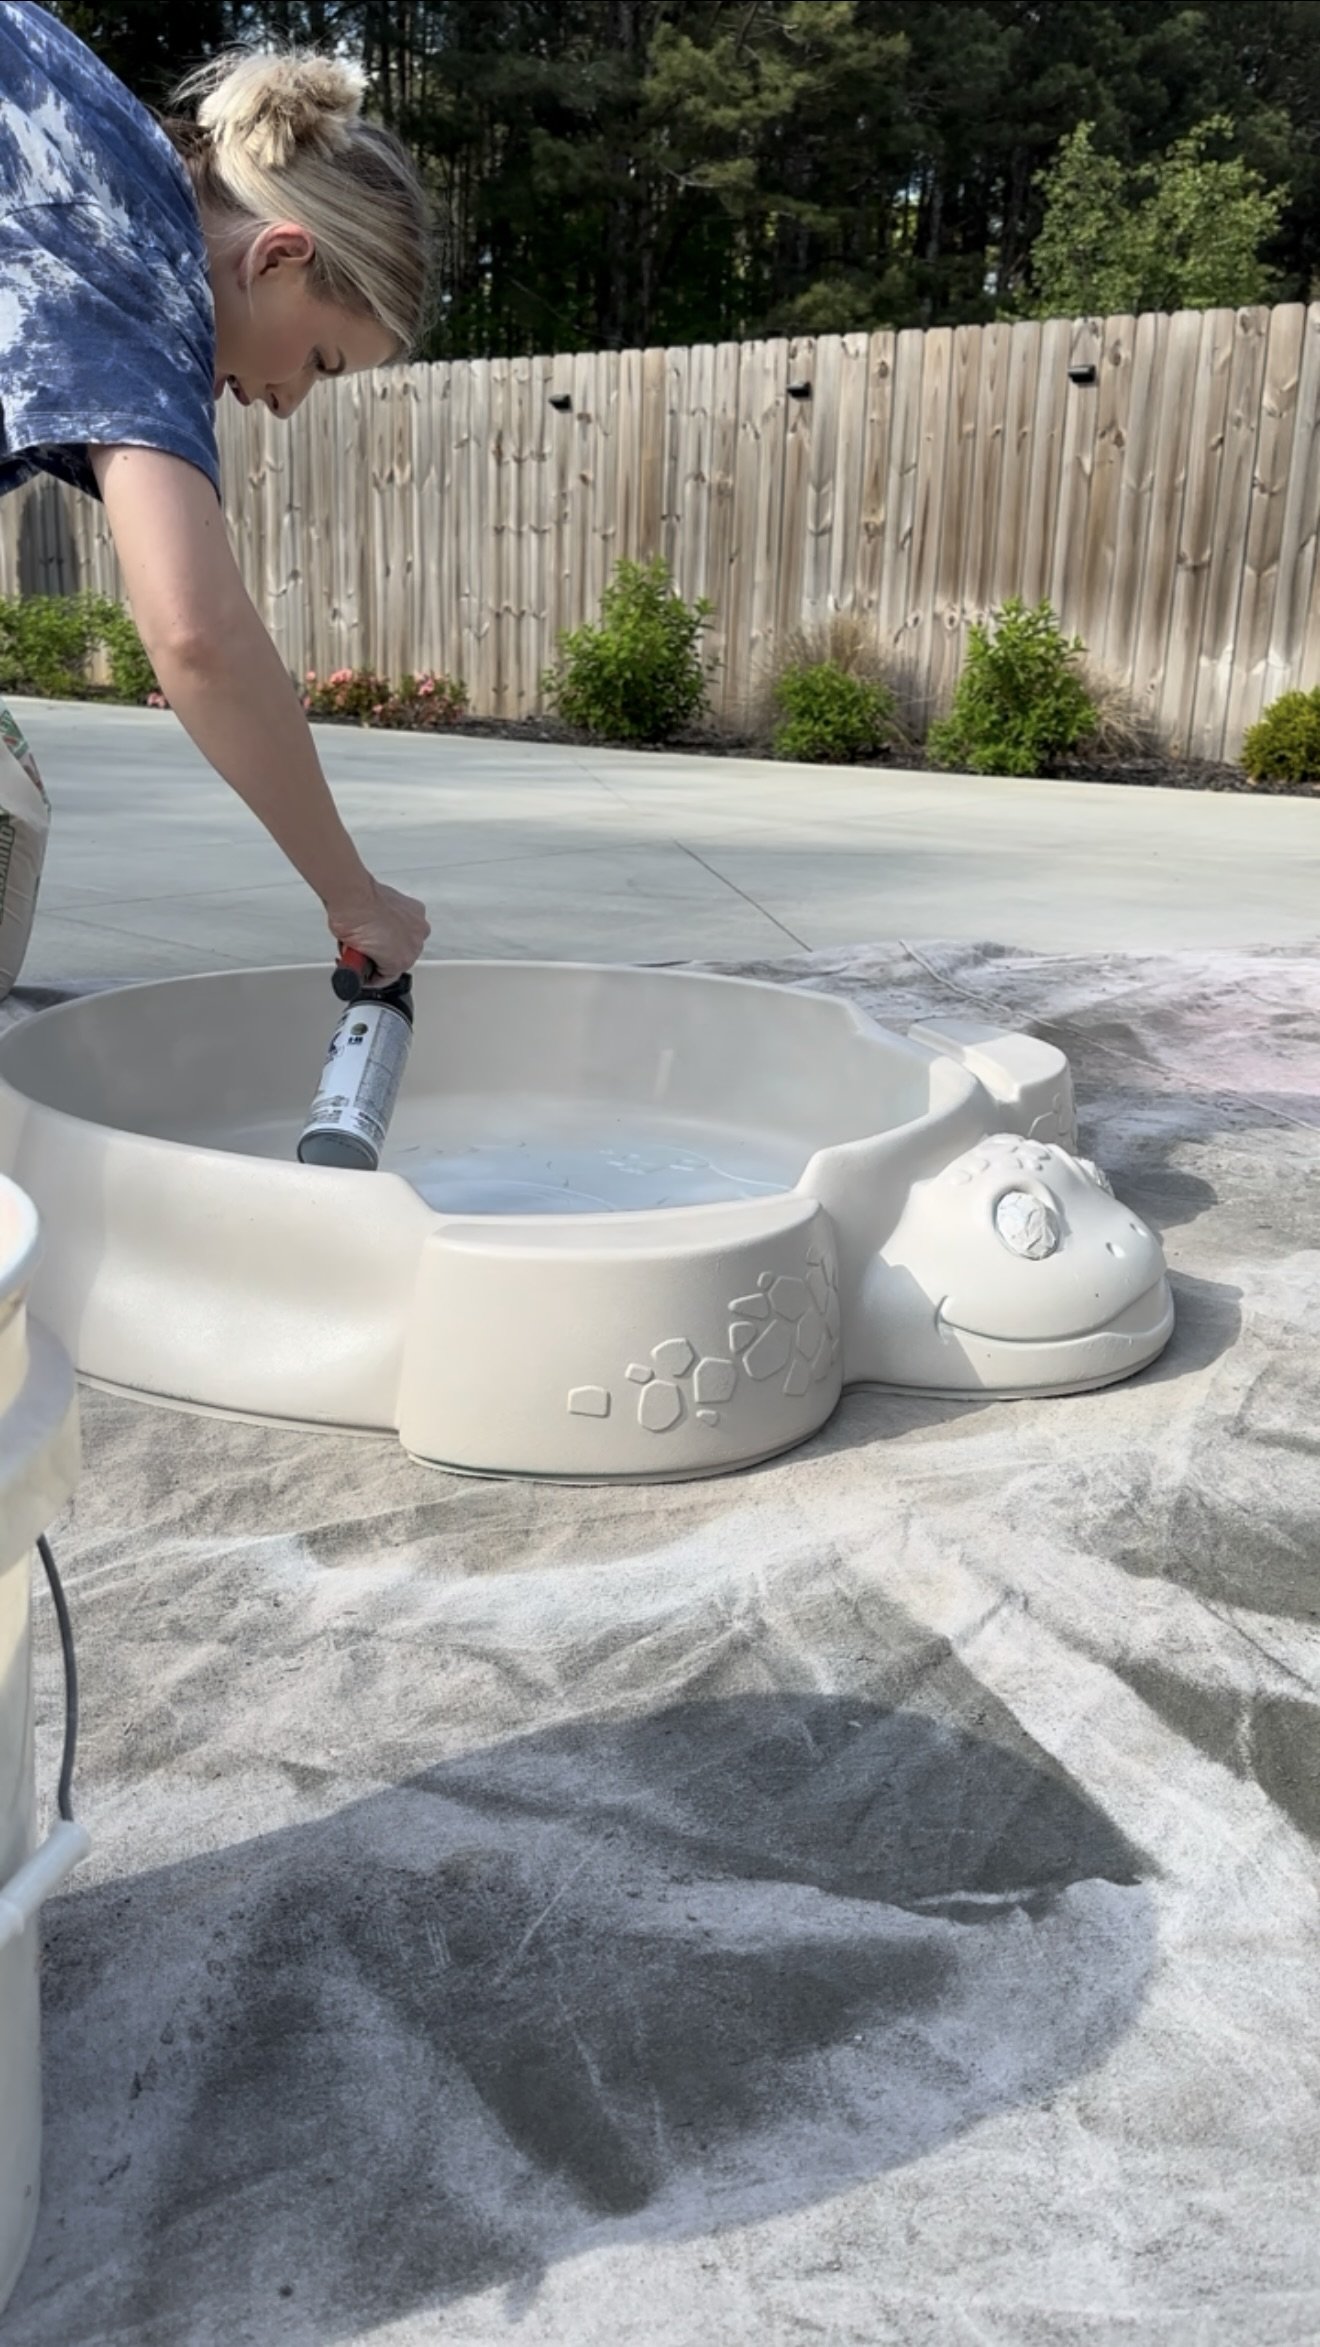
3. Prime it.
This step is easy to skip, but so worth it. I used a spray primer that’s safe for plastic to help the paint stick better and last longer. A light, even coat is all you need—just be sure to let it dry fully before moving on to color.
4. Spray the base and the lid.
Once the primer was dry, I sprayed the turtle’s body with a soft neutral beige and the lid with a warm blush pink. I stuck to light coats and let each one dry before adding the next. The contrast between the two colors gave it a fun but modern look that felt totally fresh.
5. Add shell detail.
After the base coat dried, I used some craft paint I already had, and a small paint brush to paint the little spots on his shell.
6. Seal it.
Once all the paint was dry and I was happy with the look, I finished it off with a few coats of clear spray sealant made for outdoor plastic. It adds a bit of shine, protects the paint from chips, and makes cleanup after play days so much easier.
7. Fill with sand!
After everything cured, I added fresh play sand and tossed in a few fun toys. Our toddler was in it immediately, and it’s easily become one of the most-used toys.

How It’s Holding Up:
Look, when you mix sand, spray paint, and an enthusiastic toddler, you’re obviously going to get a little chipping. And yep, we do have a few spots where the paint has worn off, especially around the edges where little feet climb in and out. But honestly? It’s held up way better than I expected.
The color is still vibrant, the shell details are intact, and the sealant has definitely helped protect it from full-on flaking or fading. It lives outside, gets played with constantly, and still manages to look cute. Considering it started as a $5 thrift find, that feels like a major win.