Refillable Paint Pens: The Touch-Up Hack Every Home Needs
Let me put you on to something that’s been a total game-changer around here: refillable paint pens. Not the craft kind you use for lettering, these are made to be filled with your actual interior paint for easy, mess-free touch-ups around the house.
You know how it goes—you finally finish painting a room, clean everything up, and a week later, someone (ahem, usually a child or the vacuum) takes a chunk out of your baseboard. Or you notice a mystery scuff on the wall and immediately regret not saving your tiny touch-up brush. I used to ignore those little marks until they piled up and I had to haul the whole paint can out again. Not anymore.
These refillable paint pens are the simplest solution. They’re compact, easy to store, and best of all—ready whenever I need them.


Here’s how I use them:
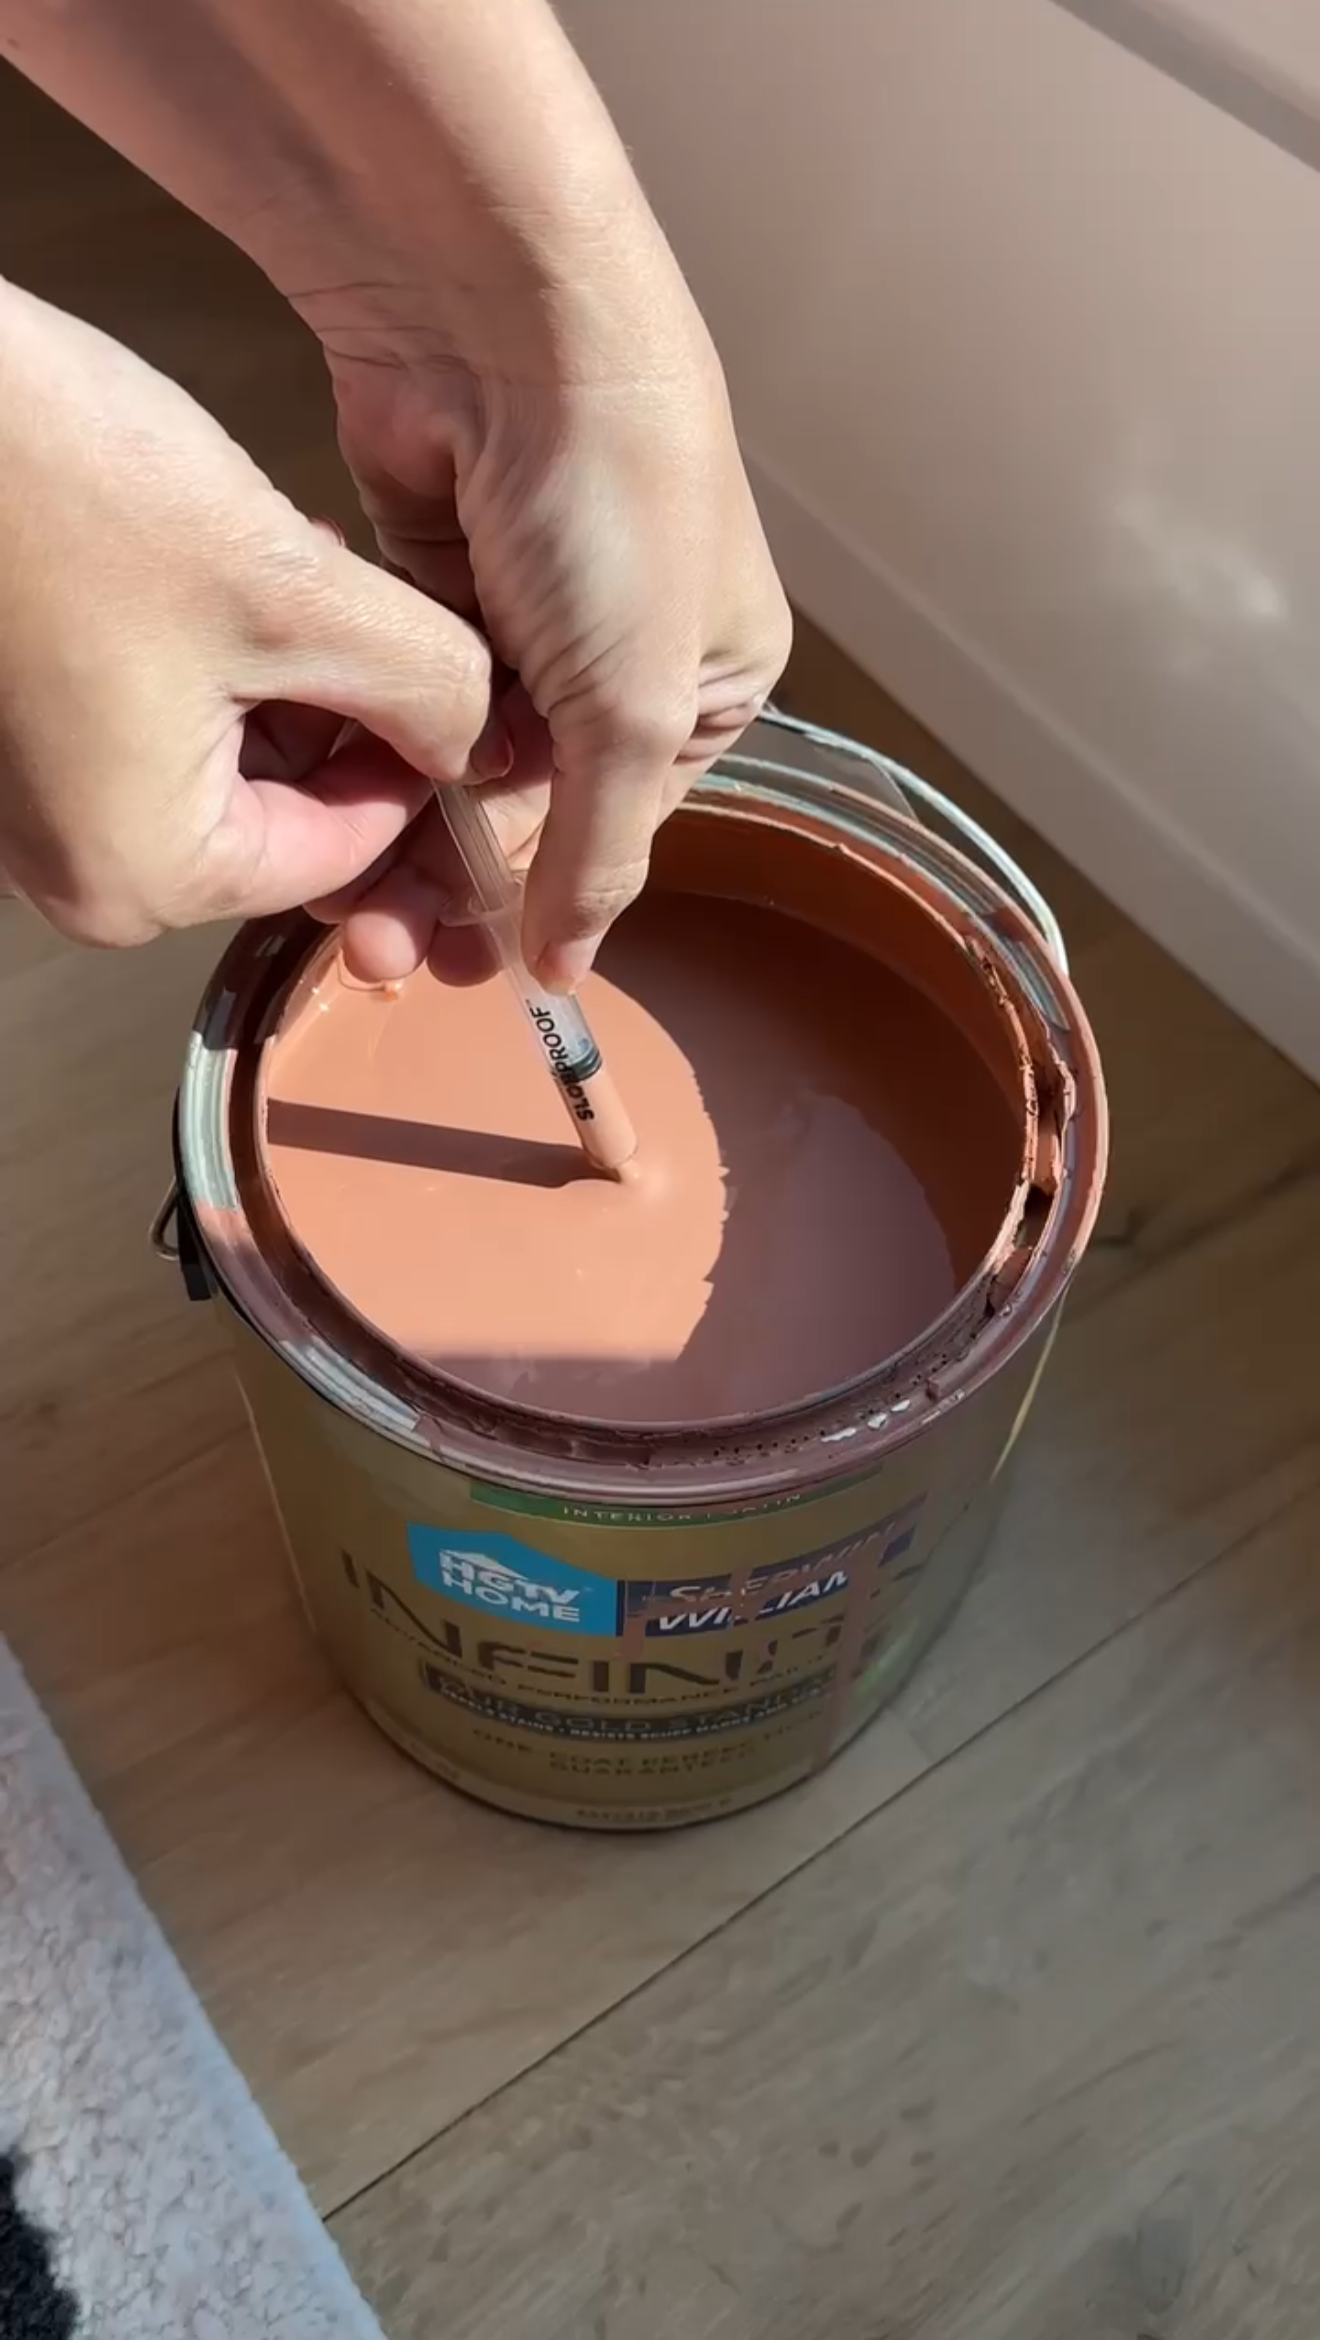
Fill the pen using the included syringe. You just draw the paint straight from your can and inject it into the pen.
Label the pen with the room or color name. I use a sharpie or a little tape label. This is key if you’ve got multiple paints throughout your house.
Store them somewhere convenient. I keep mine in a small bin in the laundry room so I can grab them on the fly. Shake, twist the top, and you’re ready to go.
The pens are airtight and designed to keep the paint fresh for years. YEARS. Which is amazing, because most of us have at least one gallon of wall paint in the garage with a lid that doesn’t quite seal anymore.

A few extra reasons I love them:
They’re perfect for small spaces—no tray, roller, or brush cleanup.
You get super precise application (hello, tight corners).
They’re budget-friendly and way less wasteful than cracking open a whole can for a one-inch nick.

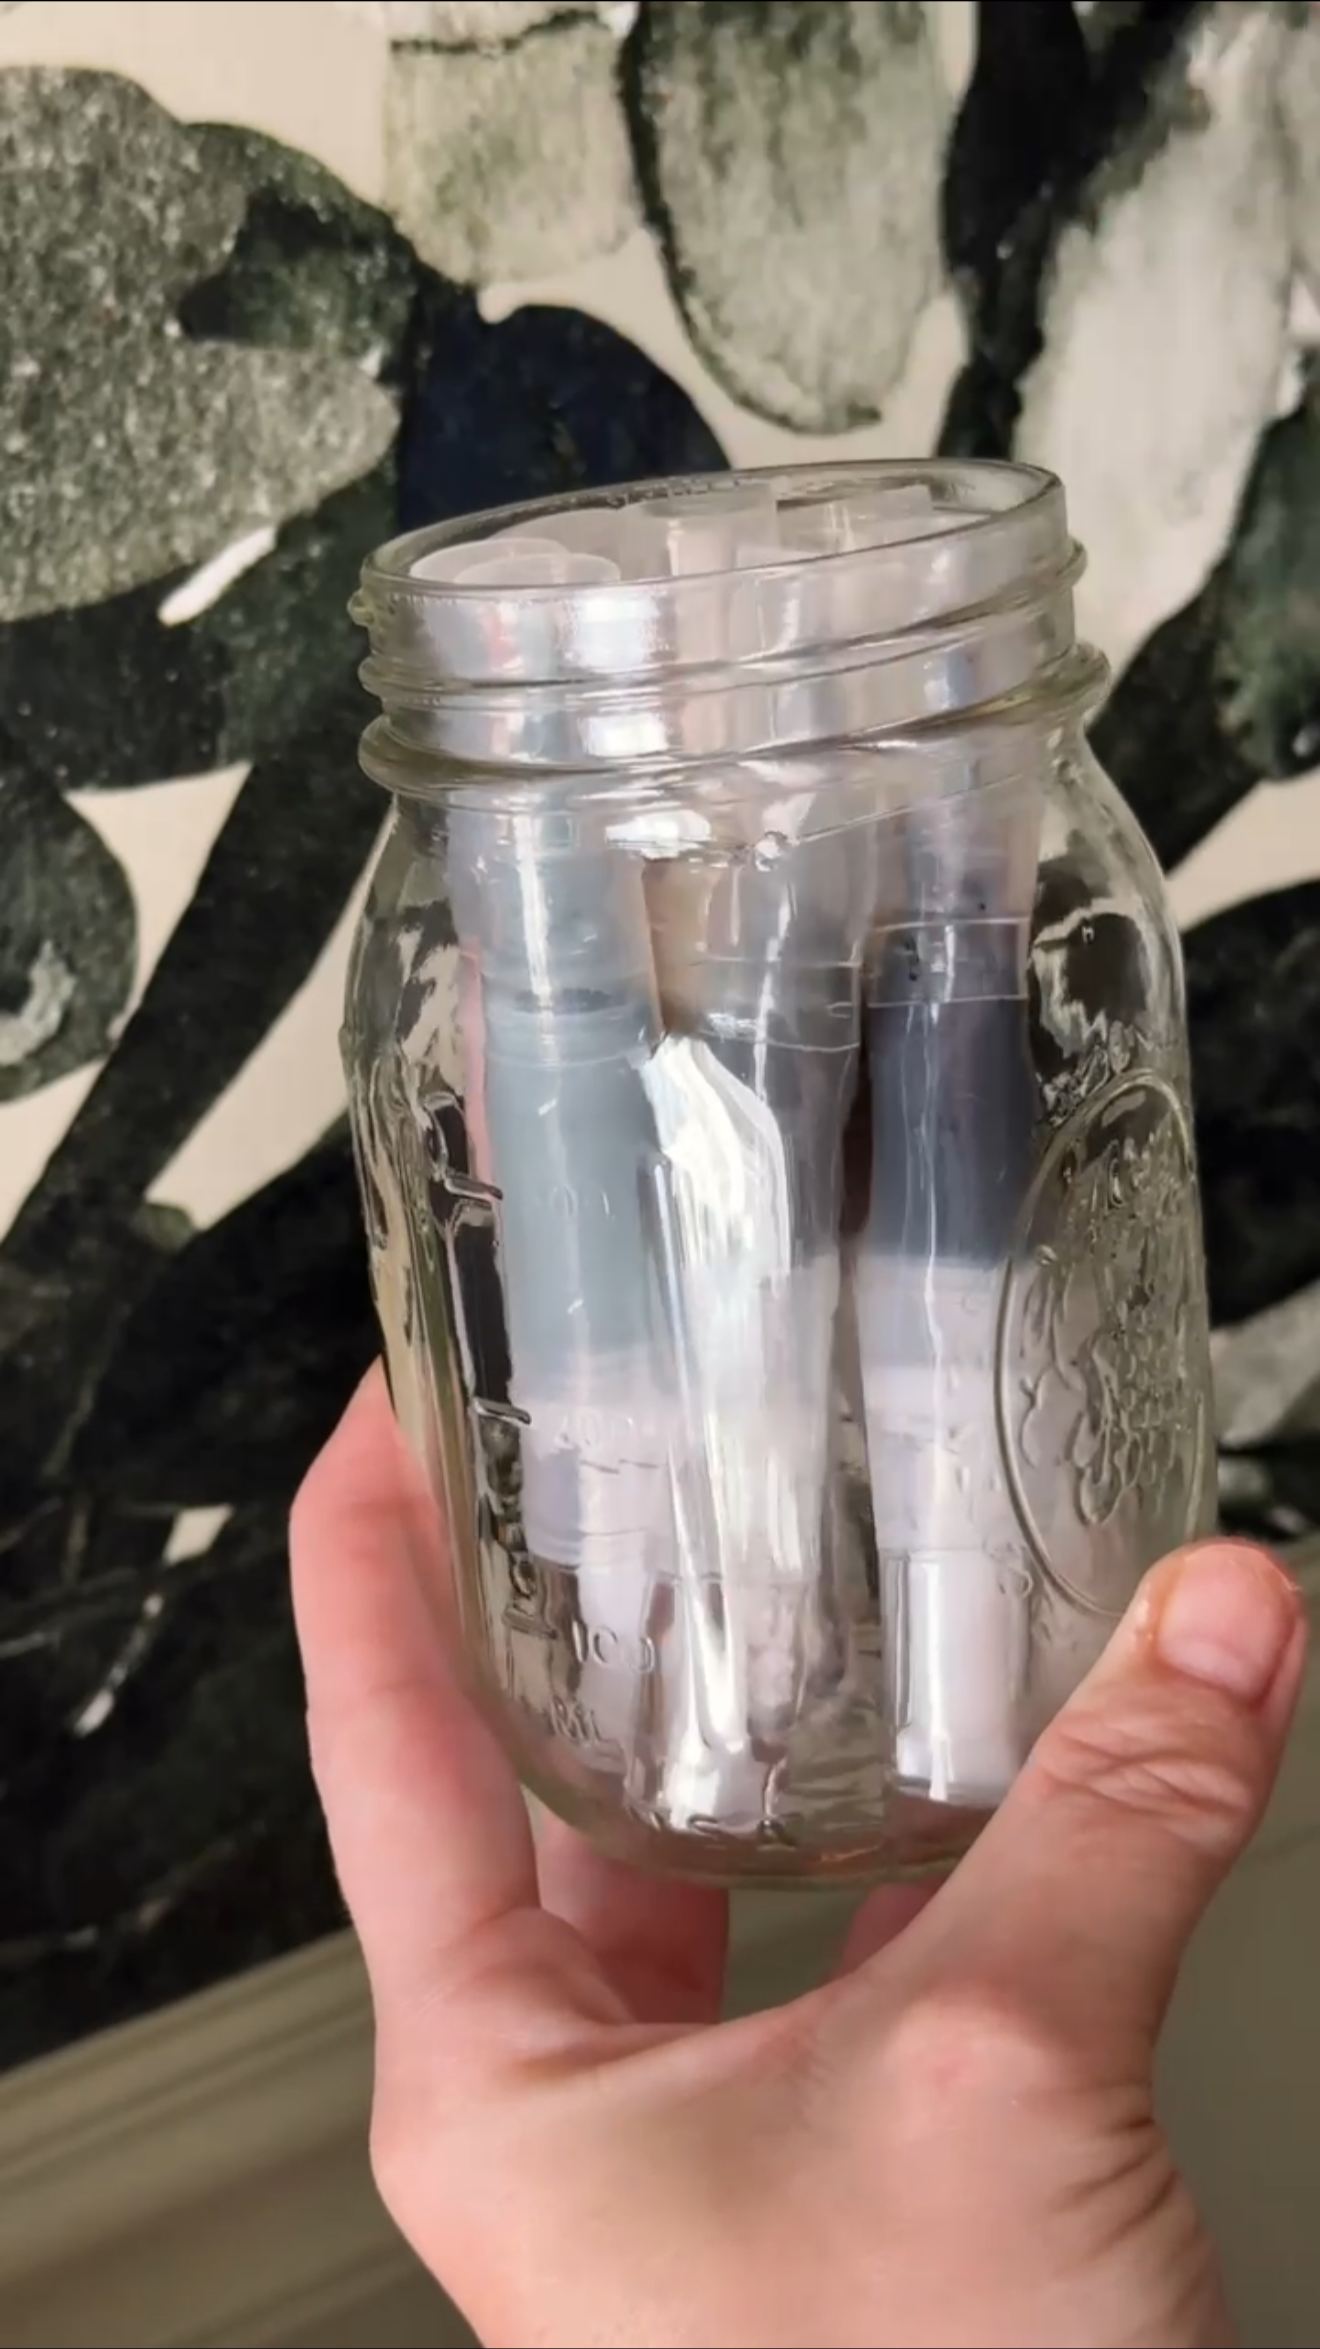
I now keep a pen for every main color in our house— trim, wall color, even the cabinetry. It’s so satisfying to tackle touch-ups on the spot instead of adding them to the never-ending to-do list.
So if you’re someone who notices every little chip or mark (guilty), refillable paint pens will change your life. They make it so easy to keep your home looking fresh without turning it into a whole production.
Links at a Glance
Gold Mirror (Thrift Store Find)
IF YOU ENJOYED THIS POST, YOU MIGHT BE INTERESTED IN the paint colors in my house.
FOLLOW ME ON MY SOCIALS!

Facebook Marketplace Reveal

Facebook Marketplace Console Table Makeover
One of my favorite parts of any room makeover is finding those special pieces that tie everything together – and this time, Facebook Marketplace came through in a big way! I stumbled upon the most adorable console table and instantly knew it had to be part of my sunroom refresh. It was listed for $100, but I offered $80 and got it!

FBMP Listing photo

The first thing that caught my eye? The gorgeous scallop details. They added such a charming touch that I just couldn’t resist. Of course, I had to put my own spin on it, so a little DIY magic was in order.
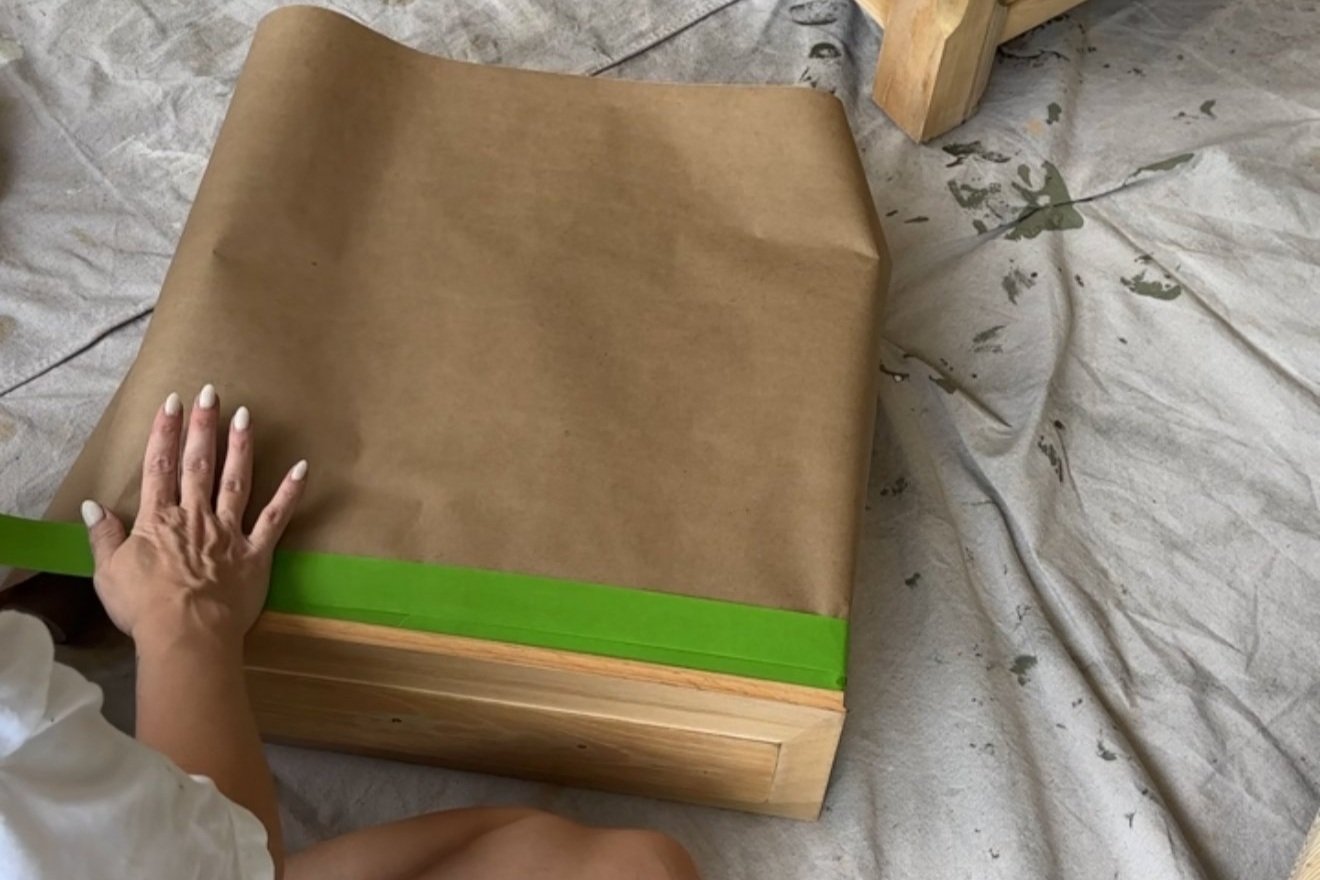
Step 1: Prepping for paint - After giving it a good clean, I removed the drawers, took off the knobs, and taped the inside of the table as well as the boxes of the drawers.
Step 2: Prime and sand – I started by applying one coat of HGTV Home by Sherwin-Williams Cabinet and Furniture Primer with my paint sprayer, ensuring smooth, even coverage. Once dry, I lightly sanded the surface with fine-grit sandpaper for a flawless finish. To remove any residual dust, I wiped everything down with a clean towel.


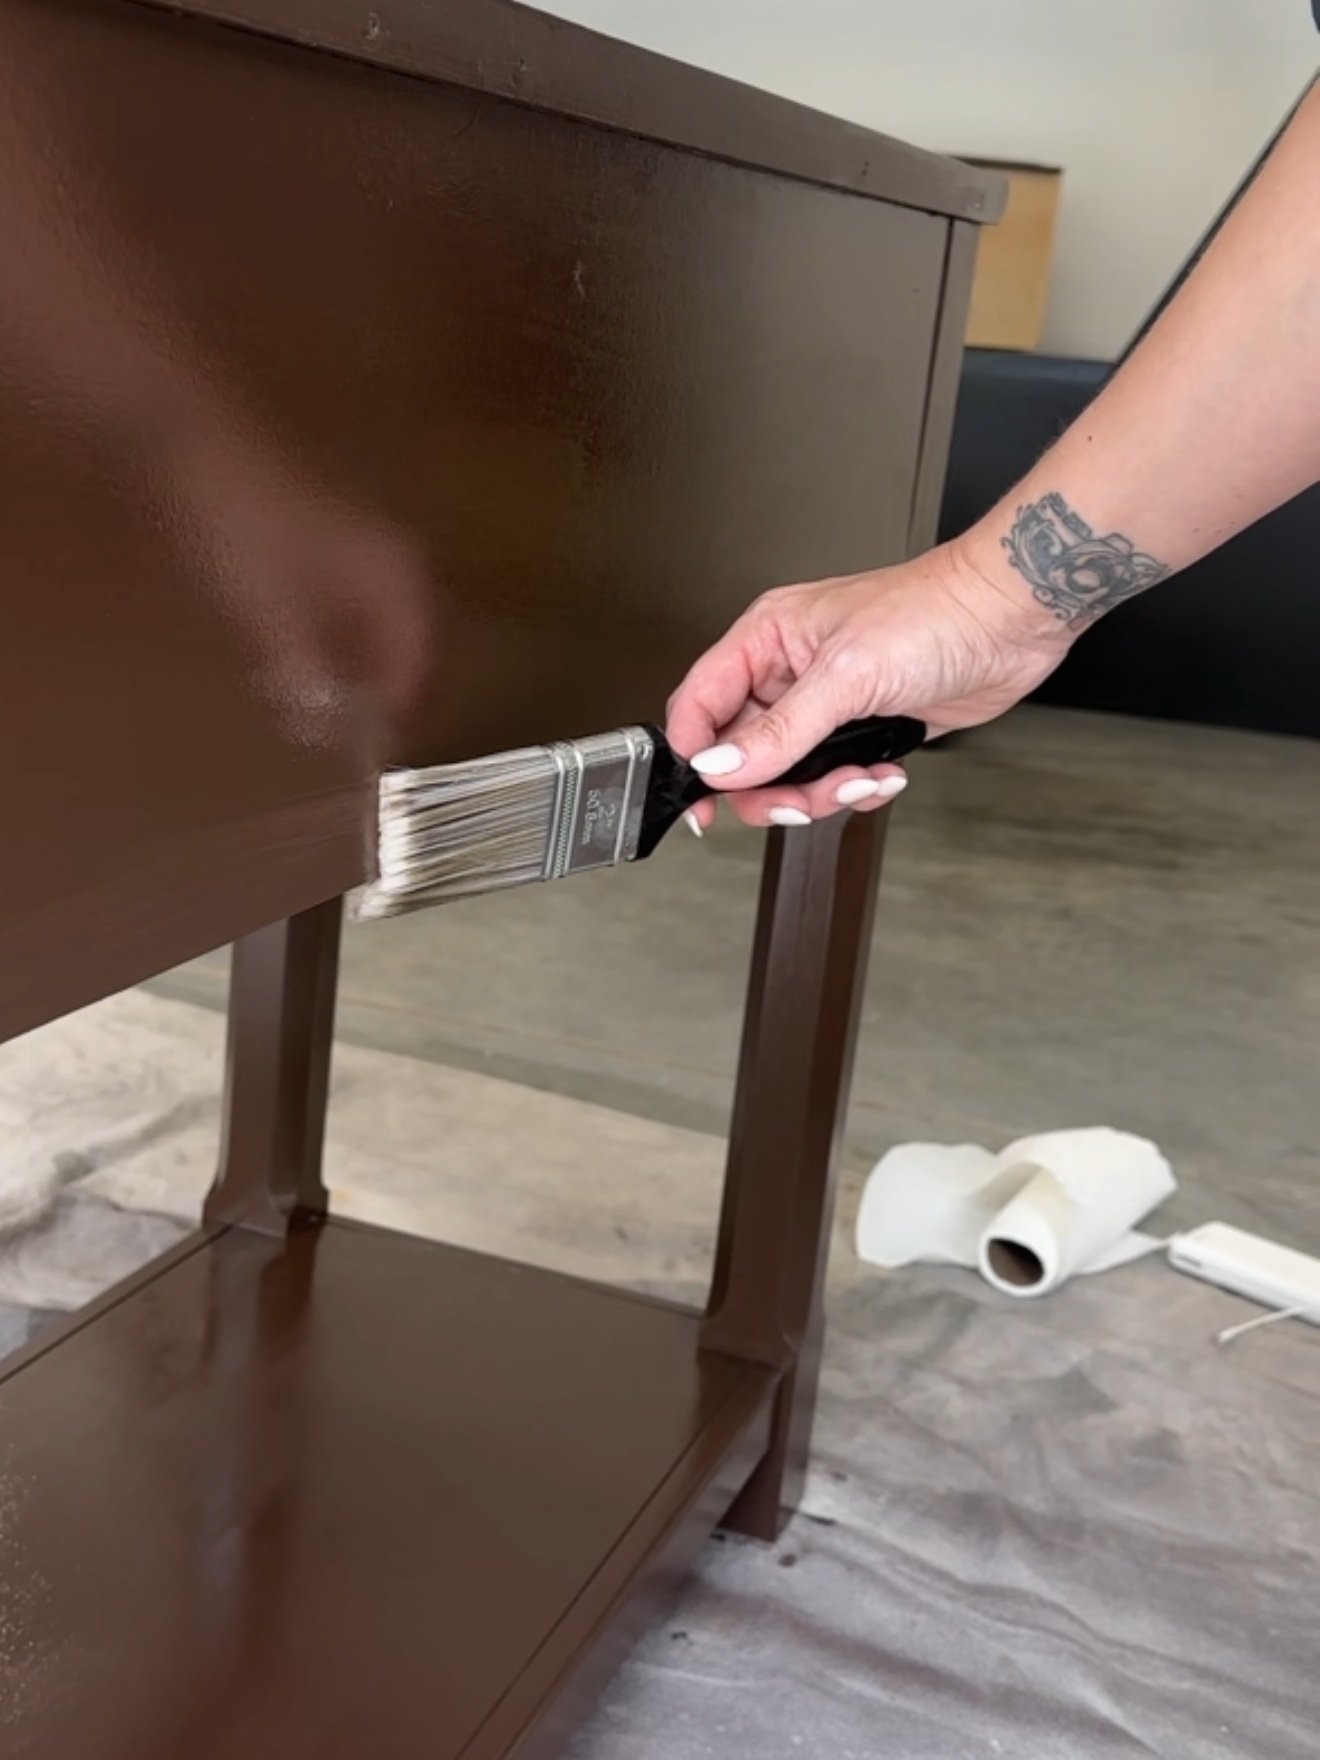
Step 3: Paint! Using my paint sprayer, I applied HGTV Home by Sherwin-Williams Cabinet and Furniture Paint in the shade "Otter." This paint is available in both satin and semi-gloss sheens, but I chose satin. Between each coat of paint, I lightly sanded with fine-grit sandpaper and wiped everything down to ensure a smooth finish.
Fun fact: I also used this same paint to transform my DIY coffee table, which now sits proudly in the sunroom alongside the console table.


Step 4: Clear Coat (Optional): To add extra durability (because I have a rambunctious toddler), I finished the piece with a coat of Minwax Fast-Drying Polyurethane in Satin. Since it’s oil-based, be sure to use a disposable brush—do not use your paint sprayer! It dries quickly, so work fast, and make sure your space is well-ventilated because the fumes are strong. Honestly, the poly coat ended up a bit glossier than I wanted, so if you prefer a more matte look, you can totally skip this step. The cabinet paint is durable enough on its own!

Step 5: Finishing Touches - Once the piece was completely dry, I swapped out the old knobs for some new ones that better fit my style. This small change made a big impact and really pulled the whole look together. Finally, I slid the drawers back into place, and just like that – my console table was complete!


This project was so simple but made such a big difference in the space. The new color and updated hardware were the perfect addition to my sunroom makeover. I couldn’t be happier with how it turned out.

Want to shop this room? Links here!
What do you think of the transformation? Have you ever scored a hidden gem on Facebook Marketplace? Let me know in the comments – I’d love to hear about your favorite finds and DIY projects!
IF YOU ENJOYED THIS POST, YOU MIGHT BE INTERESTED IN my sunroom makeover post.
FOLLOW ME ON MY SOCIALS!

FAQ: Paint Colors In My House
“What paint color is that?” - A frequently asked question so I finally decided to put it somewhere beside my IG highlight bubble! As a reminder paint looks different depending on the light, room, time of day, etc so I always recommend painting swatches in your space before you decide on a color.
Drum roll please….
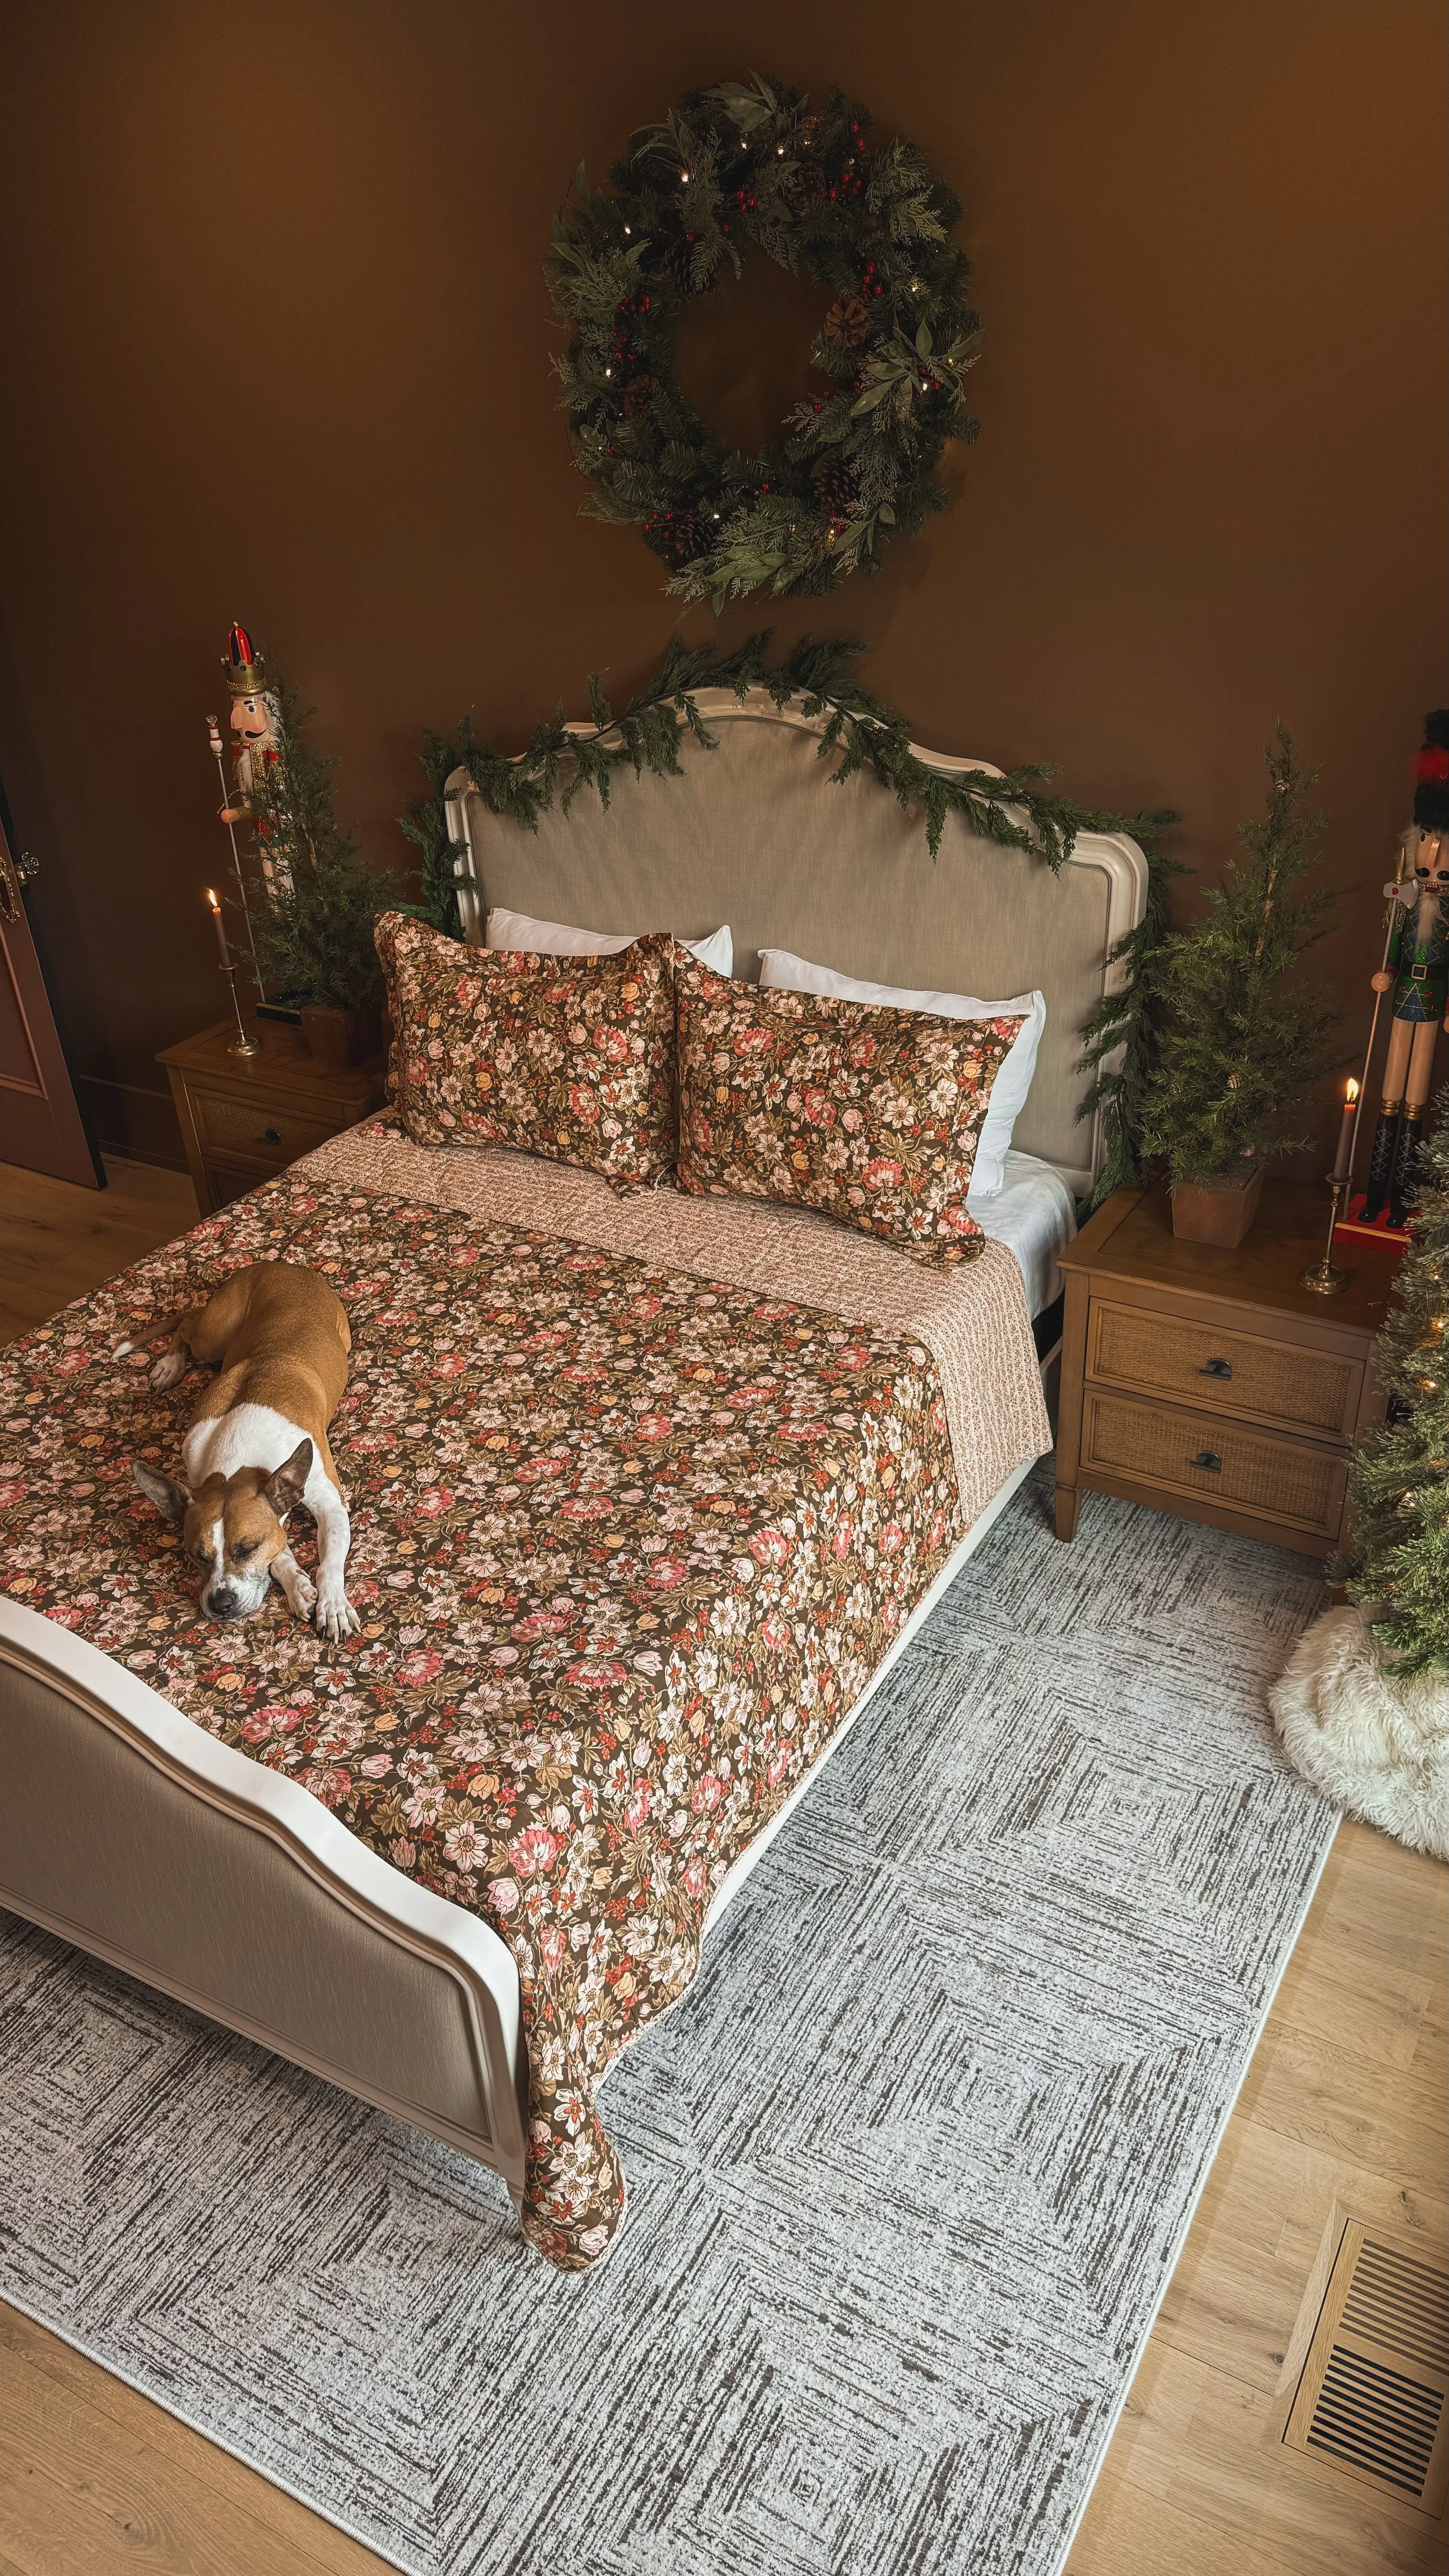
BEDROOM : Field Trip by Clare


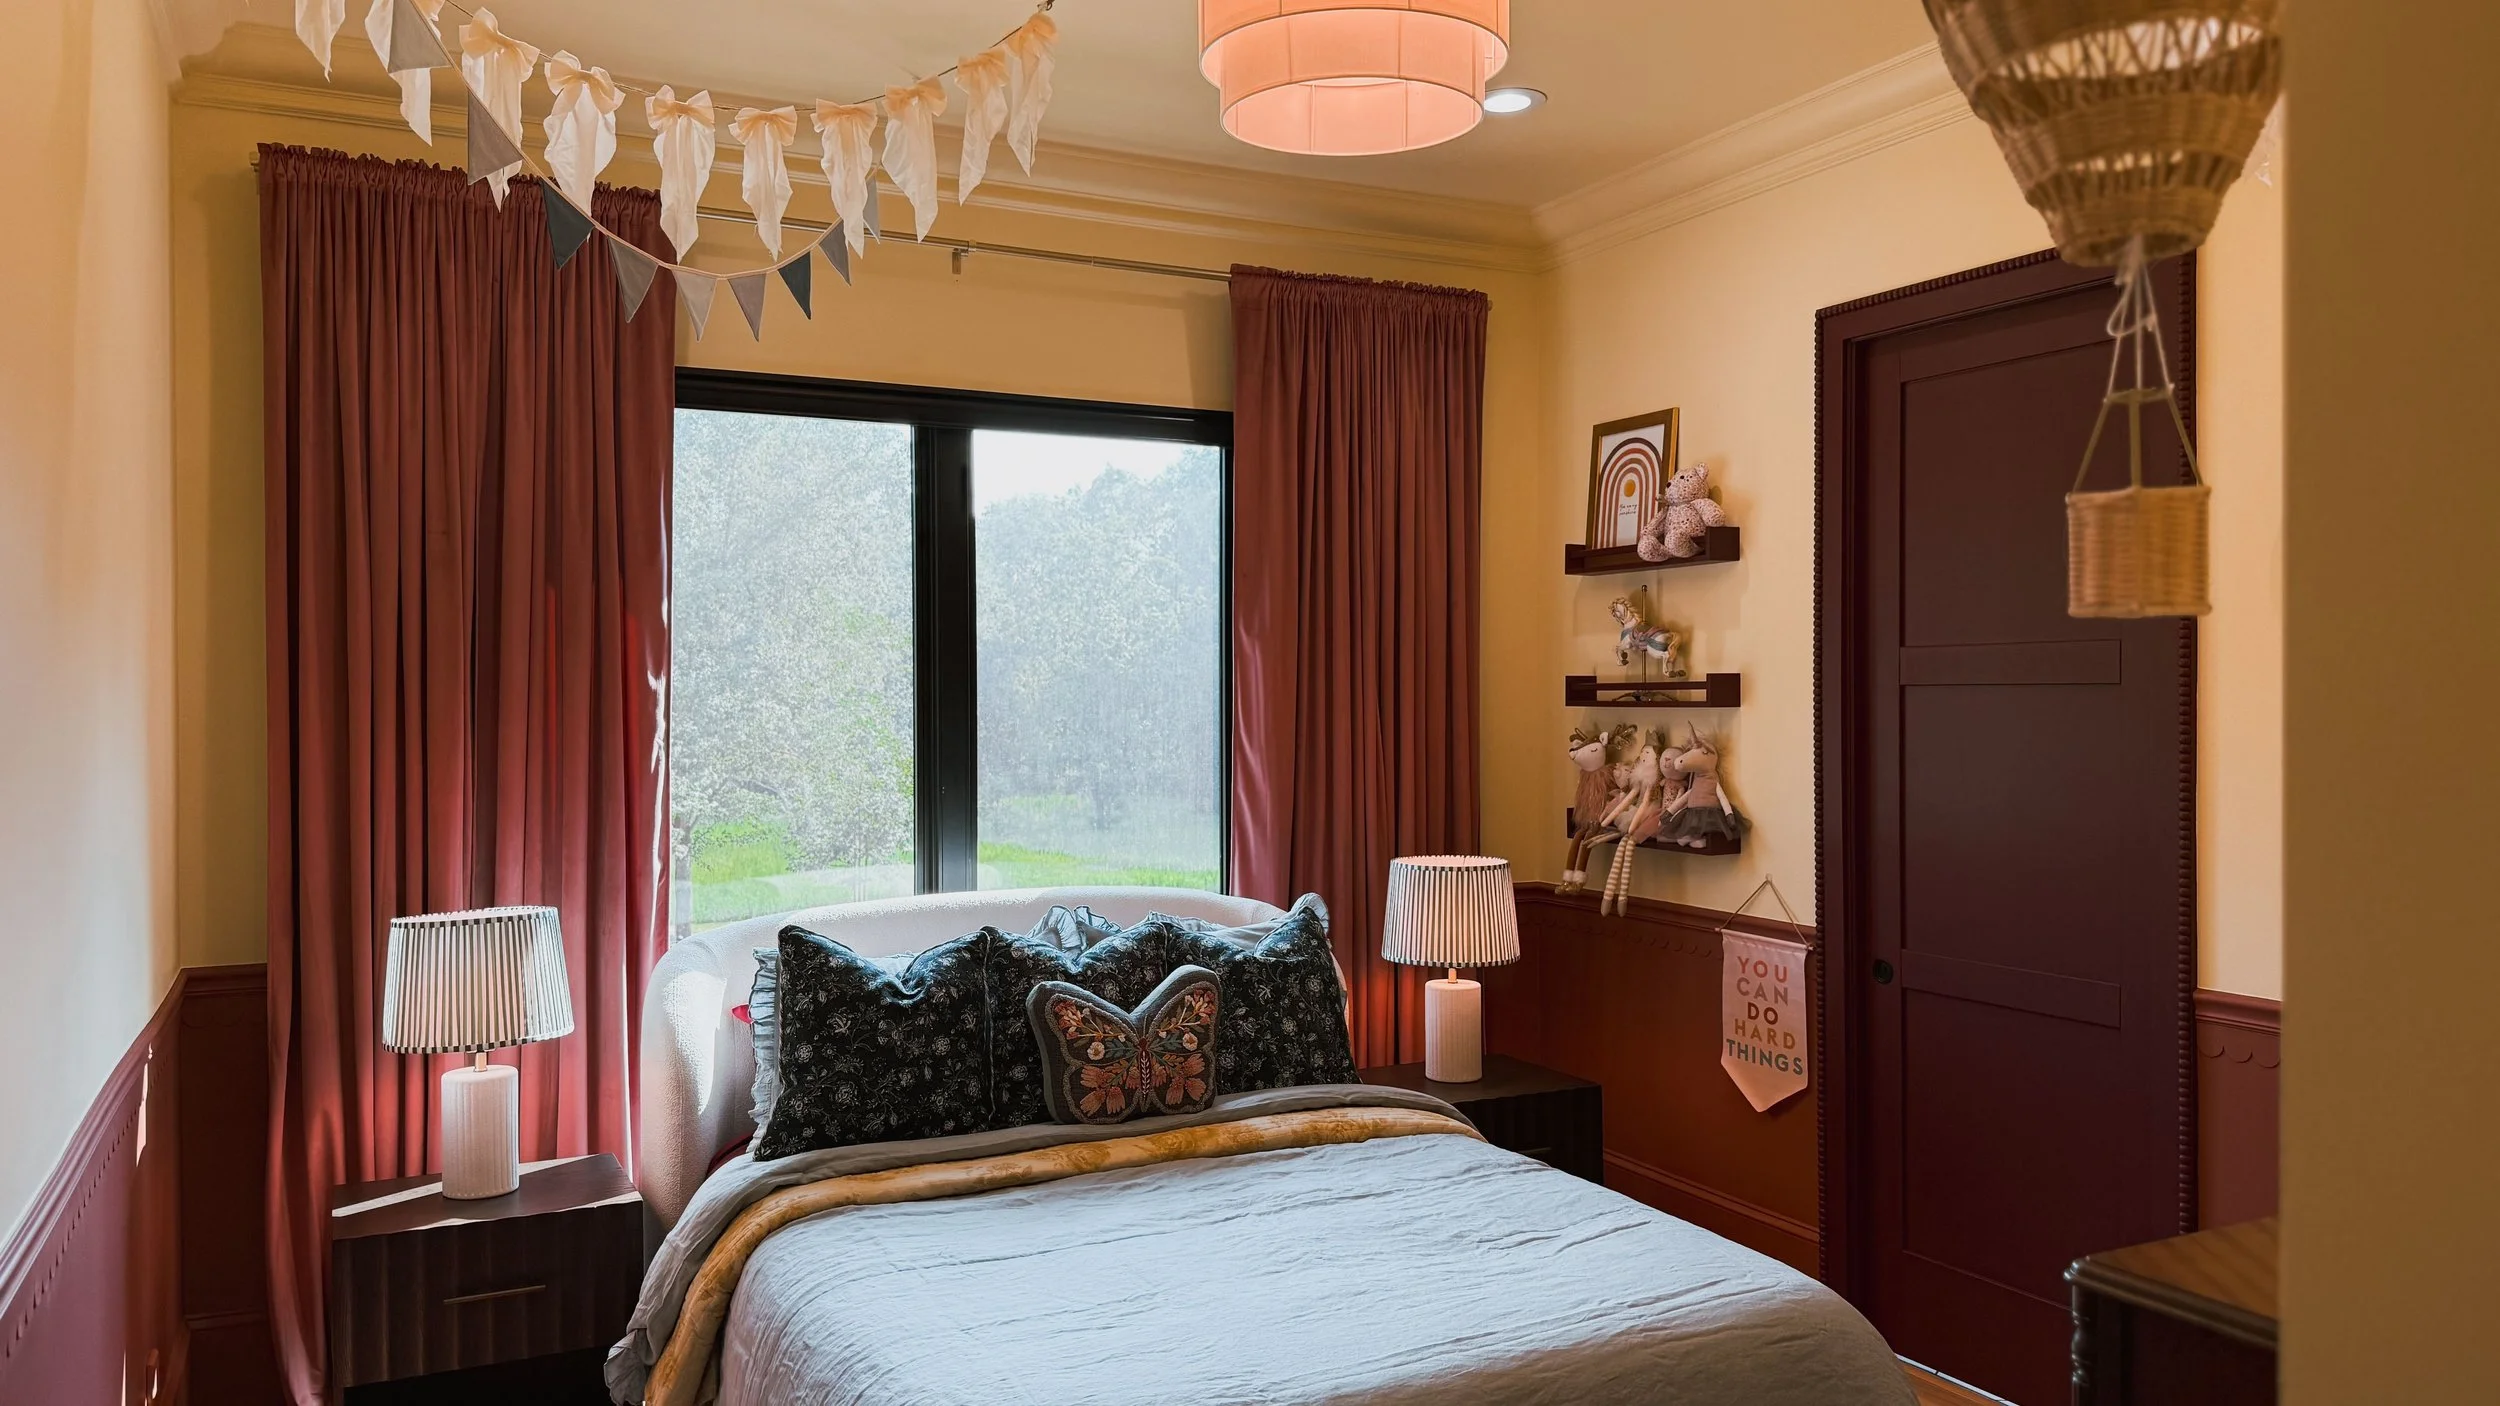
My Daughter’s Room: Lemon Chiffon, Cordovan and Reddened Earth by HGTV Home by Sherwin Williams
Top of wall and ceiling is Lemon Chiffon
Closet door and it’s trim are Cordovan
Bottom of walls and trim are Reddened Earth
Sheen is eggshell
Bedroom links here


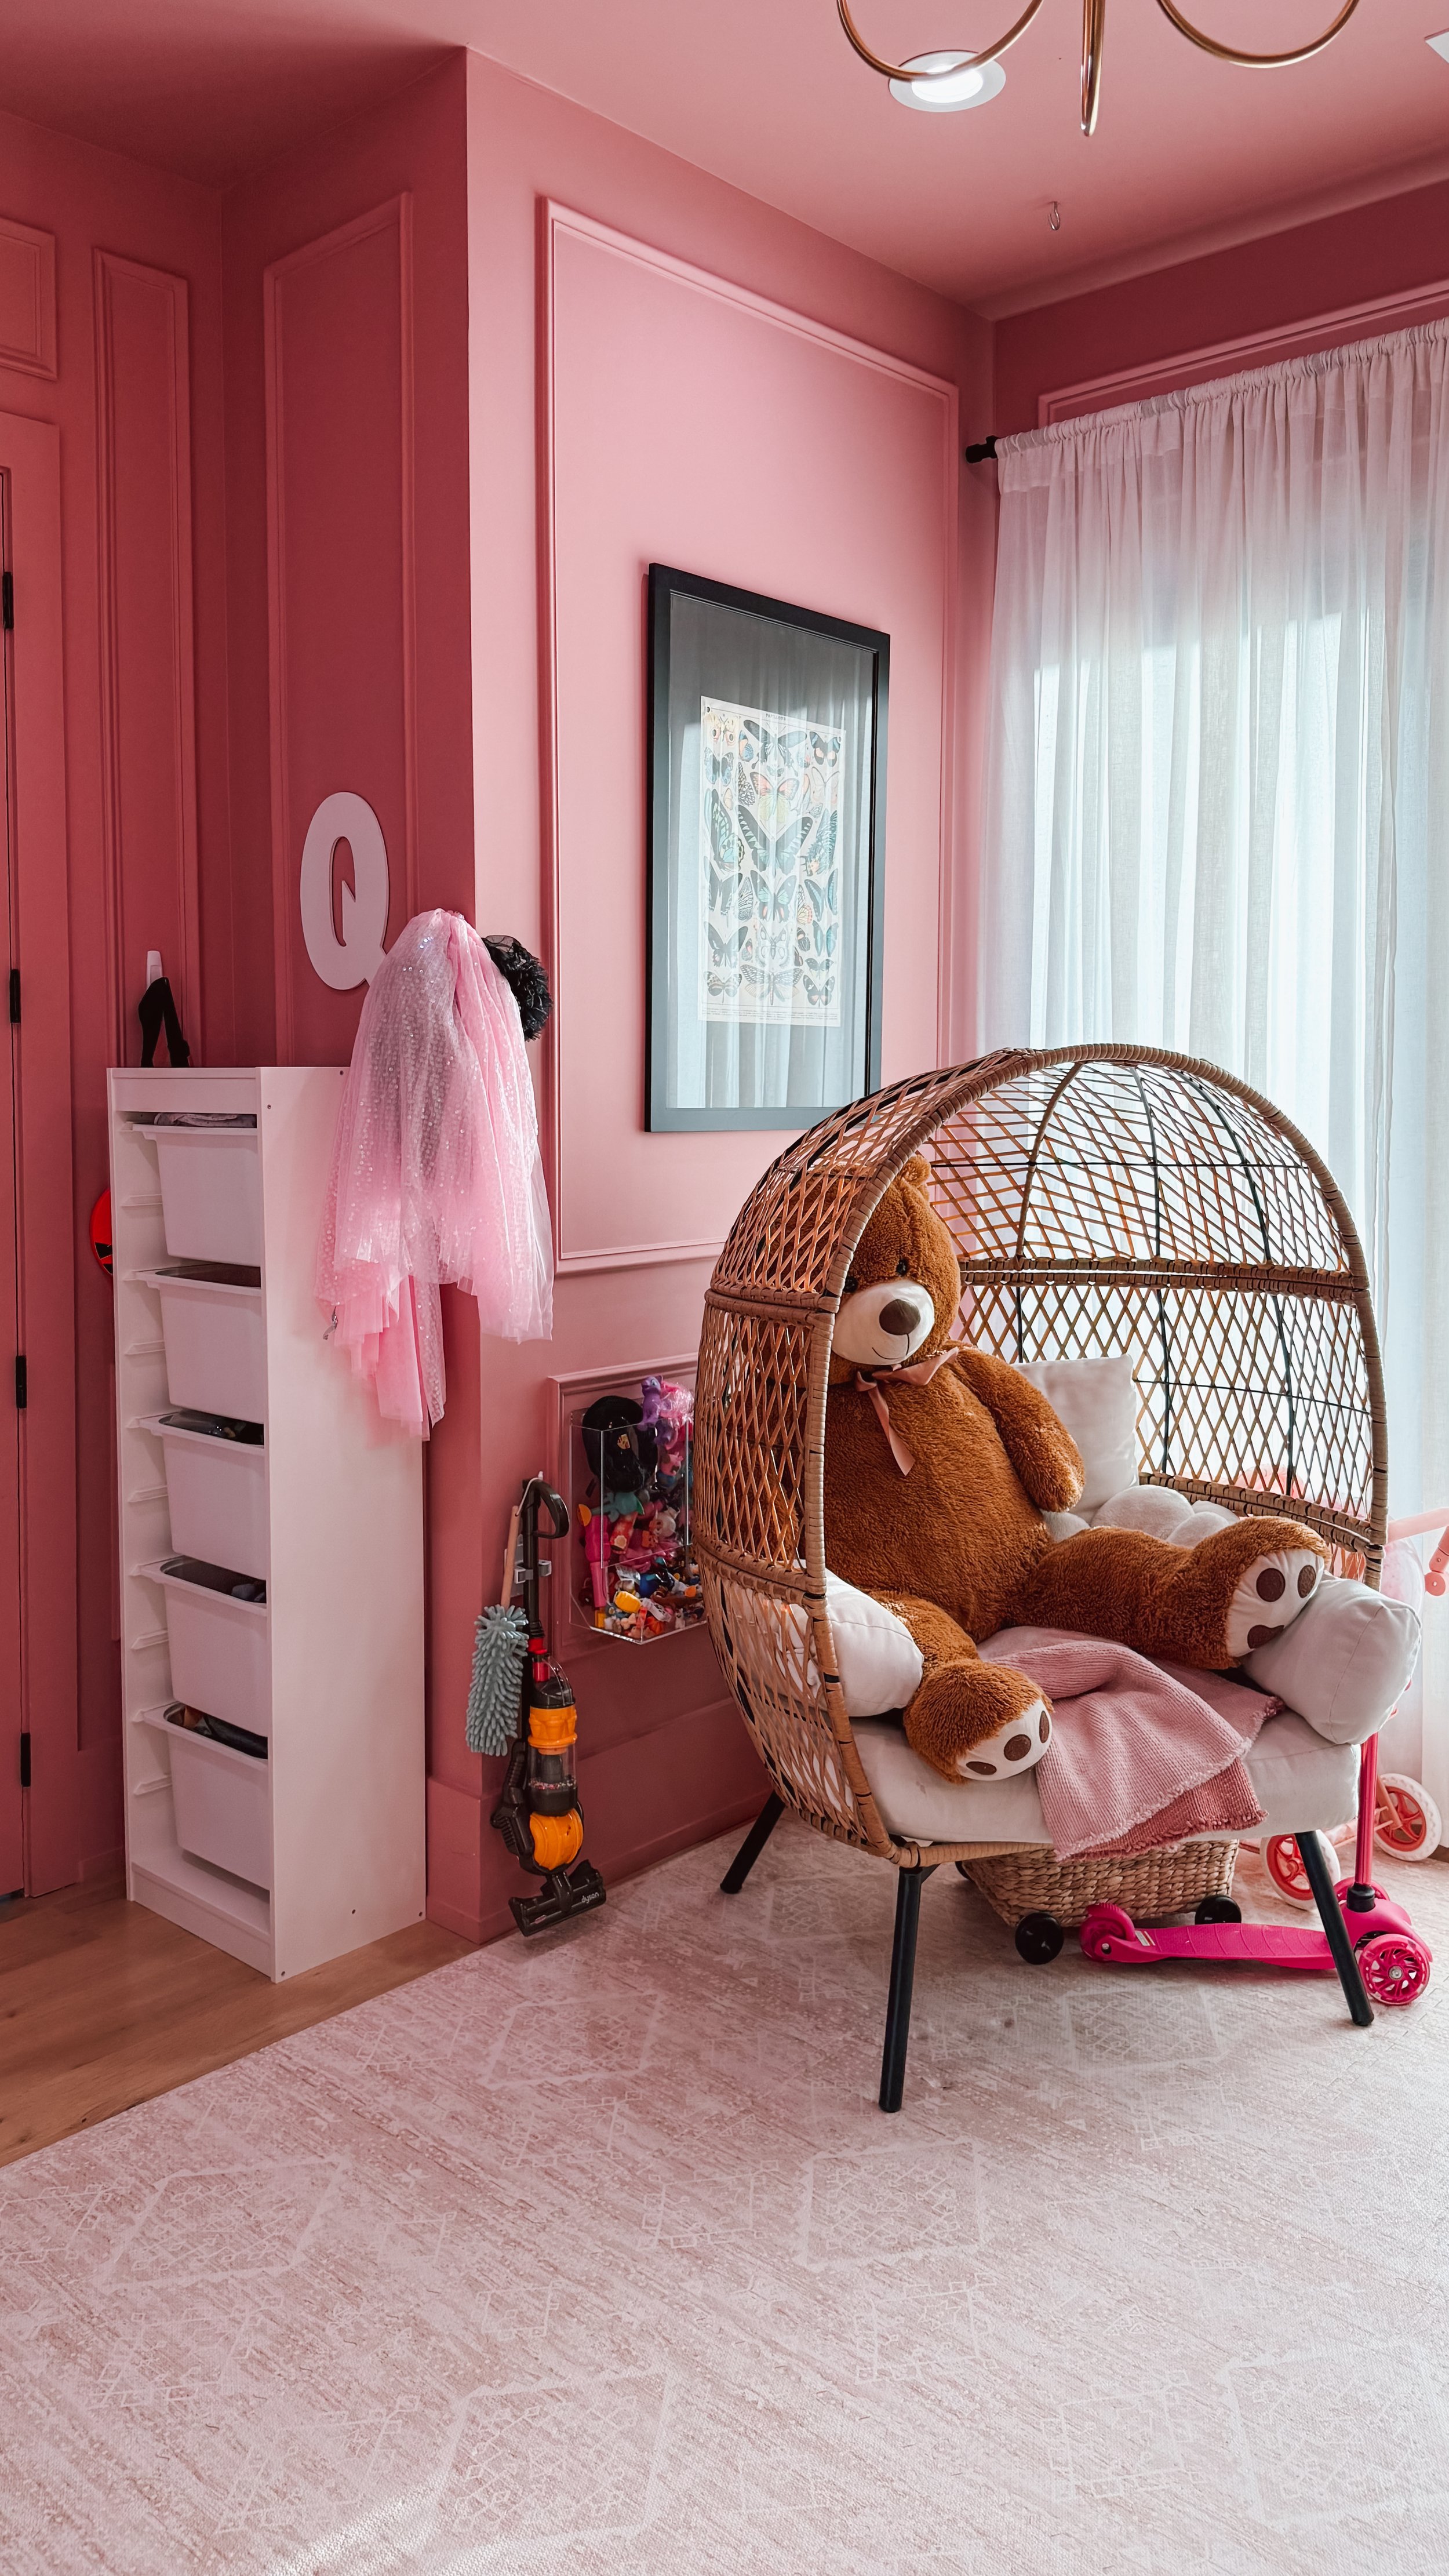
TODDLER ROOM - 50% of Malted Milk by Sherwin Williams
This is a beigey-pink. If I could go back I would have done 100% of the color instead of cutting it 50%
Sheen is eggshell for ceiling and walls
Links for the room here


This is a great example of a color that look different depending on what side of the wall I’m photographing (ie next to the pink curtains or the wall directly opposite the big window.