
How to Pick the Right Paint Color (the First Time)

Let’s be honest, picking paint is one of those things that seems easy until you’re actually doing it. You bring home a dozen little swatches, tape them to the wall, and suddenly every beige looks green and every gray feels… blue? It’s wild how different paint can look once it’s in your space.
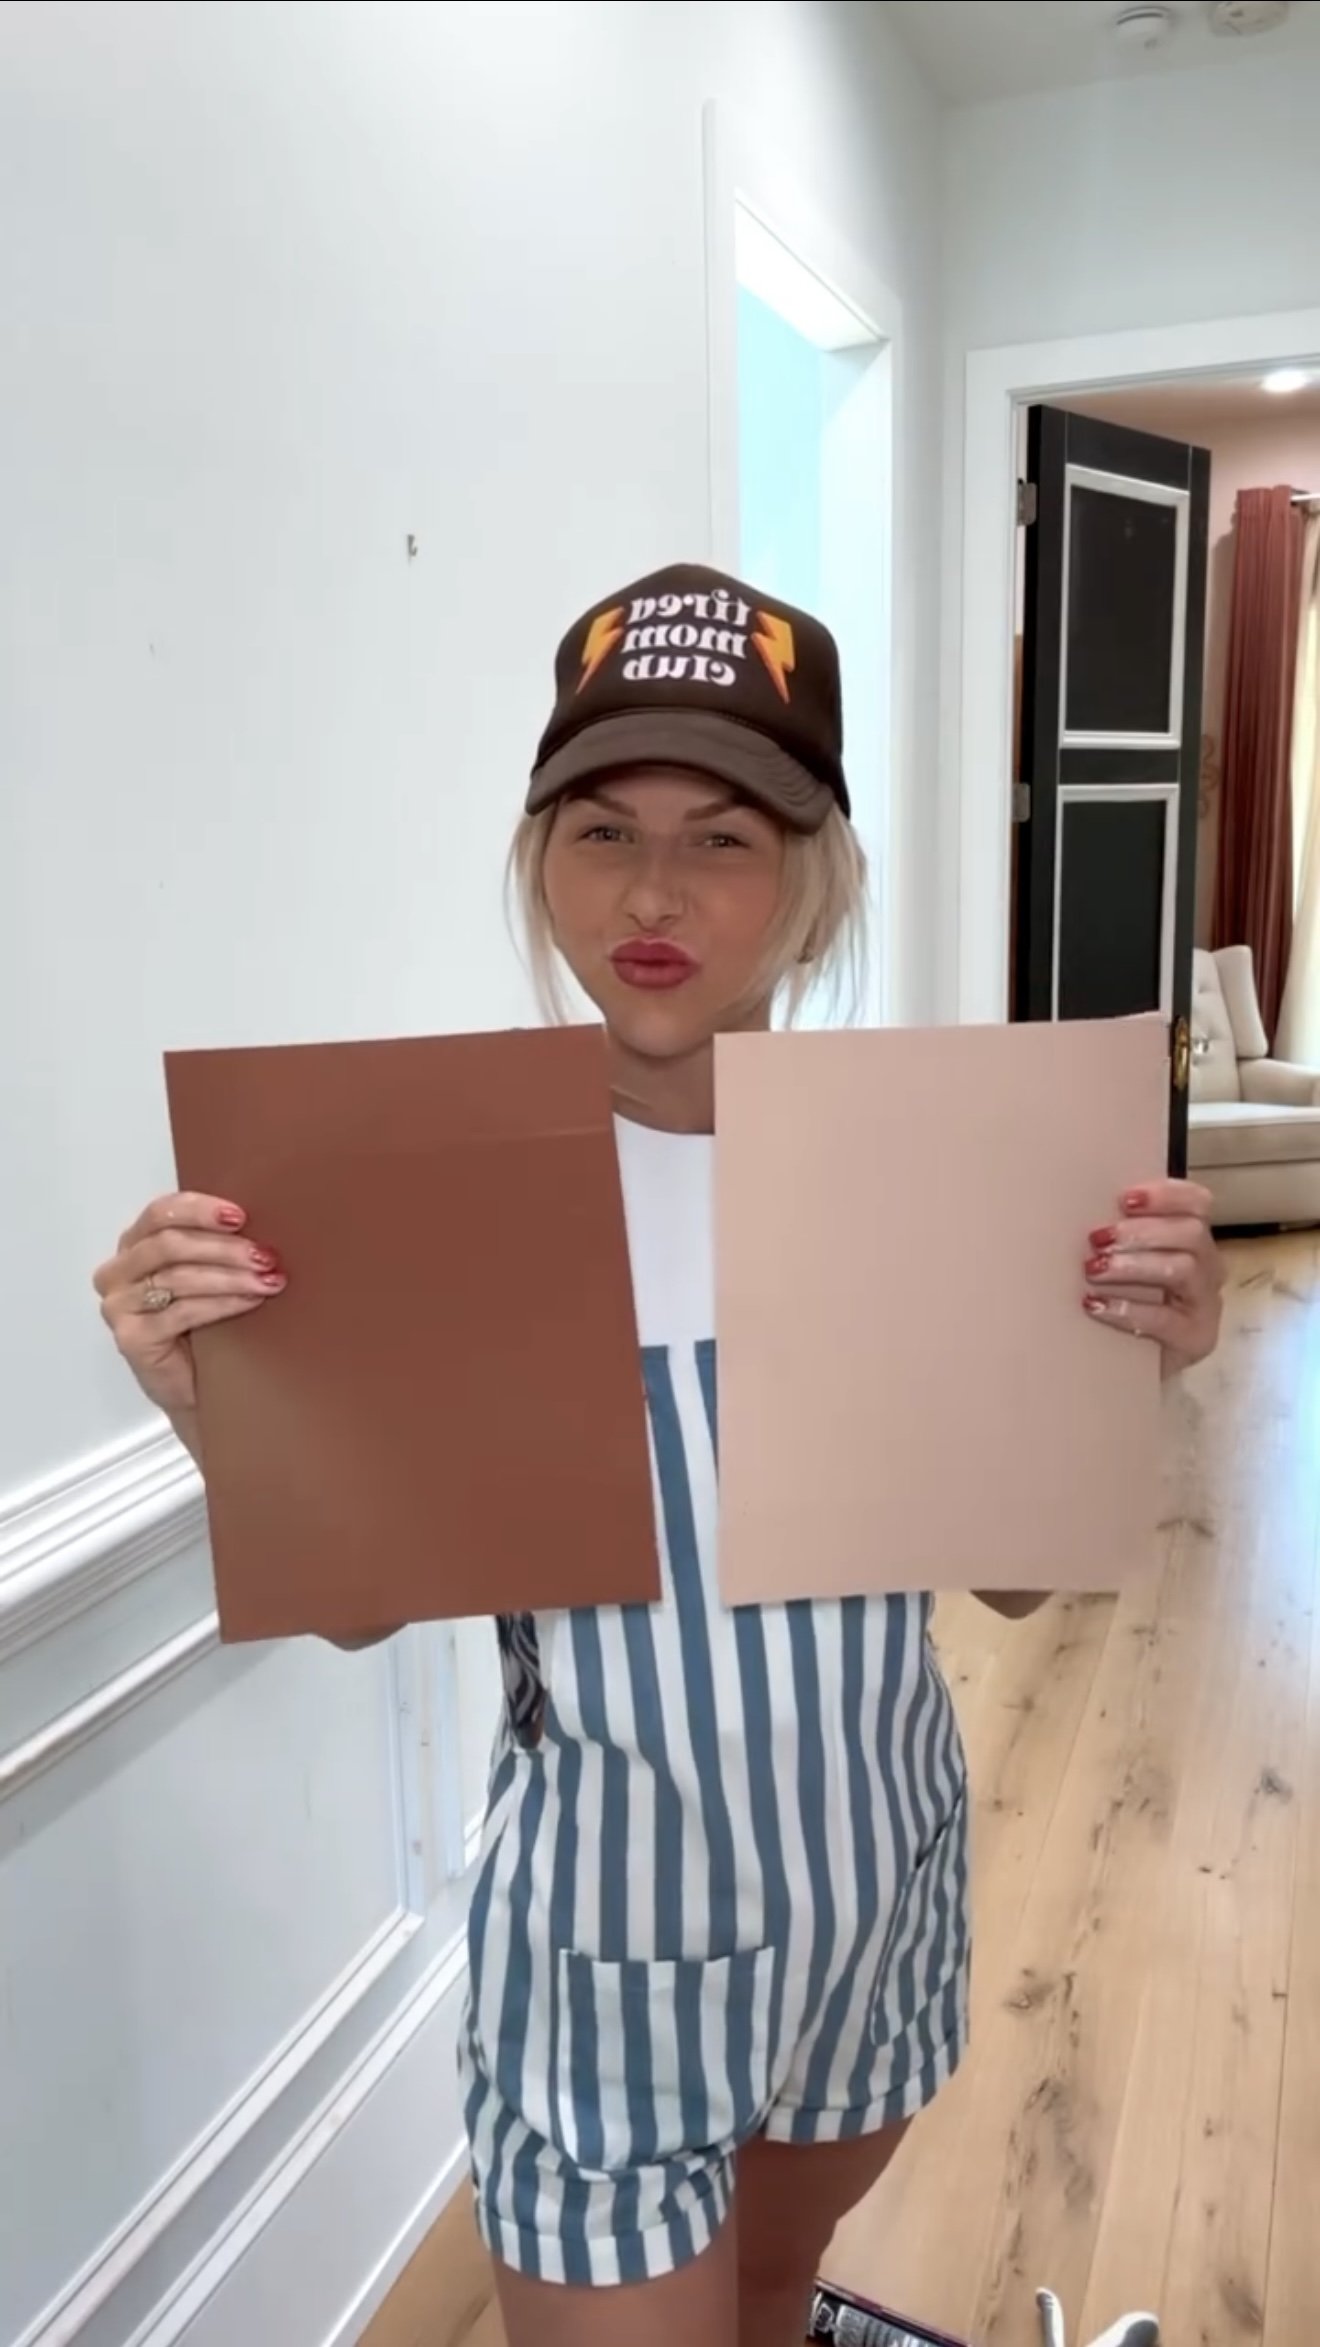
That’s why I’ve stopped relying on tiny paper samples and started using peel-and-stick paint swatches (made with real paint) instead. They make such a difference. You get a bigger sample, it goes right on the wall (no painting required), and you can move it around to see how the color behaves in different lighting. It’s such a simple switch, but it’s saved me from so many paint mistakes.
Here’s what I’ve learned about choosing the right color the first time:
Test multiple walls. Light hits differently depending on where the wall is. A color that looks warm and cozy on one wall might feel totally flat on another.
Check it throughout the day. Morning light, afternoon shadows, and evening lamps can all change the vibe. I like to peek at my samples over a couple of days before making a call.
Put it next to your trim and flooring. Sometimes a color looks perfect until it’s right next to that bright white baseboard or warm-toned wood floor. Seeing it in context helps avoid surprises.
Try at least 2–3 shades. Even if you’re set on a general color, comparing subtle undertones side by side makes it easier to spot the one that actually works in your space.
Don’t rush it. It’s tempting to just pick something and get started, but giving yourself a little time to sit with the samples really pays off.

Honestly, this has taken so much stress out of the process for me. When you get it right the first time, it makes everything else feel smoother.
So if you’re staring at swatches and feeling stuck, try testing a few peel-and-stick samples around the room. It’s such a small step that makes a big difference, and your walls will thank you.
Links At A Glance
IF YOU ENJOYED THIS POST, YOU MIGHT BE INTERESTED IN The Paint colors in my house!
FOLLOW ME ON MY SOCIALS!

Using Canva to Plan My Primary Bathroom Design
If you’re trying to pull a room together and want to make sure everything actually works, do yourself a favor and make a mood board in Canva. I use it all the time for room makeovers, and it never fails to bring clarity.
This project is a no-demo reno, so I needed a way to visualize the whole space. I dropped all my ideas into a Canva board and suddenly, it all started to make sense. I could instantly see what clashed, what felt too cold, and where I needed to pivot.
What’s on the Mood Board:
Here’s where things are at right now:
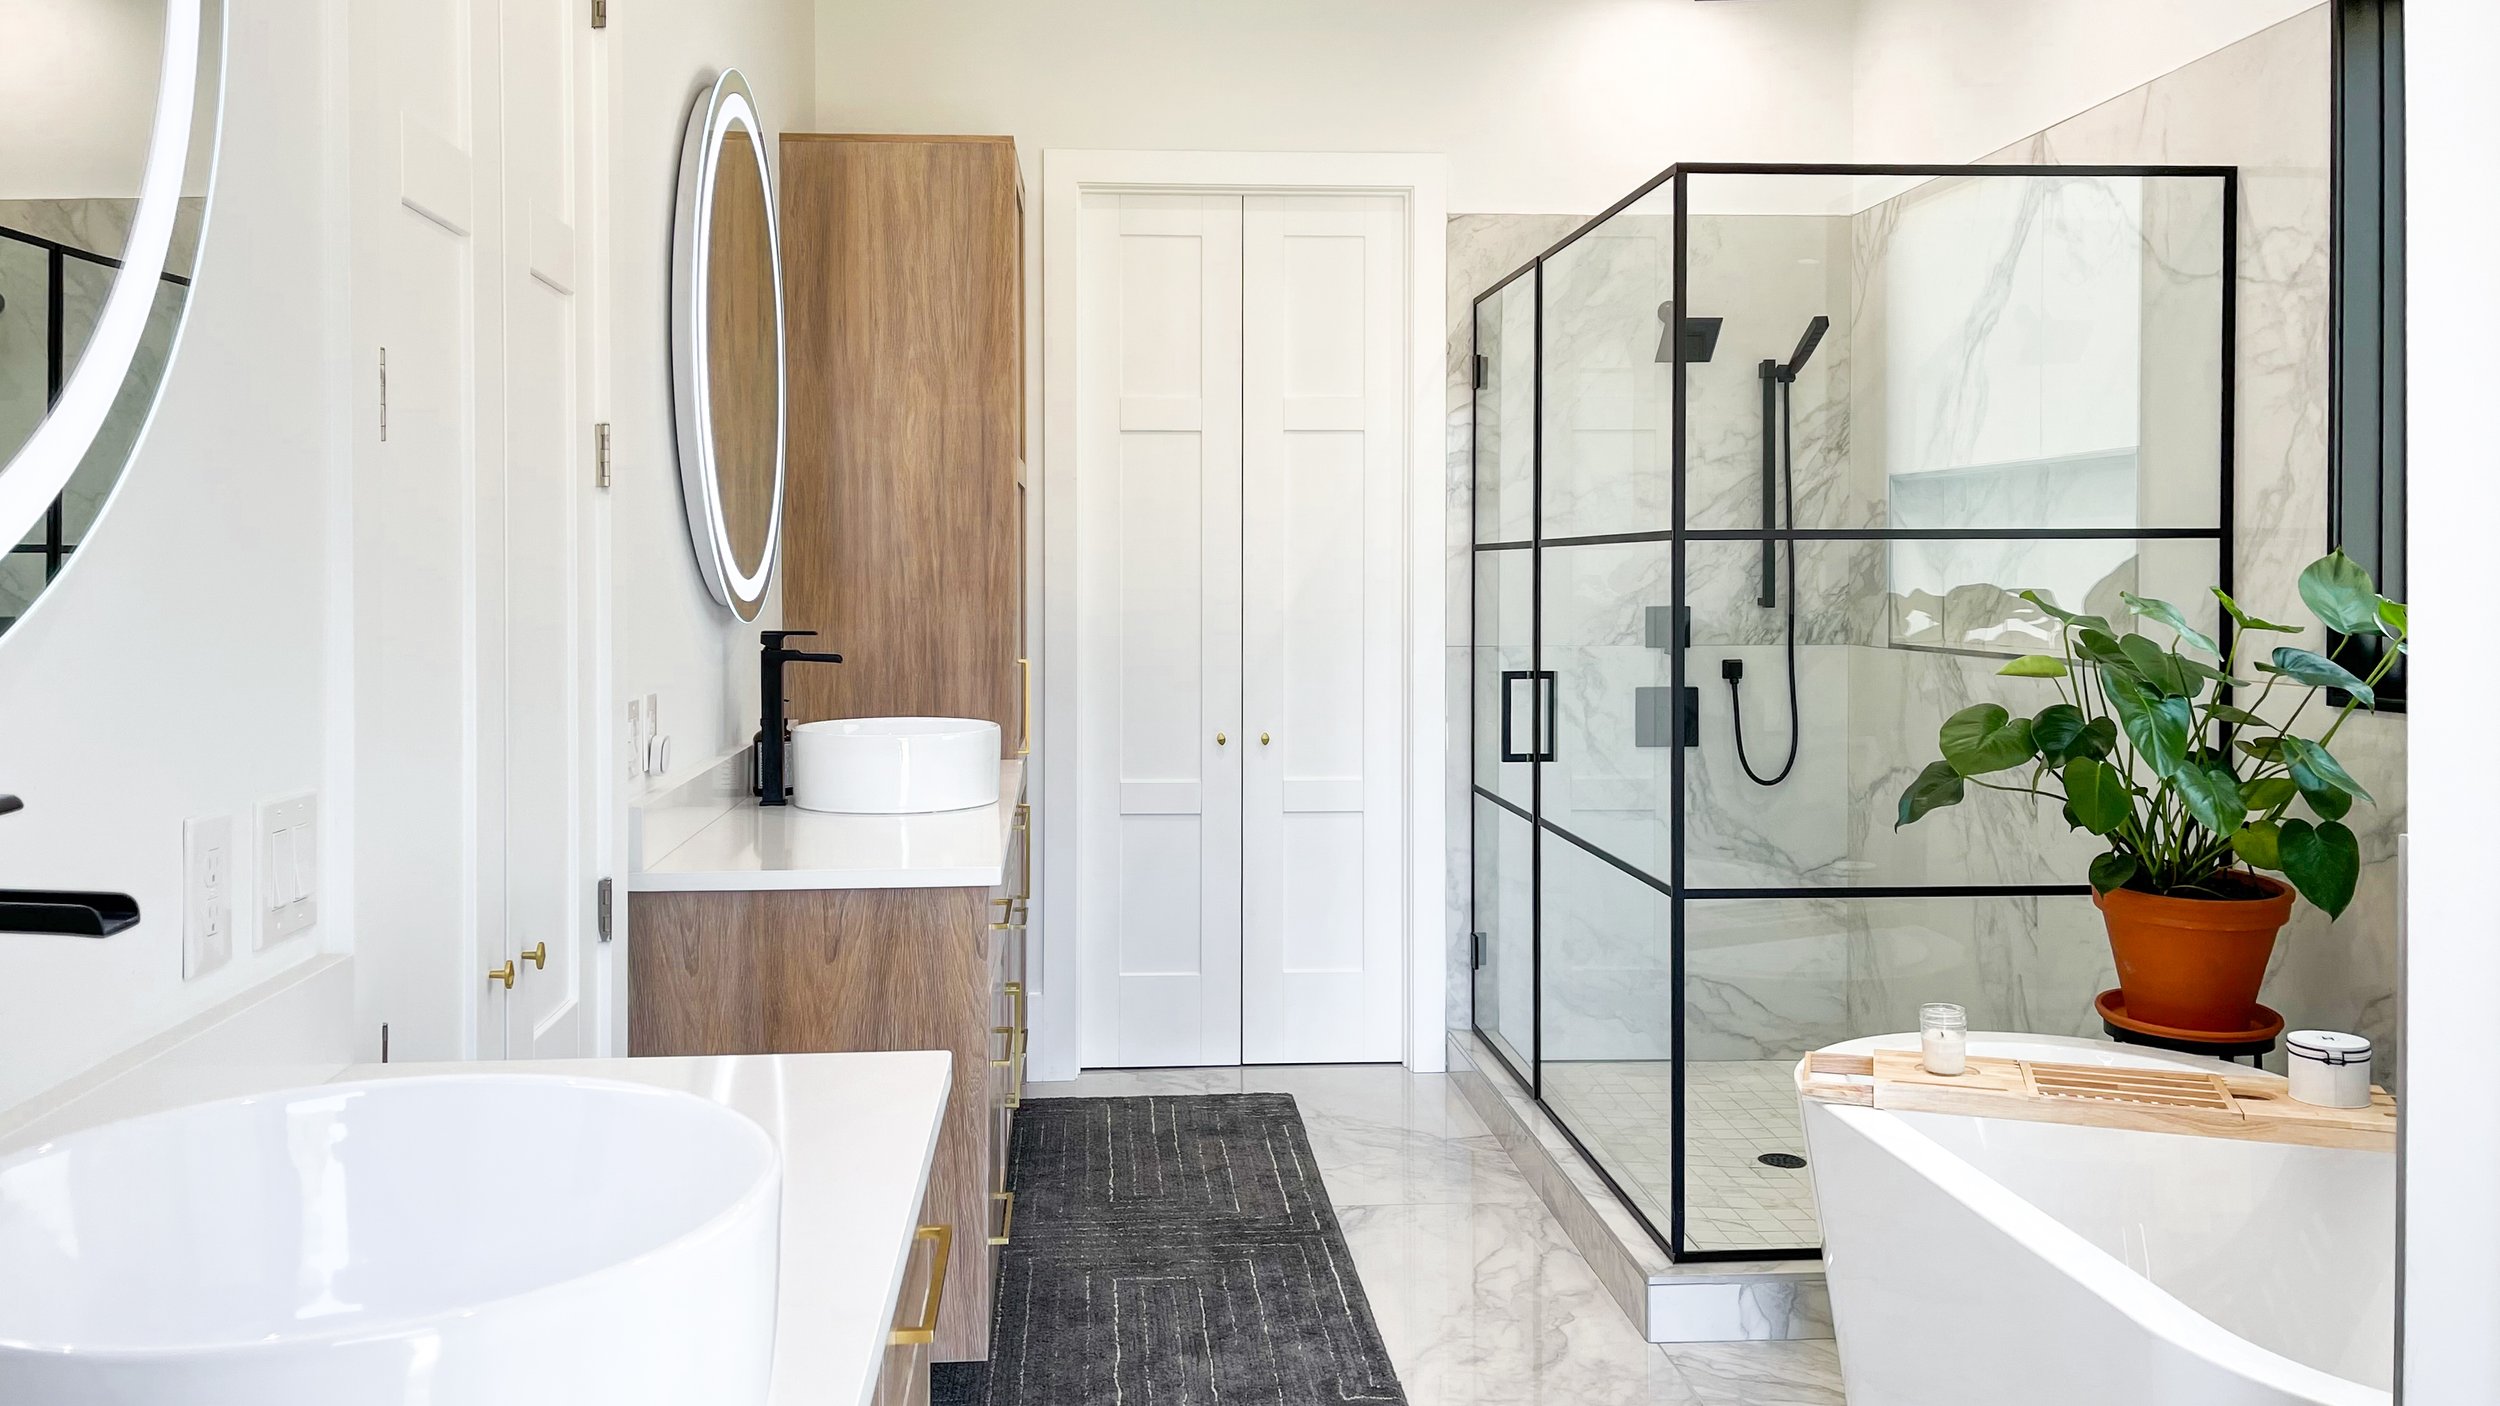
The black-framed shower that’s staying
My current custom wood vanities
Paint swatches I’m choosing between
the light fixture I like
Dragging it all into one space helped me quickly spot what was working and what wasn’t.

The Color Palette:
I also made a quick color guide to keep my vision focused.
I’m using Virtual Taupe for the main walls and Favorite Tan in the water closet. The rest of the palette comes through in decor and textiles.


Why Canva Makes Design So Much Easier:
Canva is such a game-changer for planning a space. It turns all your scattered screenshots and ideas into one clean, visual layout. It doesn’t have to be perfect. You just need enough to see what’s clicking.
Here’s why I love it:
It helps me see how colors, textures, and finishes actually work together
I can play around with bold choices without commitment
It keeps me from overthinking every tiny detail
It’s free and easy to use (but the Pro version let's you quickly remove the background of images which is nice)
If you’re feeling overwhelmed in the design process, try throwing together a mood board. It gave me clarity, helped me make confident decisions, and made the whole thing way more fun.
I’ll keep sharing updates as this room comes together. And if you’ve ever used Canva to plan a room, I’d love to hear how it worked for you too!
Links At A Glance
IF YOU ENJOYED THIS POST, YOU MIGHT BE INTERESTED IN My blue floral bathroom makeover!
FOLLOW ME ON MY SOCIALS!

Sheet Storage That Actually Works


These sheet organizers are one of my favorite finds! Let’s be honest, linen closets are chaos waiting to happen. No matter how many times I’ve tried to keep mine tidy, it always ended up with a jumble of mismatched sheets, slipping stacks, and a rogue pillowcase or two wedged in the back. And don’t even get me started on trying to store king-size sheets or my heated blanket. It was basically a wrestling match every time.
But then I found these zip-up organizers and everything changed.


They come in a set of four, and they’re roomy enough to hold even the bulkiest sets of bedding. I’ve stuffed mine with king sheets, tablecloths, and yes, even that giant heated blanket I always struggle to store. Each organizer zips closed, keeping everything neat and compressed. No unraveling. No refolding. No drama.
One of my favorite parts? They have a clear little window. I can see exactly what’s inside each one without having to unzip or pull anything out. It’s a small detail, but it makes a huge difference when I’m looking for the guest bed sheets or trying to find the right tablecloth five minutes before company shows up.


I stacked them up in my linen closet and honestly, it’s a game changer. Everything looks so much more put together, and I don’t dread opening the door anymore. Plus, they’re super easy to pull out when I need something, and because they hold their shape, the whole shelf doesn’t collapse every time I grab one.
If you're looking for a simple, affordable way to get your linens under control, these organizers are it. I wish I had found them sooner.
Links At A Glance
IF YOU ENJOYED THIS POST, YOU MIGHT BE INTERESTED IN My Playroom Makeover!
FOLLOW ME ON MY SOCIALS!

How to hang decor, using the toothpaste method


How to Hang Wall Decor Using the Toothpaste Trick
You know when you measure and mark exactly where you want a frame or mirror to go, but then you flip it over and realize the hangers on the back are in totally different spots? That’s where the toothpaste trick comes in.
Here’s how it works: you still measure to center your decor or get it at the right height—this isn’t a total free-for-all. But instead of guessing where the nails need to go based on mystery hangers on the back, you use toothpaste to mark their exact spots on the wall.
Just dab a little toothpaste on each hanger, press the decor against the wall right where you want it to hang, and boom. You’ve got perfect marks for where your screws or nails need to go, no extra measuring required.
It’s weirdly satisfying, saves so much time, and makes things way easier to get level on the first try.
What You’ll Need:
Your art, mirror, frame, or whatever you’re hanging
Two nails or screws (or however many hangers are on the back)
A tape measurer (to find the right spot)
A pencil to mark your spot
Toothpaste. Yes, really.
The Method:
Flip It Over: Look at the back of your frame and find the hangers. Those little keyhole openings or sawtooth brackets? That’s where the toothpaste is going.
Dab It: Put a small dot of toothpaste on each hanger, right where the nail or screw would go.
Press & Mark: Carefully press your frame against the wall exactly where you want it to hang. Don’t wiggle it. Just a nice firm press. The toothpaste will leave a dot on the wall in the perfect spot.
Nail It: Drive your nails or screws right into those toothpaste marks.
Hang It Up: Wipe away any extra toothpaste, and hang up your piece. That’s it.


Why It’s So Good:
It works every time. Some decor has hangers in the most random, hard-to-measure spots, and trying to line everything up can drive you a little nuts. Whether you're creating a perfectly centered gallery wall or dealing with one stubborn mirror that never wants to hang straight, the toothpaste trick takes all the guesswork out.
Final Thoughts:
I still measure to get things centered or at the right height, but figuring out exactly where the hangers are? That’s where the toothpaste trick saves the day. No more guessing, no more flipping frames over five times. Just dab, press, and hang.
Once you try it, you’ll never go back.
Links At A Glance
Candleholder (Estate Sale Find)
IF YOU ENJOYED THIS POST, YOU MIGHT BE INTERESTED IN How to hang a gallery wall!
FOLLOW ME ON MY SOCIALS!

Our Little Cheetah Bathroom Glow-Up

If there was ever a room that gave me the green light to go a little wild, it was this one. Our half bathroom may be tiny, but it came with a big opportunity to pack in all the personality I could. So I did what any maximalist at heart would do and covered the walls in cheetahs.
The wallpaper really sets the tone in here. It’s bold and a little playful, but it still feels polished and grown-up. I pulled in more warm tones with the gold mirror, a vintage-style towel ring, and that marble and brass console sink that kind of steals the show. Everything works together to make the space feel styled and intentional without tipping into full-on theme territory.


One of my favorite little spots is right by the sink. I use a decorative box to hold paper towels, paired with a textured glass soap dispenser, and it all just works. It feels pulled together without trying too hard and adds a little bit of style to an otherwise functional corner.
Even the back of the toilet got a glow-up with a thrifted woven basket that holds spare rolls and looks way cuter than anything plastic. Little things matter in small spaces, and this room is proof that no corner is too small to style.
So here’s the takeaway: if there’s a room you’ve been playing it safe with, maybe it’s time to go for it. Try the bold wallpaper. Add the fun details. Make it a space that feels like you, even if you're the only one who sees it.
Links At A Glance:
Decorative Box (mine was thrifted but I’ve linked something similar)
Soap Dispenser (this one is out of stock but I’ve linked something similar)
Toilet Paper Basket (thrifted)
Candleholder (thrifted)
IF YOU ENJOYED THIS POST, YOU MIGHT BE INTERESTED IN The wallpaper in my house!
FOLLOW ME ON MY SOCIALS!

DIY Turtle Sandbox Makeover: From Thrifted to Adorable


How to Give a Faded Sandbox Turtle a Fresh New Look
I found this classic turtle sandbox at Goodwill for $5, and I knew right away it had potential. Sure, it was faded, scratched, and looked like it had lived a full life, but the shape was iconic, and I love a good transformation project. A few hours and a couple cans of spray paint later, this little guy got a whole new lease on life.
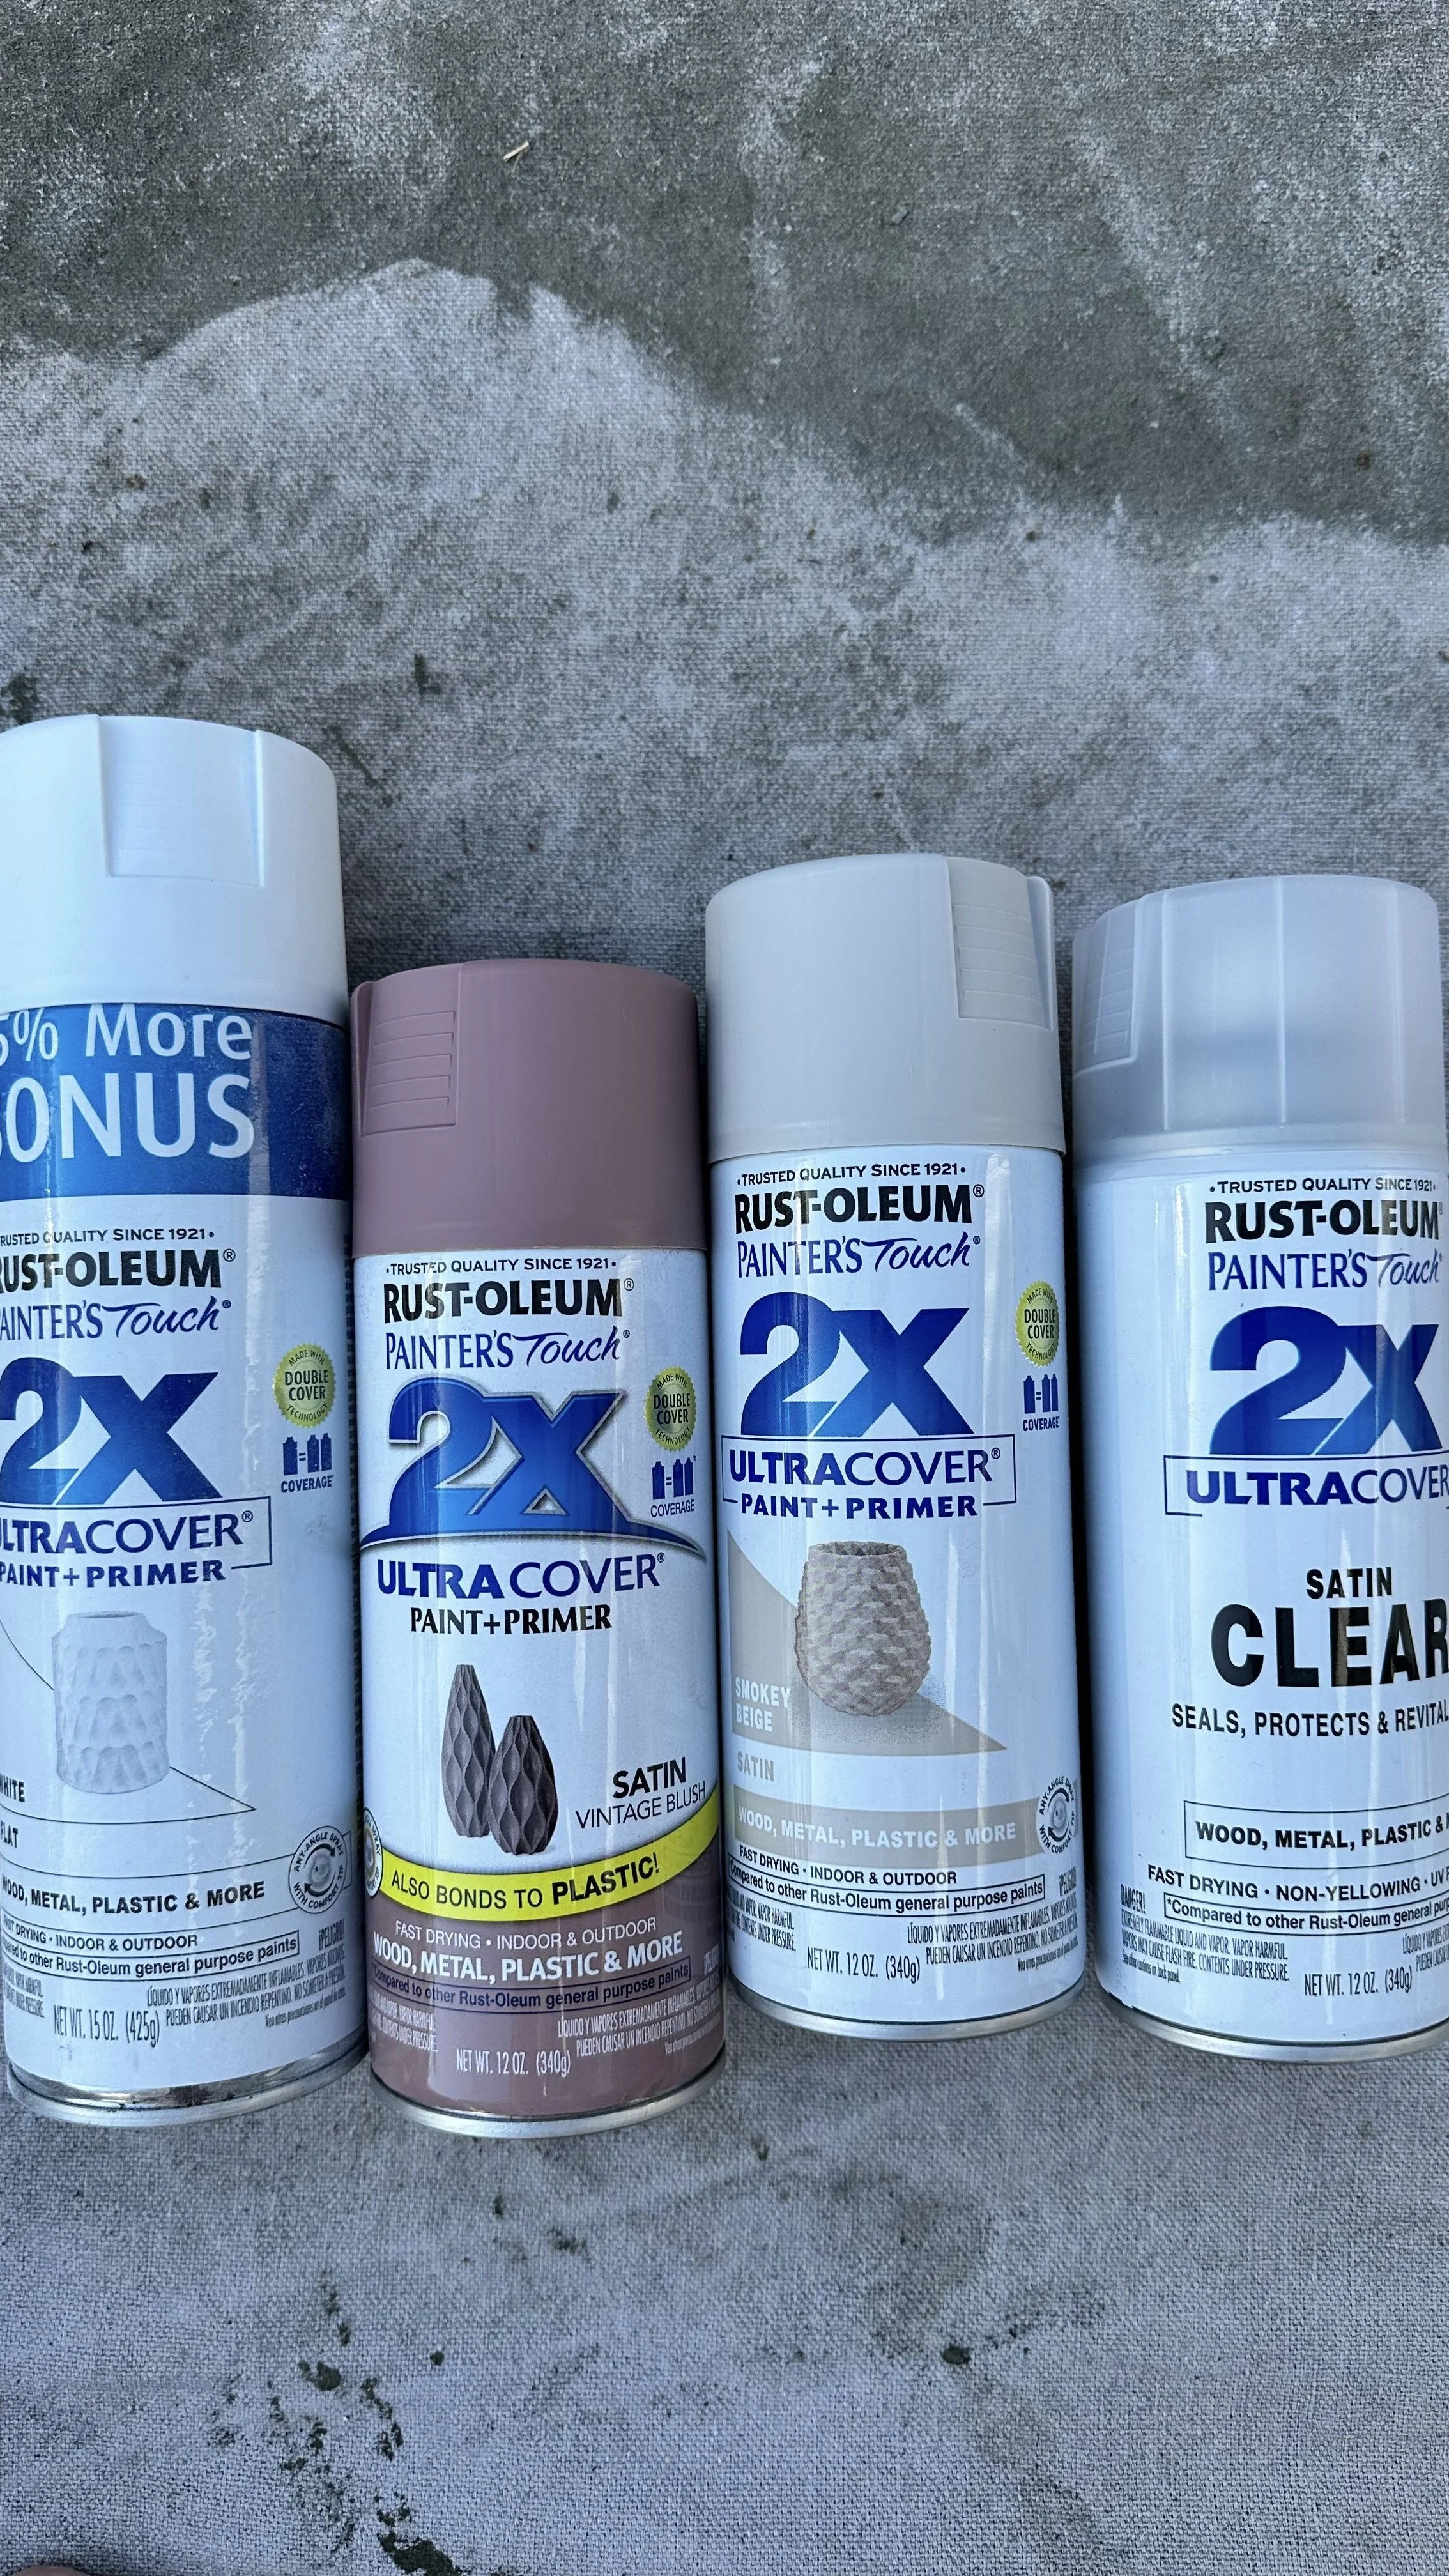
What You’ll Need:
Scrub brush and soap (for cleaning)
Spray paint made for plastic (I used two coordinating colors: one for the body and one for the lid)
Contrasting paint for the shell details (I used some craft paint I already had)
Small paint brush for the shell details
Clear outdoor spray sealant (non-yellowing)
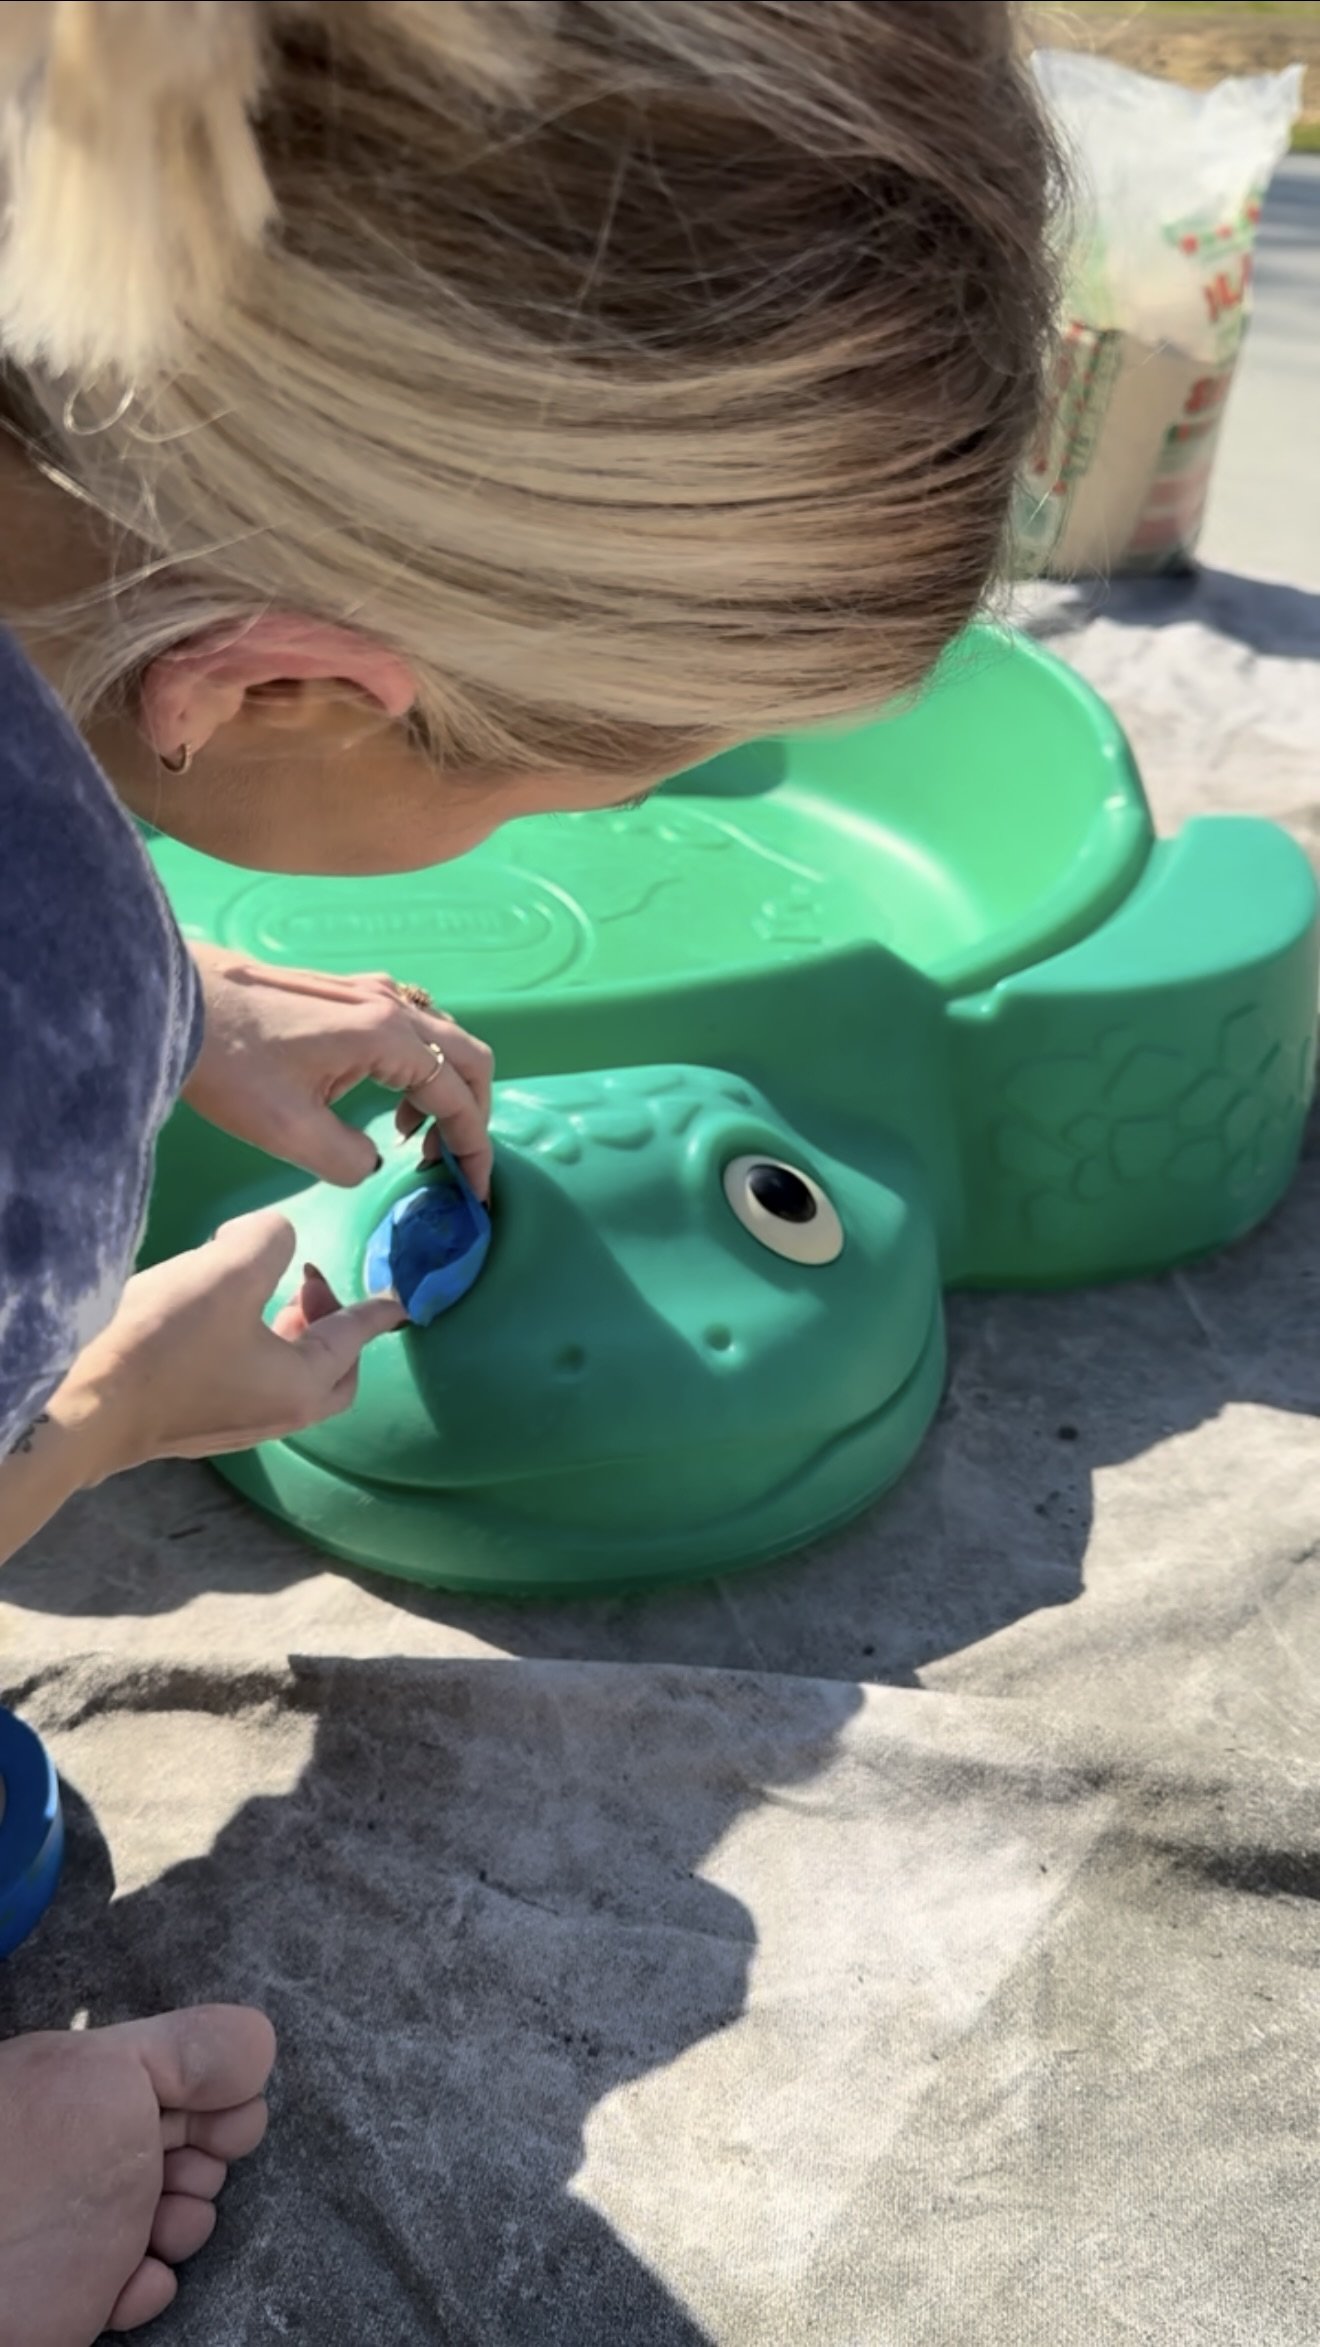
Painter’s tape (for detailing—especially the eyes!)
A comfort grip spray can handle (optional, but makes a huge difference for even coverage and avoiding finger fatigue)
A bag or two of sand (for the fun part)

How to Do It:
1. Clean it really well.
Start by giving the turtle a thorough scrub with warm soapy water. Mine was definitely showing its age, so I made sure to get into all the little nooks and rinse it really well. Once it was completely dry, I wiped it down again just to be sure there wasn’t any leftover grime or residue.
2. Protect the eyes.
Before painting, I used painter’s tape to cover the turtle’s little eyes. It’s a tiny detail, but keeping them paint-free helped preserve that classic, recognizable expression, and made the final result feel more polished.
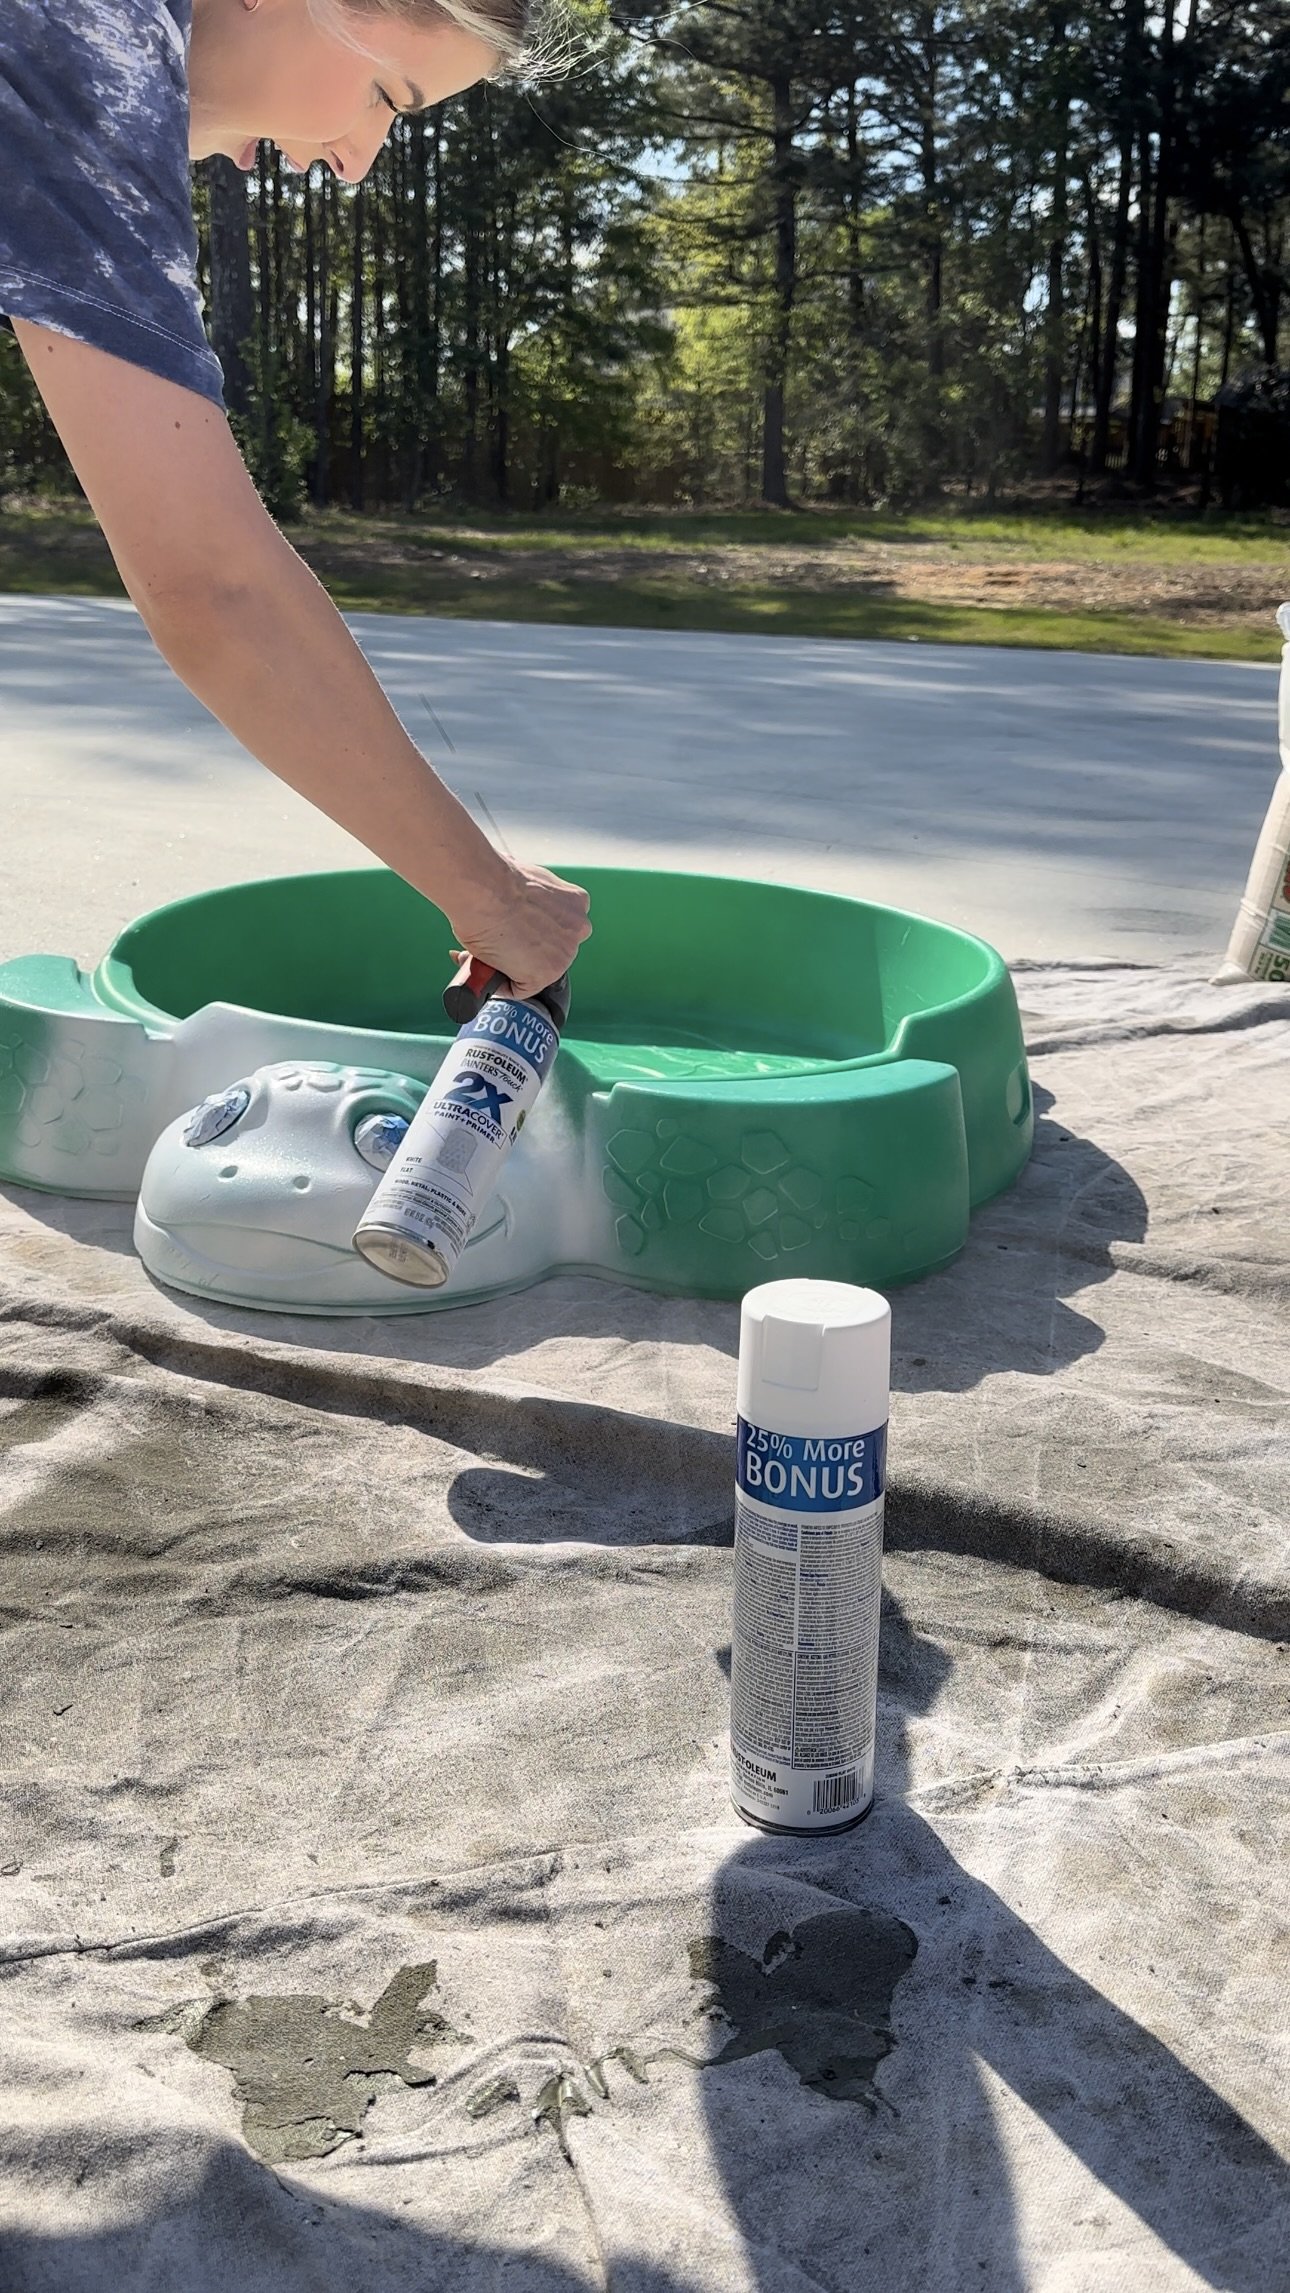
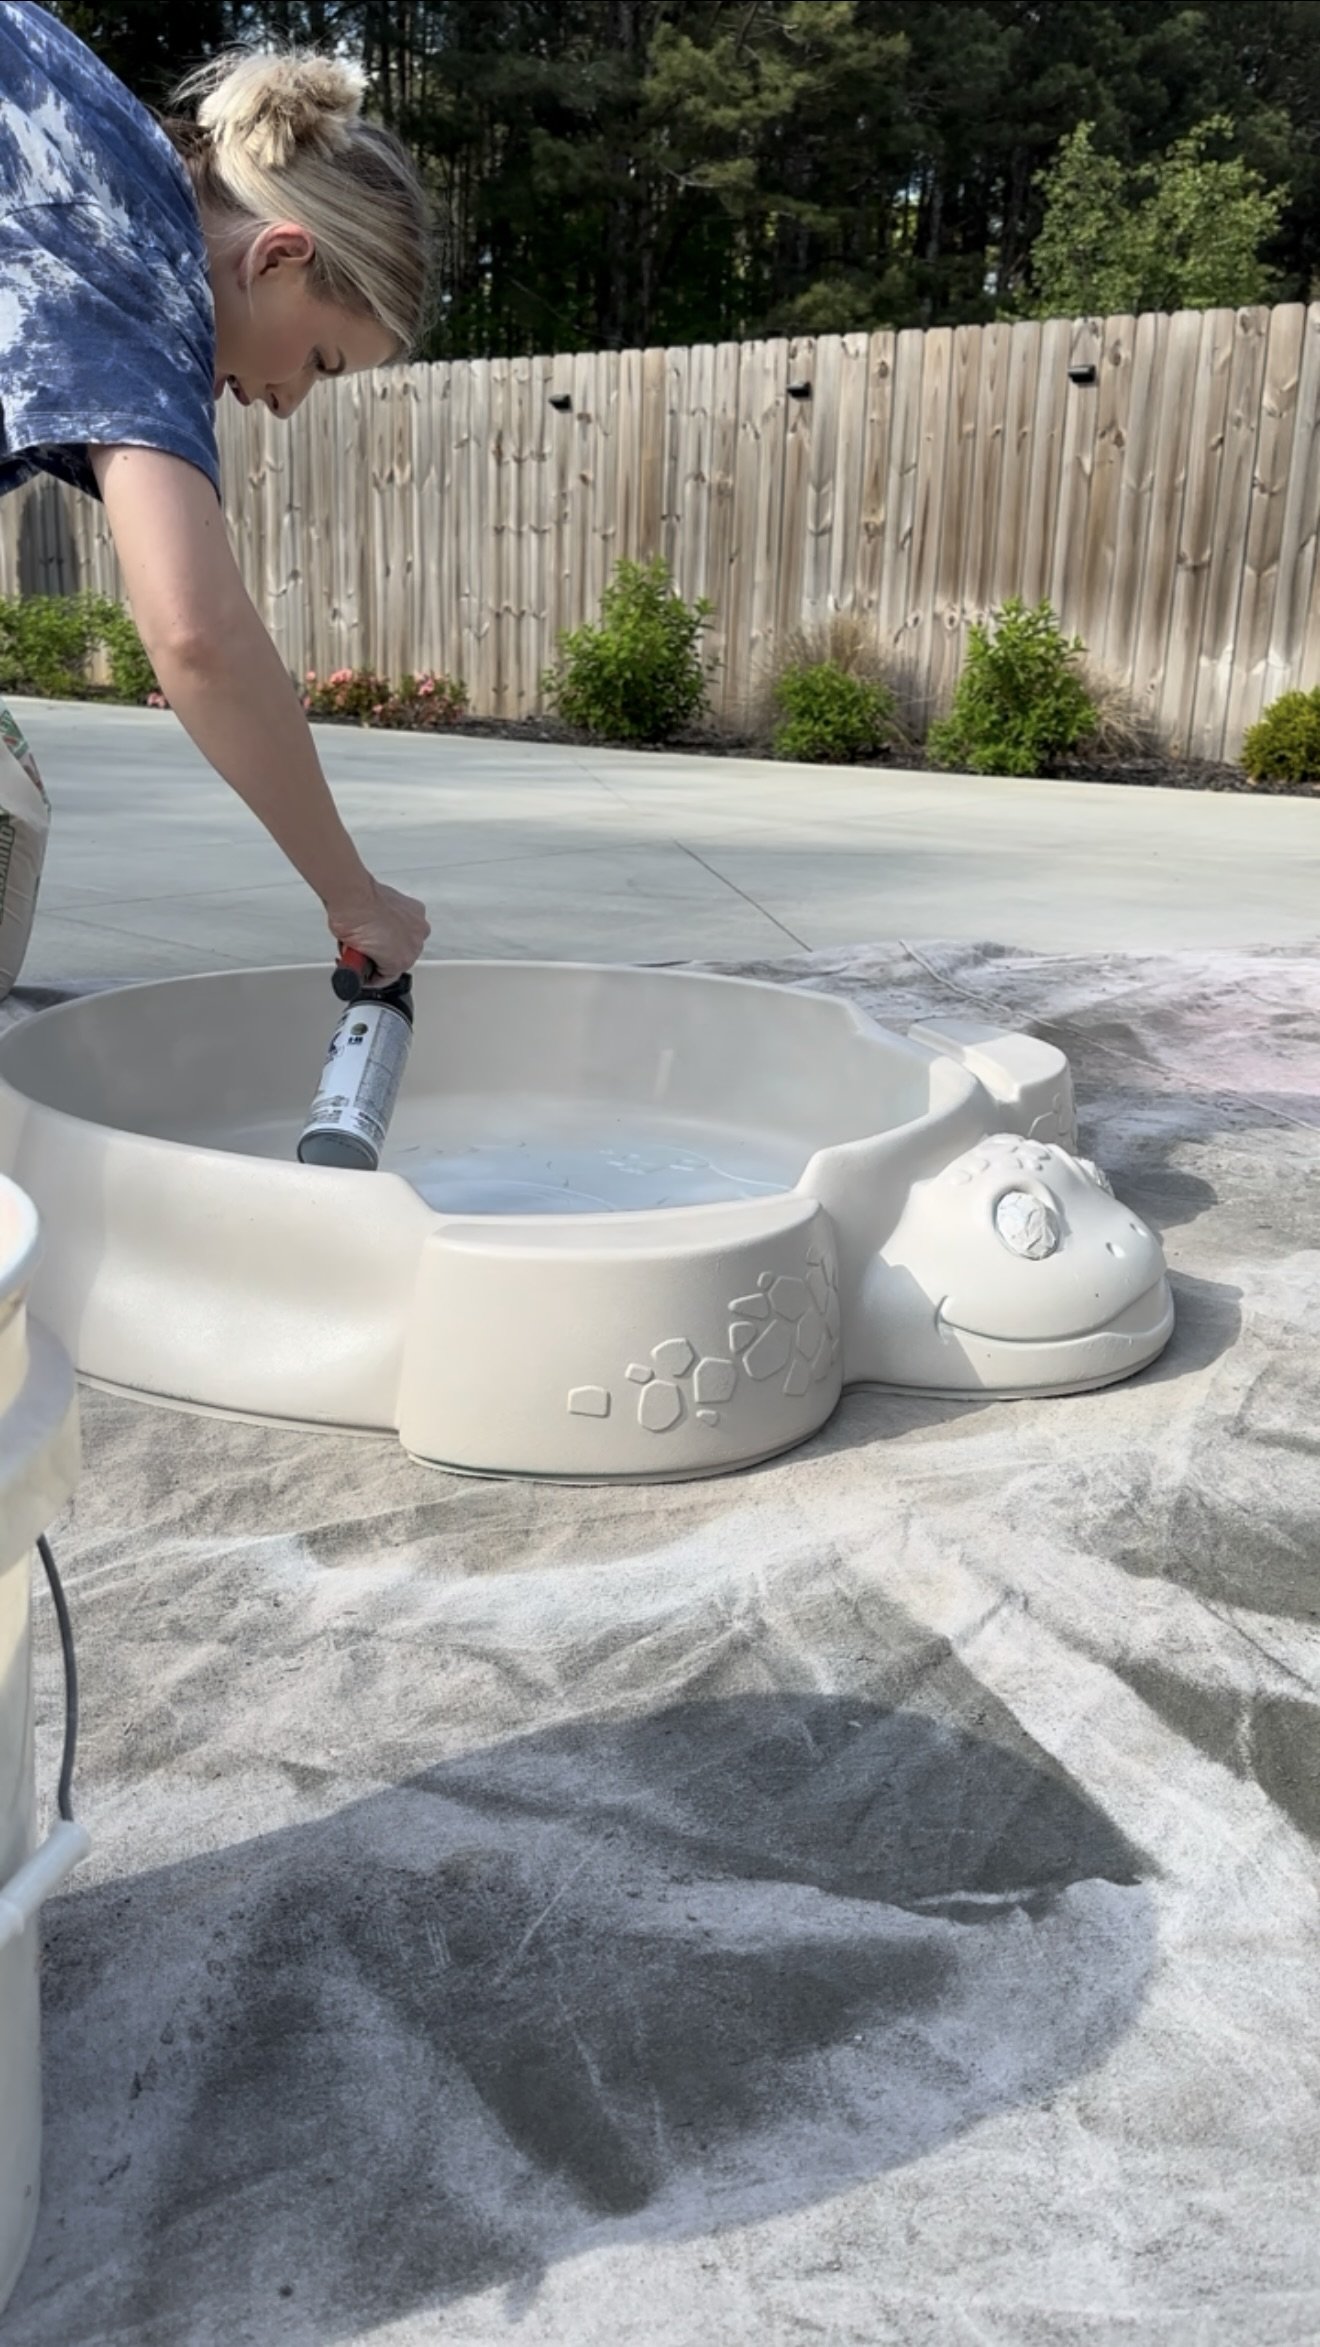
3. Prime it.
This step is easy to skip, but so worth it. I used a spray primer that’s safe for plastic to help the paint stick better and last longer. A light, even coat is all you need—just be sure to let it dry fully before moving on to color.
4. Spray the base and the lid.
Once the primer was dry, I sprayed the turtle’s body with a soft neutral beige and the lid with a warm blush pink. I stuck to light coats and let each one dry before adding the next. The contrast between the two colors gave it a fun but modern look that felt totally fresh.
5. Add shell detail.
After the base coat dried, I used some craft paint I already had, and a small paint brush to paint the little spots on his shell.
6. Seal it.
Once all the paint was dry and I was happy with the look, I finished it off with a few coats of clear spray sealant made for outdoor plastic. It adds a bit of shine, protects the paint from chips, and makes cleanup after play days so much easier.
7. Fill with sand!
After everything cured, I added fresh play sand and tossed in a few fun toys. Our toddler was in it immediately, and it’s easily become one of the most-used toys.

How It’s Holding Up:
Look, when you mix sand, spray paint, and an enthusiastic toddler, you’re obviously going to get a little chipping. And yep, we do have a few spots where the paint has worn off, especially around the edges where little feet climb in and out. But honestly? It’s held up way better than I expected.
The color is still vibrant, the shell details are intact, and the sealant has definitely helped protect it from full-on flaking or fading. It lives outside, gets played with constantly, and still manages to look cute. Considering it started as a $5 thrift find, that feels like a major win.
IF YOU ENJOYED THIS POST, YOU MIGHT BE INTERESTED IN my cozy coupe makeover!
FOLLOW ME ON MY SOCIALS!
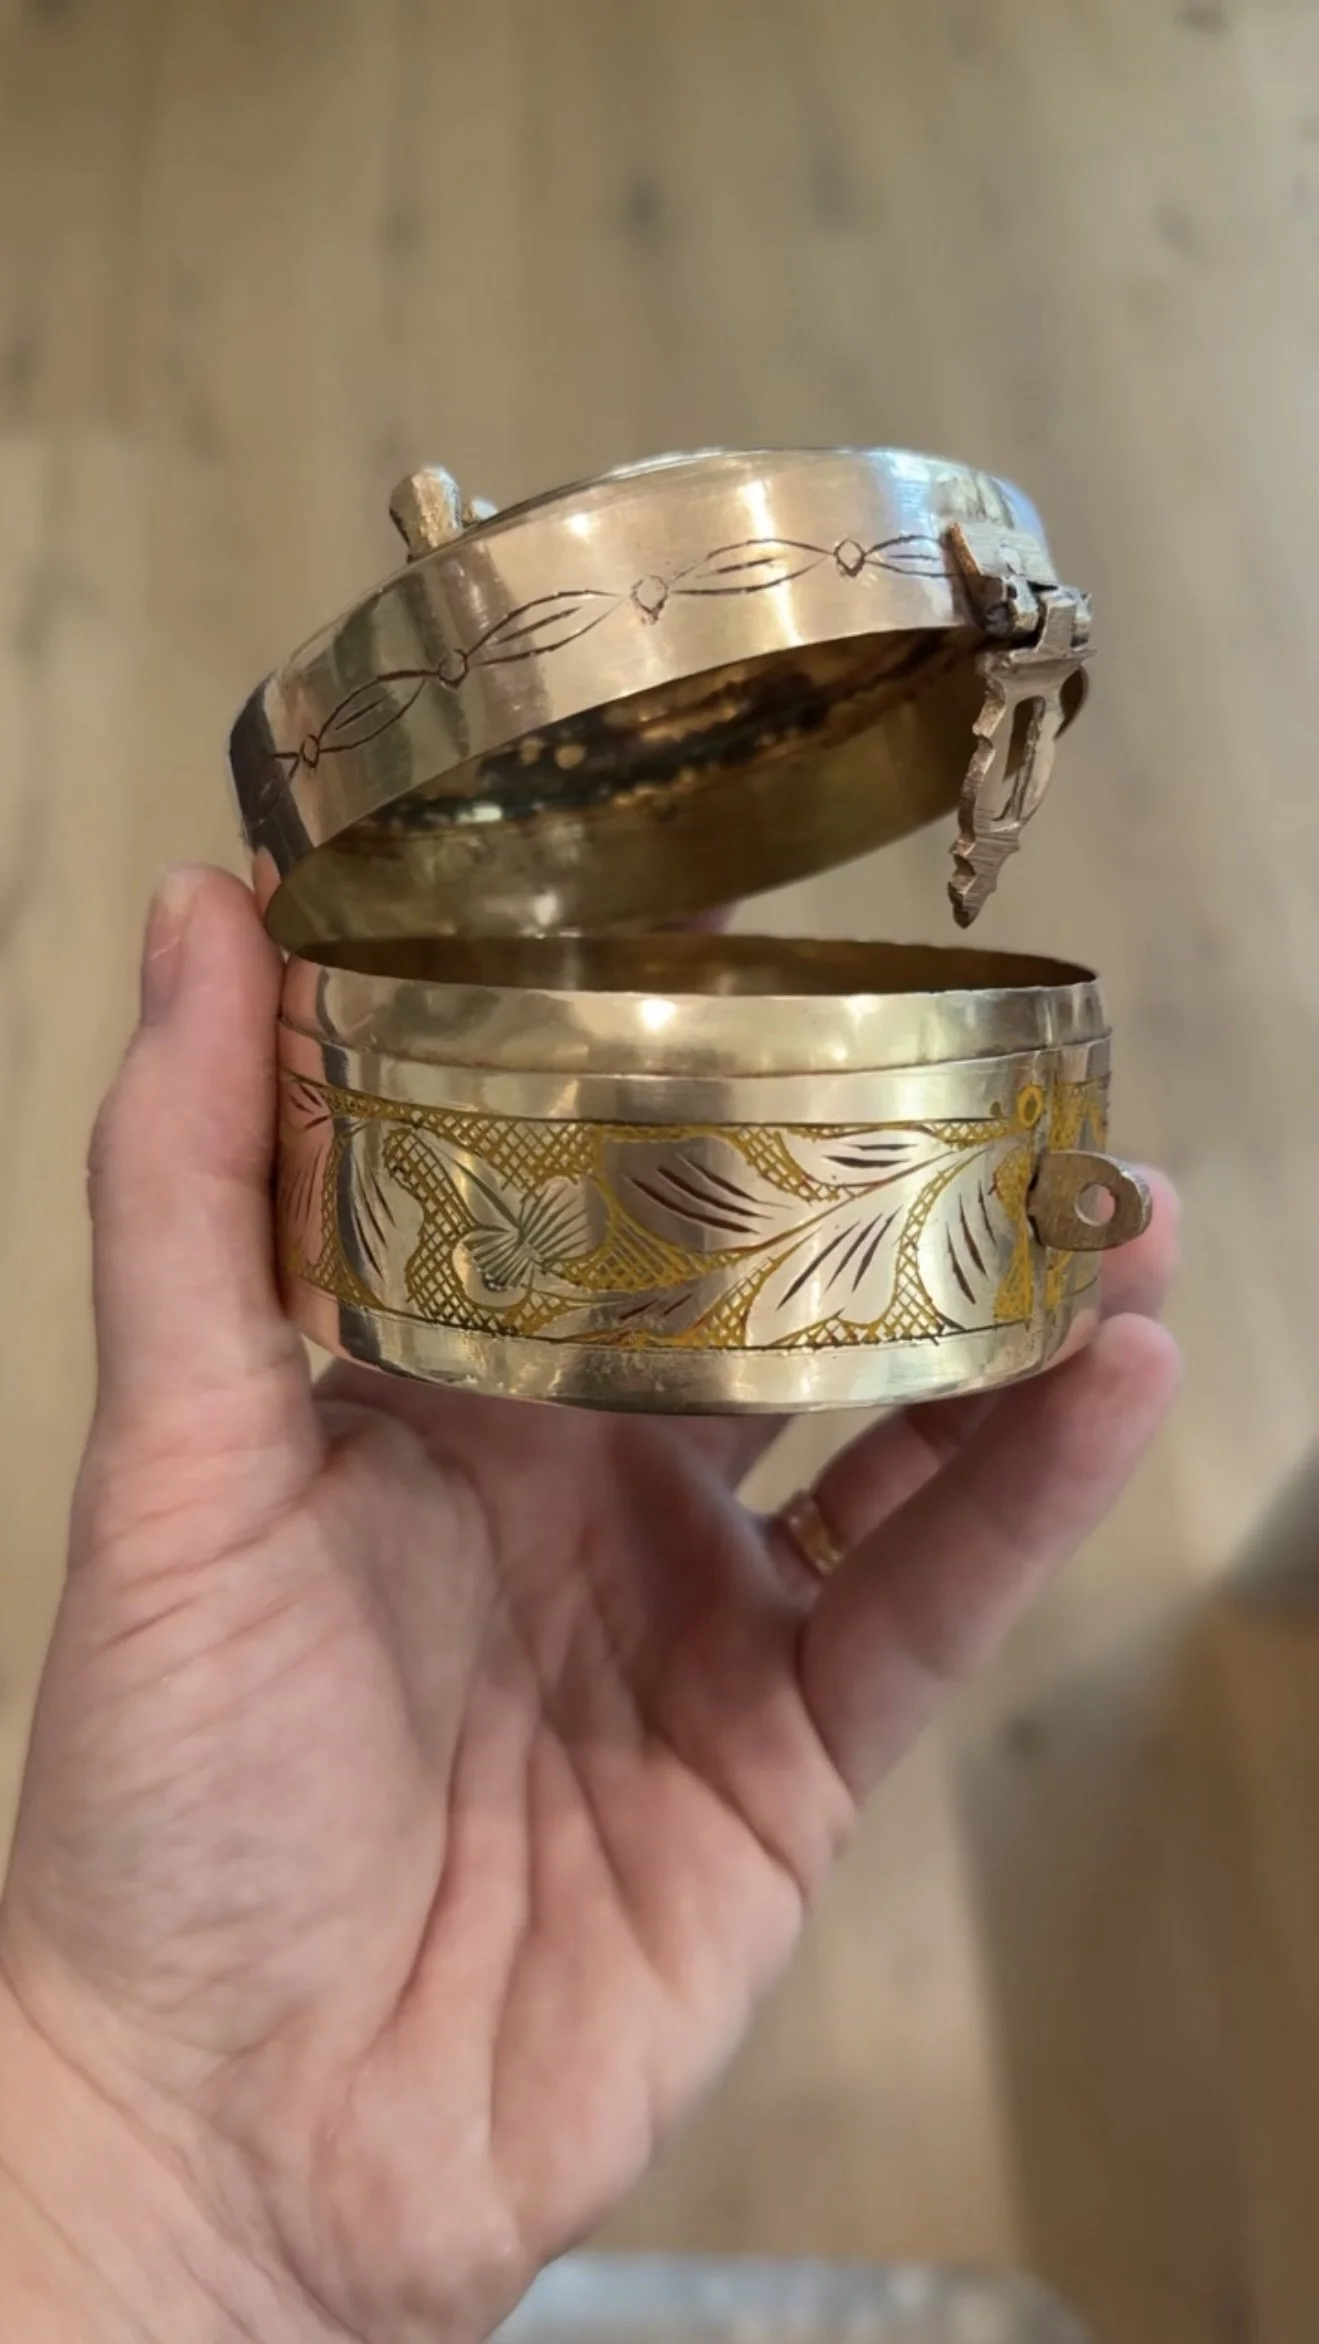
How to Clean Brass and Make It Shine Like New
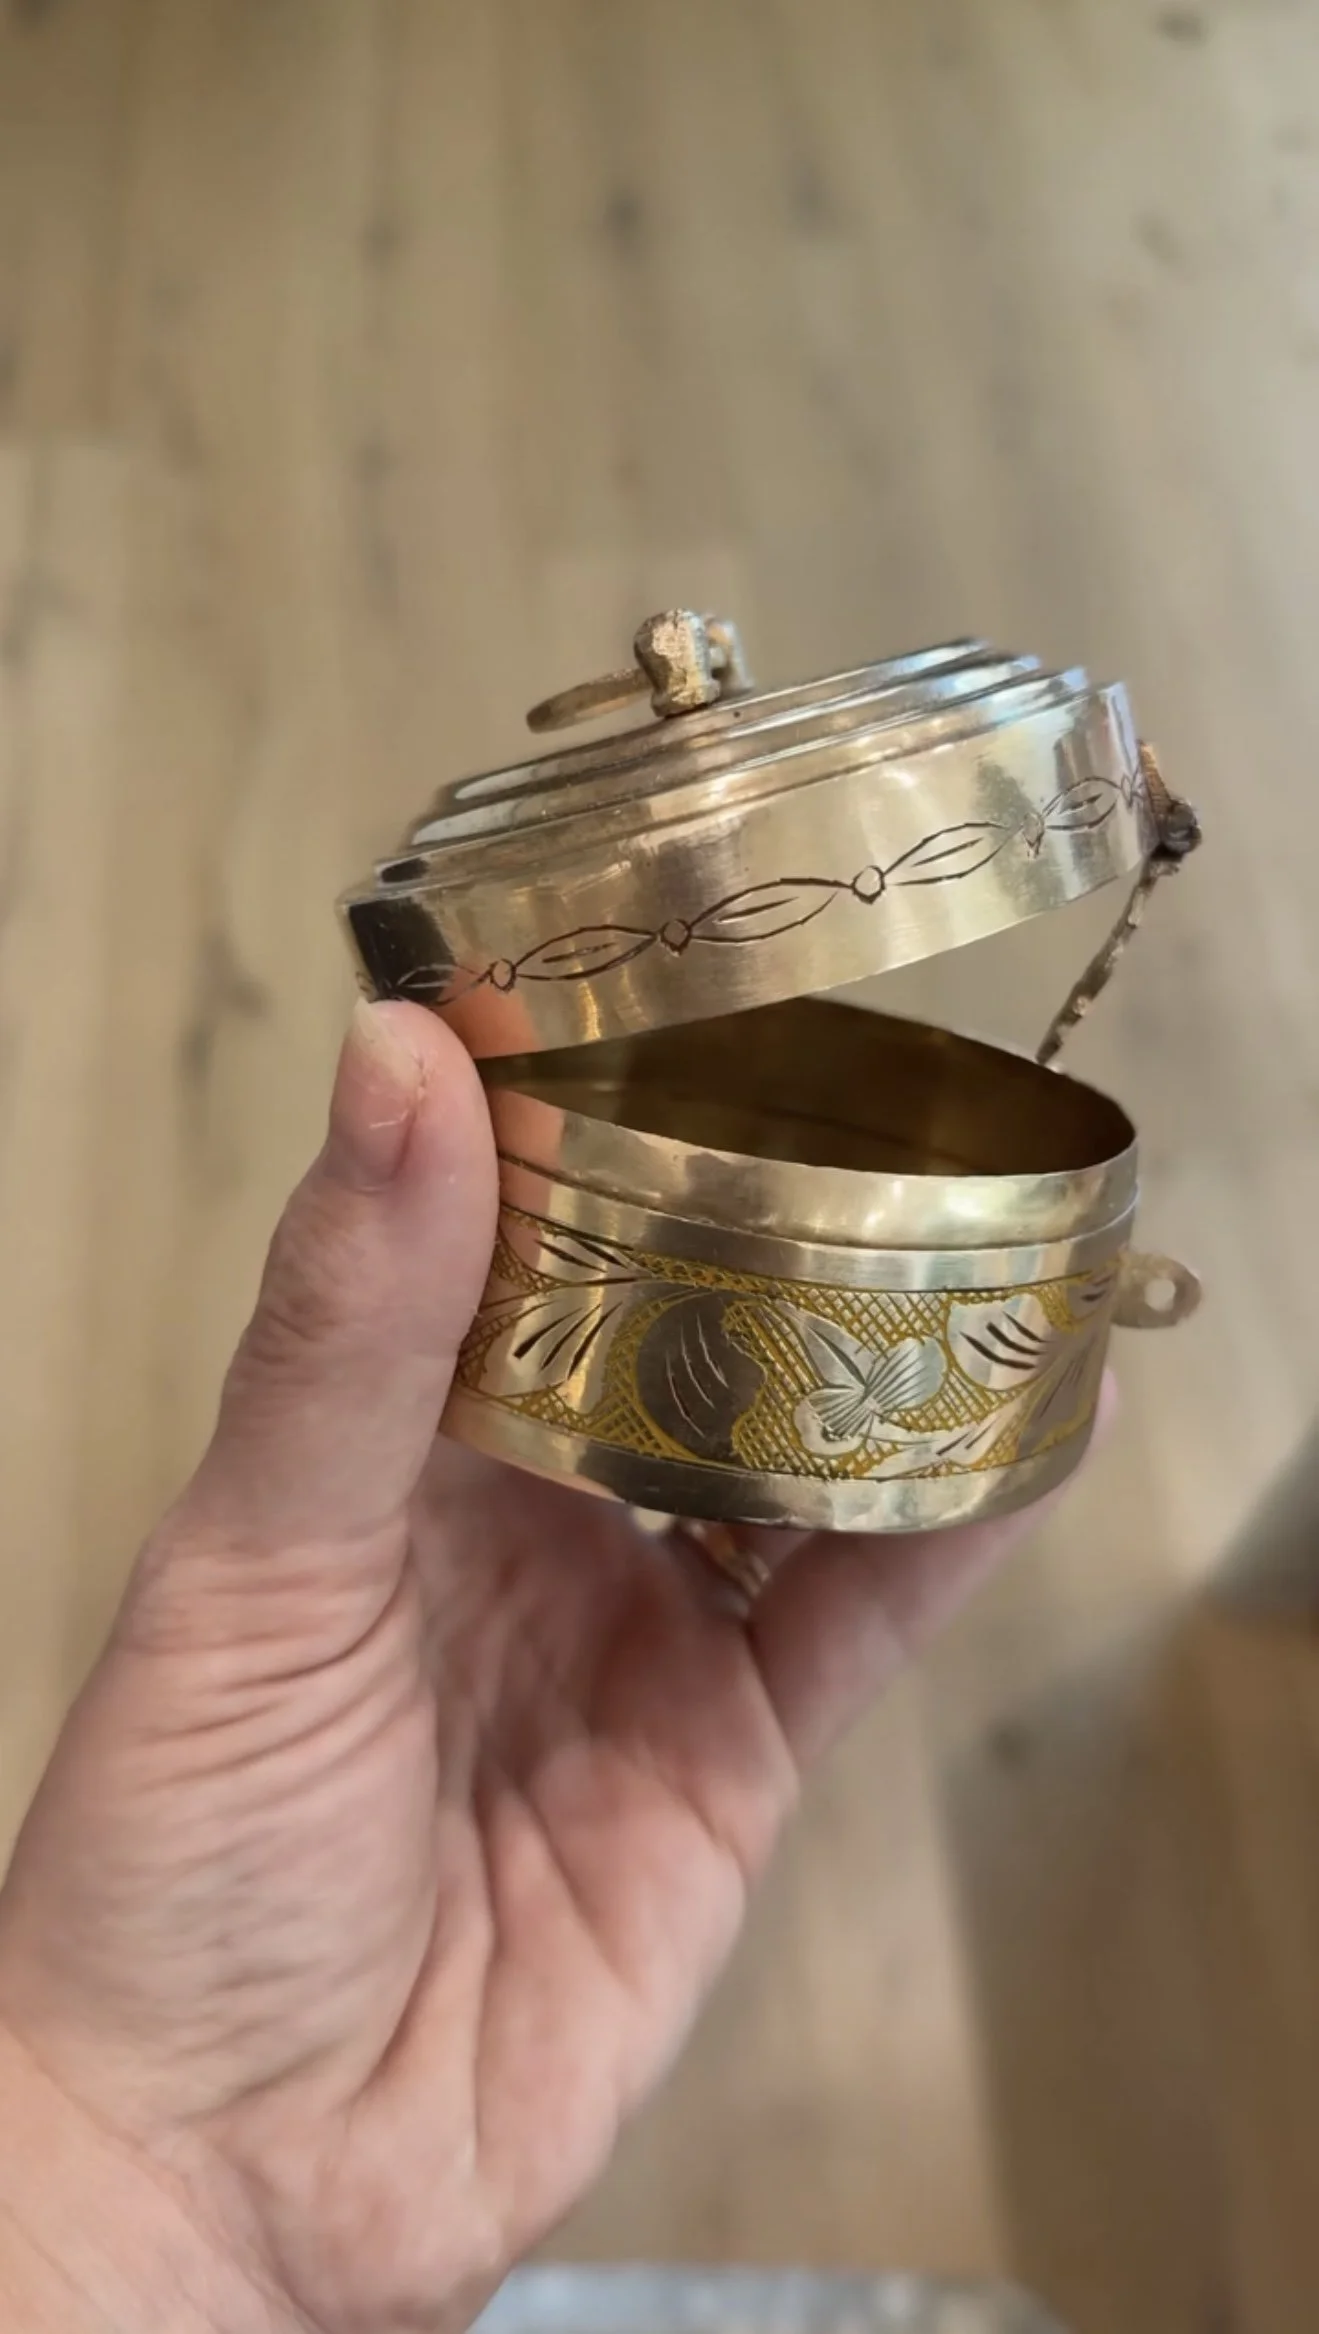

How to Clean Brass
Brass is one of those materials that can look incredibly luxe—or incredibly grimy, depending on how much love it’s been given lately. I’m all for a good patina, but sometimes you just want your brass to shine. So let’s talk brass cleaning: the easy, no-fuss kind.
I recently gave one of my brass pieces a little spa day, and wow, the before and after is satisfying. Here’s how I did it:


The Process:
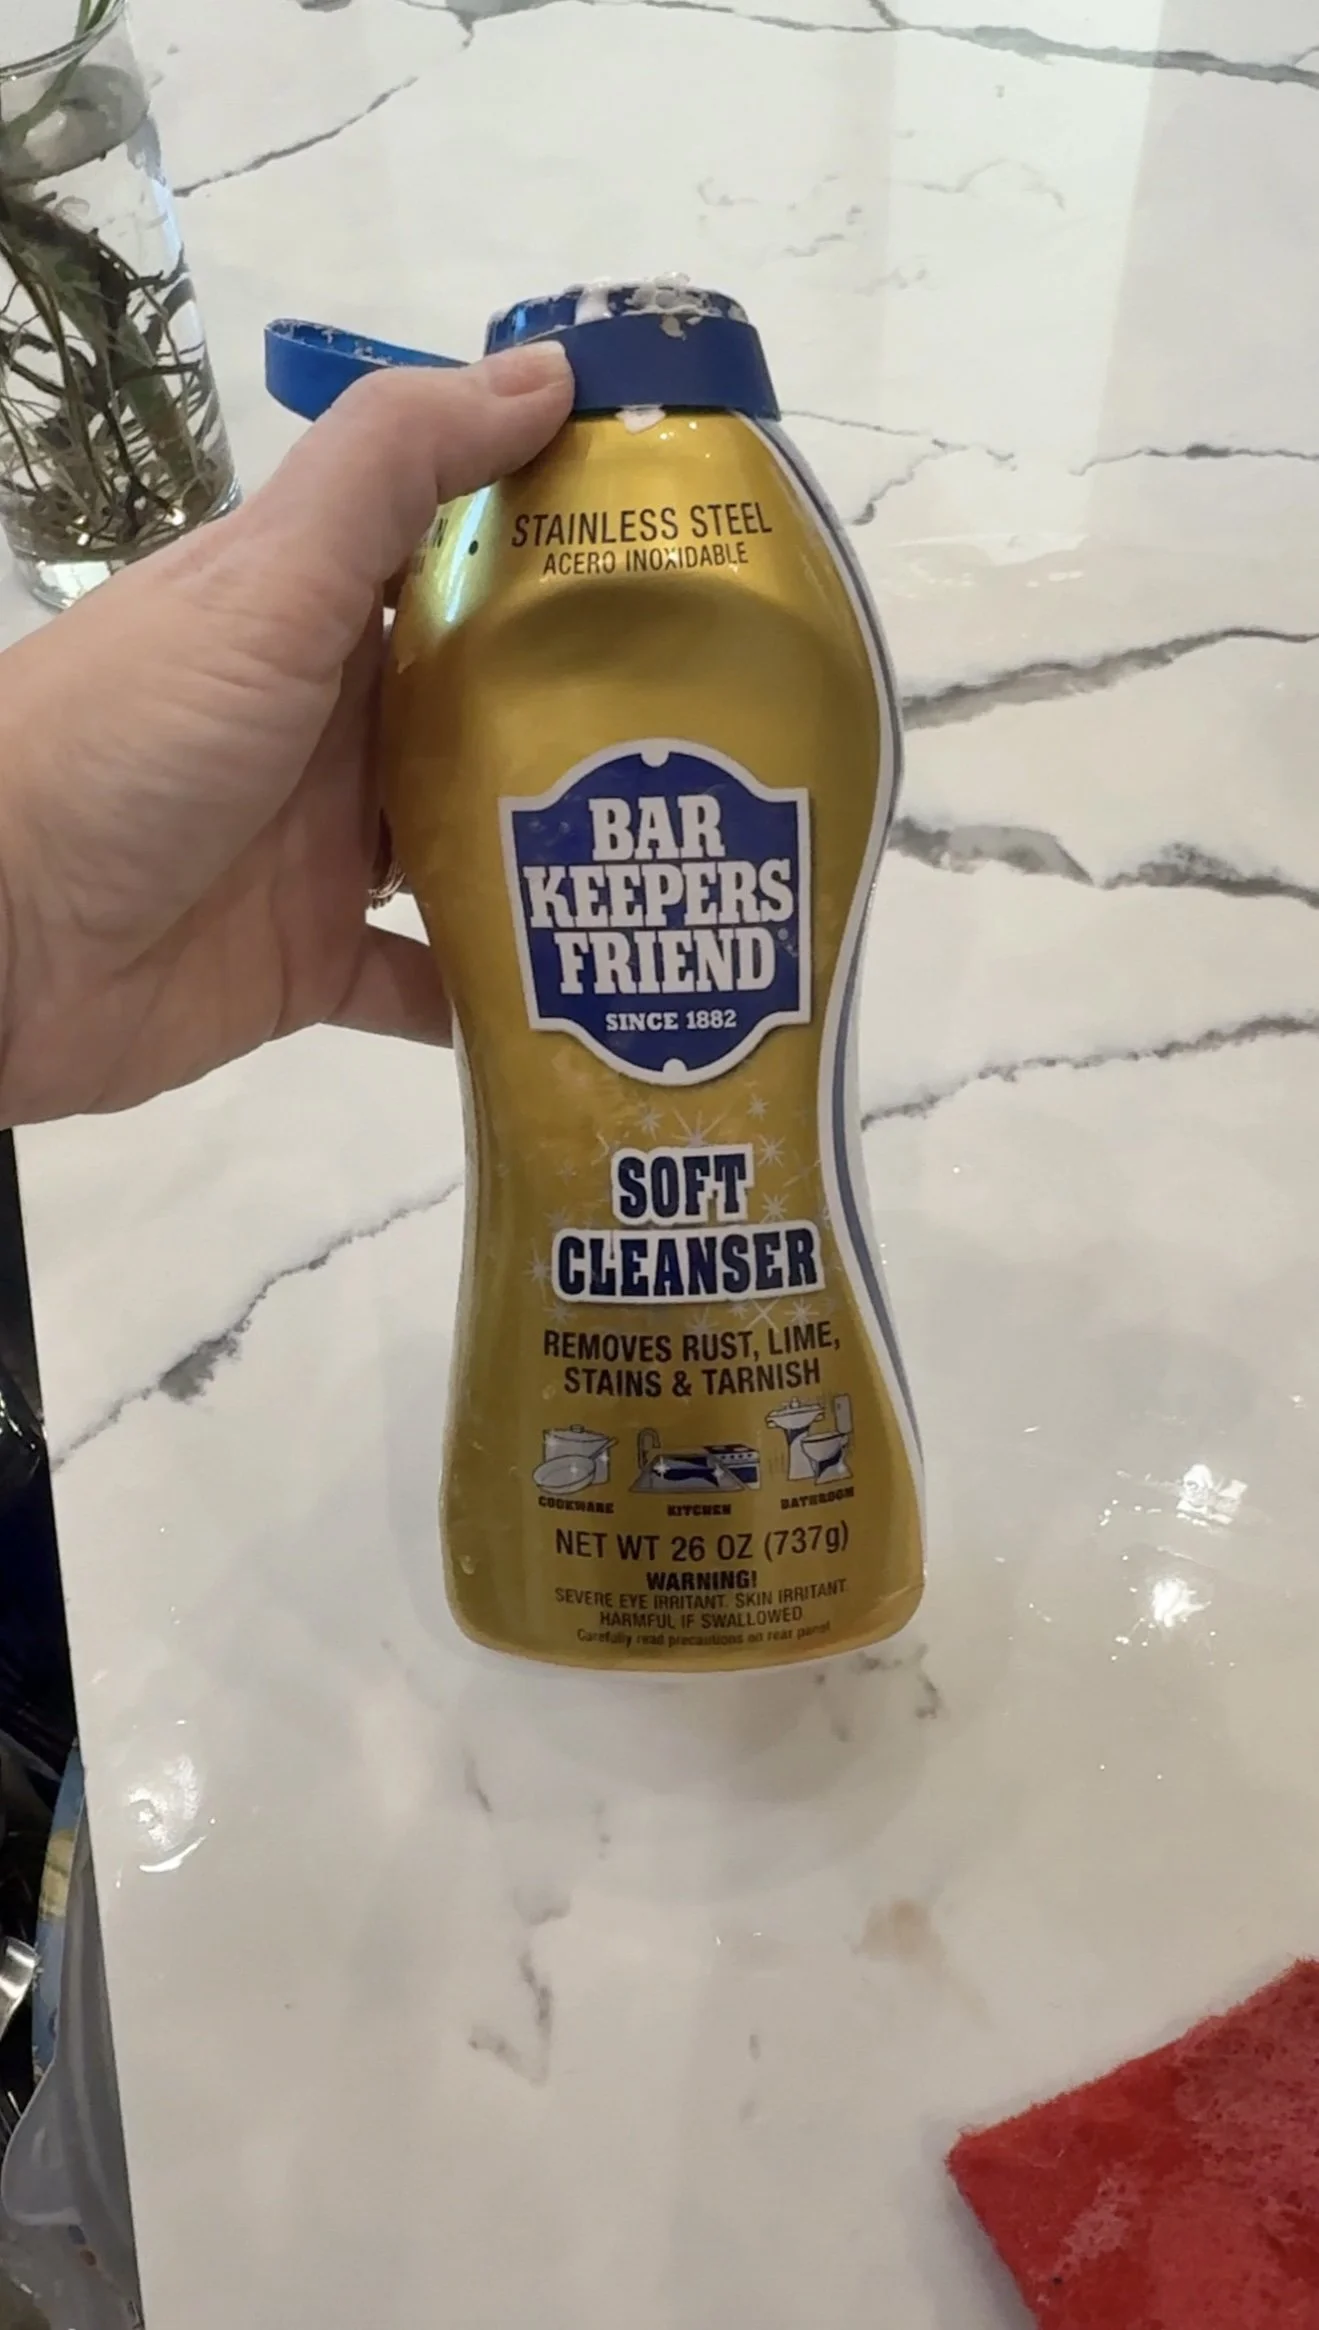
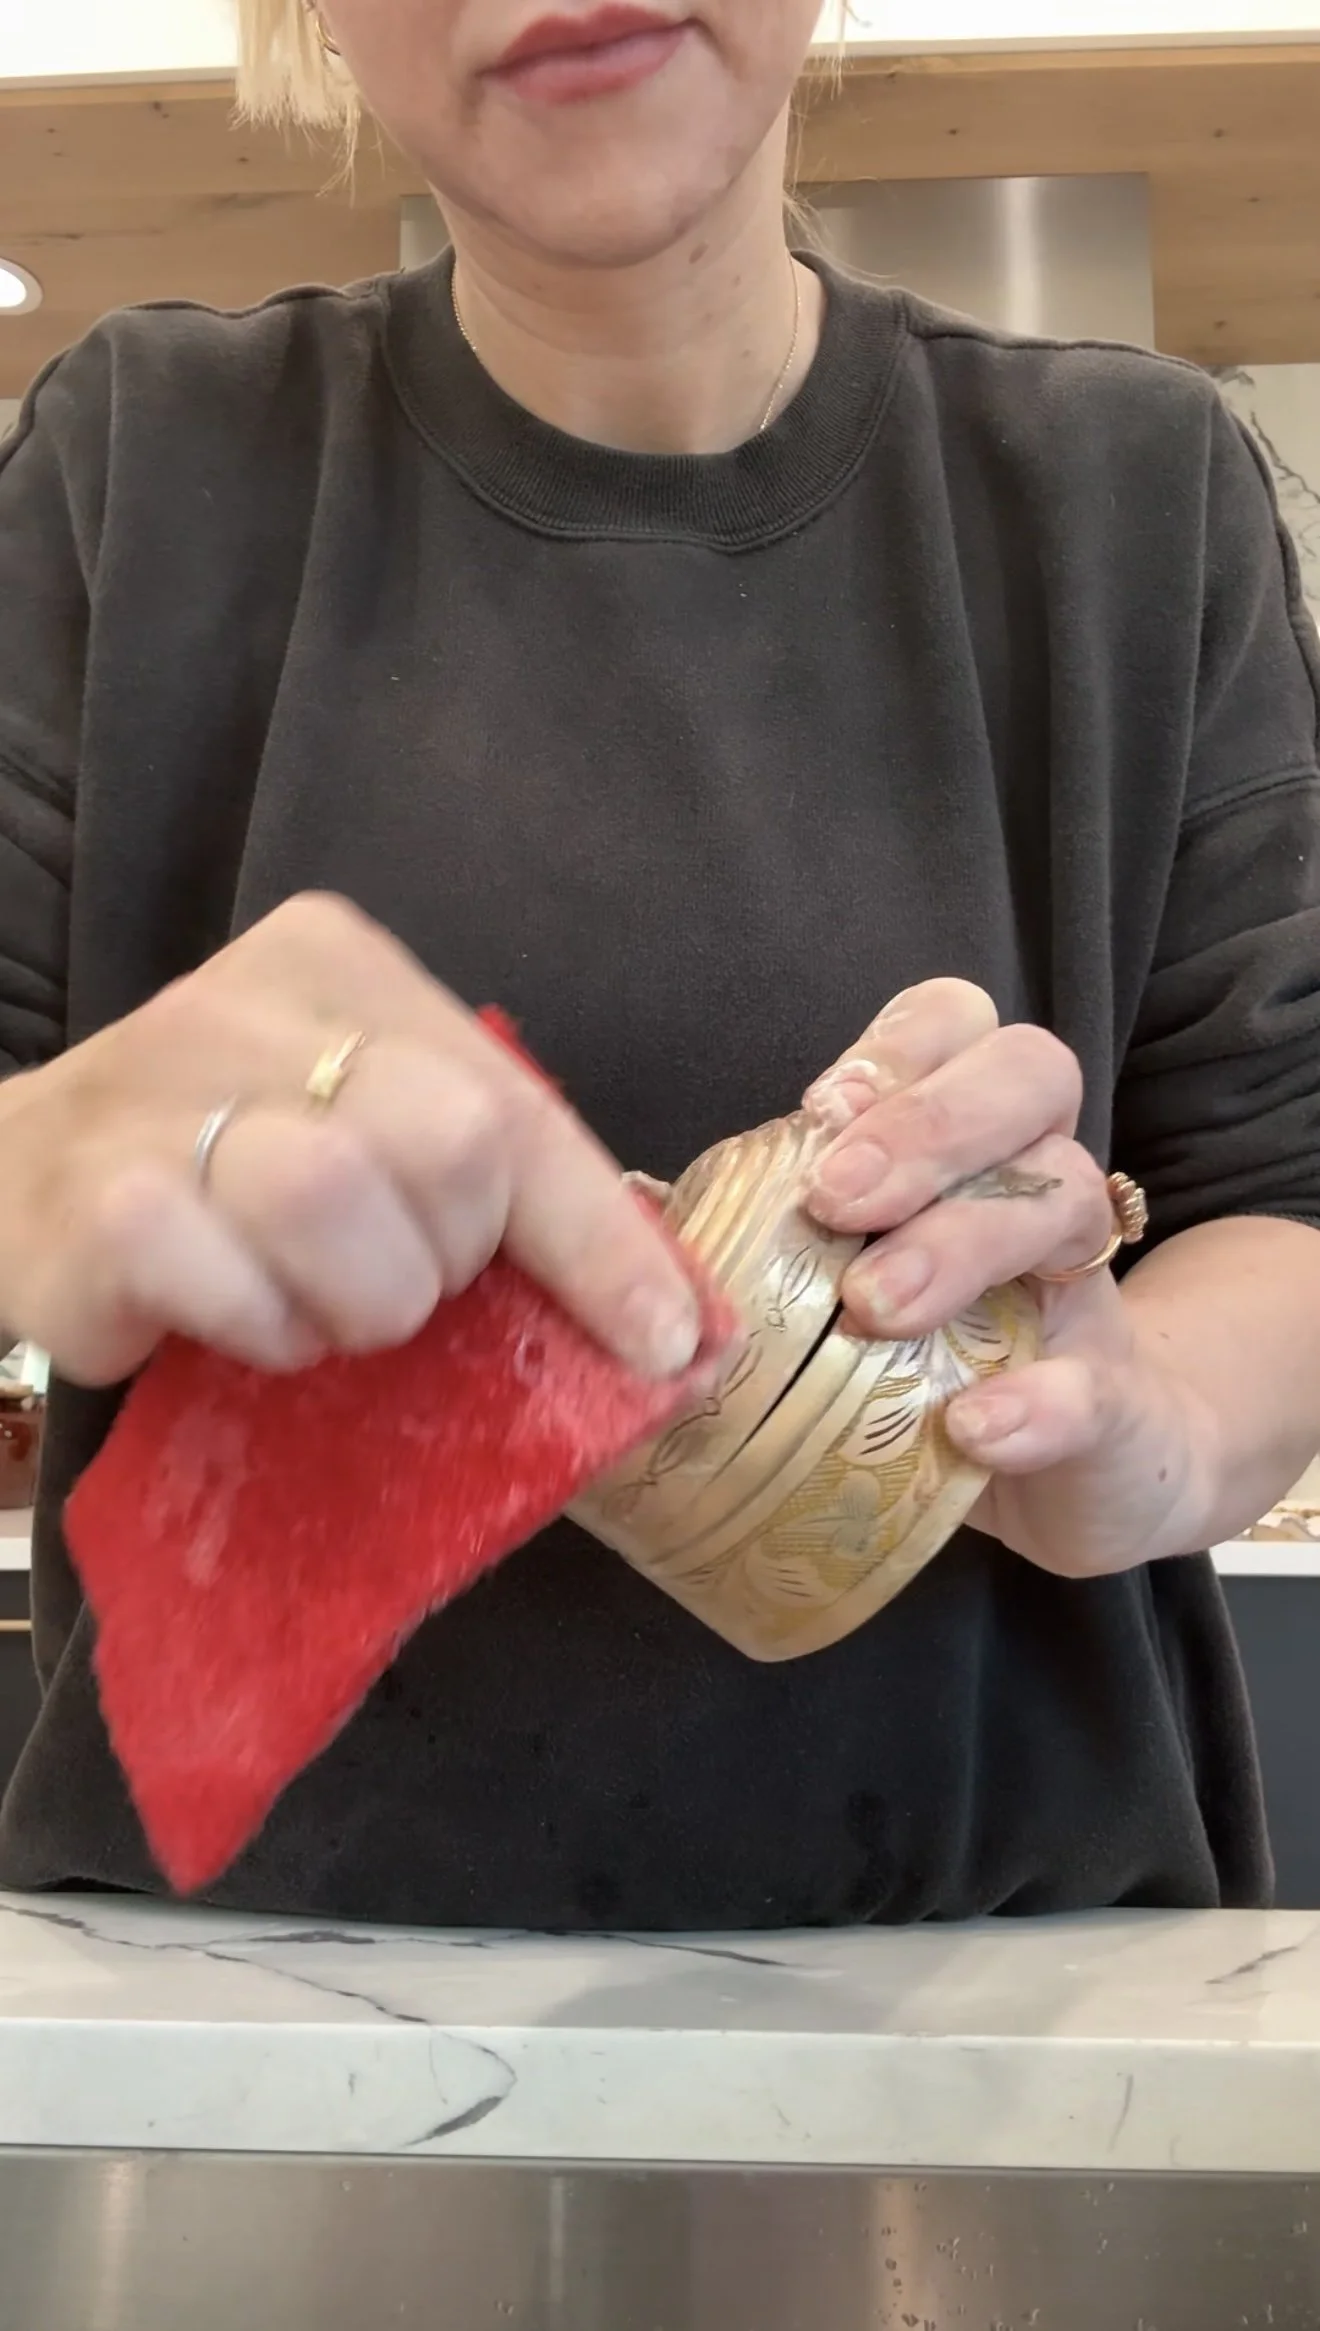
Give it a gentle wash. Start by mixing a little dish soap with warm water and wiping down your brass piece to get rid of any surface dust or grime. This helps prep it for a deeper clean.
Get scrubbing. This is where Bar Keepers Friend comes in. Squirt a little directly onto the brass, and gently rub in circles with your fingers (wear gloves!) or the cook top pad. For tight spots, a toothbrush works like magic.
Rinse and wipe dry. Once you’re happy with the shine, rinse off any residue and dry it completely with a soft towel. Don't leave it wet because moisture is brass’s enemy.
Optional: Buff it. If you’re feeling extra, go in with a dry microfiber cloth for a final buff. It makes everything glow.


A Few Tips:
Always test a small hidden spot first, just in case your piece is brass-plated instead of solid brass.
Don’t go too hard with abrasives—brass is tough, but not invincible.
Regular touch-ups are easier than deep cleans, so try wiping things down every so often.
Brass doesn’t have to be high maintenance. With just a few minutes and some elbow grease, you can bring that gorgeous golden glow back to life. And trust me, it’s weirdly satisfying.
IF YOU ENJOYED THIS POST, YOU MIGHT BE INTERESTED IN How i covered the glass doors of my cabinet!
FOLLOW ME ON MY SOCIALS!

Small Spaces Can Handle Big Color

I used to think small spaces needed to stay light and neutral, like they were shy or something. But then I found out about color drenching, and everything changed. If you haven’t heard of it, color drenching is when you use one bold color across the walls, trim, and even the ceiling. It sounds intense, right? It is. In the best possible way.
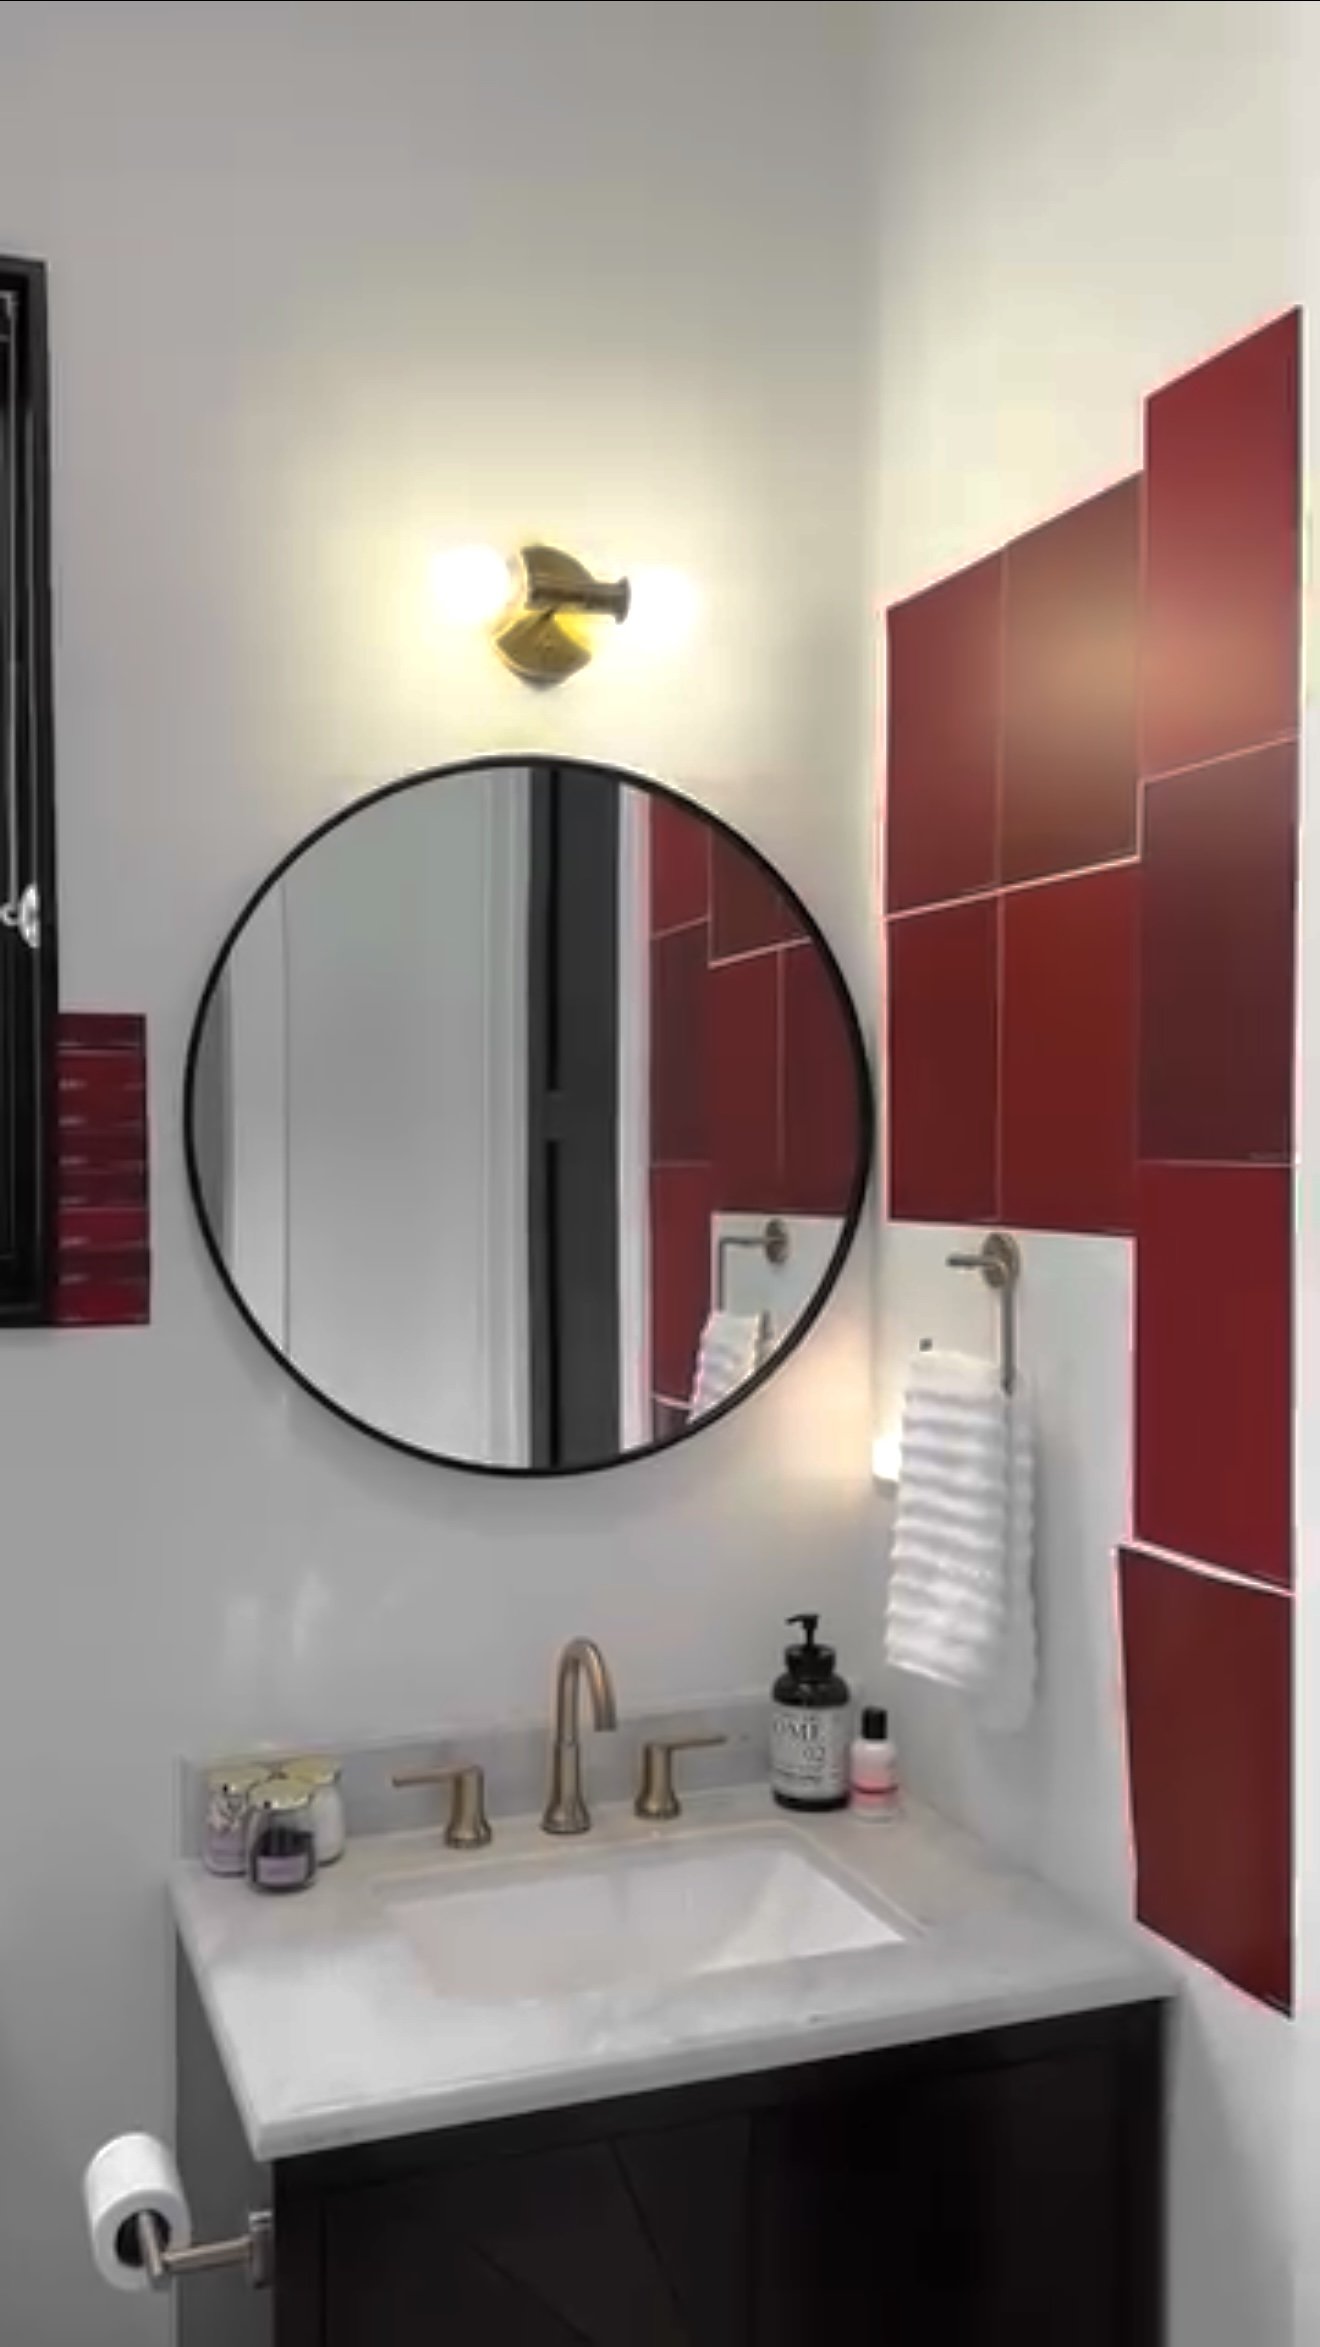
So naturally, I went all in and painted our bathroom Salute by Sherwin Williams.


This space went from basic to bold faster than I could light a taper candle. I leaned into the drama with warm, moody walls in Salute by Sherwin Williams, wrapping the whole room in this deep, saturated red. It completely transformed the space into a little jewel box, that is rich, layered, and full of personality. It’s amazing what the right color can do in a small room.
Let’s talk about the details, because they really make the room. The gold mirror and vintage-style light fixture set the tone right away, but it’s the smaller touches that really bring it home. The curved brass faucet, the toilet lever, and the matching towel hook all tie into the warm, moody palette. The candles add that soft, cozy glow, and the shower curtain adds just enough drama. It’s giving "tiny royal retreat" in the best way.


Here’s something to keep in mind if you’re thinking about trying a bold color yourself: lighting makes a big difference. The same paint color can look completely different depending on the natural and artificial light in your space. Since this bathroom doesn’t get a ton of natural light, I leaned into the warmth and picked a rich red that glows under the sconces and candlelight. If your room gets a lot of sun, a deep navy or forest green might give you that same cozy effect without feeling too heavy. Cool light will bring out cooler tones, and warm bulbs will make everything feel a little more golden and soft.


People always say small rooms need light colors to feel bigger, but I think they just need confidence. This bathroom proves that going bold in a small space doesn't make it feel smaller. It makes it feel intentional. It makes it feel designed.
So if you’ve been tempted to try something dramatic, especially in a space that’s a little smaller, this is your sign. Go for the deep green, the inky blue, the moody plum. Or, if you’re really ready to have fun, go full red.
You just might fall in love with your house all over again.
Links at a Glance
Black Round Mirror (Before Picture)
Ruffled Shower Curtain (Before Picture)
Vintage-Inspired Light Fixture
Brass Plate - Antique Store Find
Gold Frame - Antique Store Find