
Vegan Boxed Brownies (With a Coffee Twist)

My Go-To Vegan Brownie Hack (Even Though I’m Not Vegan)
Okay, confession time: I’m not vegan. I love butter and cheese as much as the next person. But so many of my friends and family are either vegan or dairy-free, and I always want everyone to feel included when they come over. Dessert shouldn’t be something people have to skip, especially when it’s something as easy (and delicious) as brownies.
So here’s the little hack I use all the time: boxed brownie mix. Yep, most of them are already vegan and have no eggs or dairy in the dry mix. You just need to swap out the usual wet ingredients for a few easy alternatives. I’ve tested this one a bunch of times, and it always turns out rich, fudgy, and honestly just as good as the “regular” kind. The coffee gives it a deeper flavor, the flax eggs hold everything together, and the texture is chef’s kiss.


Vegan Boxed Brownies (With a Coffee Twist)
Ingredients:
2 tablespoons flaxseed meal
6 tablespoons water
1 box Duncan Hines brownie mix
¼ teaspoon baking powder
¼ cup vegan butter, melted (there are so many great brands out there now!)
¼ cup oil
½ cup coffee (any kind—whatever you have brewed!)


Directions:
Preheat your oven to 350°F and spray an 8x12” baking pan with nonstick spray.
Mix the flaxseed meal with the water and let it sit for 5 minutes—that’s your egg replacer.
In a large bowl, combine the brownie mix and baking powder.
Add the flax eggs, melted butter, oil, and coffee. Stir it all up until it’s fully combined.
Pour the batter into your pan and smooth it out.
Bake for 25 minutes. If you’re using an 8x8 pan instead, go for 30-35 minutes.
Let the brownies cool (this part is hard), then slice them with a plastic knife for cleaner cuts.


That’s it. So simple. I’ve brought these to parties, served them after dinner, and packed them in lunchboxes—and no one has ever guessed they’re vegan. They just ask for the recipe.
Even if you’re not dairy-free yourself, having a go-to vegan dessert in your back pocket is such a thoughtful touch. And let’s be real, brownies are never a bad idea.
Let me know if you try it!
IF YOU ENJOYED THIS POST, YOU MIGHT BE INTERESTED IN My vegan thanksgiving recipes!
FOLLOW ME ON MY SOCIALS!

How to Make Floral Ice Cubes for Your Next Party

If you’re hosting anything, from a backyard hangout to a baby shower, you have to try floral ice cubes. Trust me, this is one of those DIYs that looks super fancy but is actually incredibly easy. They take almost no time to make, but they instantly make your setup feel thoughtful, festive, and way more elevated.
I used them in a clear drink tub and they totally stole the show. People were way more excited about the ice than I expected (like, full-on compliments about ice cubes). It’s such a simple touch, but it adds this fun, creative vibe that makes everything feel a little extra special without any real effort.


Here’s how I made them:
I used a mix of dried flowers, real flowers, and even a few fake ones I had lying around. Don’t overthink it! Just grab whatever looks pretty! I stuffed each section of the ice cube tray with petals and blooms, and didn’t worry about making them perfect. For the roses, I found a little trick: if you twist them quickly between your palms, the petals come off super easily. It’s oddly satisfying and made the whole process go faster.
Once your tray is packed with floral goodness, just fill it to the top with water and freeze overnight. No need to get fancy with layers or stages, you just pop it in the freezer and forget it.
One thing to keep in mind: if you’re planning to use these cubes in drinks (like cocktails or lemonade), make sure you’re using edible flowers. Not all flowers are safe to consume, so it’s worth double-checking. But if they’re just for chilling wine bottles or decorating a drink tub, feel free to use any combination of dried, real, or faux.


In the morning, you’ll have the prettiest ice cubes ever, like little frozen flower arrangements. I dumped mine into a clear drink tub with sparkling waters and wine bottles, and they instantly made everything feel so much more fun and festive. You could also pop them into pitchers, a punch bowl, or even individual glasses if you’re going all out. However you use them, they’re guaranteed to make people stop and say, “Wait…did you make these?!”
It’s such a small detail, but it really pulls everything together and makes your setup feel intentional. One of those easy little wins that looks high-effort but takes barely any time at all.
Give it a try and let me know how yours turn out, I’d love to see!
Links At A Glance
IF YOU ENJOYED THIS POST, YOU MIGHT BE INTERESTED IN how to make a hot chocolate bar!
FOLLOW ME ON MY SOCIALS!

The Amazon Curtains That I Love
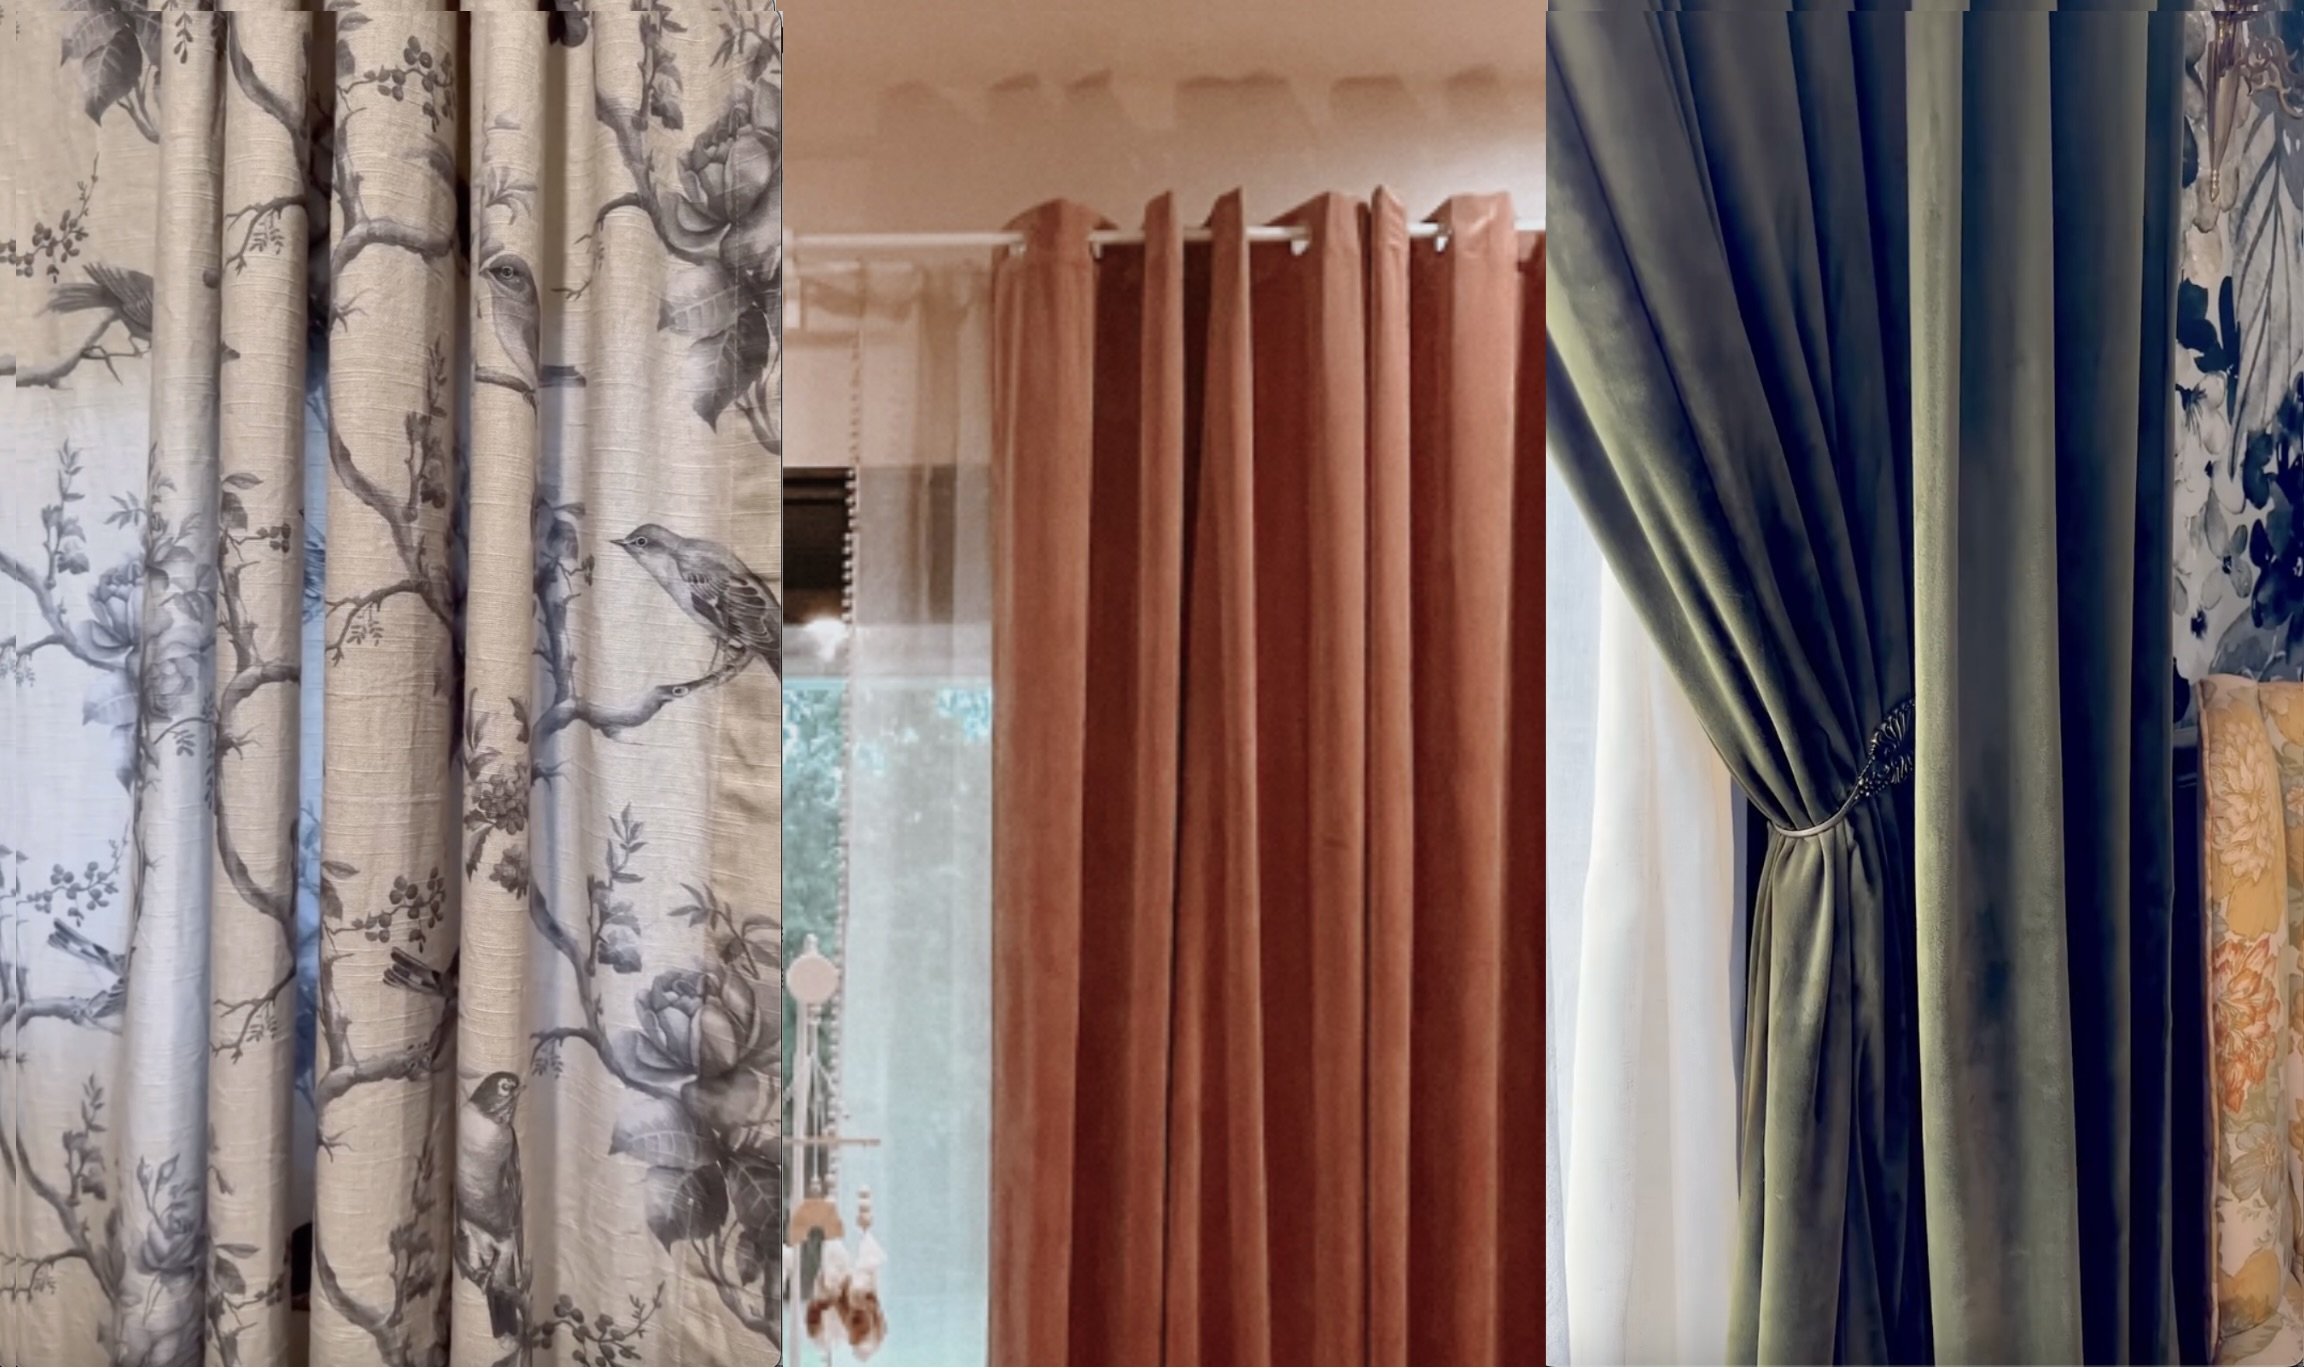
Curtains are one of those things that seem small until you realize how much they totally change a room. I’ve browsed so many over the years. Some curtains are too thin, others look shiny or stiff, and plenty just feel kind of sad once they're up. Some of my absolute favorite curtains in my home are actually from Amazon, so I figured I’d round them up and share exactly what I have hanging in each space.


We already have shades on the windows, so I didn’t need blackout curtains here. I just wanted something with a little texture and pattern that would let the light in when I opened the blinds. The ones I found are a soft, creamy linen-look panel with a design that adds interest without feeling busy. You can hang them with the back tabs for a neat, pleated look or use the rod pocket for something more relaxed. They hang beautifully either way, feel way more expensive than they are, and don’t wrinkle like crazy straight out of the package. Exactly what I was looking for.

This setup might be my favorite. I layered two sets: an olive green velvet panel on the outside and a light-filtering linen-style curtain behind it. The velvet adds this warm, moody vibe to the room (perfect for all the vintage details in here), and the layered look makes the whole space feel a little more styled without a ton of effort. It’s a super easy combo that makes a big impact and pulls the whole space together.


Her room is a little more fun and playful, so I mixed a soft blush curtain with sheer white panels that have the cutest little pom pom trim. The blush ones have a light blackout lining, which is perfect for keeping her room cool and nap-friendly, and the pom pom detail adds just the right touch of whimsy when the curtains are open. Together, they feel sweet and polished without being over-the-top. And she loves them, which is a bonus.
I didn’t expect to love Amazon curtains as much as I do, but these really came through. Each one added something different to the room, whether it was softness, color, texture, or just making the space feel more finished. And honestly, I couldn’t be happier with how they turned out.
Links At A Glance
Primary Bedroom
Lamp (Antique Store)
Nightstand (TJ Maxx)
Office
Lamp (Thrifted)
My Daughter’s Room
Bed (Facebook Marketplace)
IF YOU ENJOYED THIS POST, YOU MIGHT BE INTERESTED IN my Hallway Makeover!
FOLLOW ME ON MY SOCIALS!

DIY Personalized Cupcake Toppers

Let’s talk about one of my favorite little party details: personalized cupcake toppers. They’re the kind of thing that makes a dessert table feel extra special, and the best part is you can totally make them yourself. No fancy tools required, just a little crafting and some patience.
I made these for my daughter’s 1st birthday party and had so much fun putting them together. Here's how you can do the same:
What You'll Need:
Photos with the face big enough to actually show up once it’s cut out


How To Make Them
Pick your photos
Start by choosing clear, front-facing photos where the person's face is large enough to show up well once cut out. I used Canva to zoom in and fit two to three faces per page. You want the faces to be big enough to stand out on top of a cupcake, so don’t be afraid to crop in close.Print and cut
I printed mine on photo paper using my home photo printer, but you can absolutely get them printed anywhere you normally develop photos. Once they’re printed, just cut around each face. They end up looking so cute and personal.Attach to skewers
Flip the face cutouts over and tape a skewer or toothpick to the back. That’s it. No fancy supplies or tools needed. You can also add a second face on the back if you want them double-sided, but I usually keep it simple.Stick them in and enjoy
Once they’re ready, just pop them into your cupcakes. These always get a good laugh and make the whole party feel a little more personal and fun. They're perfect for birthdays, graduations, bachelorette parties, pretty much any celebration where faces on cupcakes would make people smile.


That’s all it takes. It’s a super quick and budget-friendly DIY that adds such a personal touch. I love how easy it is to switch up the style depending on the occasion: birthdays, showers, holidays, or even just for fun.
Let me know if you make some. I’d love to see how yours turn out!


IF YOU ENJOYED THIS POST, YOU MIGHT BE INTERESTED IN my daughter’s music themed 1st birthday party!
FOLLOW ME ON MY SOCIALS!

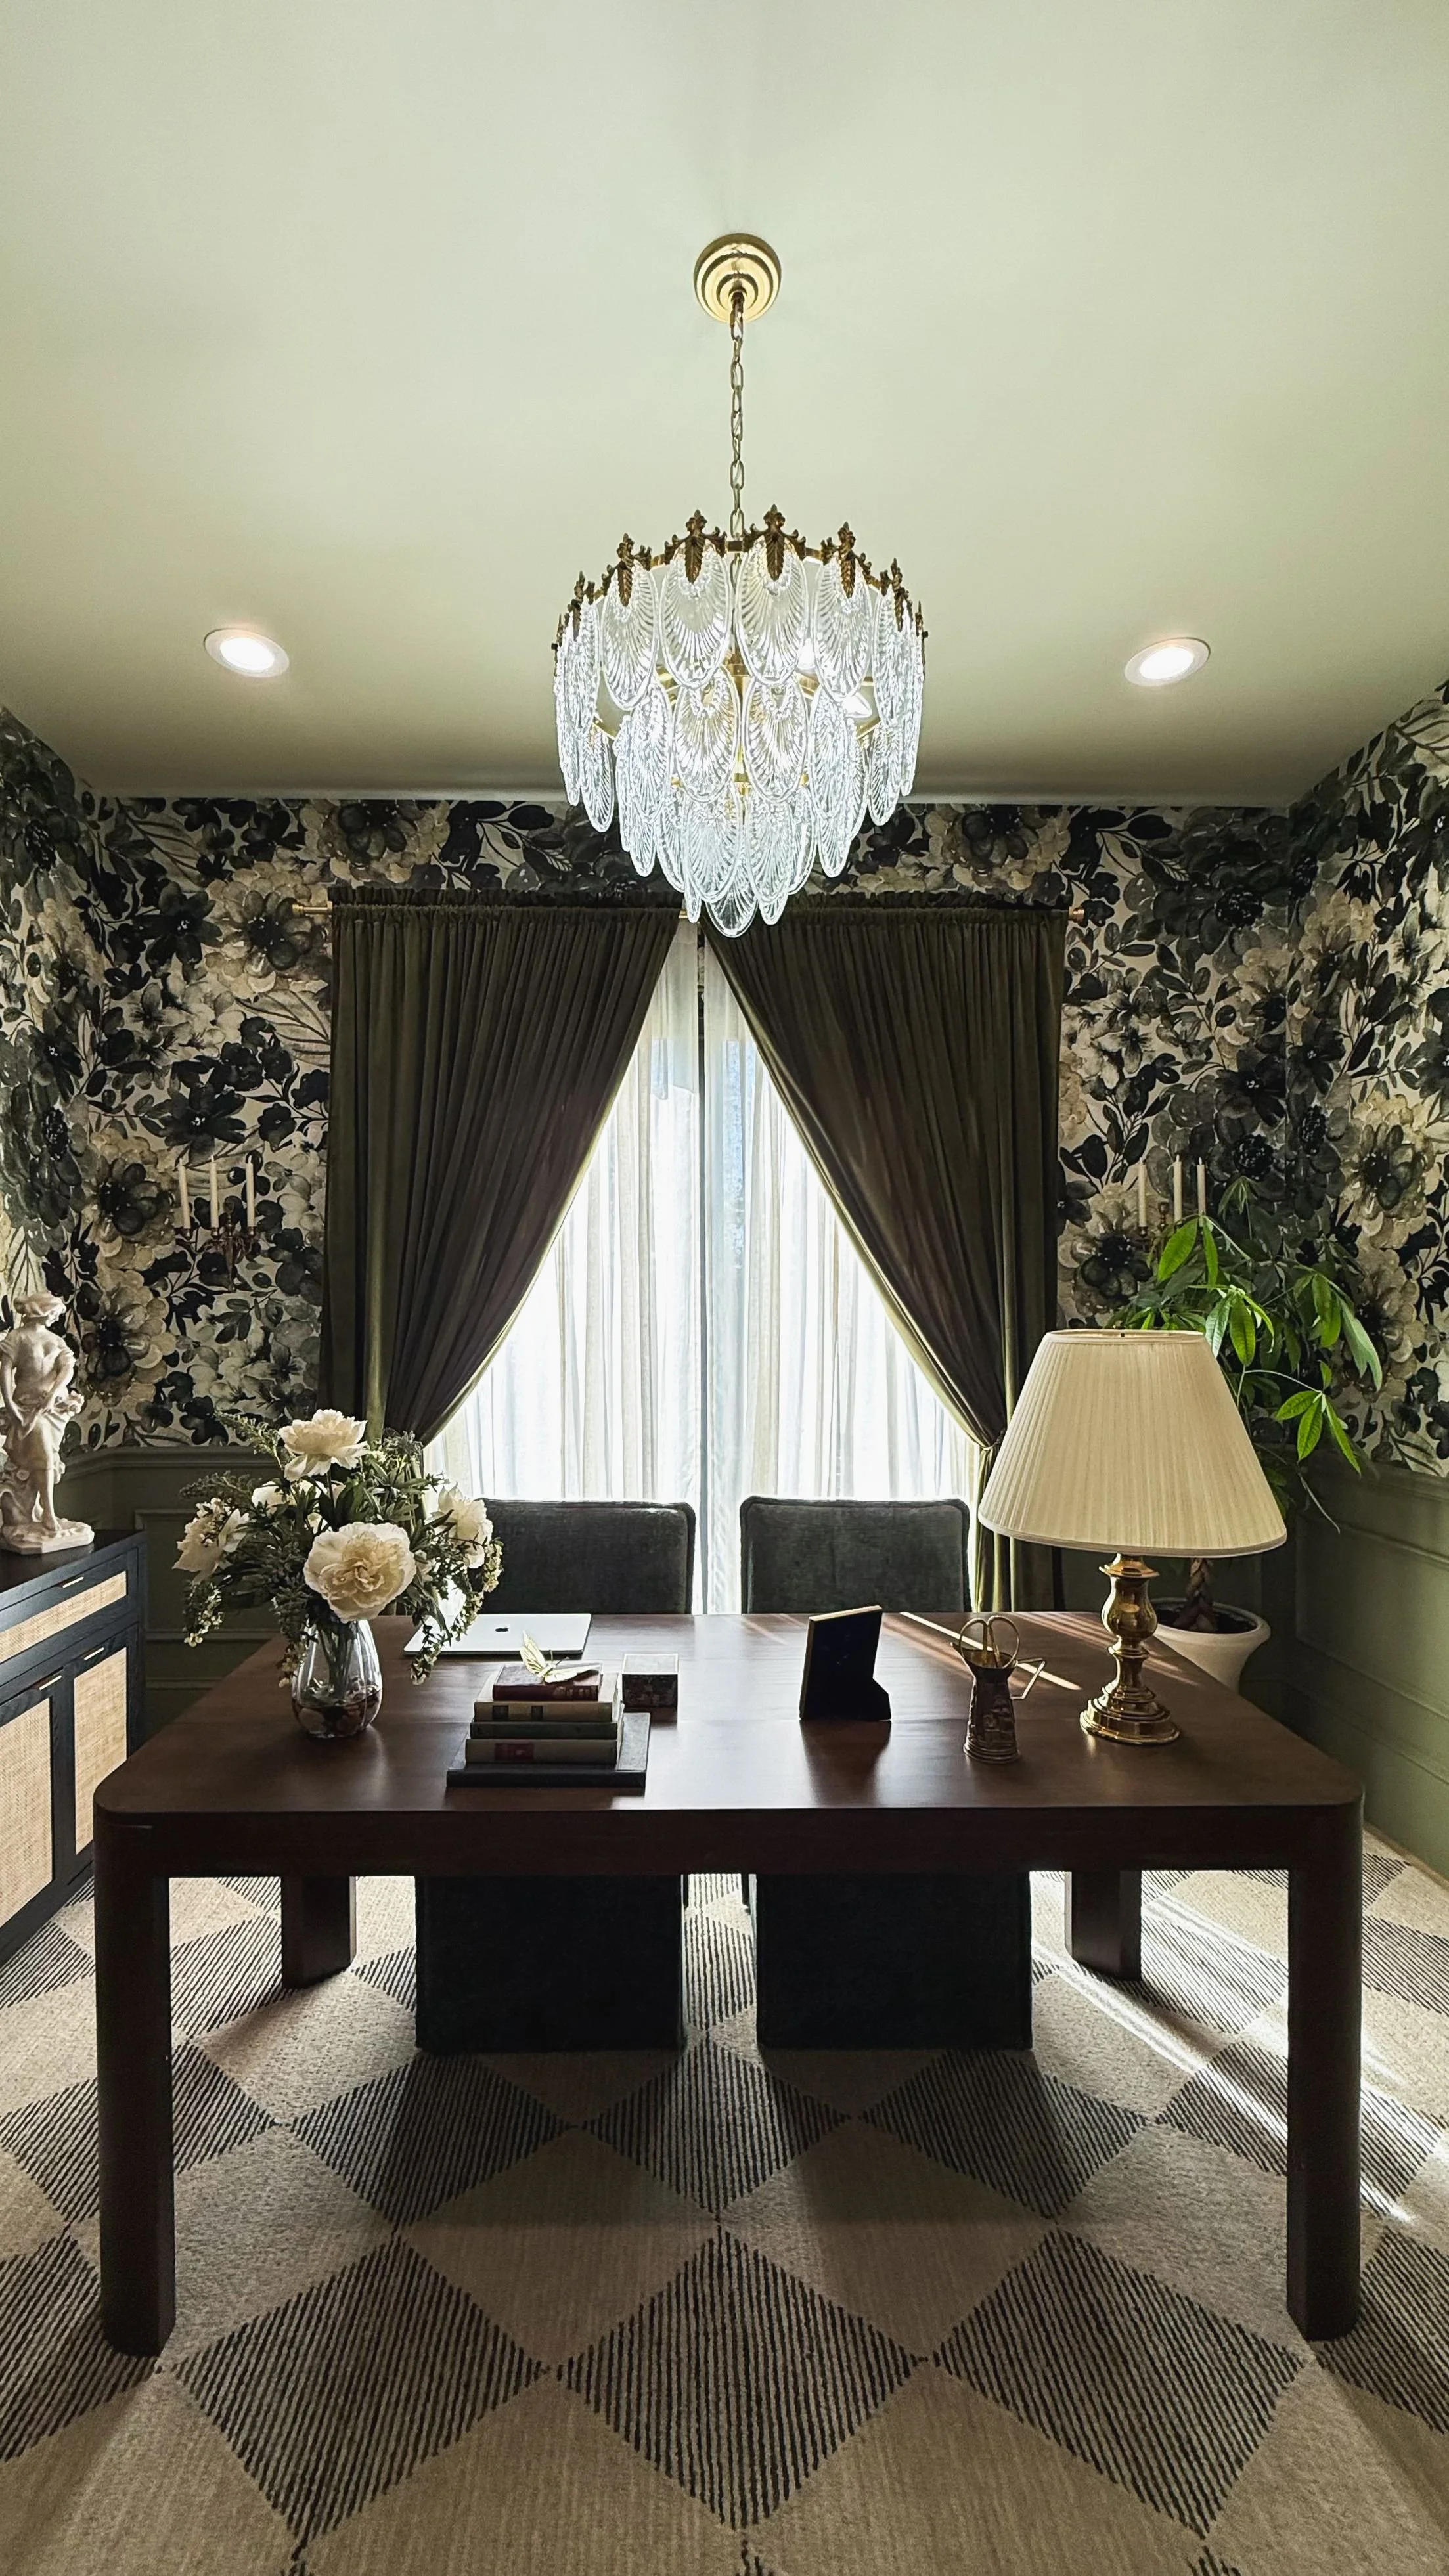
Vintage-Inspired Touches in the Hallway

I love how this hallway turned out, and I thought it’d be fun to share some of the little vintage-inspired details that give it its character. Most of these weren’t big projects, but they added so much charm once they were all layered in.


Let’s start with the lighting. I used can light converter kits to swap out the old recessed lights for these Amazon glass pendant lights, and I’m still not over how pretty they are. They have that antique-y feel but are easily available and at a great price point. The converter kit makes it super easy to turn a builder-basic can light into something with way more personality and I’ll be using these in future room makeovers.


Then I got kind of hooked on the gold details. The ornate light switch cover is such a small thing, but it instantly made the wall feel more styled. I also found gold outlet covers and even swapped out the door hinges to keep that vintage look consistent. It's one of those things no one really notices until they do, yet it brings the whole space together.


The doorknobs were another easy upgrade, and these have a crystal knob with a super pretty backplate that makes them feel like something you’d find in an old historic home. They make me smile every time I walk past them.
For the gallery wall, I used a combo of my favorite picture hooks and adhesive plate hangers. I love mixing in vintage plates, and these hangers make it easy to get that clean, floating look without any visible hardware.
It’s definitely one of those spaces that came together slowly, one little detail at a time. But now it feels layered and thoughtful—like it’s always been this way, in the best possible way.
Links At A Glance
IF YOU ENJOYED THIS POST, YOU MIGHT BE INTERESTED IN my Hallway Makeover!
FOLLOW ME ON MY SOCIALS!

How to Pick the Right Paint Color (the First Time)
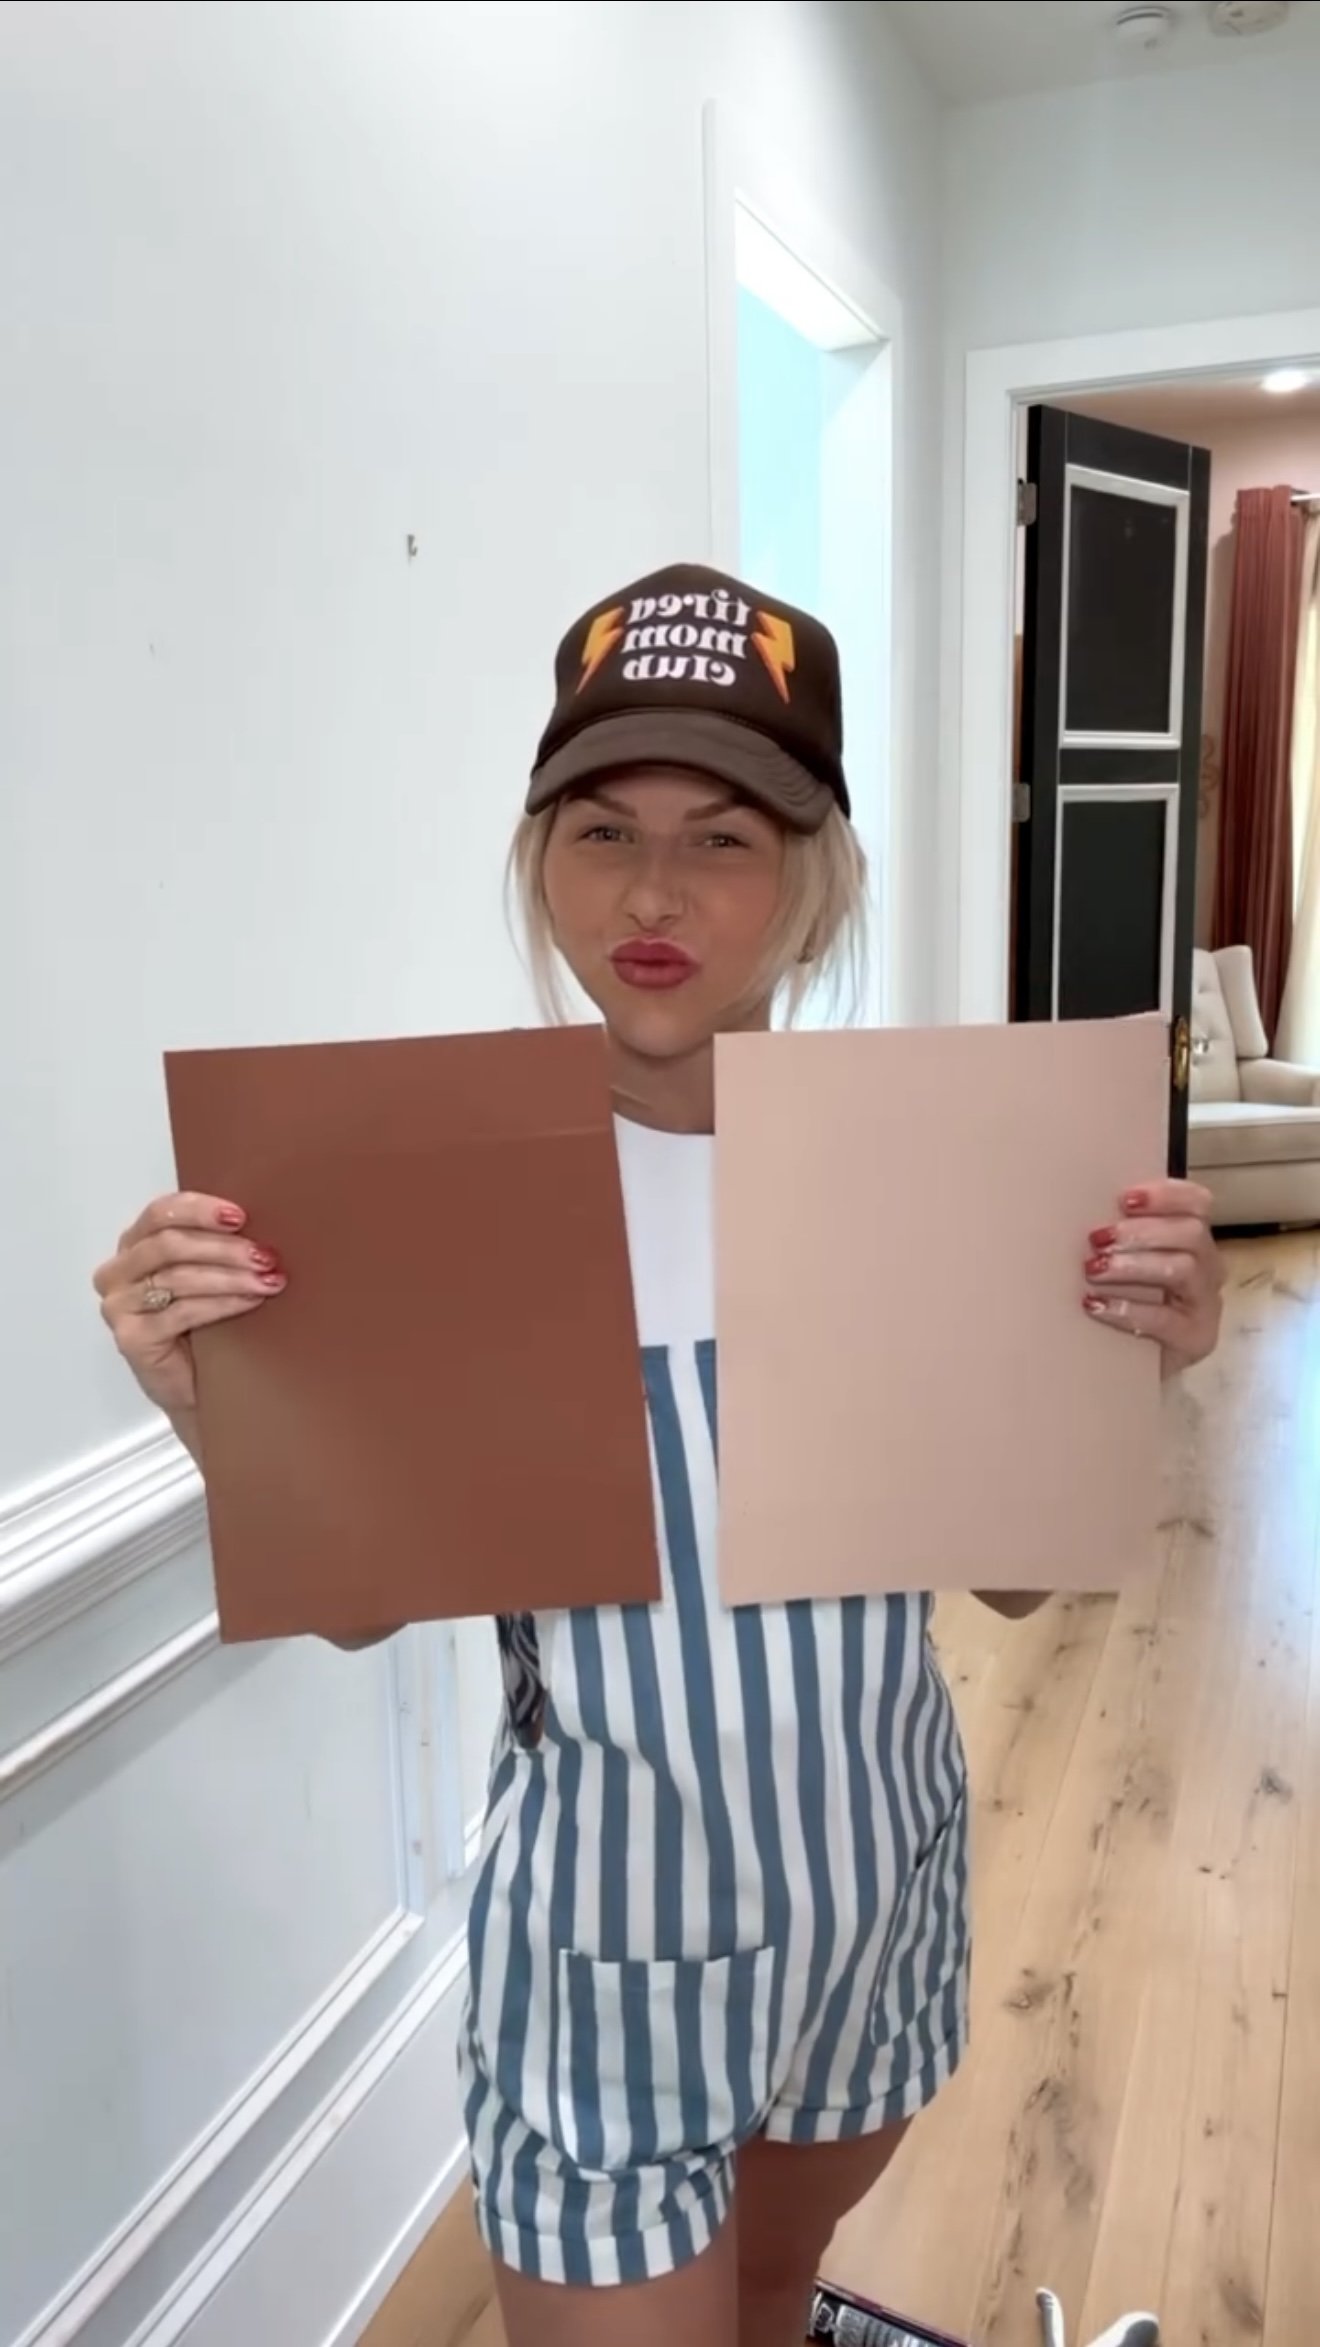

Let’s be honest, picking paint is one of those things that seems easy until you’re actually doing it. You bring home a dozen little swatches, tape them to the wall, and suddenly every beige looks green and every gray feels… blue? It’s wild how different paint can look once it’s in your space.
That’s why I’ve stopped relying on tiny paper samples and started using peel-and-stick paint swatches (made with real paint) instead. They make such a difference. You get a bigger sample, it goes right on the wall (no painting required), and you can move it around to see how the color behaves in different lighting. It’s such a simple switch, but it’s saved me from so many paint mistakes.
Here’s what I’ve learned about choosing the right color the first time:
Test multiple walls. Light hits differently depending on where the wall is. A color that looks warm and cozy on one wall might feel totally flat on another.
Check it throughout the day. Morning light, afternoon shadows, and evening lamps can all change the vibe. I like to peek at my samples over a couple of days before making a call.
Put it next to your trim and flooring. Sometimes a color looks perfect until it’s right next to that bright white baseboard or warm-toned wood floor. Seeing it in context helps avoid surprises.
Try at least 2–3 shades. Even if you’re set on a general color, comparing subtle undertones side by side makes it easier to spot the one that actually works in your space.
Don’t rush it. It’s tempting to just pick something and get started, but giving yourself a little time to sit with the samples really pays off.

Honestly, this has taken so much stress out of the process for me. When you get it right the first time, it makes everything else feel smoother.
So if you’re staring at swatches and feeling stuck, try testing a few peel-and-stick samples around the room. It’s such a small step that makes a big difference, and your walls will thank you.
Links At A Glance
IF YOU ENJOYED THIS POST, YOU MIGHT BE INTERESTED IN The Paint colors in my house!
FOLLOW ME ON MY SOCIALS!

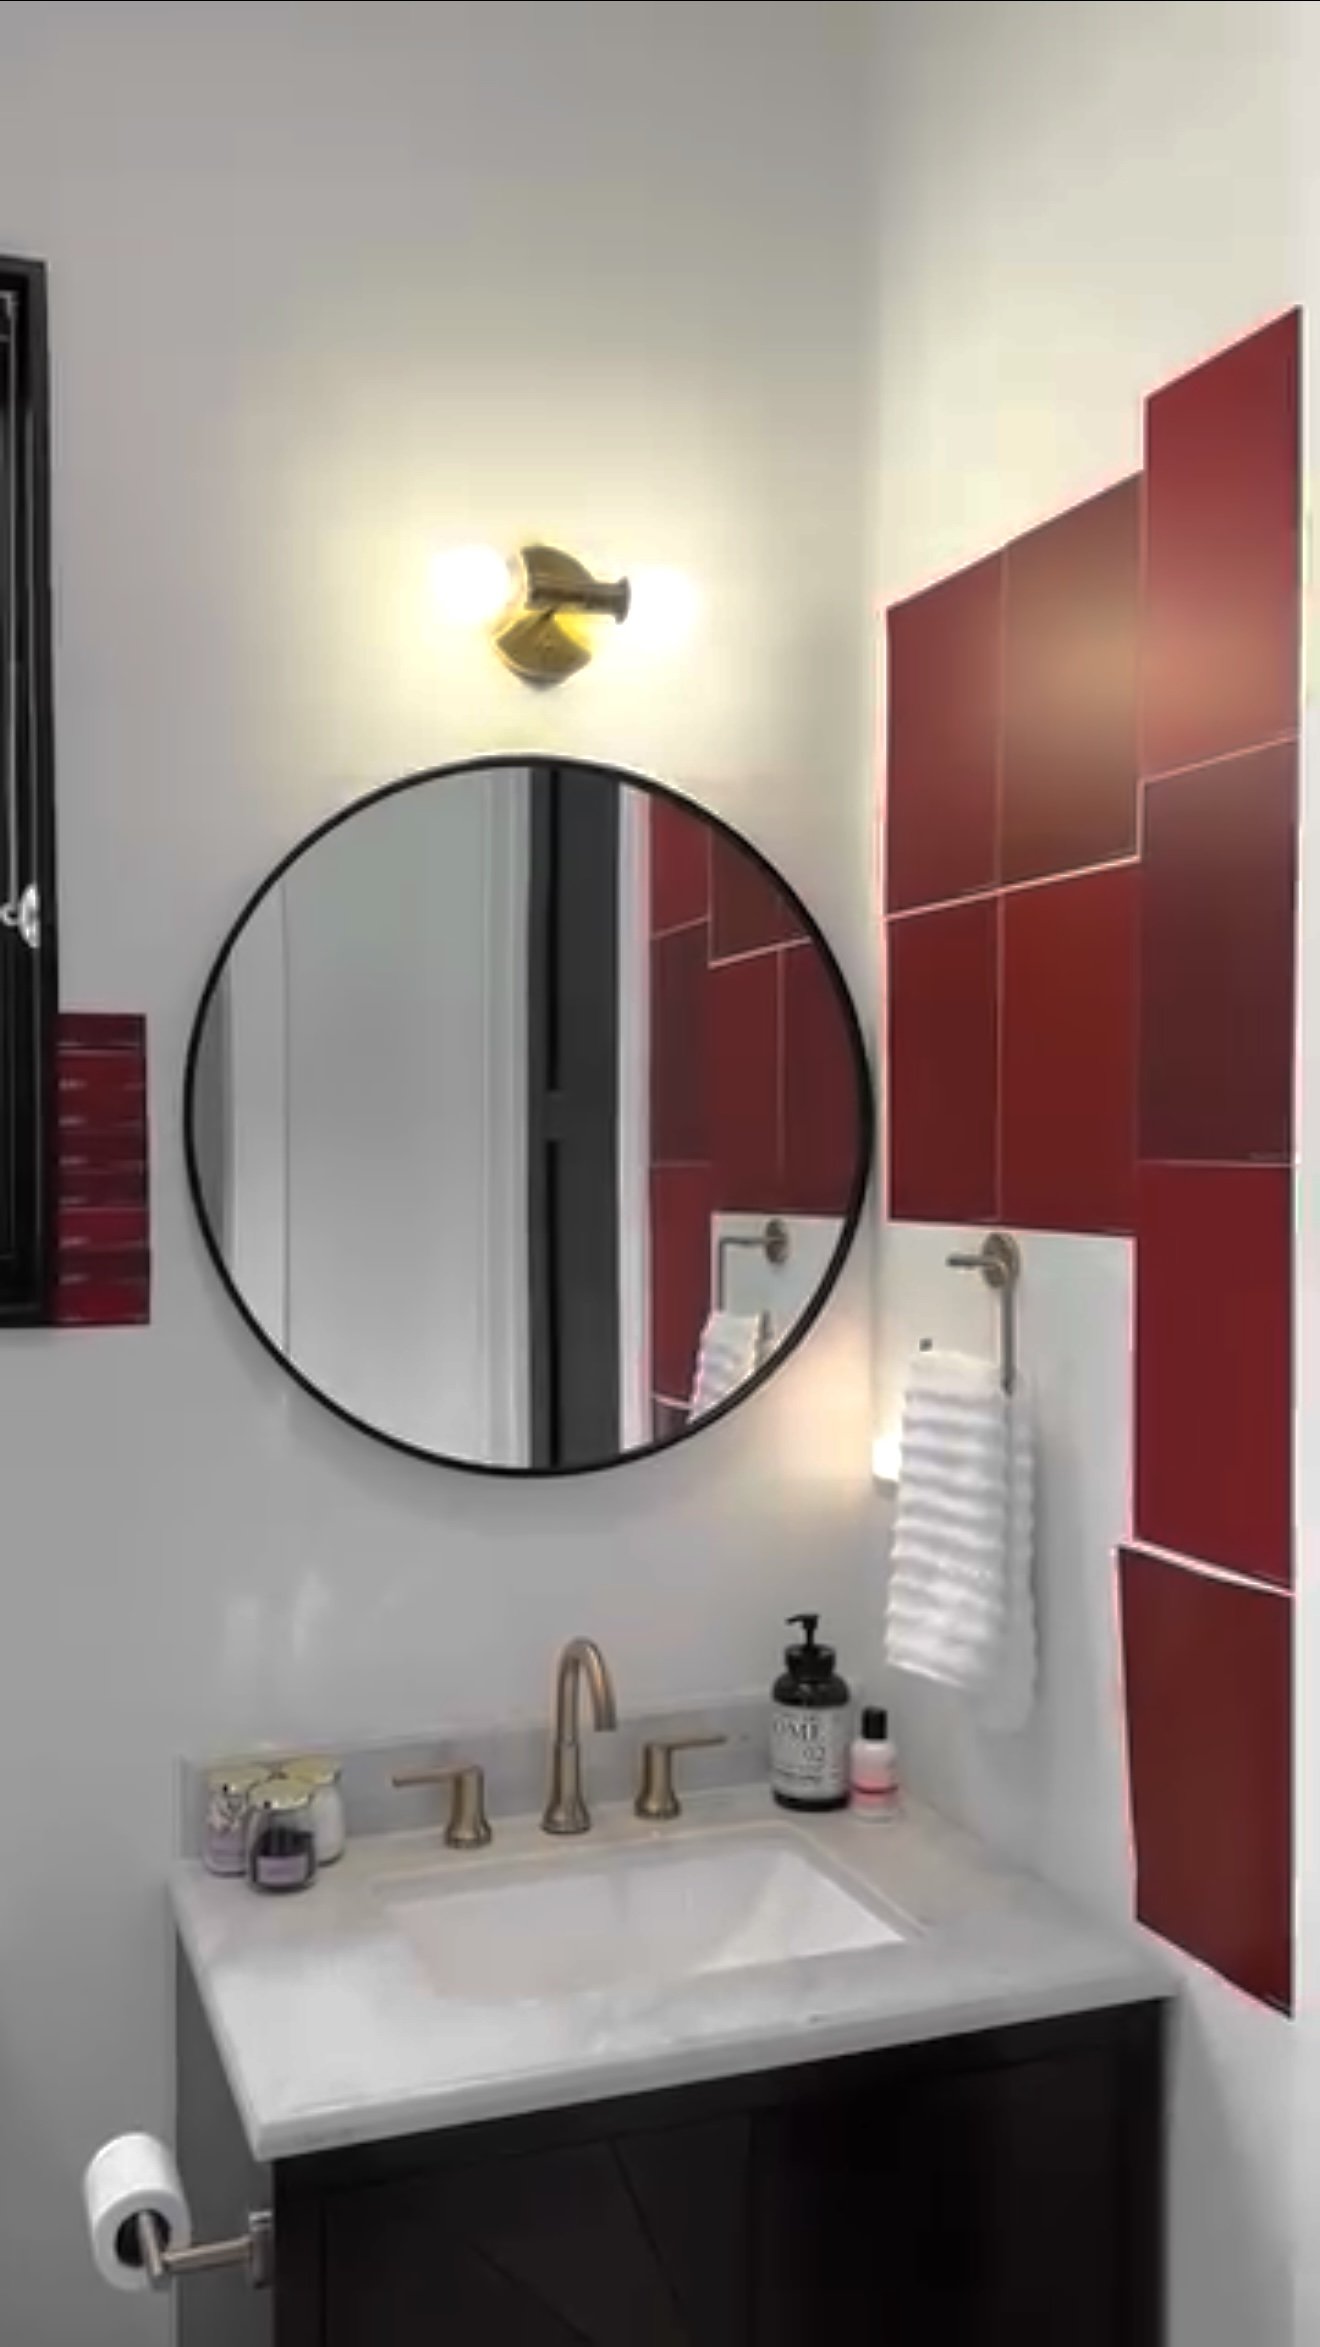
Using Canva to Plan My Primary Bathroom Design
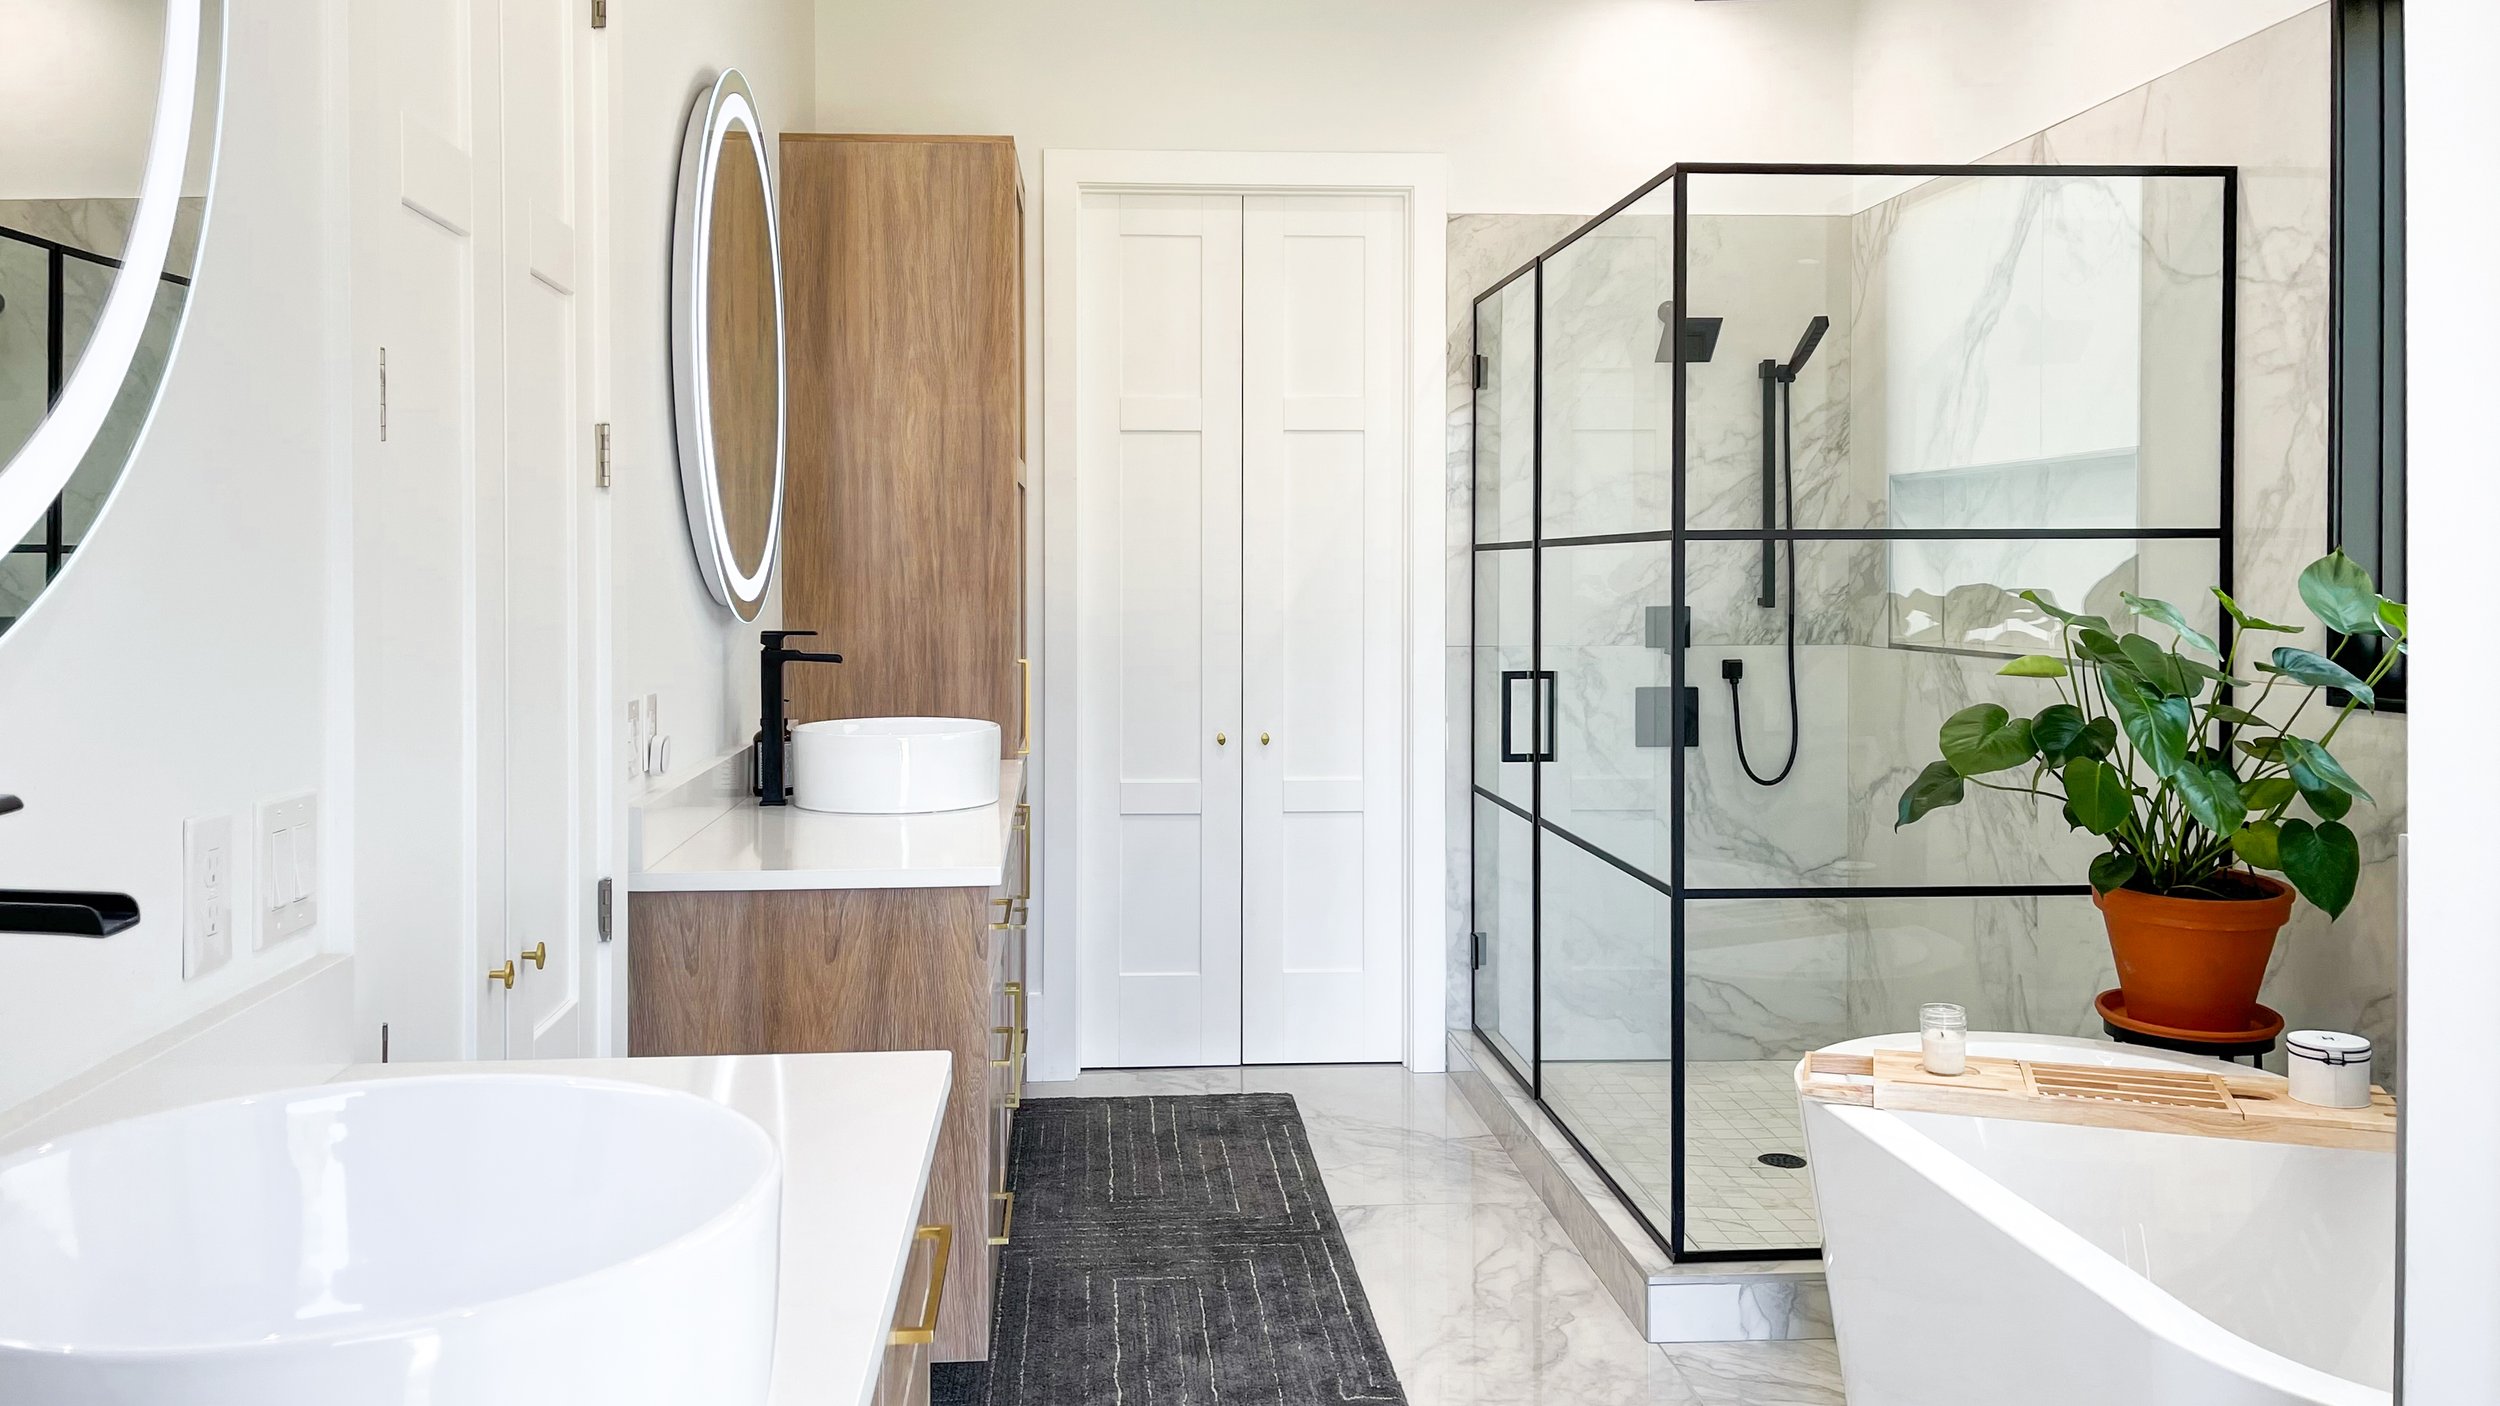
If you’re trying to pull a room together and want to make sure everything actually works, do yourself a favor and make a mood board in Canva. I use it all the time for room makeovers, and it never fails to bring clarity.
This project is a no-demo reno, so I needed a way to visualize the whole space. I dropped all my ideas into a Canva board and suddenly, it all started to make sense. I could instantly see what clashed, what felt too cold, and where I needed to pivot.
What’s on the Mood Board:
Here’s where things are at right now:
The black-framed shower that’s staying
My current custom wood vanities
Paint swatches I’m choosing between
the light fixture I like
Dragging it all into one space helped me quickly spot what was working and what wasn’t.

The Color Palette:
I also made a quick color guide to keep my vision focused.
I’m using Virtual Taupe for the main walls and Favorite Tan in the water closet. The rest of the palette comes through in decor and textiles.


Why Canva Makes Design So Much Easier:
Canva is such a game-changer for planning a space. It turns all your scattered screenshots and ideas into one clean, visual layout. It doesn’t have to be perfect. You just need enough to see what’s clicking.
Here’s why I love it:
It helps me see how colors, textures, and finishes actually work together
I can play around with bold choices without commitment
It keeps me from overthinking every tiny detail
It’s free and easy to use (but the Pro version let's you quickly remove the background of images which is nice)
If you’re feeling overwhelmed in the design process, try throwing together a mood board. It gave me clarity, helped me make confident decisions, and made the whole thing way more fun.
I’ll keep sharing updates as this room comes together. And if you’ve ever used Canva to plan a room, I’d love to hear how it worked for you too!
Links At A Glance
IF YOU ENJOYED THIS POST, YOU MIGHT BE INTERESTED IN My blue floral bathroom makeover!
FOLLOW ME ON MY SOCIALS!

Sheet Storage That Actually Works


These sheet organizers are one of my favorite finds! Let’s be honest, linen closets are chaos waiting to happen. No matter how many times I’ve tried to keep mine tidy, it always ended up with a jumble of mismatched sheets, slipping stacks, and a rogue pillowcase or two wedged in the back. And don’t even get me started on trying to store king-size sheets or my heated blanket. It was basically a wrestling match every time.
But then I found these zip-up organizers and everything changed.


They come in a set of four, and they’re roomy enough to hold even the bulkiest sets of bedding. I’ve stuffed mine with king sheets, tablecloths, and yes, even that giant heated blanket I always struggle to store. Each organizer zips closed, keeping everything neat and compressed. No unraveling. No refolding. No drama.
One of my favorite parts? They have a clear little window. I can see exactly what’s inside each one without having to unzip or pull anything out. It’s a small detail, but it makes a huge difference when I’m looking for the guest bed sheets or trying to find the right tablecloth five minutes before company shows up.


I stacked them up in my linen closet and honestly, it’s a game changer. Everything looks so much more put together, and I don’t dread opening the door anymore. Plus, they’re super easy to pull out when I need something, and because they hold their shape, the whole shelf doesn’t collapse every time I grab one.
If you're looking for a simple, affordable way to get your linens under control, these organizers are it. I wish I had found them sooner.
Links At A Glance