
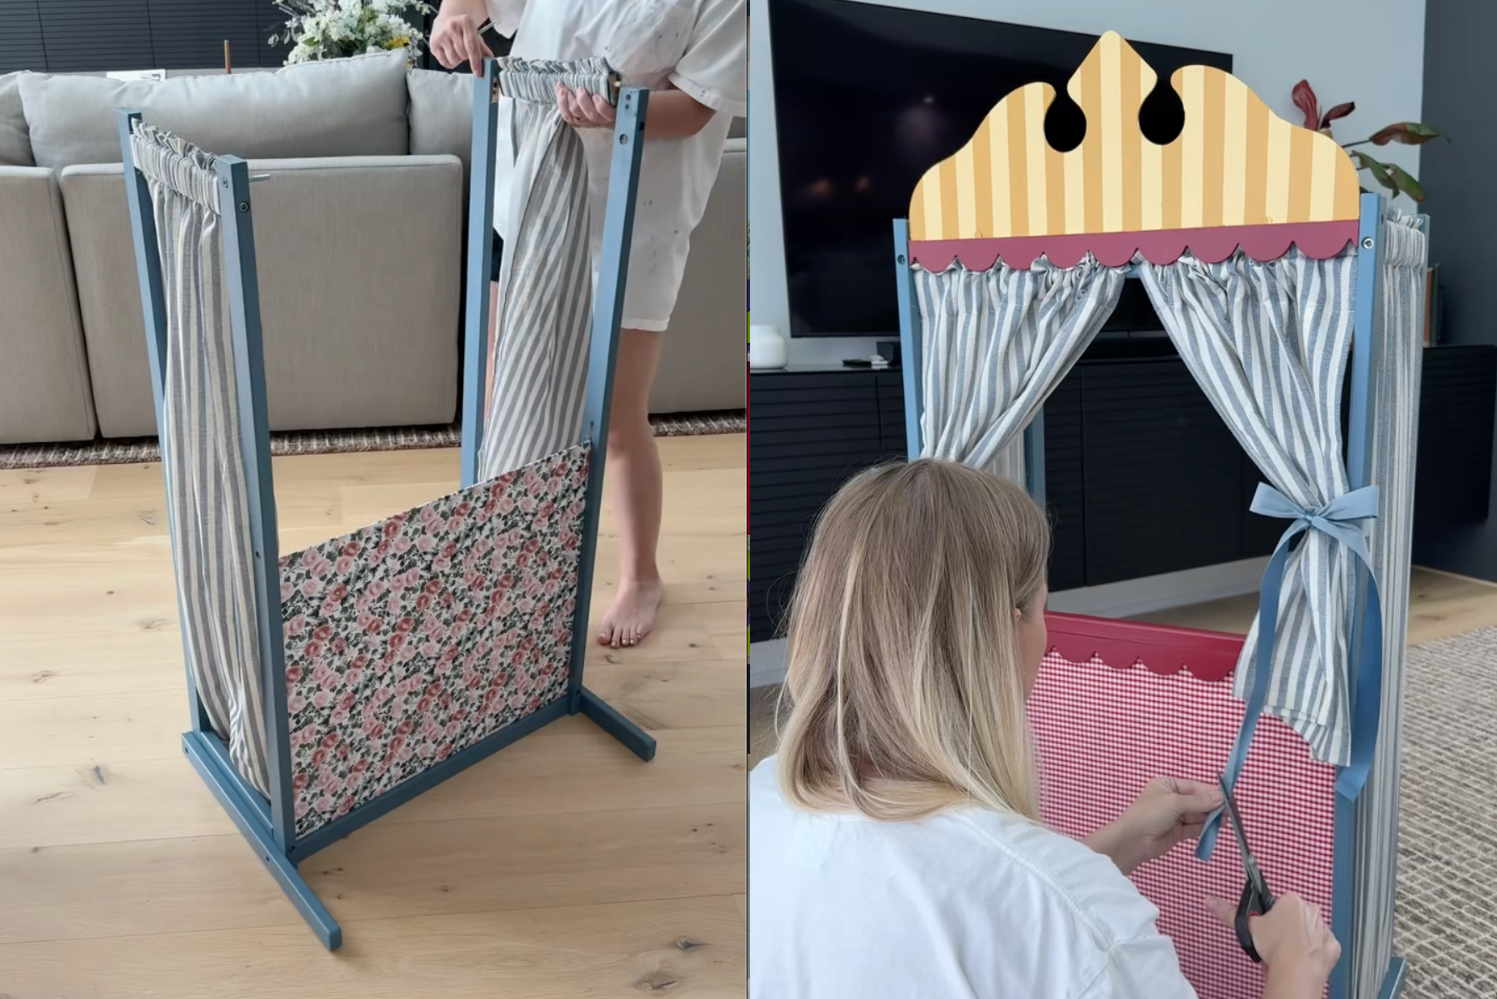
Puppet Show Theater DIY Makeover
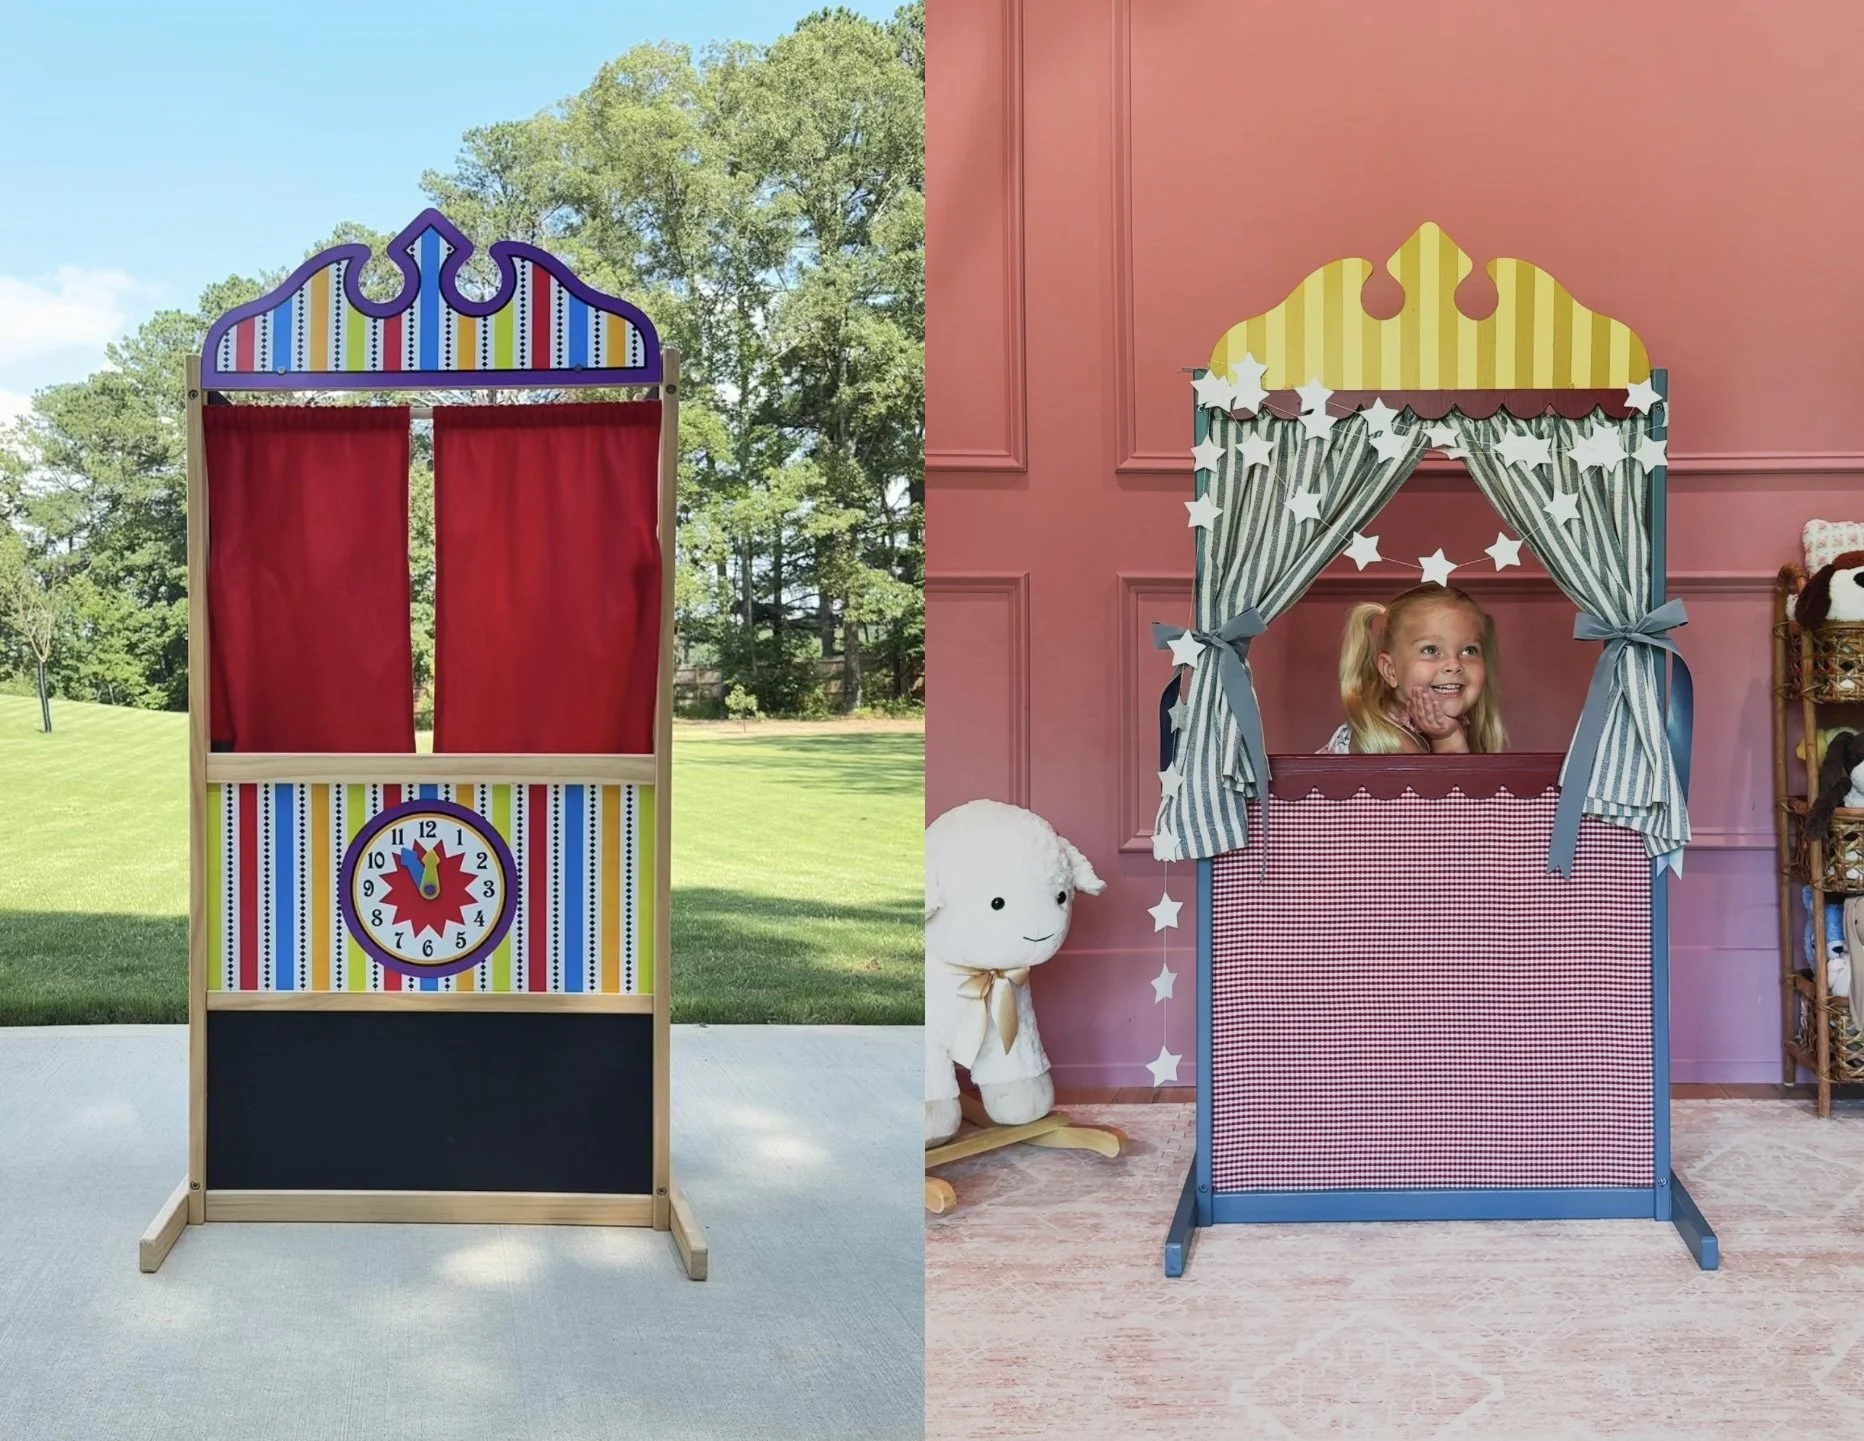
I found the cutest little puppet theater on Facebook Marketplace, but I wanted to give it a refresh. While I love color, I am not into the super bright primary color schemes that kids’ toys often come in. I wanted something a little more whimsical, playful, and girly, so I gave this toy a makeover
What You’ll Need
Scallop trim (I found mine at Hobby Lobby)
Fabric (I used red gingham for one side and a floral print on the other)
Curtains (two sizes of blue and white striped panels - 45” and 24”)
Primer (I recommend BIN primer)
Paint colors:
Paintbrushes or rollers
Ribbon (for tying back the curtains) *bought mine at a garage sale
Painter’s tape (optional, if you want crisp stripes)
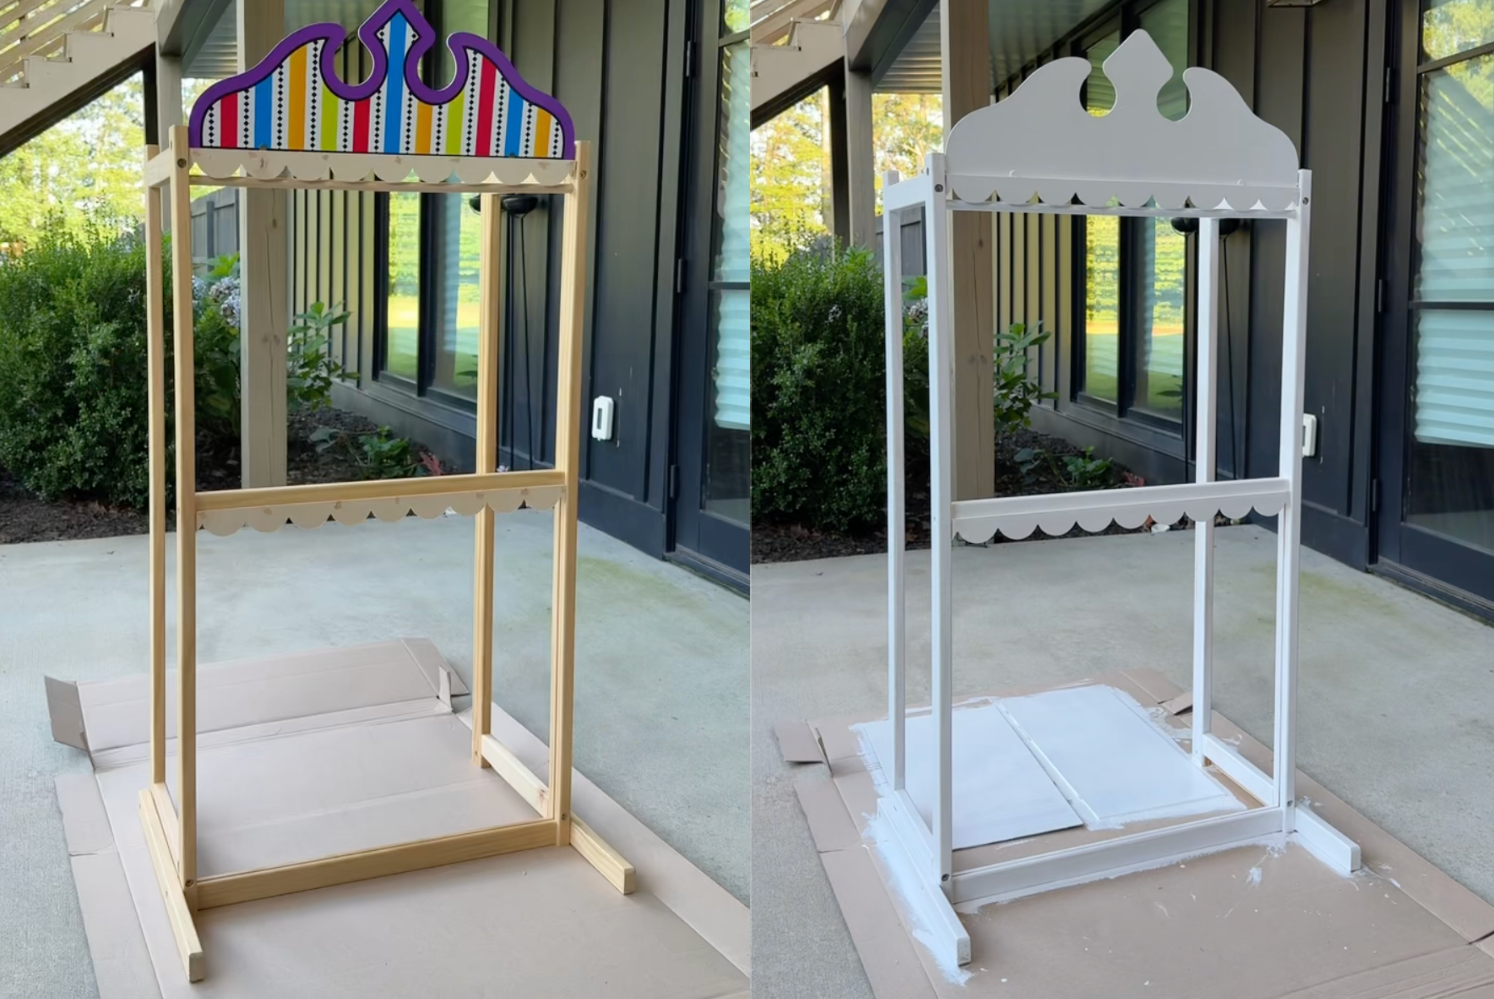
Step 1: Disassemble the Toy
The theater was really easy to take apart. I made sure to mark each piece so I could remember exactly where everything needed to go when it was time to reassemble.
Step 2: Add Scallop Trim
To give the theater a little extra character, I added scallop trim that I found at Hobby Lobby. I attached it to the top and middle sections with a brad nailer.

Step 3: Prep for Paint
I loosely reassembled the toy so I could prime it, but you could also keep it fully disassembled if that is easier. Be sure to remove the clock board and chalkboard pieces and set them aside to use later. I used BIN primer to get everything ready for paint.
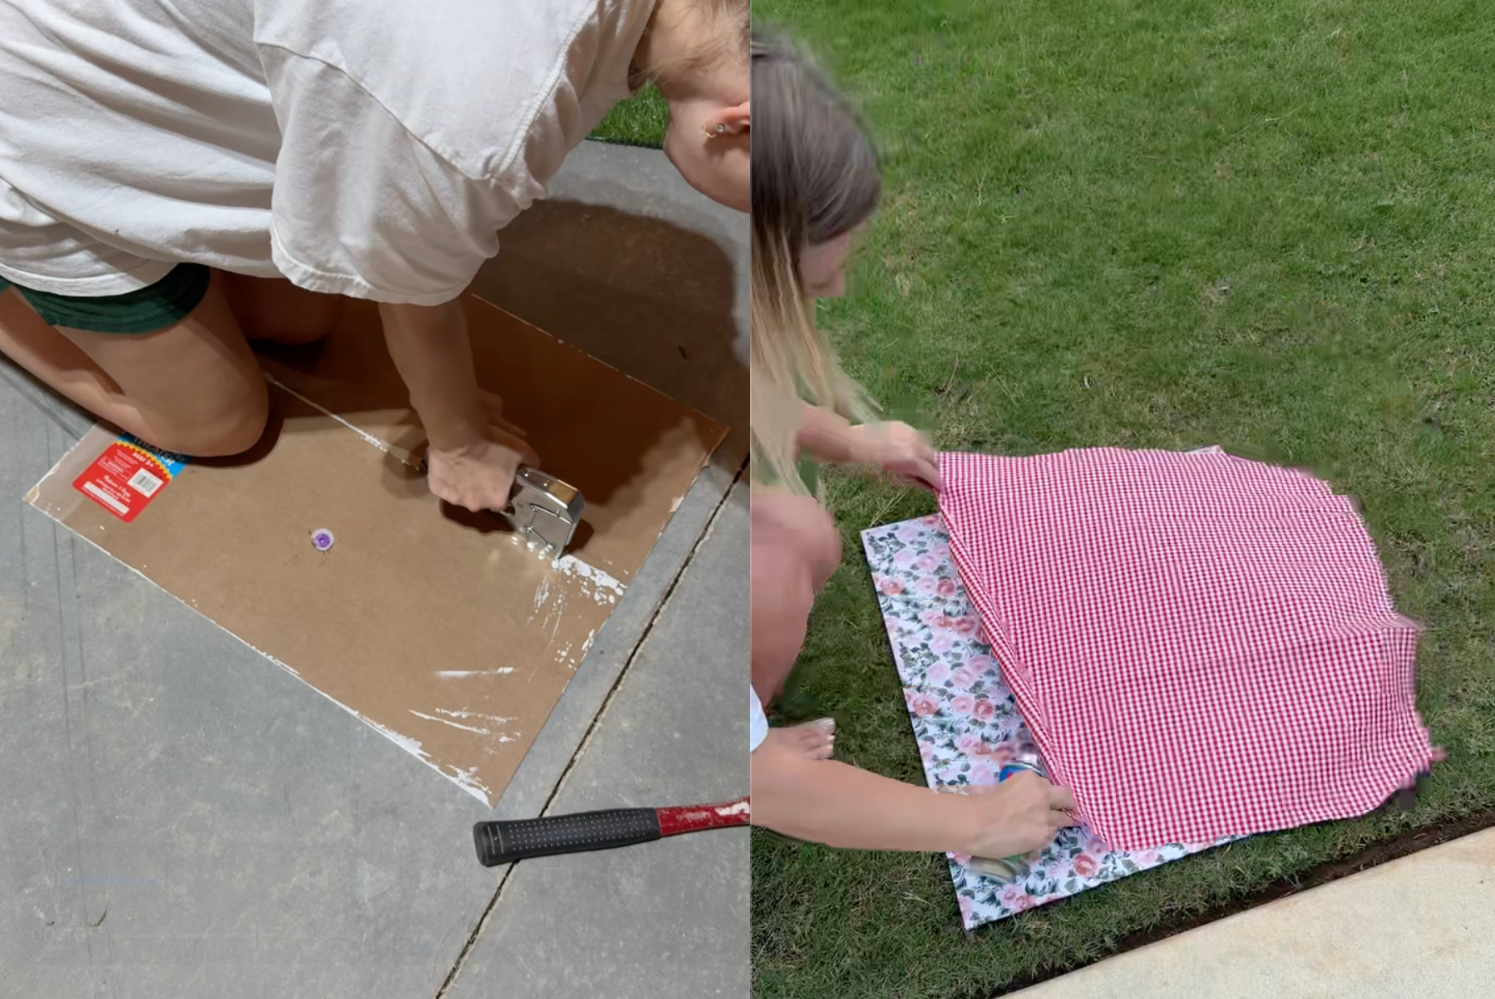
Step 4: Remove and Rework the Boards
The little clock came off easily with pliers. I then used a staple gun to attach the clock board and chalkboard together, creating one larger panel. To cover it, I wrapped both sides in fabric and secured it with a staple gun. At first, I tried a floral print but decided it was not quite right. Using spray adhesive, I added a red gingham fabric panel to one side instead. Now the board is reversible, which is a fun surprise.
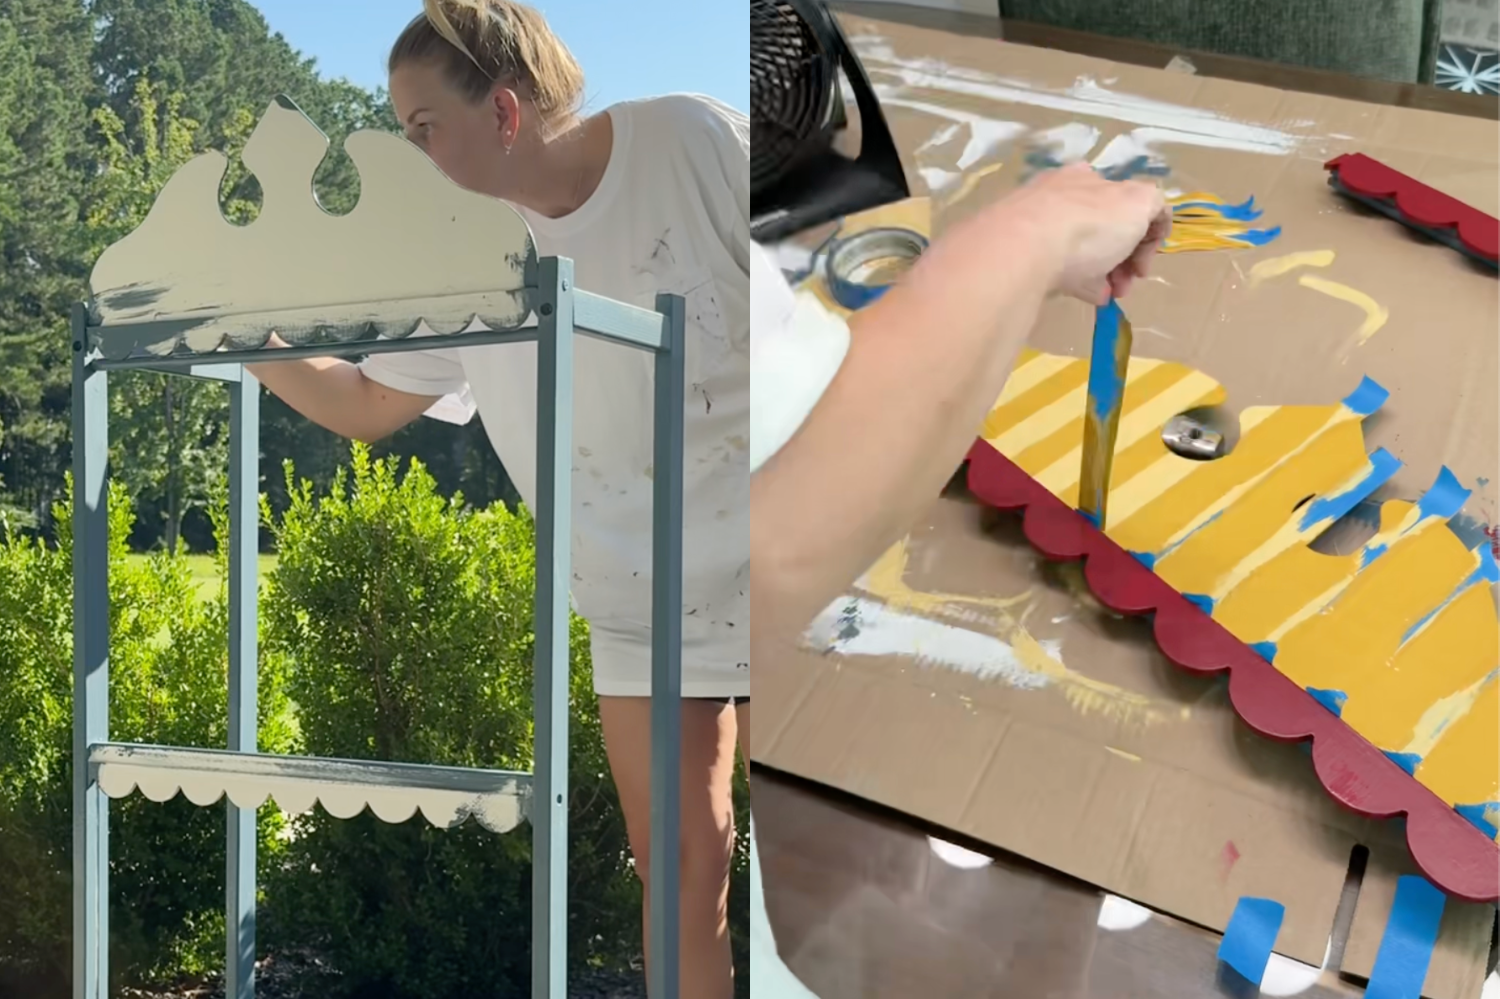
Step 5: Paint the Base and Trim
I painted the base in Smokey Blue by Sherwin Williams, the scallops in a bold red called Wild Currant by Sherwin Williams, and the top in two-toned yellow stripes using Golden Rule and Colonial Yellow. The new colors instantly transformed the toy into something more cheerful and charming.
Step 6: Add Curtains
Instead of sewing, I used two different sizes of blue and white striped curtains (45" for the sides and 24" for the front). For the sides, I hung them normally at the top and then stapled them to the inside bottom, which gave them a pretty pleated look. For the front, I hung the 24" curtains at the top and tied them back with ribbon that I bought at a garage sale for that classic theater feel.
Step 7: Reassemble
Once everything was painted, covered, and ready, I reassembled the theater.
And just like that, the makeover was complete. The puppet theater is still colorful, but in a softer, more whimsical way. It feels playful and girly, and it has become such a fun little piece for playtime.

If you like this, you might be interested in my IKEA play kitchen makeover!

DIY Halloween String Lights with Plastic Jack-o’-Lantern Pails
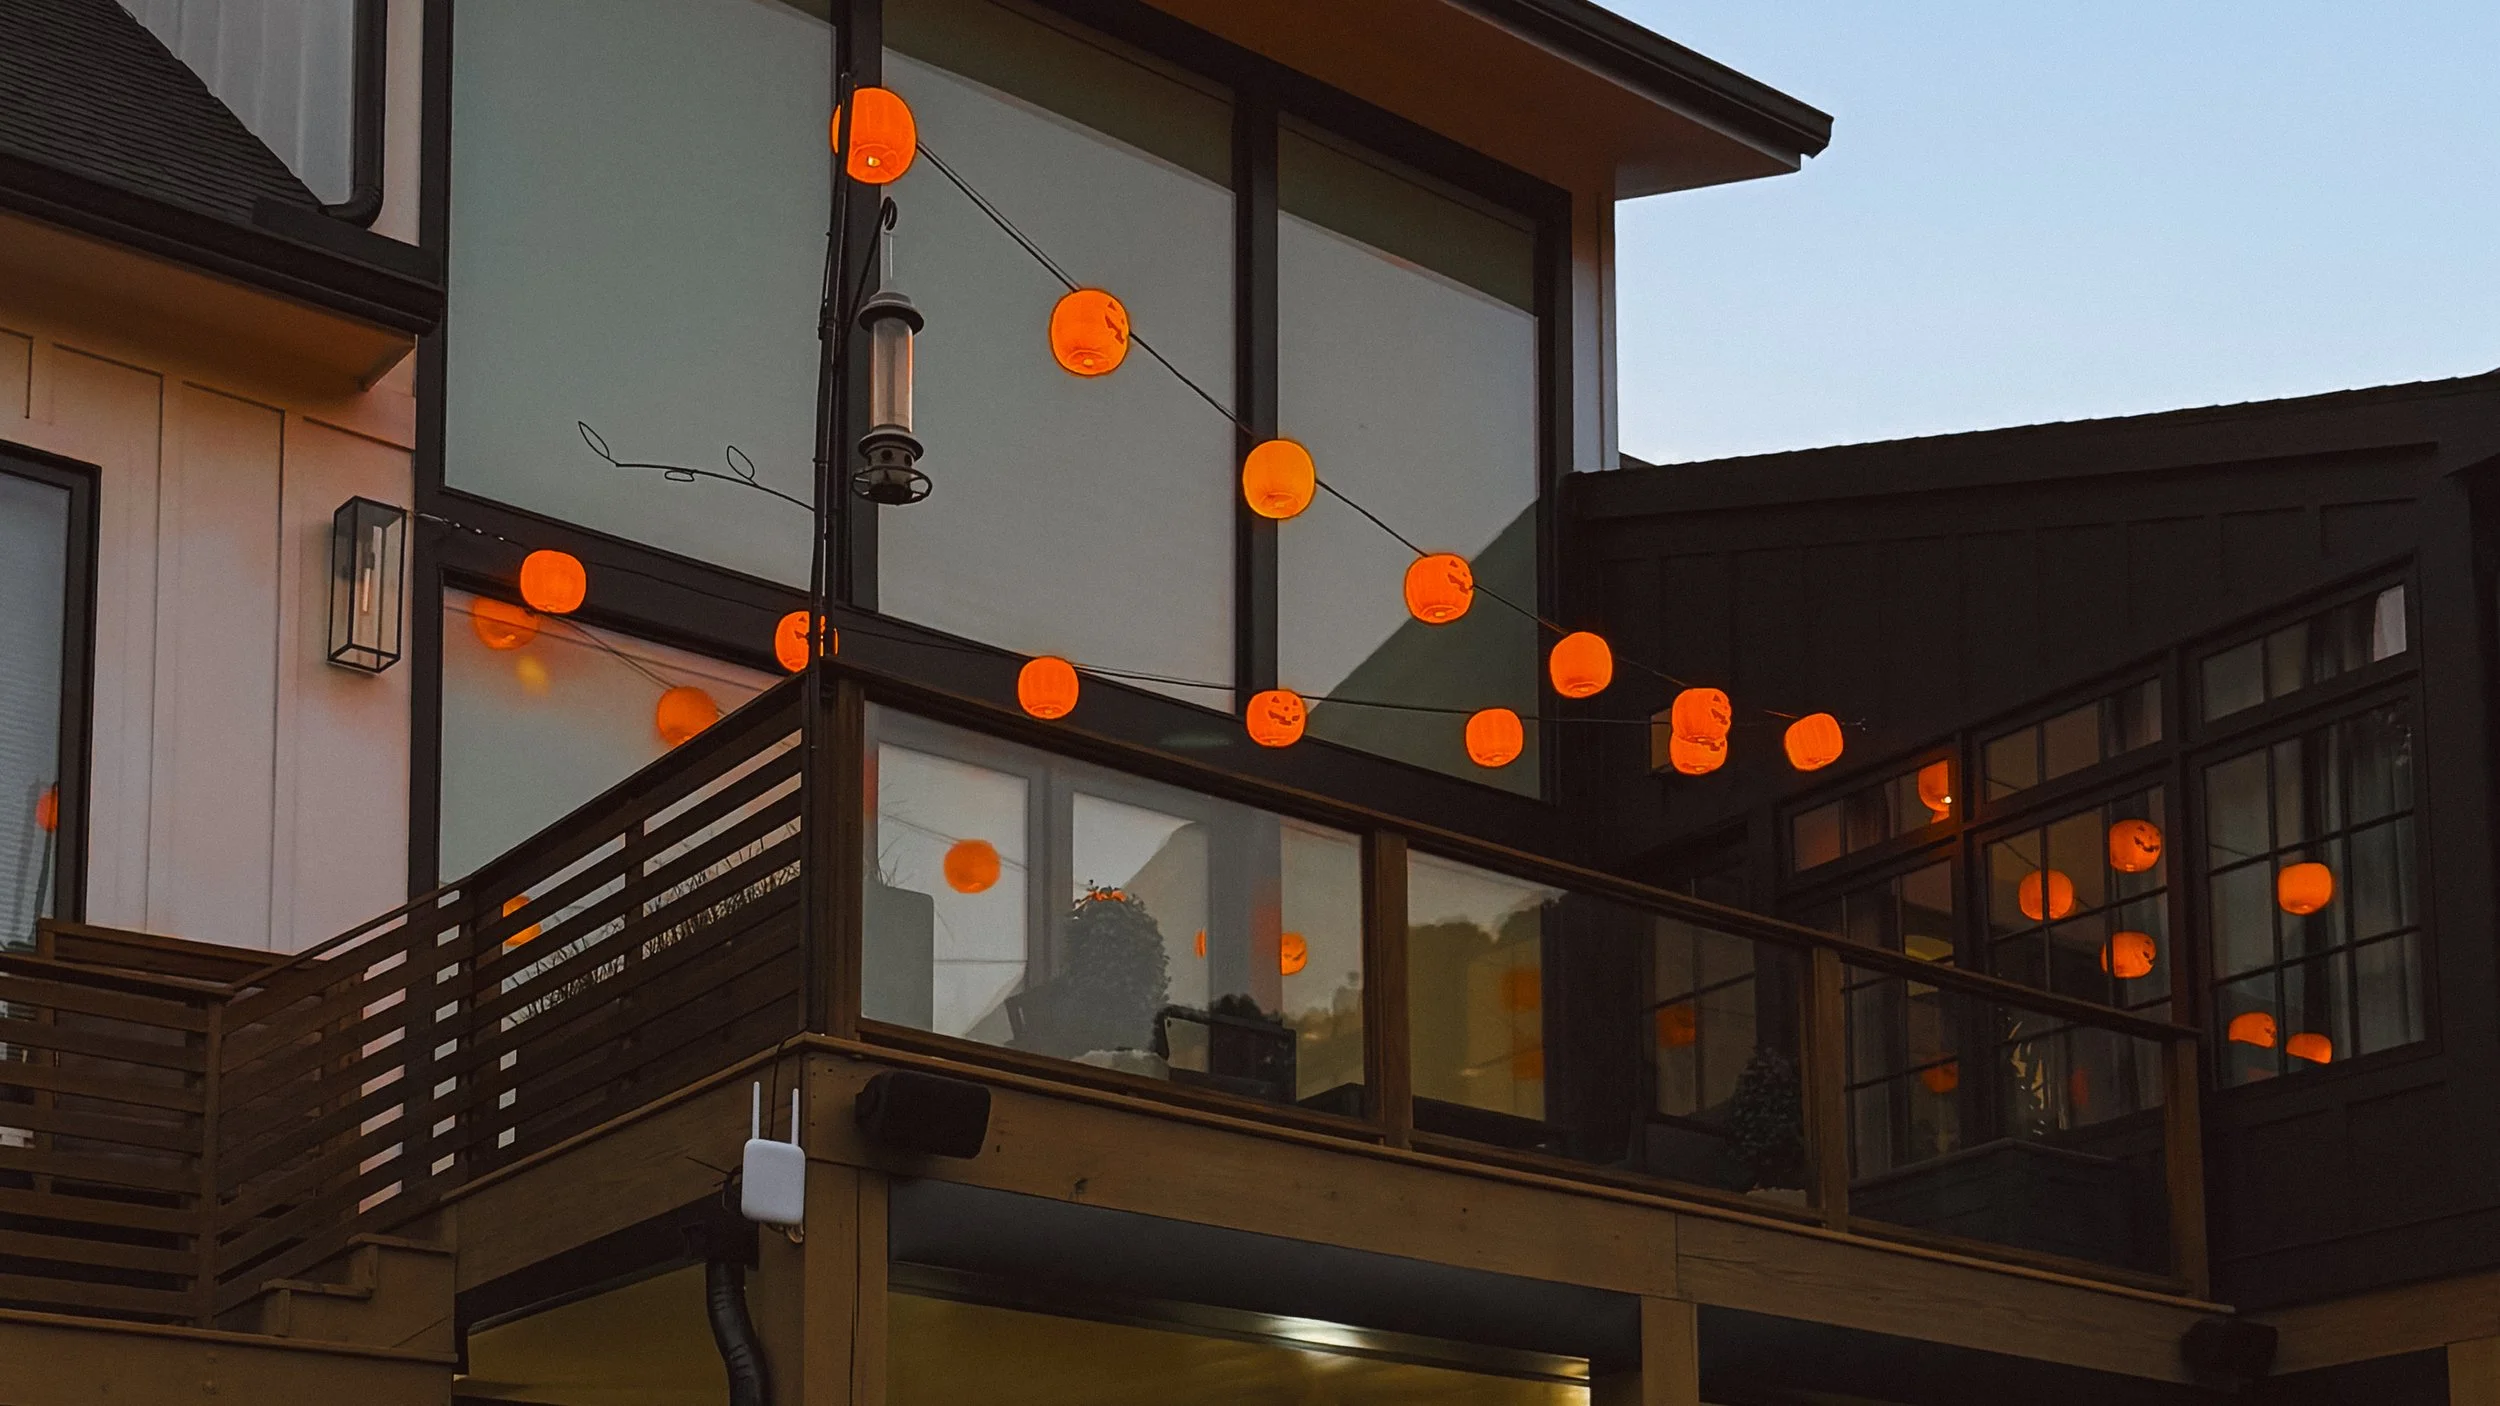
If you’re looking for a budget-friendly way to add some spooky charm to your outdoor Halloween setup, this DIY is for you. With just a few tools and those classic plastic Jack-o’-Lantern trick-or-treat pails, you can turn an ordinary set of string lights into a glowing row of pumpkin lanterns.
What You’ll Need
A box (for easy cleanup)
Step-by-Step Instructions
Step 1: Peel off any stickers from the bottom of the Jack-o’-Lanterns.
Step 2: Use your cutting pliers to carefully snip off the plastic handles. This will leave two small holes on the sides of each pumpkin that you’ll use later.
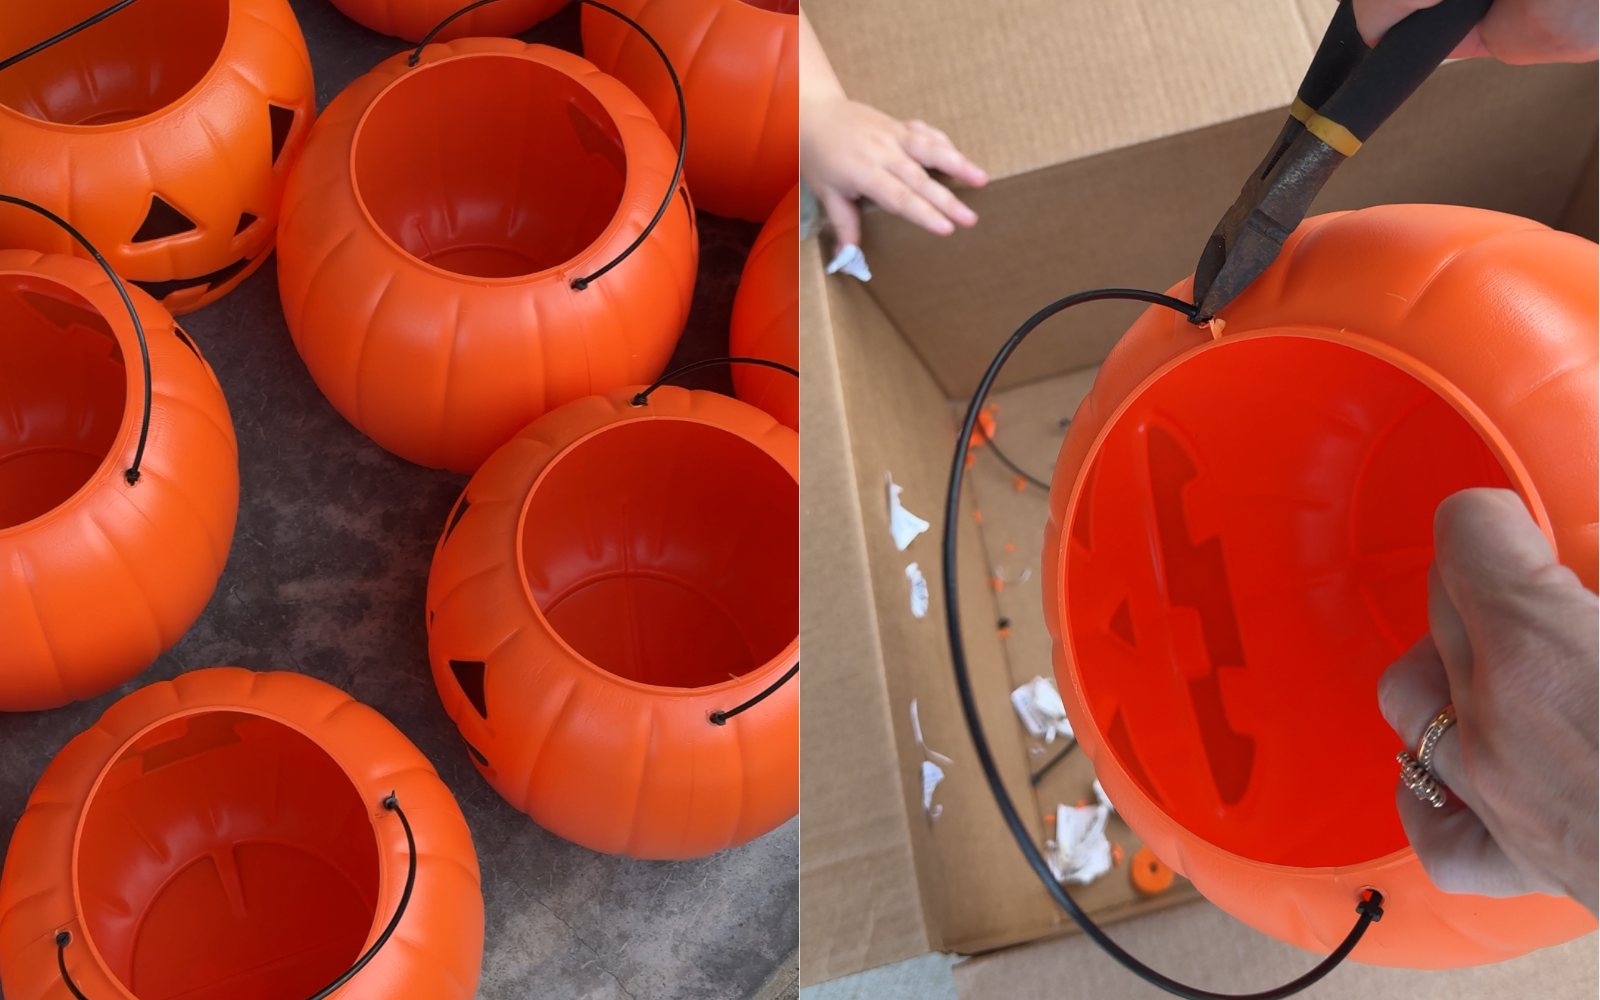
Step 3: Drill Drainage Holes. Using a 1 1/8" spade drill bit, drill a hole in the bottom center of each pail. This allows rainwater to pass through if your lights are outdoors.
💡 Pro Tip: Place the pumpkins over a box while drilling, removing stickers and cutting off handles so all the pieces and plastic shavings fall inside. It makes for an easy clean up!

Step 4: Feed a zip tie through each handle hole of each pumpkin. These will secure the pumpkins to your string lights.
Step 5: Attach to the Lights. Place each Jack-o’-Lantern over a bulb on your string lights. Once it’s centered, tighten the zip ties around the wire so the pumpkin stays in place. I alternated the faces so I could see them from both my living room and back yard.
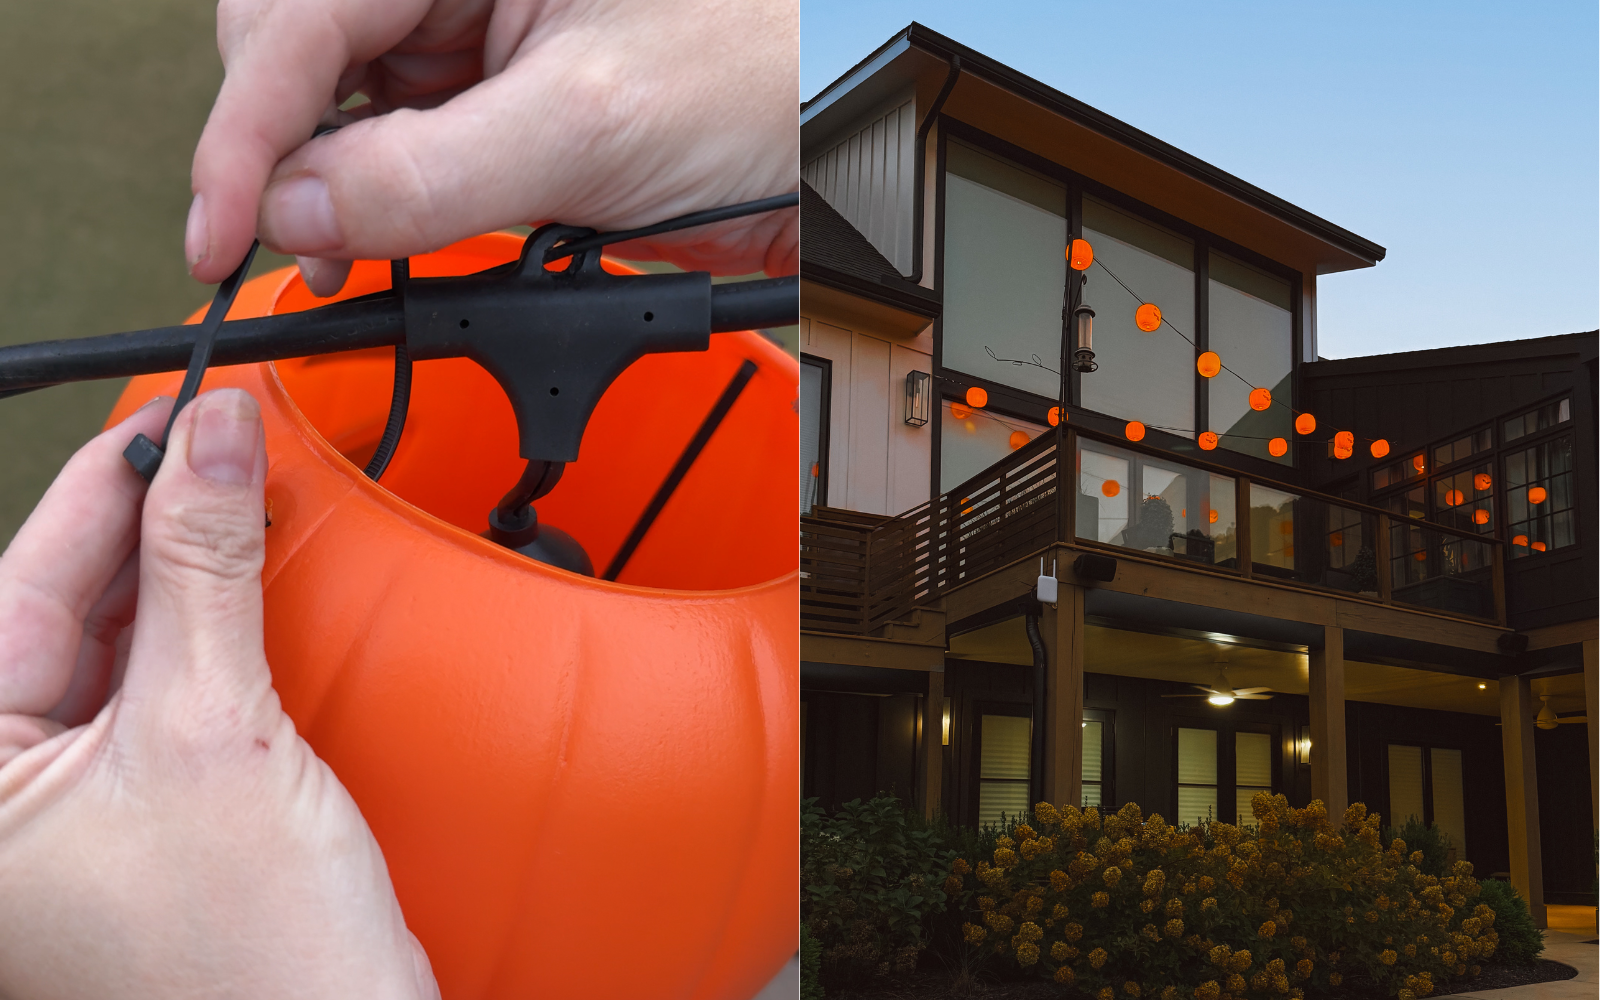
Step 6: Snip Off the Extra. Use your cutting pliers to trim off the excess zip tie for a clean finish.
And that’s it! You’ve got yourself a glowing line of cheerful (or spooky!) Jack-o’-Lantern lights perfect for Halloween.
If you liked this, you might enjoy reading about my DIY floral ice cubes!

The Rugs In My House
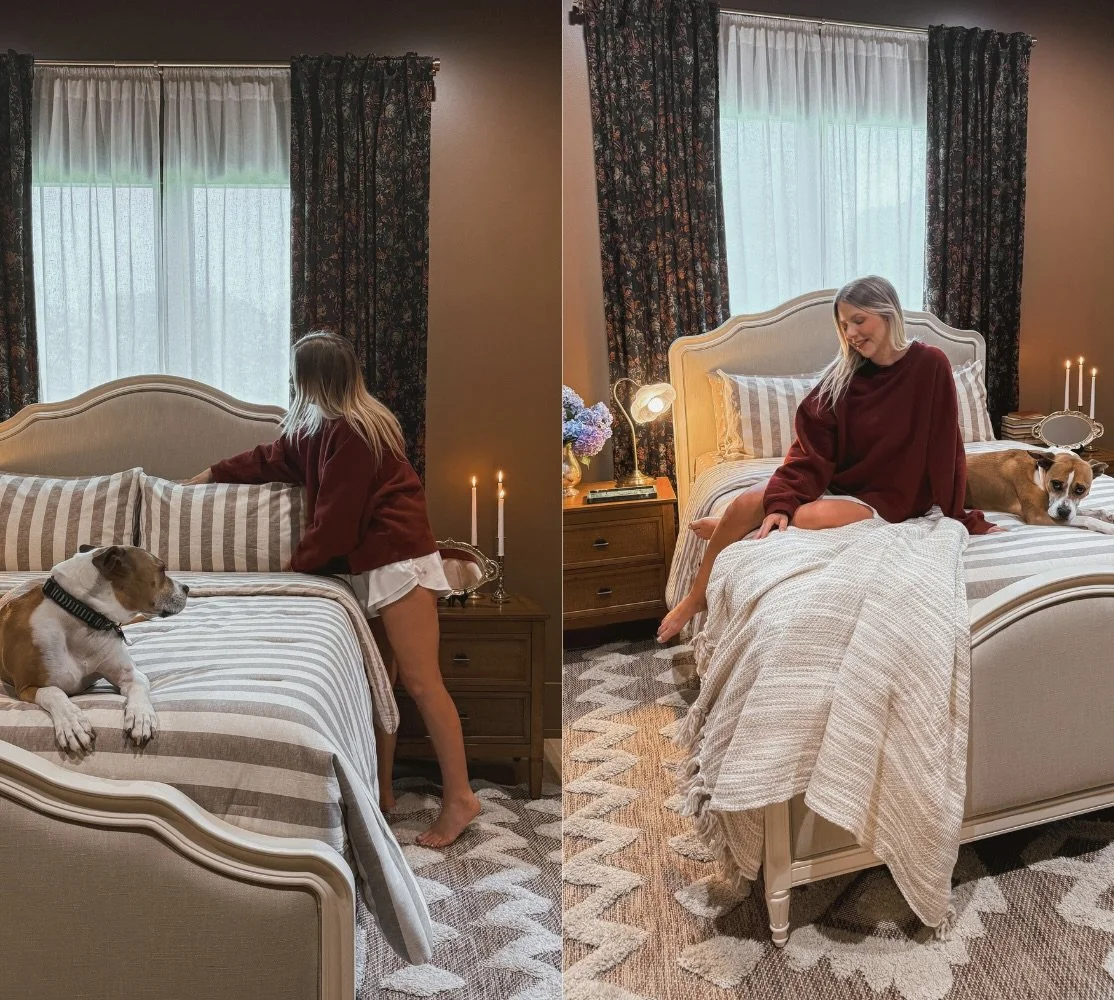
Primary Bedroom

Shop my primary bedroom here.
Kitchen
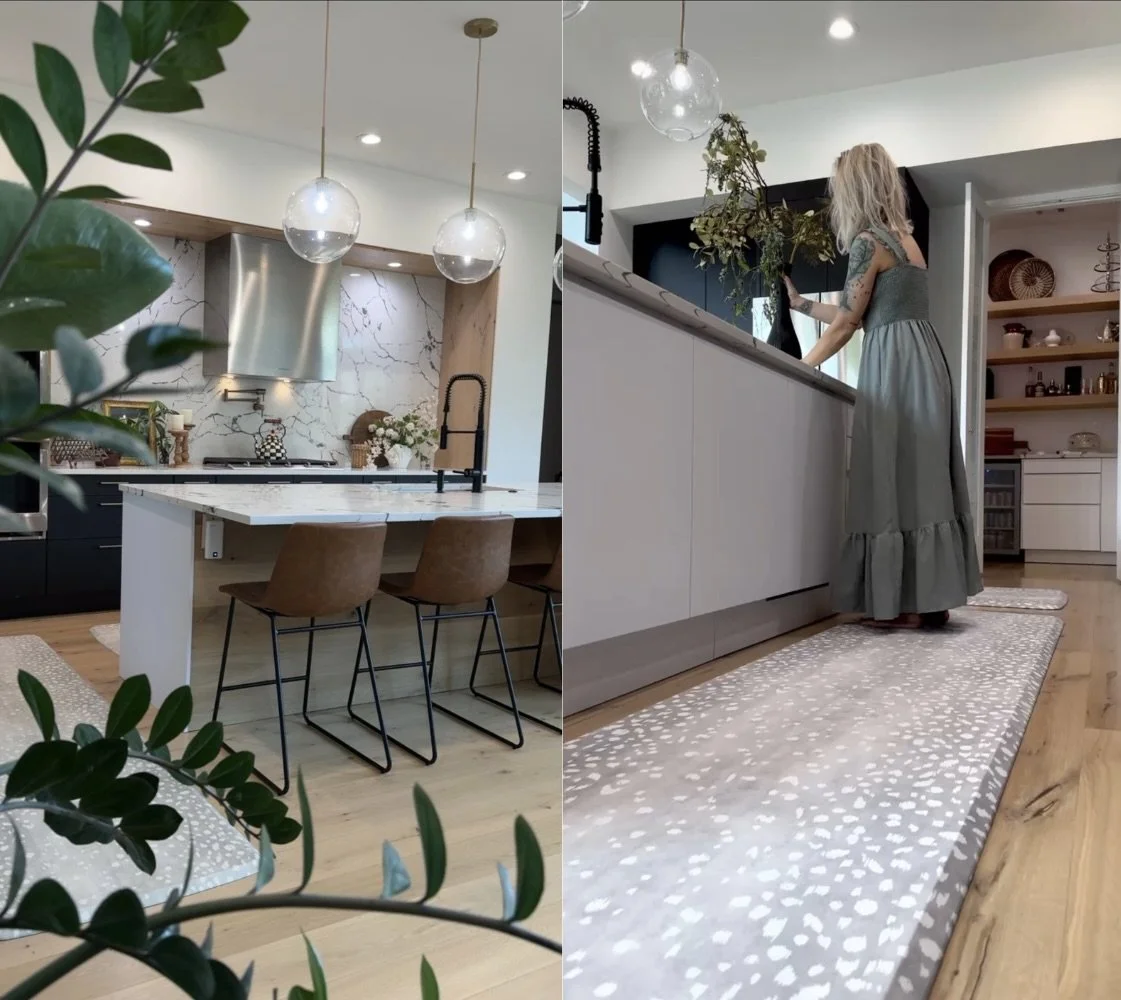
Kitchen mat linked here.
Hallway

Shop my hallway here.
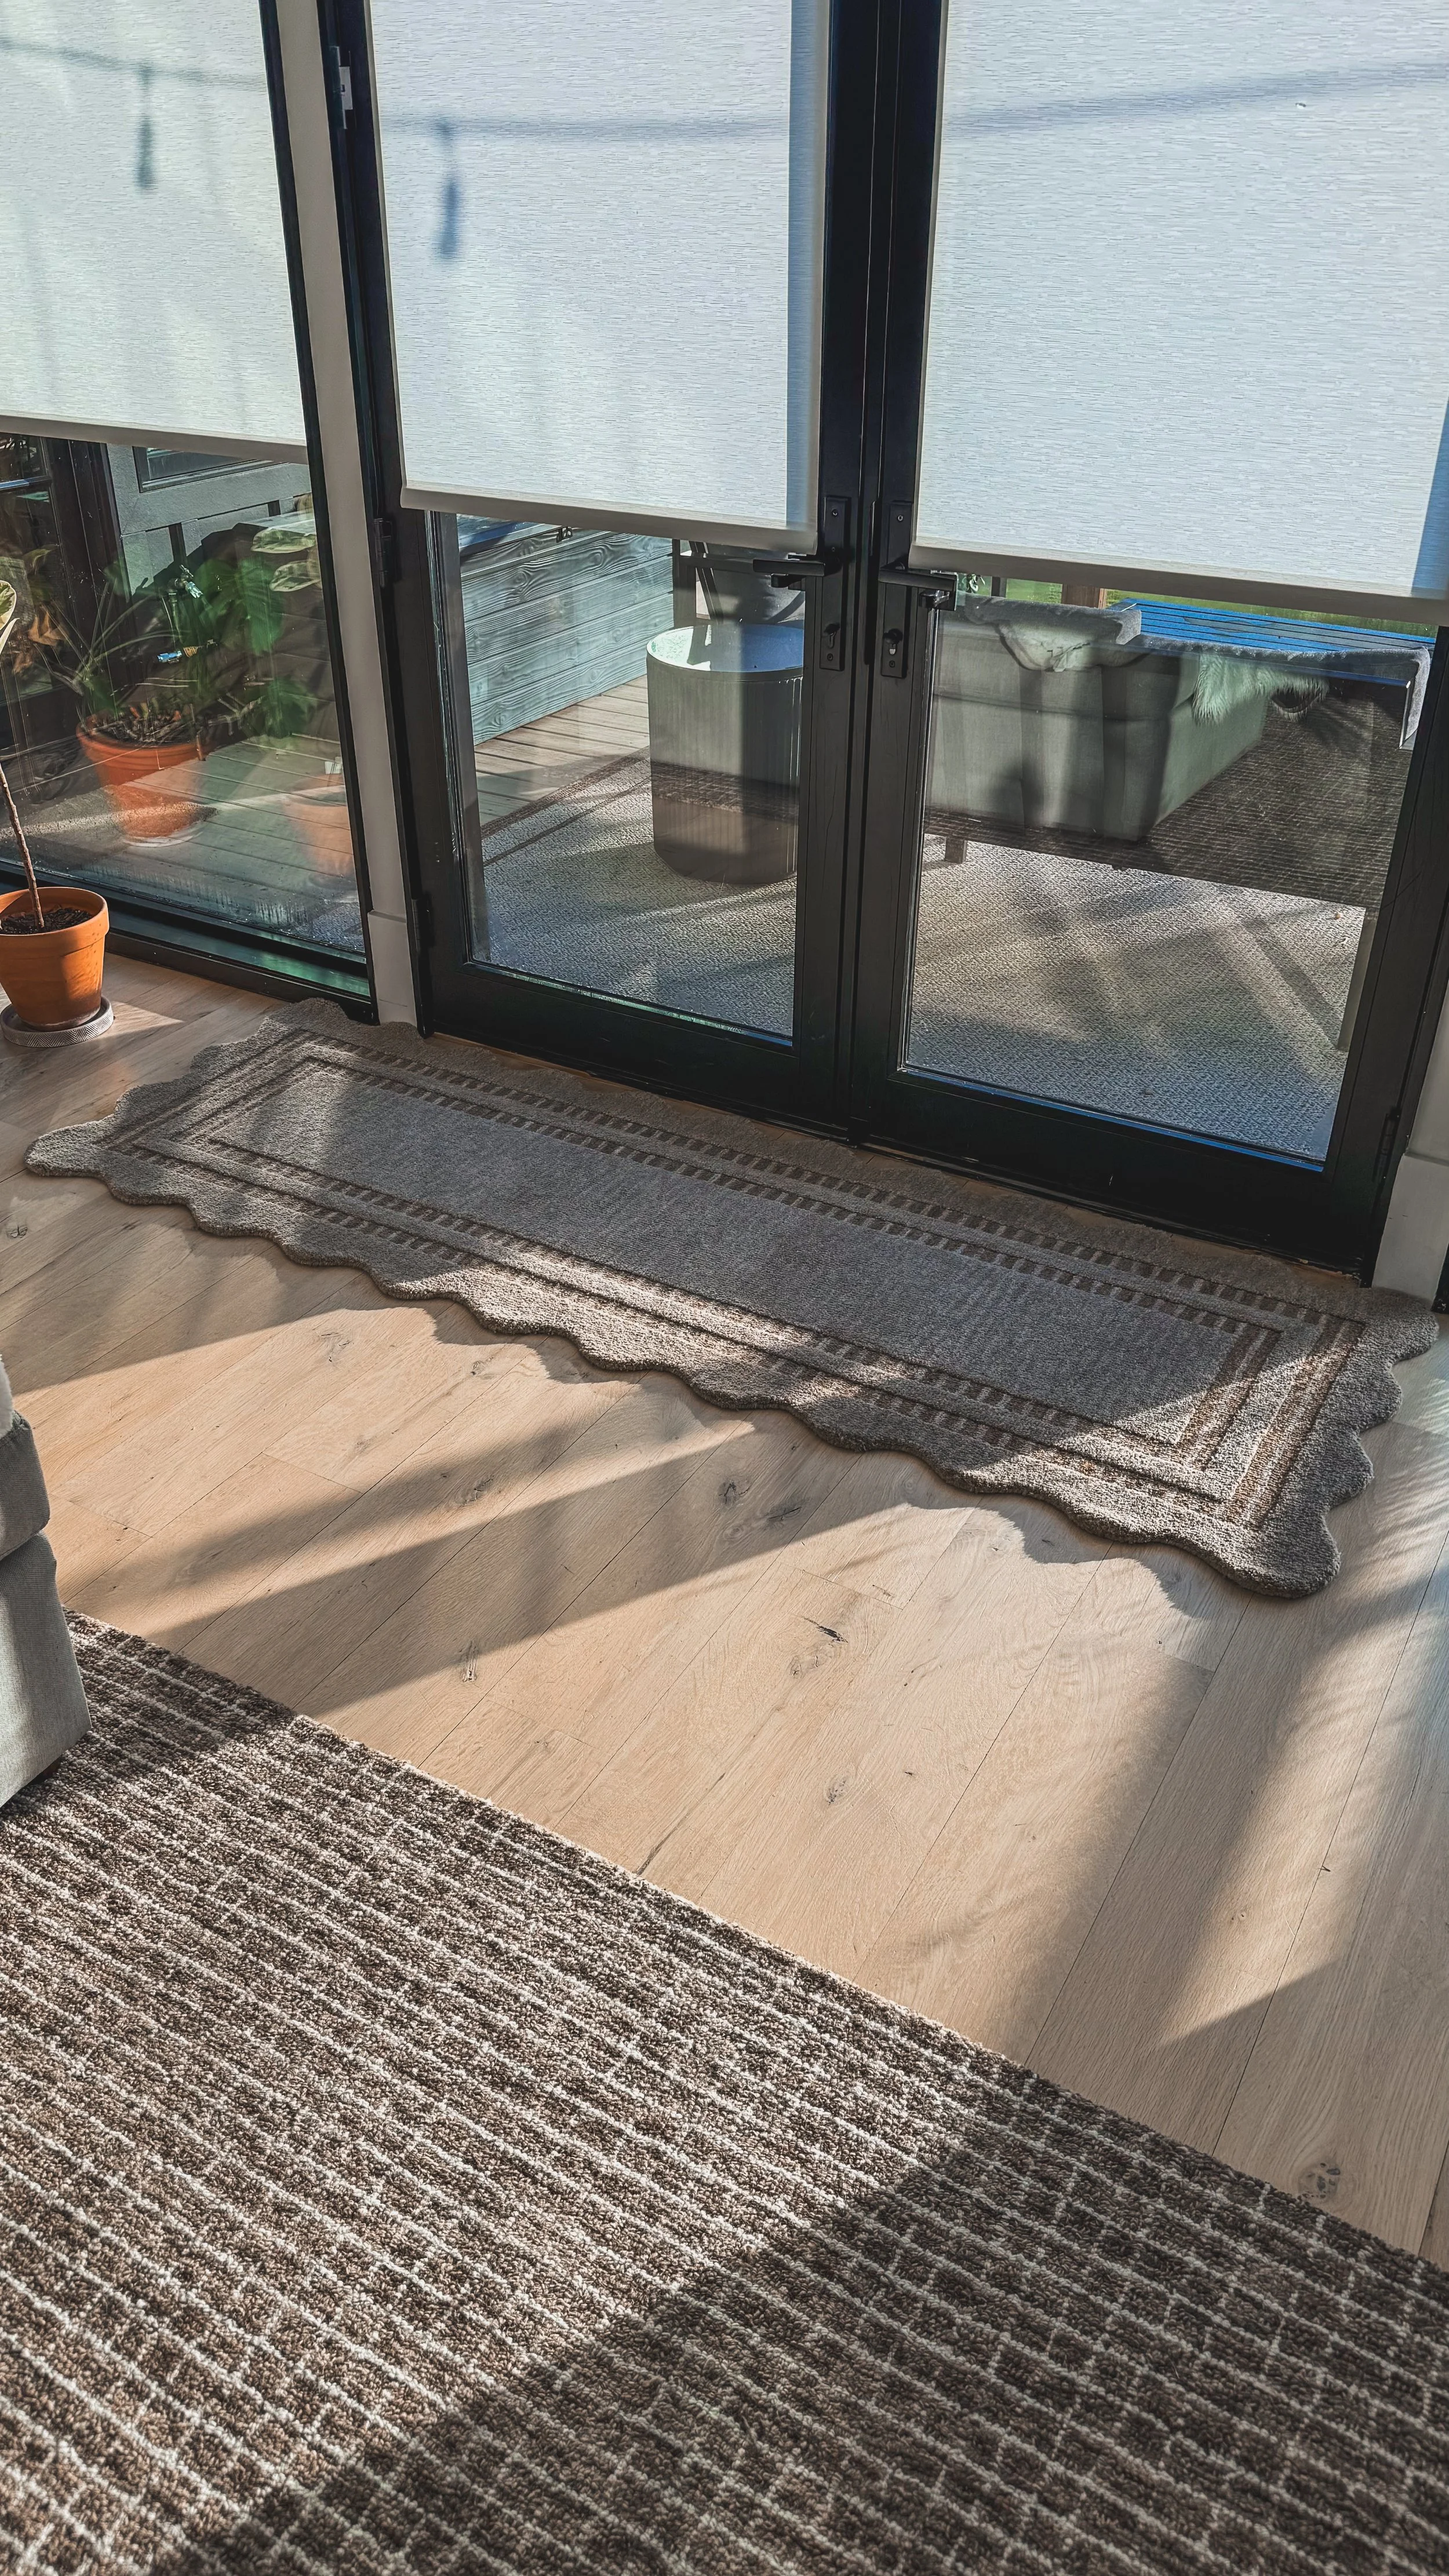
Sunroom
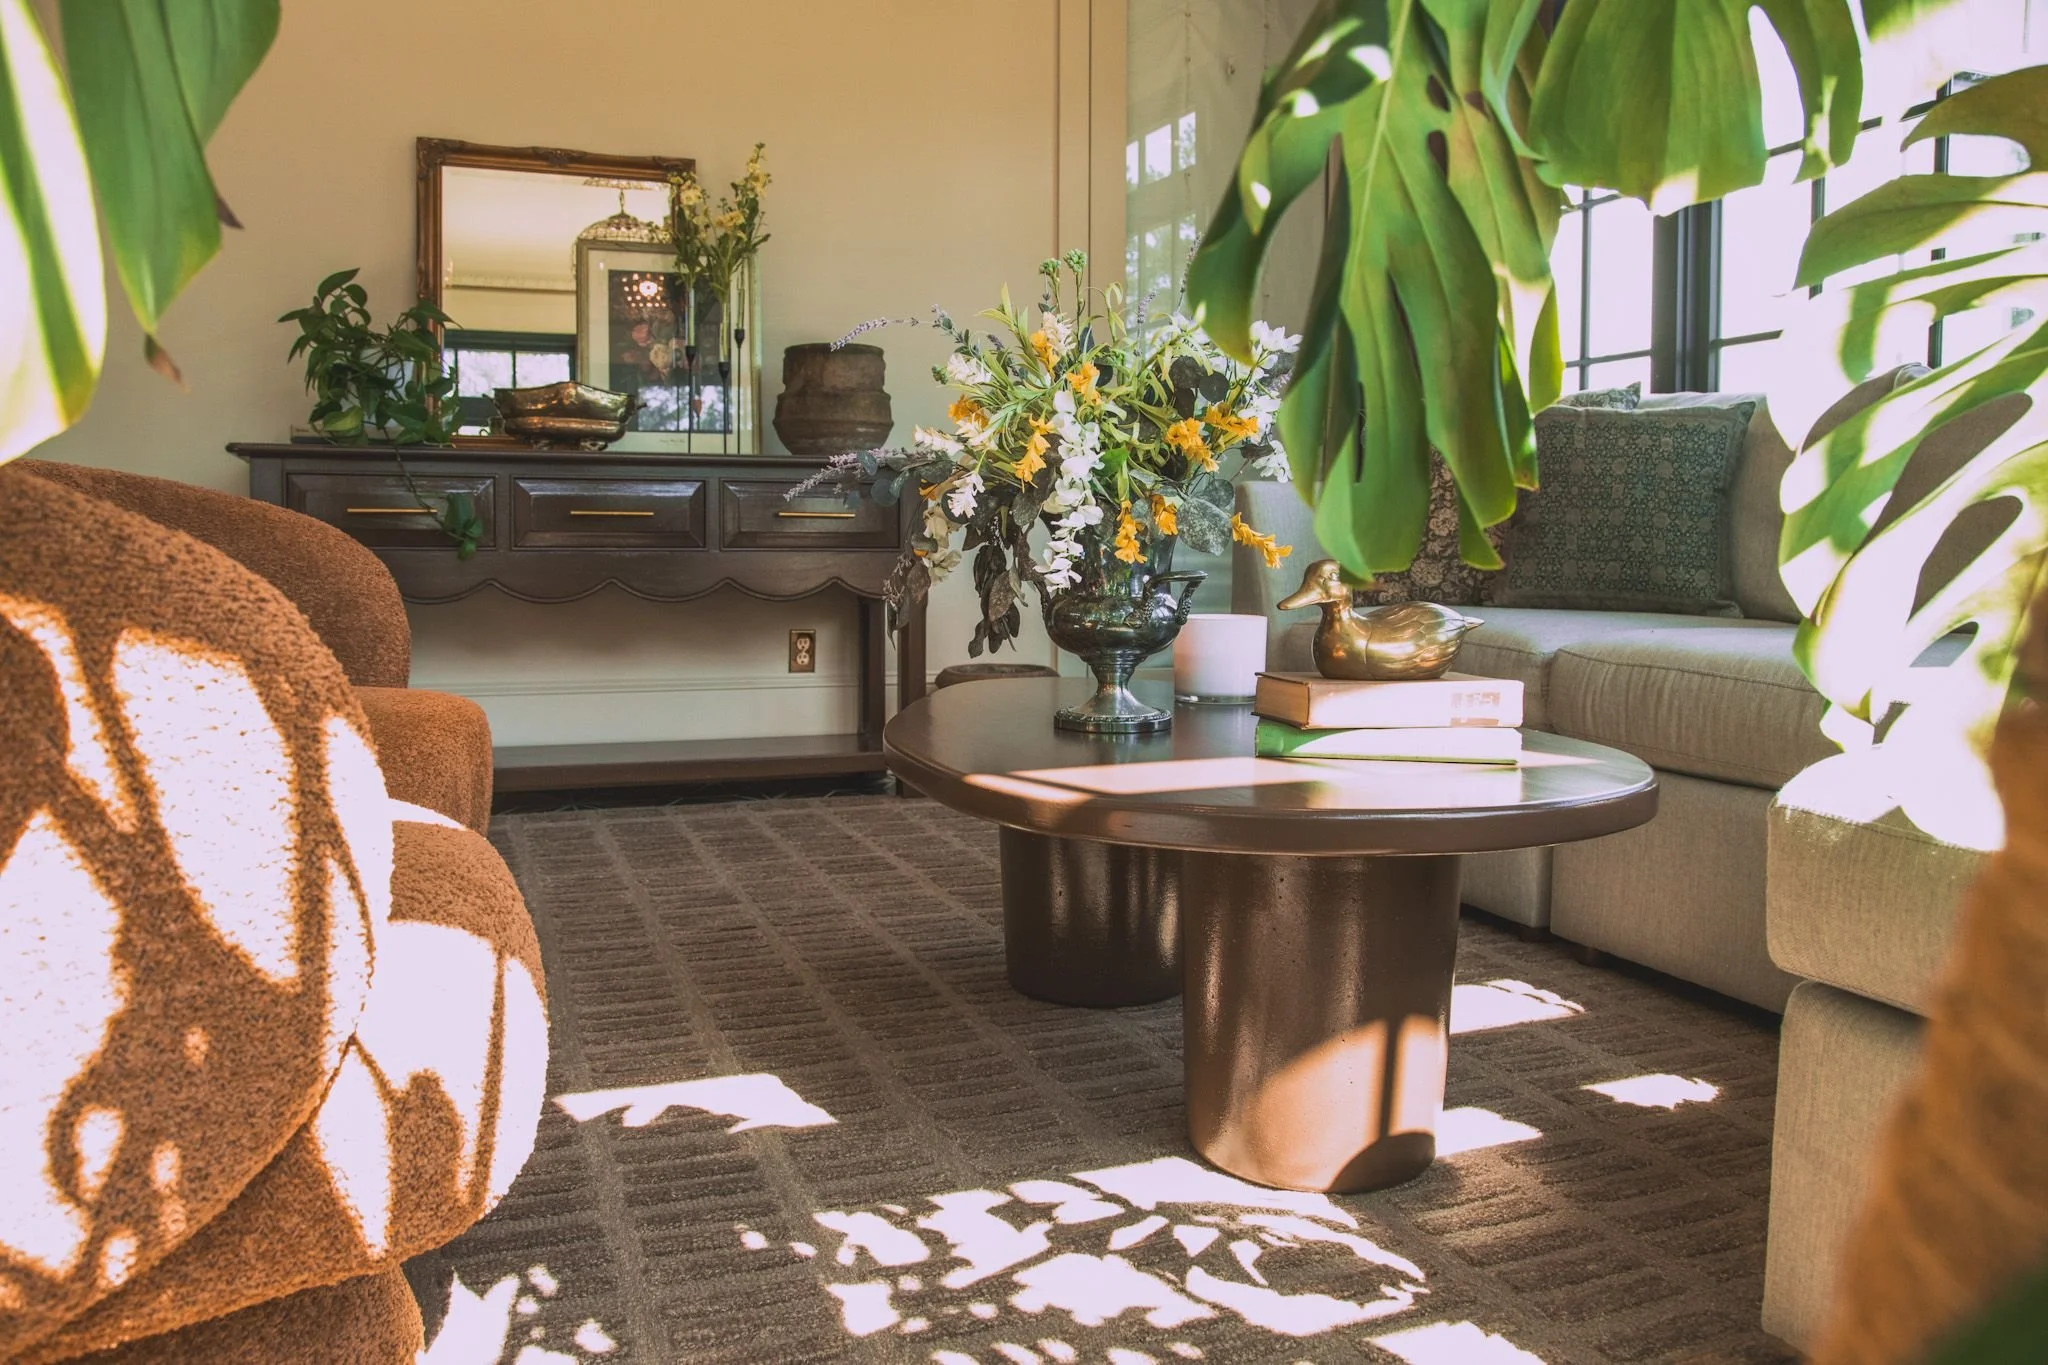
Sunroom rug linked here.
Playroom
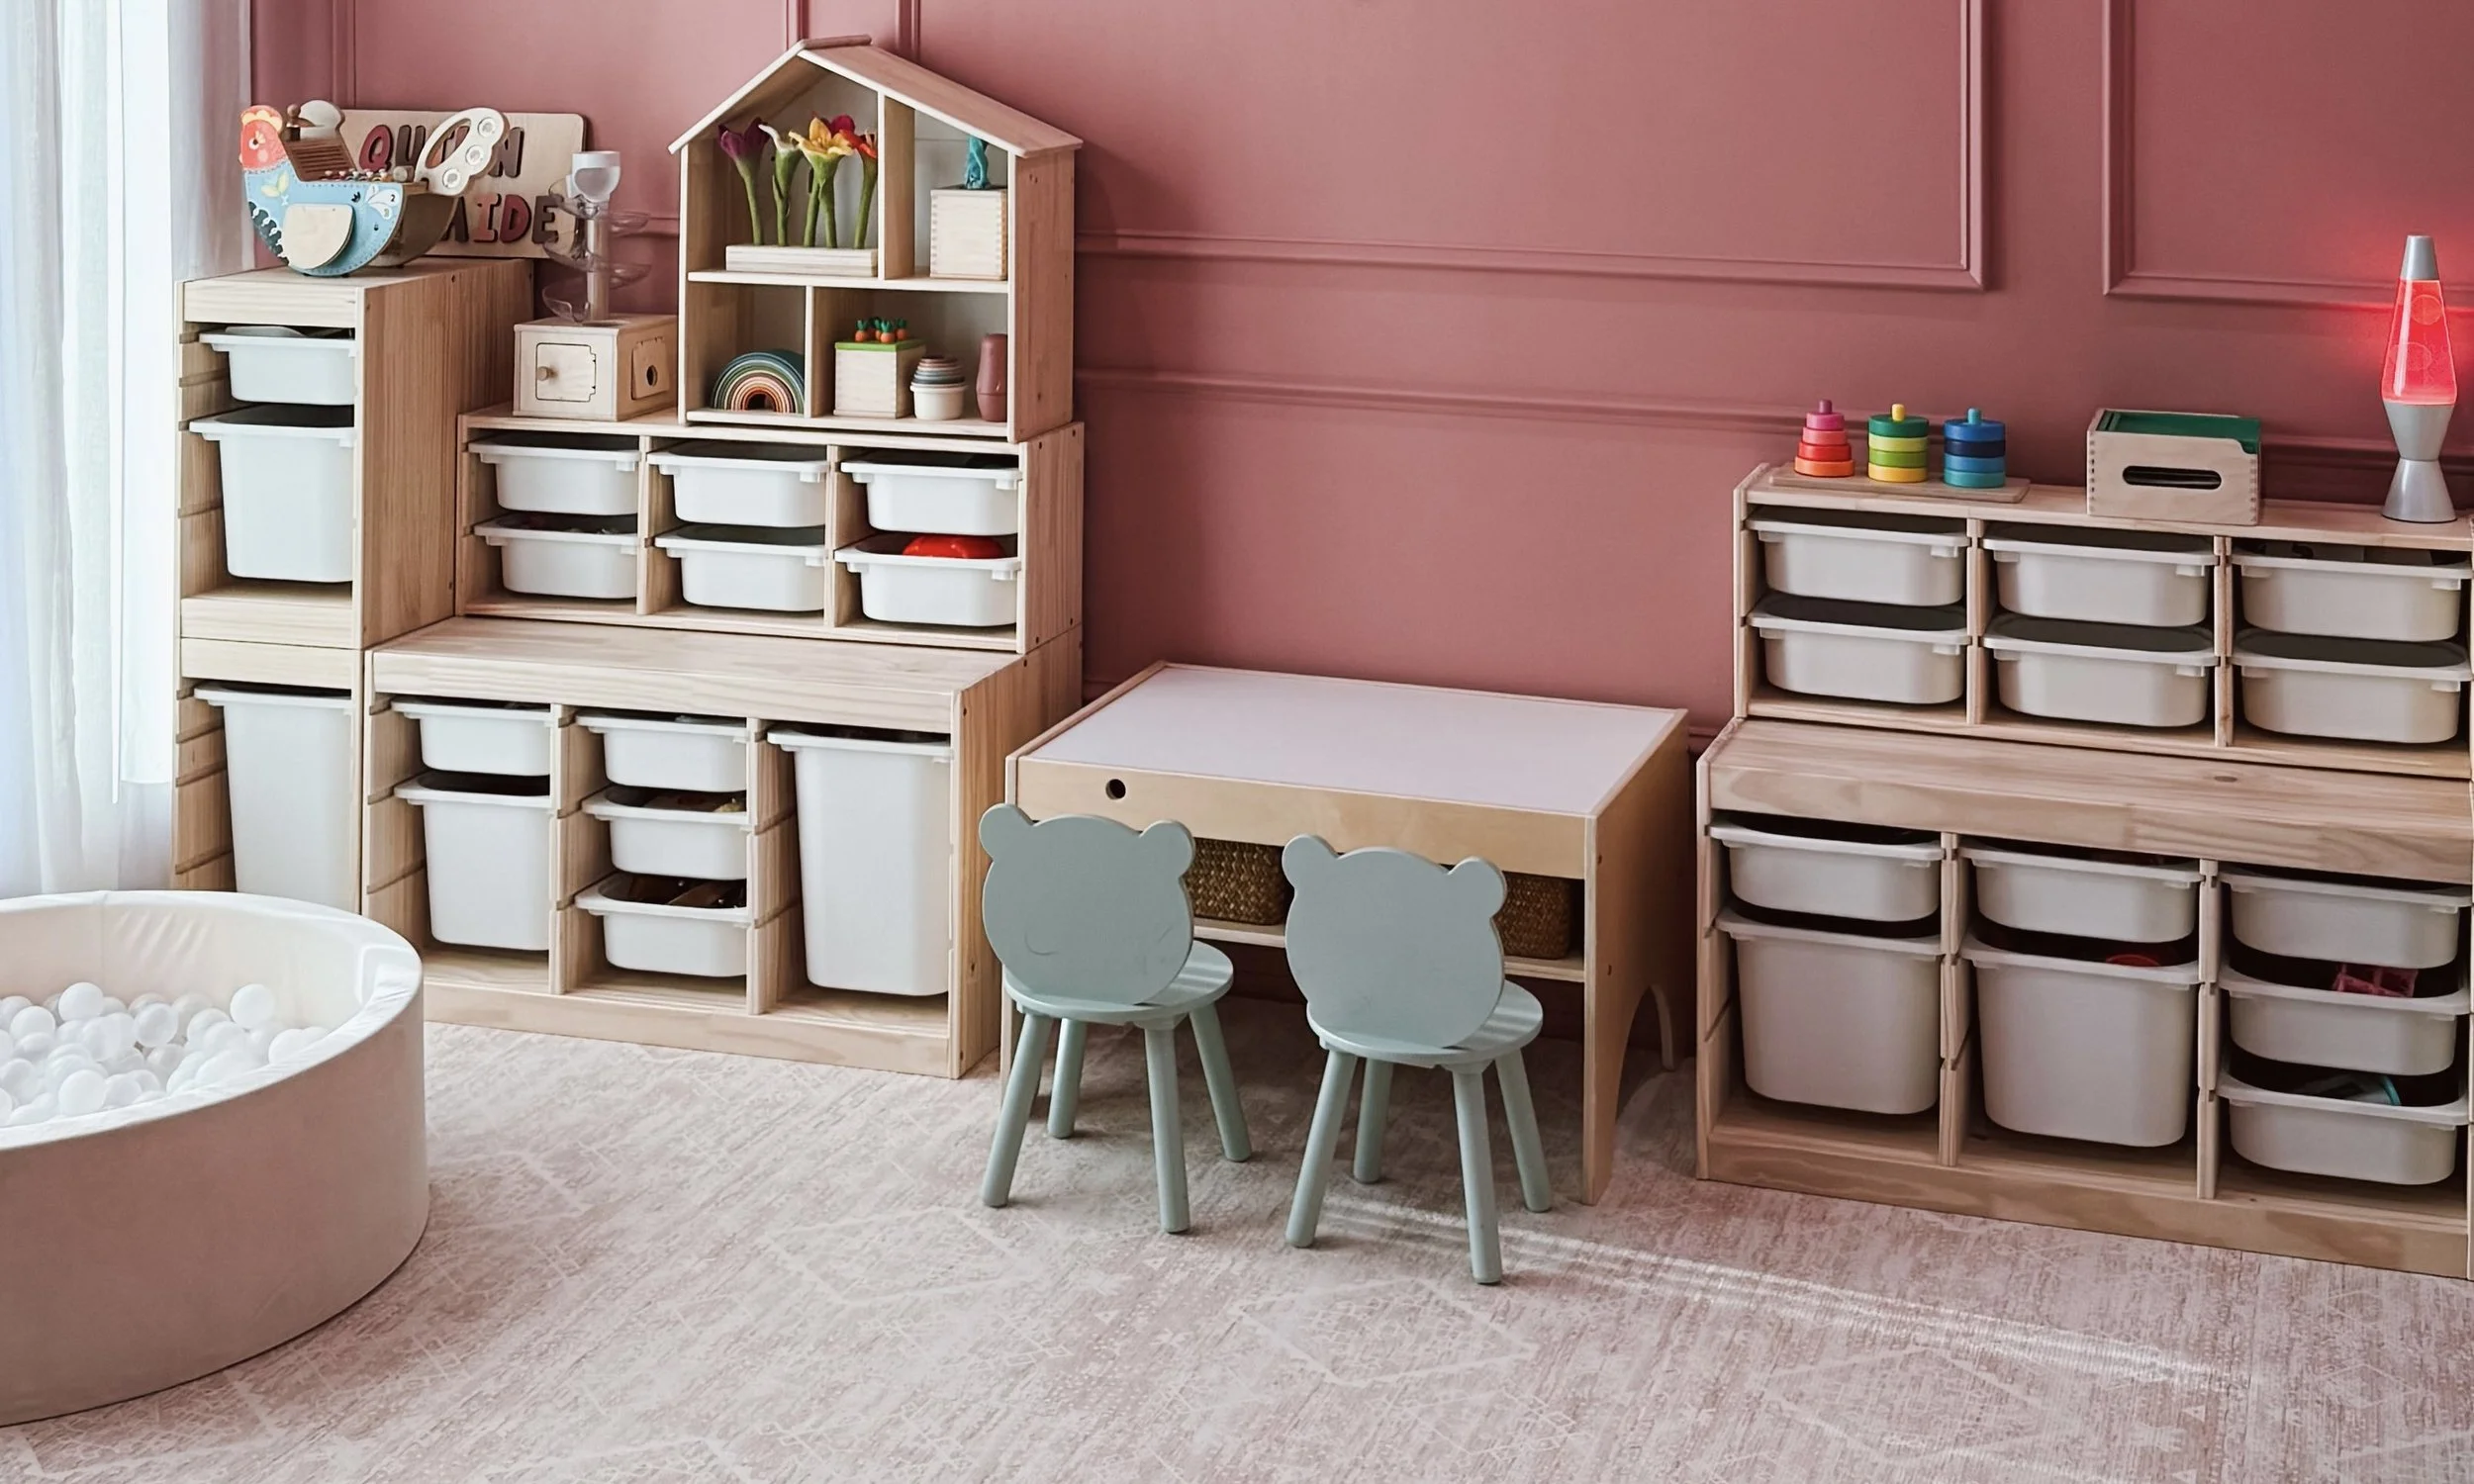
Playroom soft mat linked here.
Red Bathroom
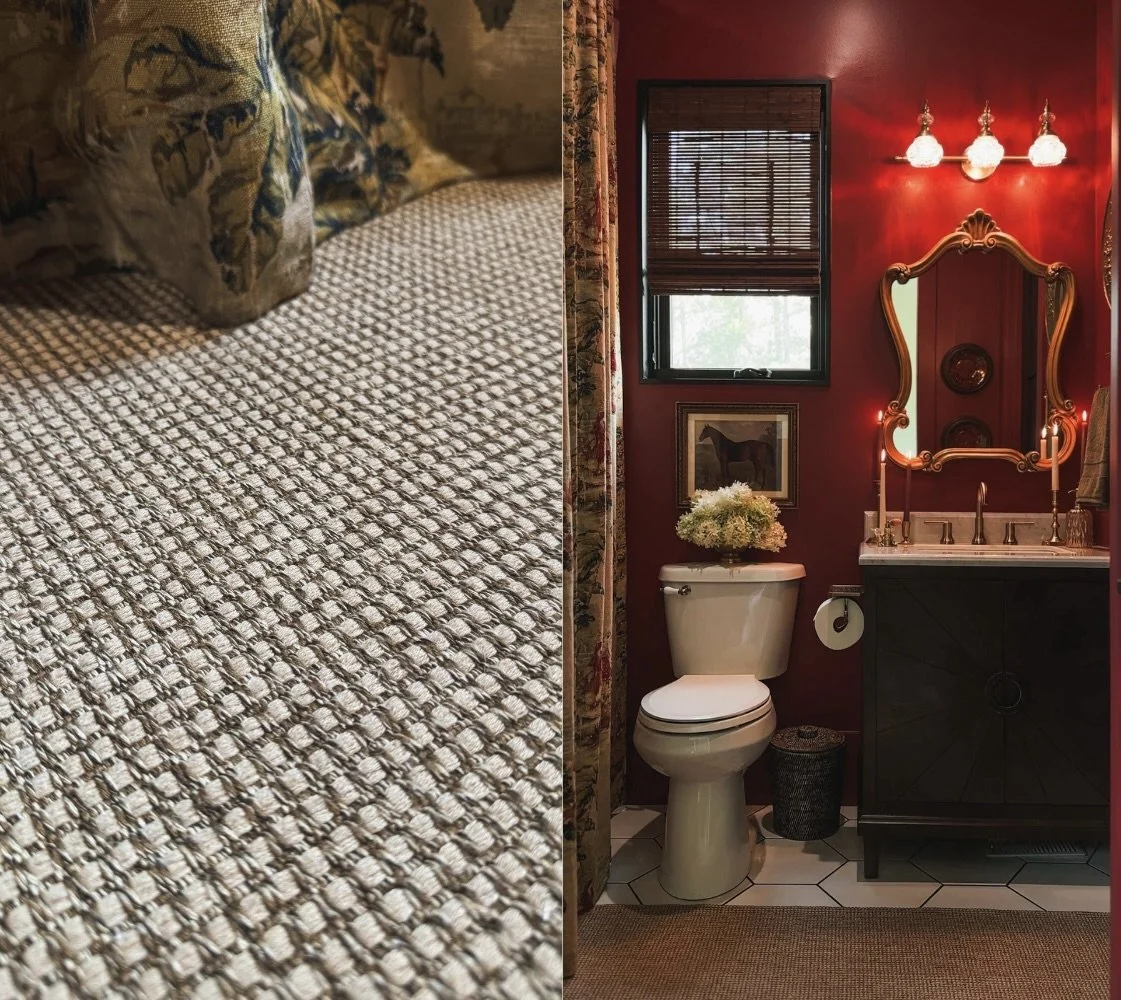
Red bathroom rug linked here.
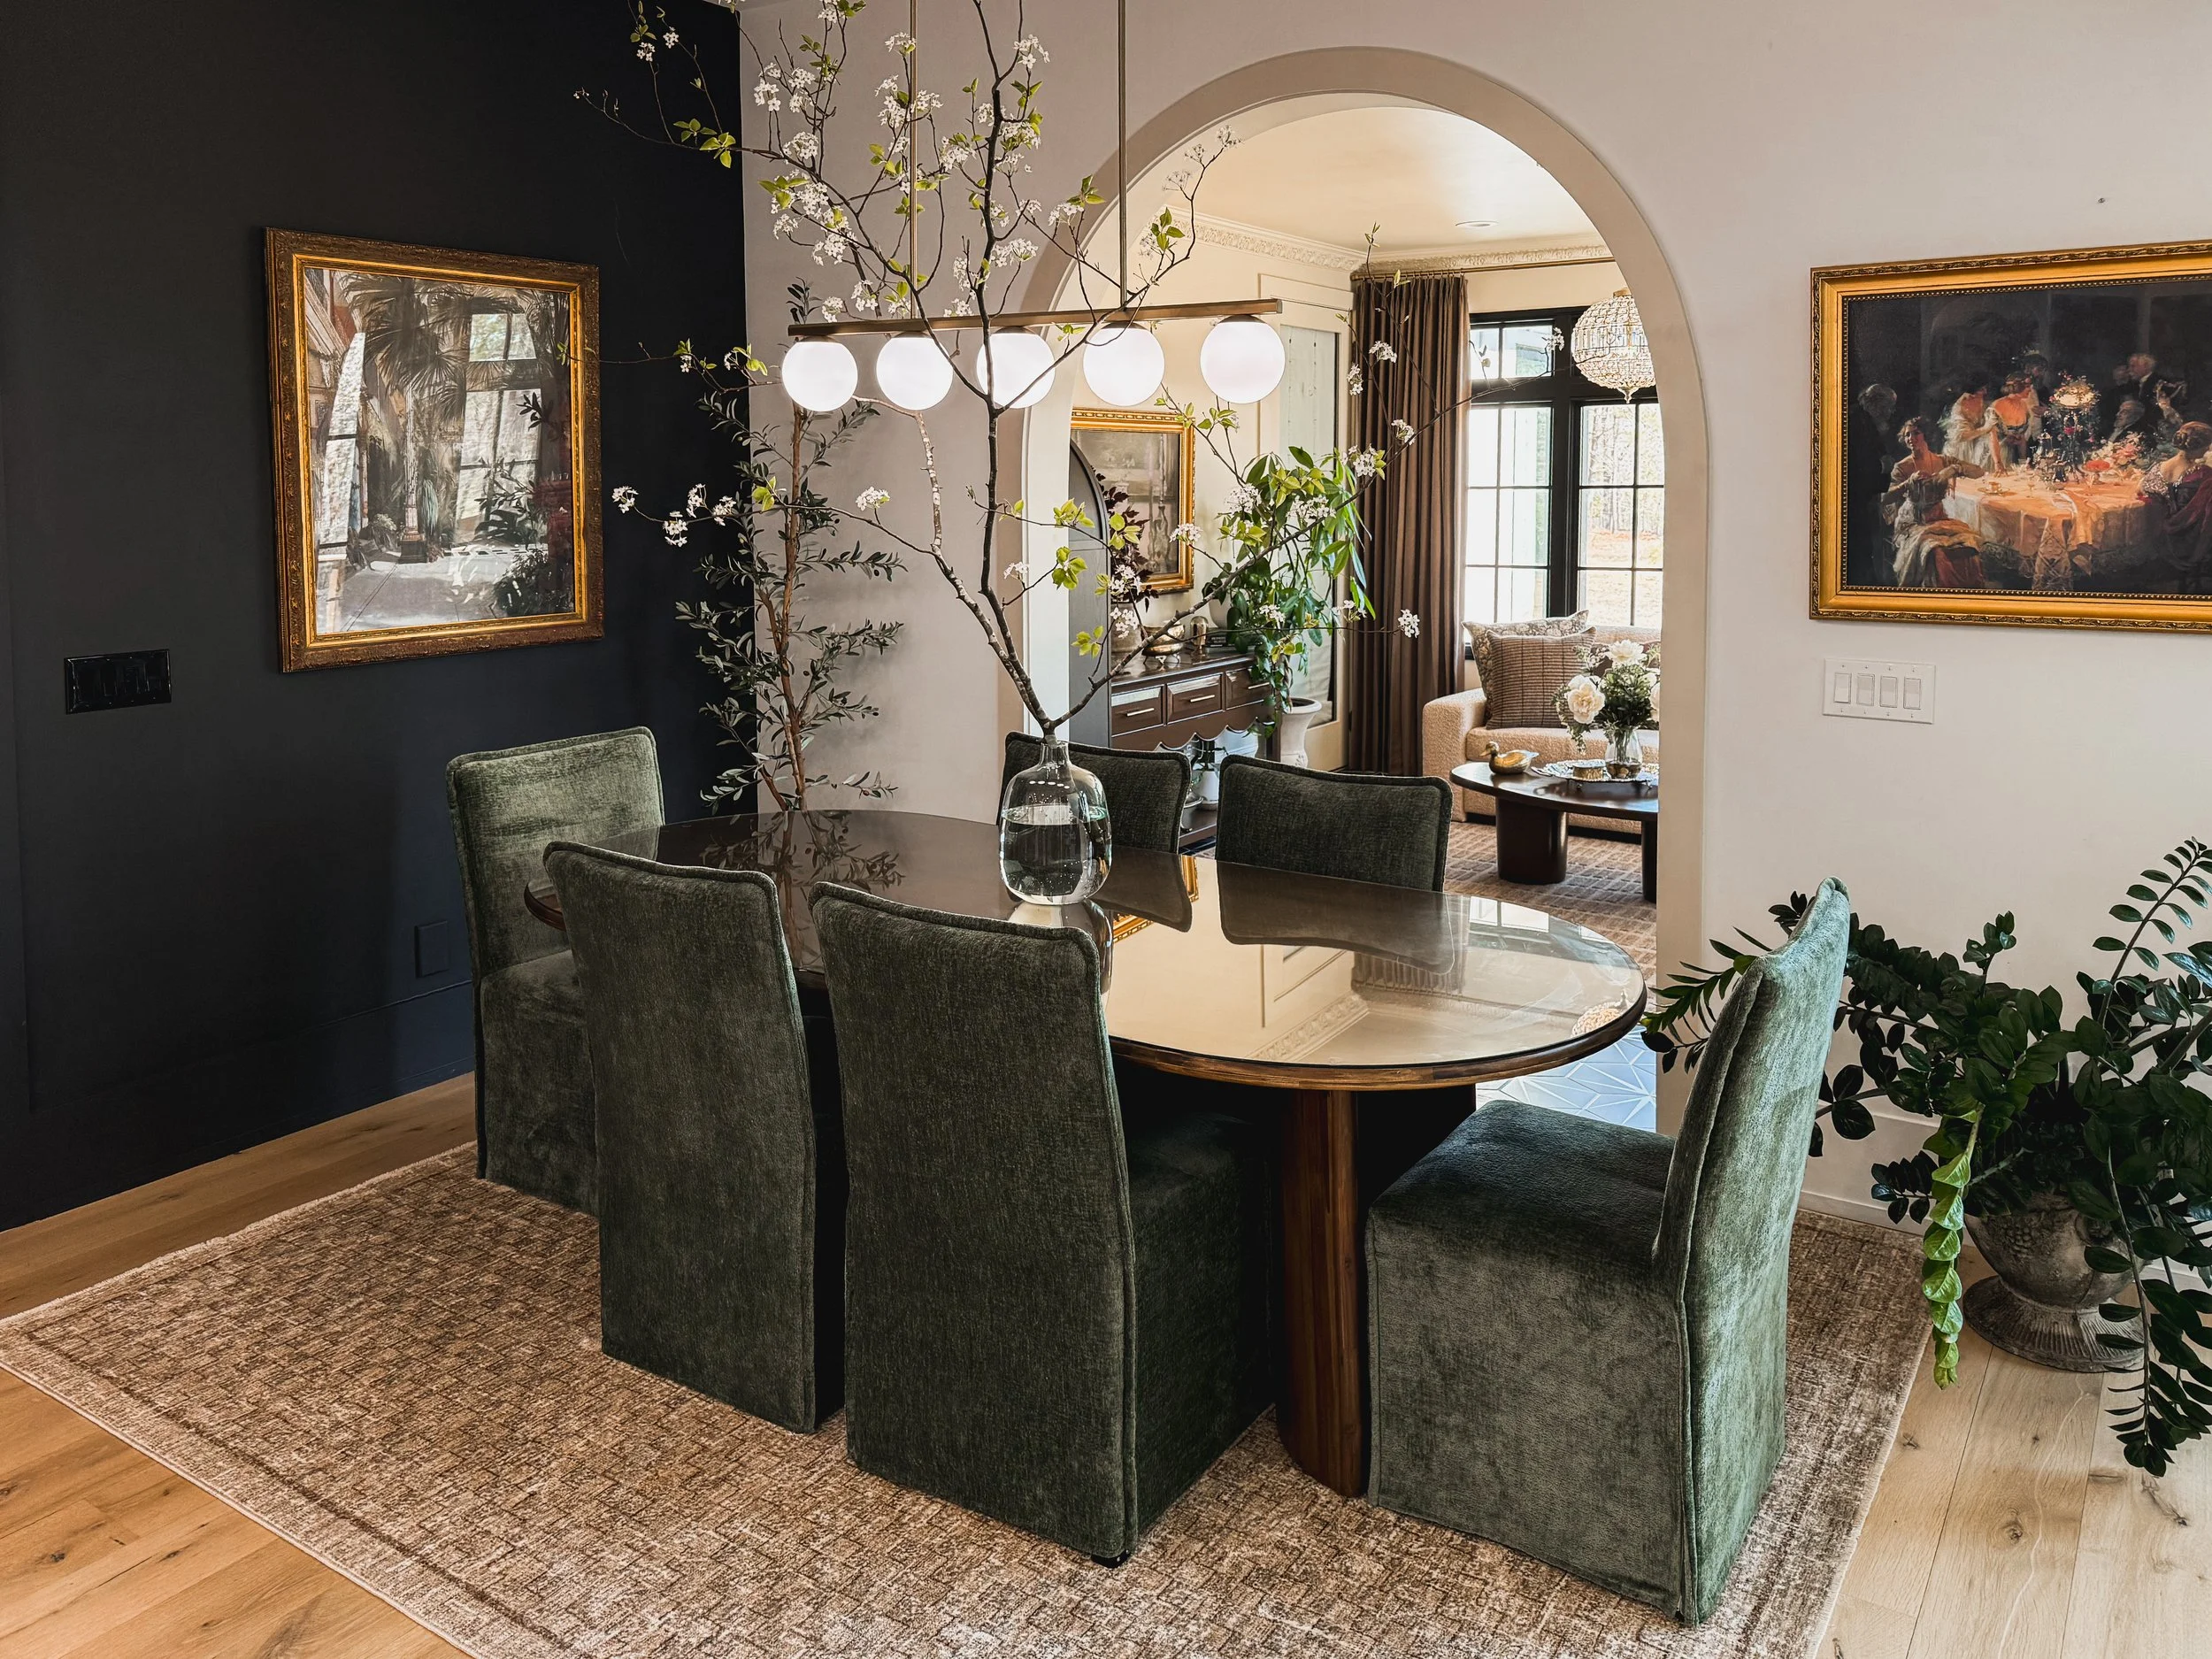
Dining Room

Dining room rug linked here.
Primary Bathroom
Primary Bathroom rug linked here.
Blue Floral Bathroom
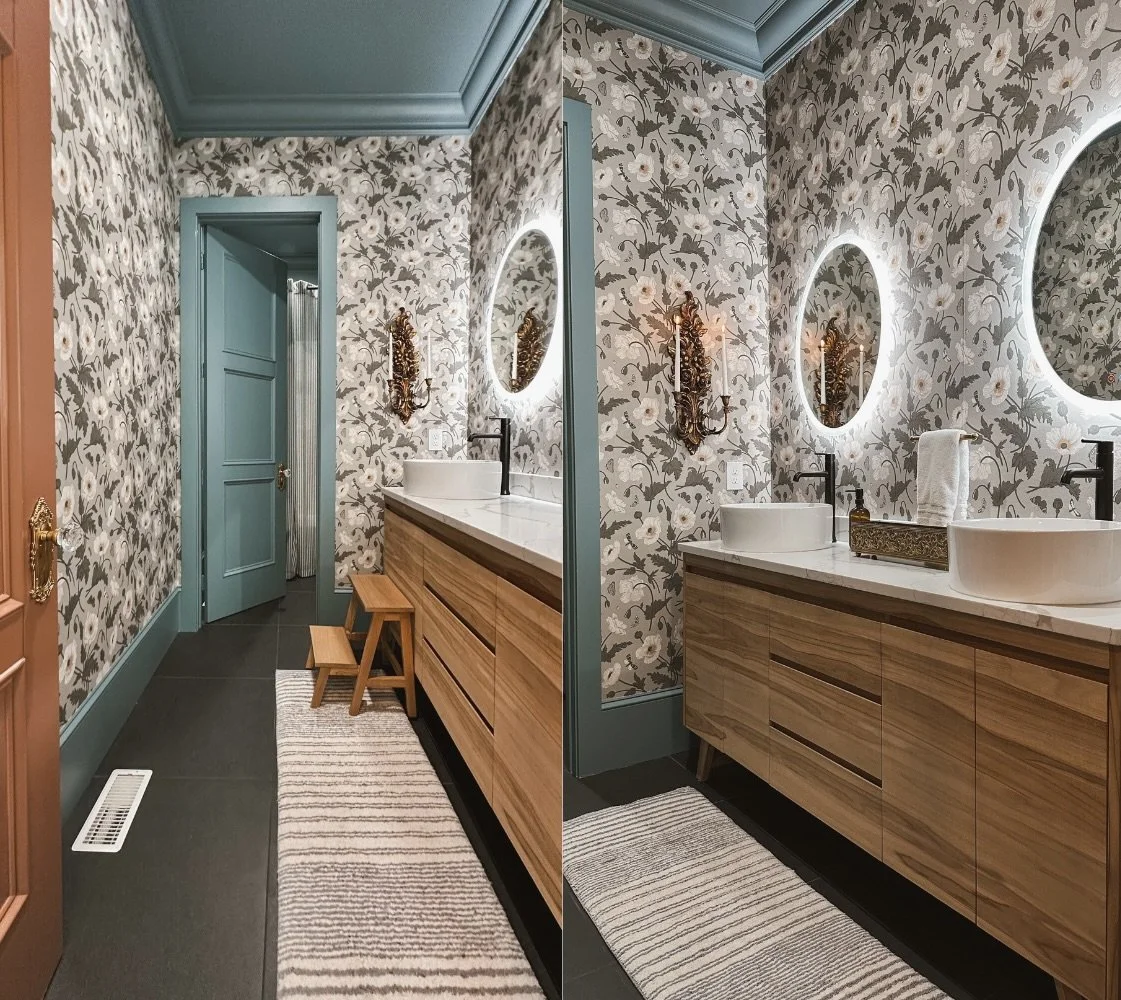
Bath mat linked here.
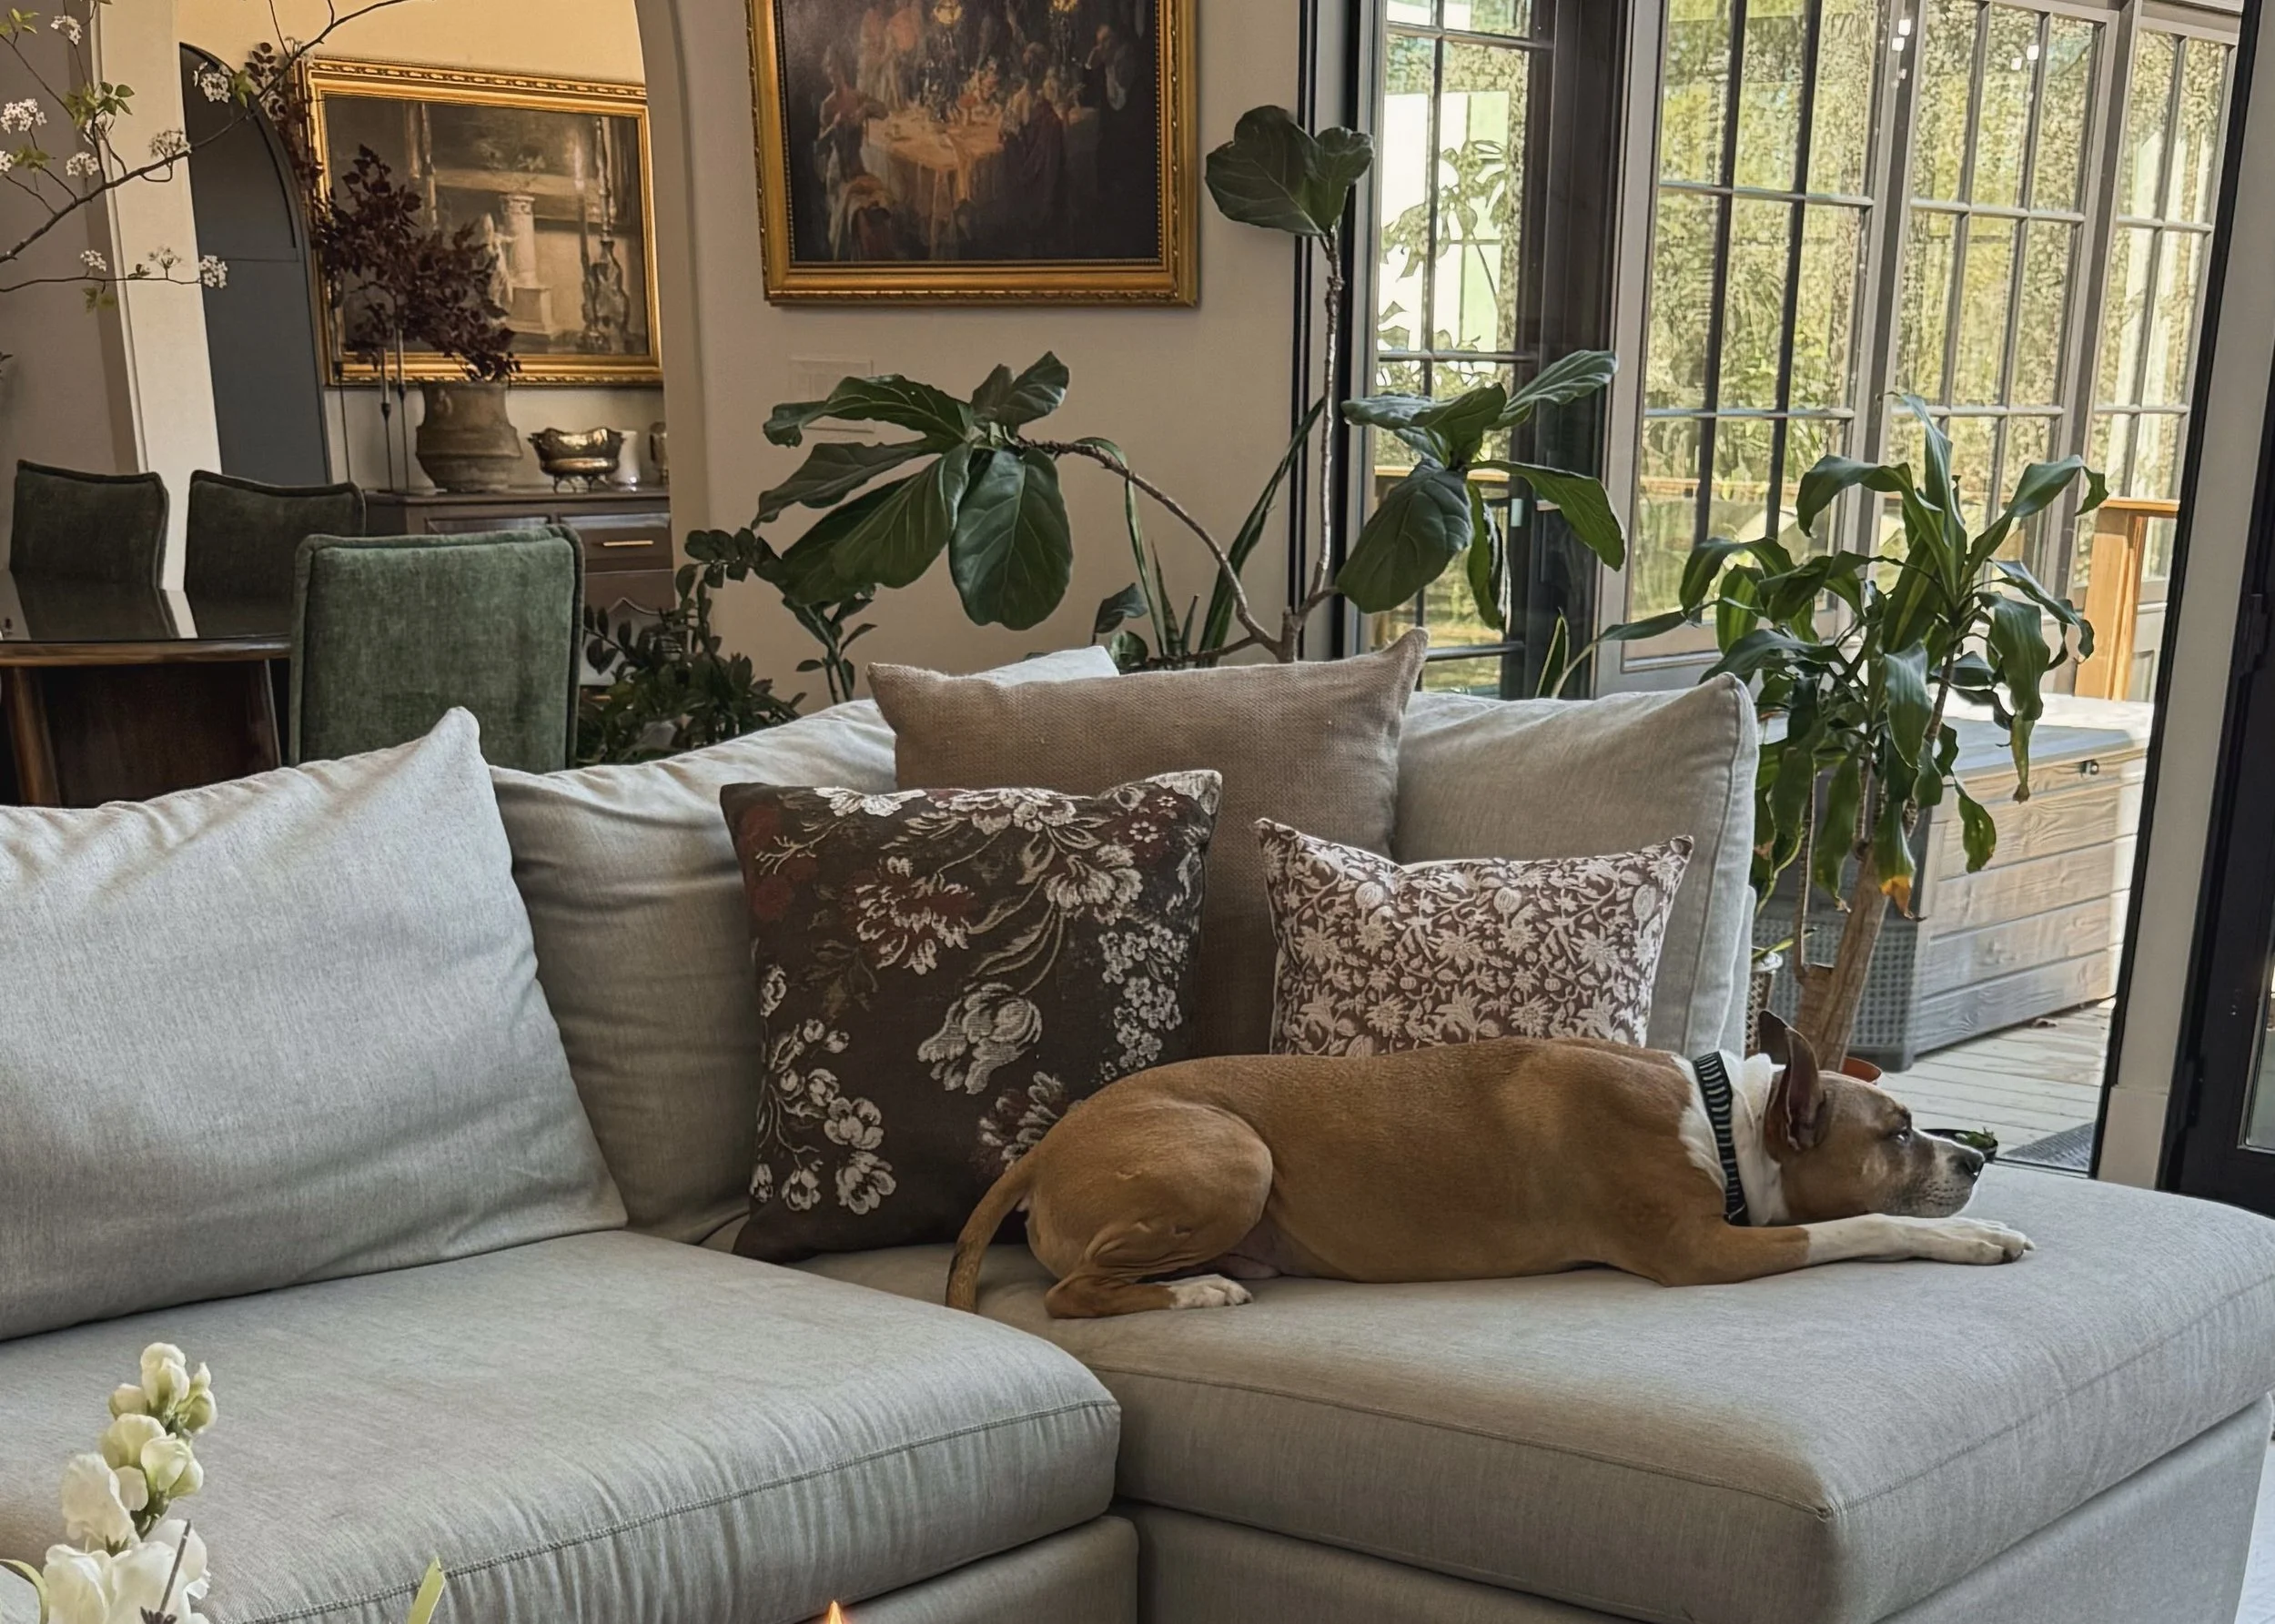
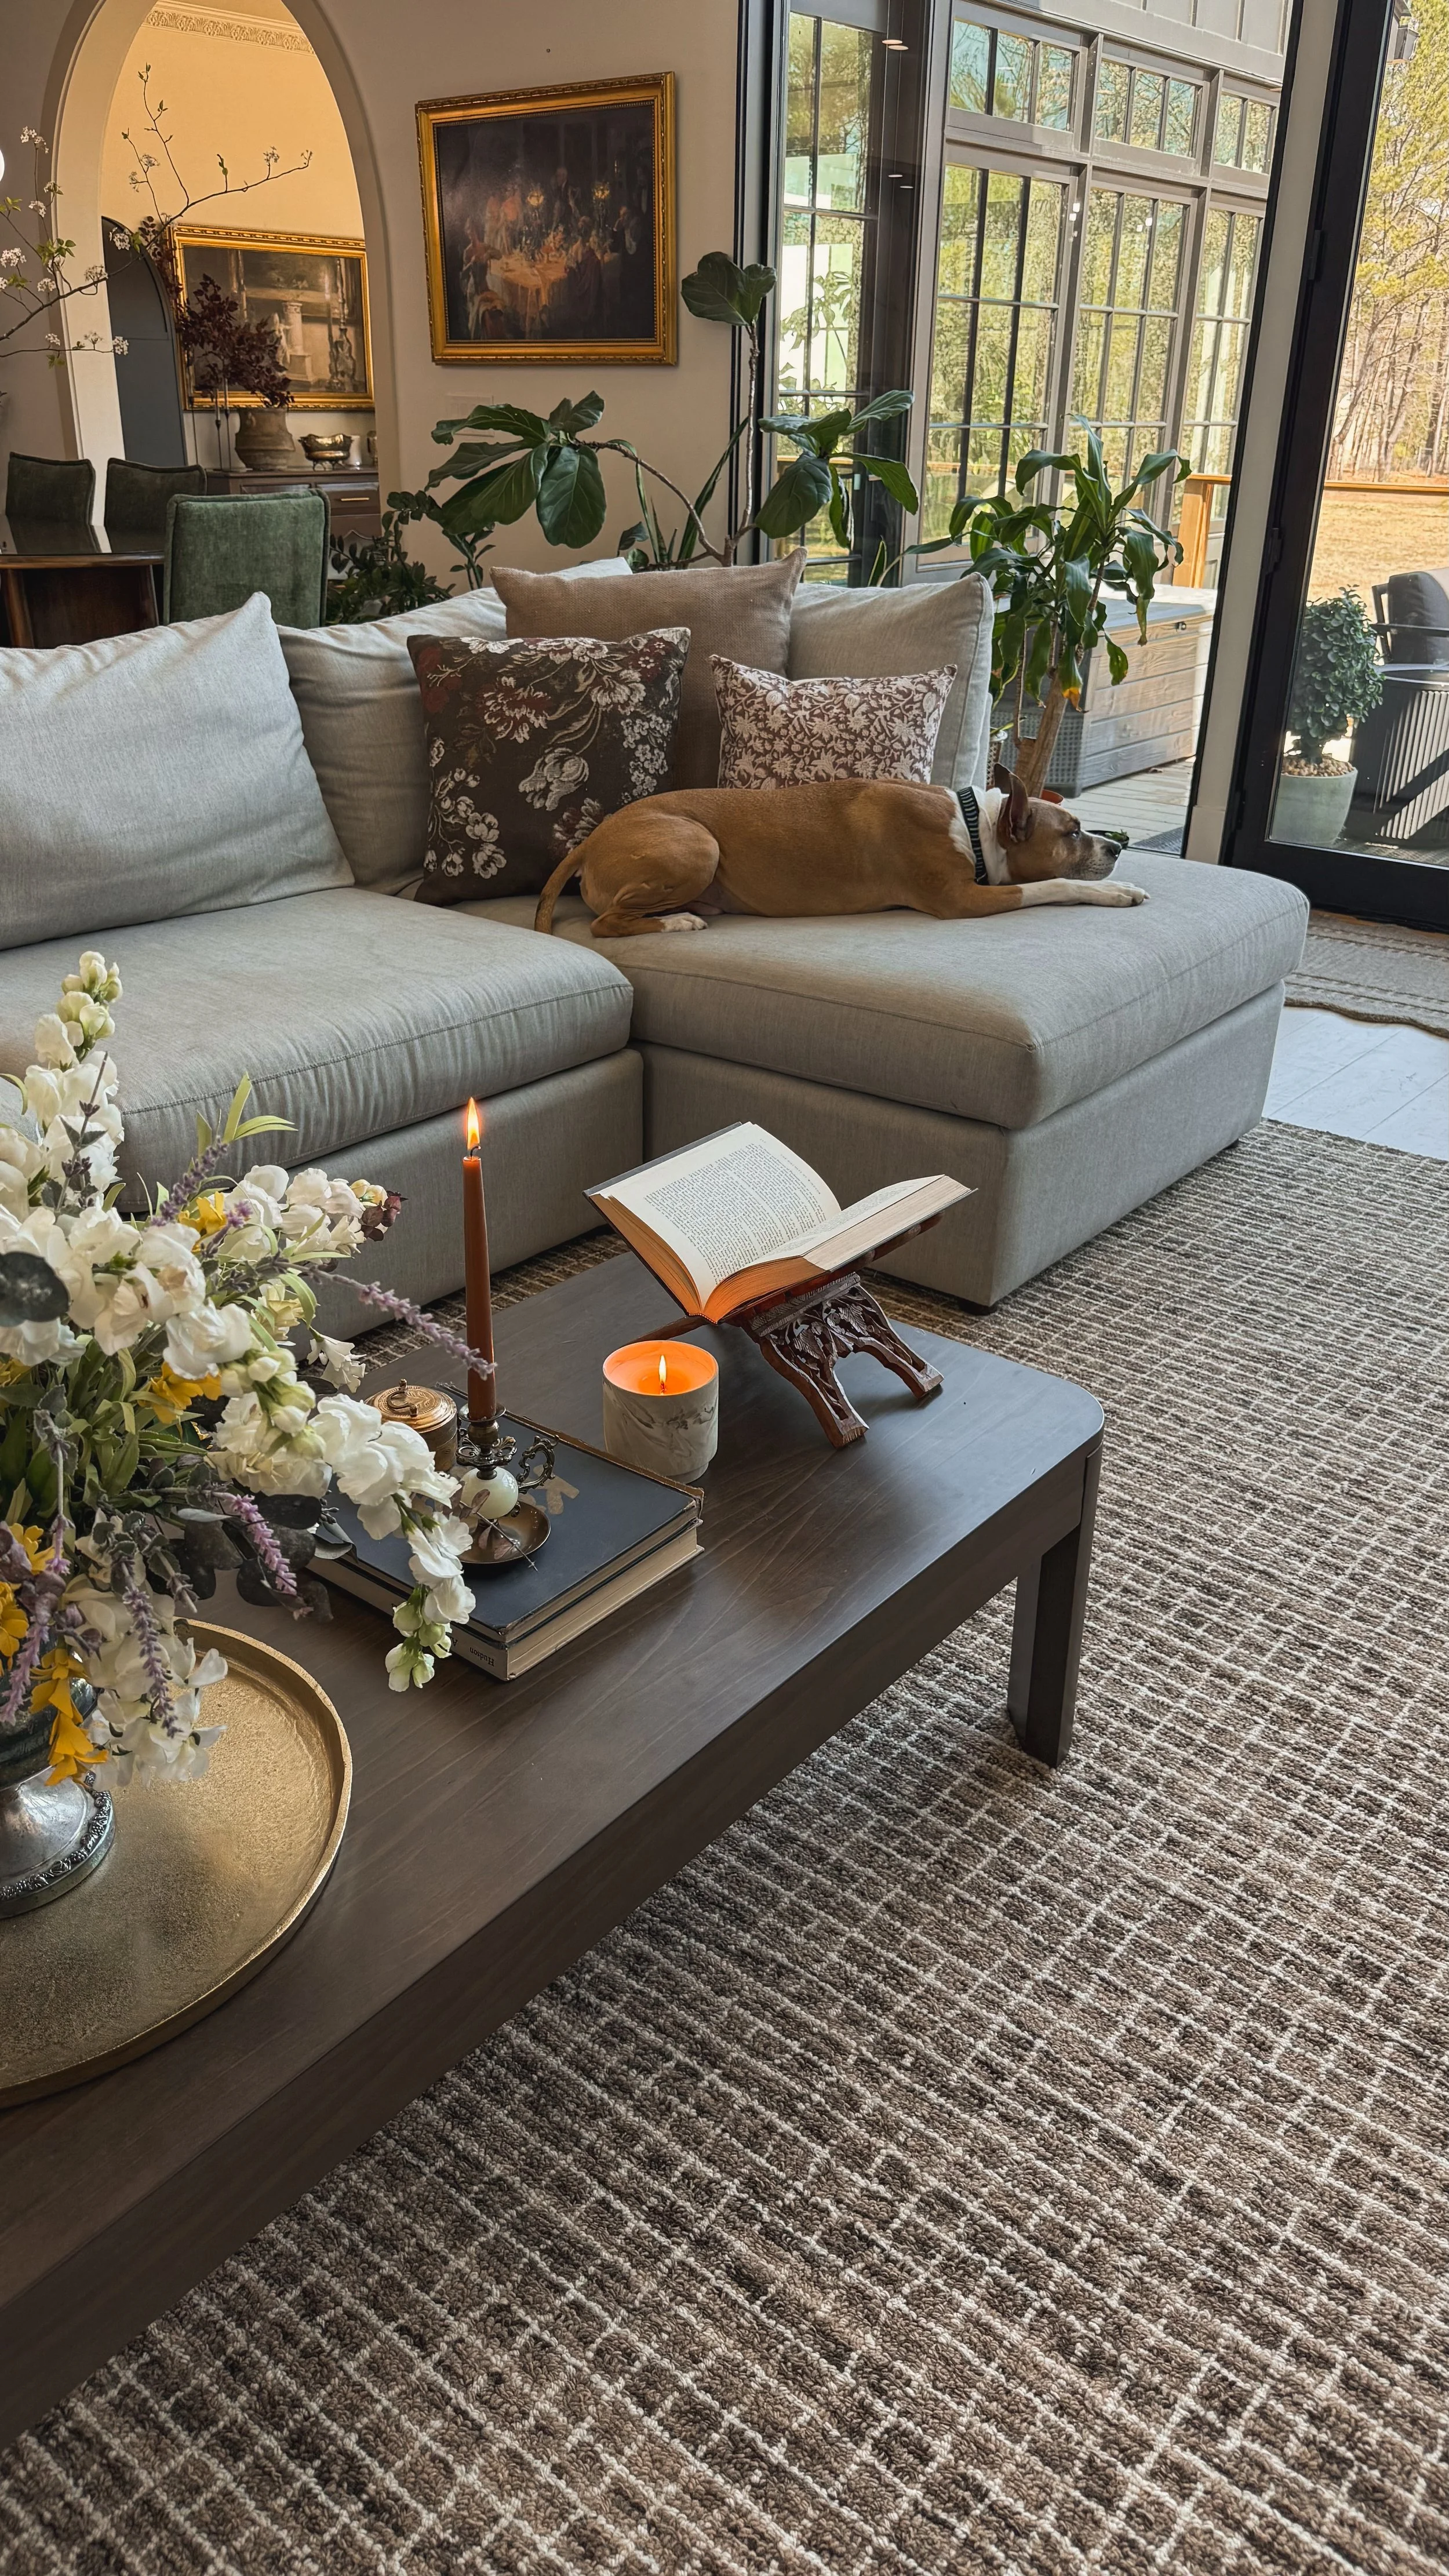
Living Room
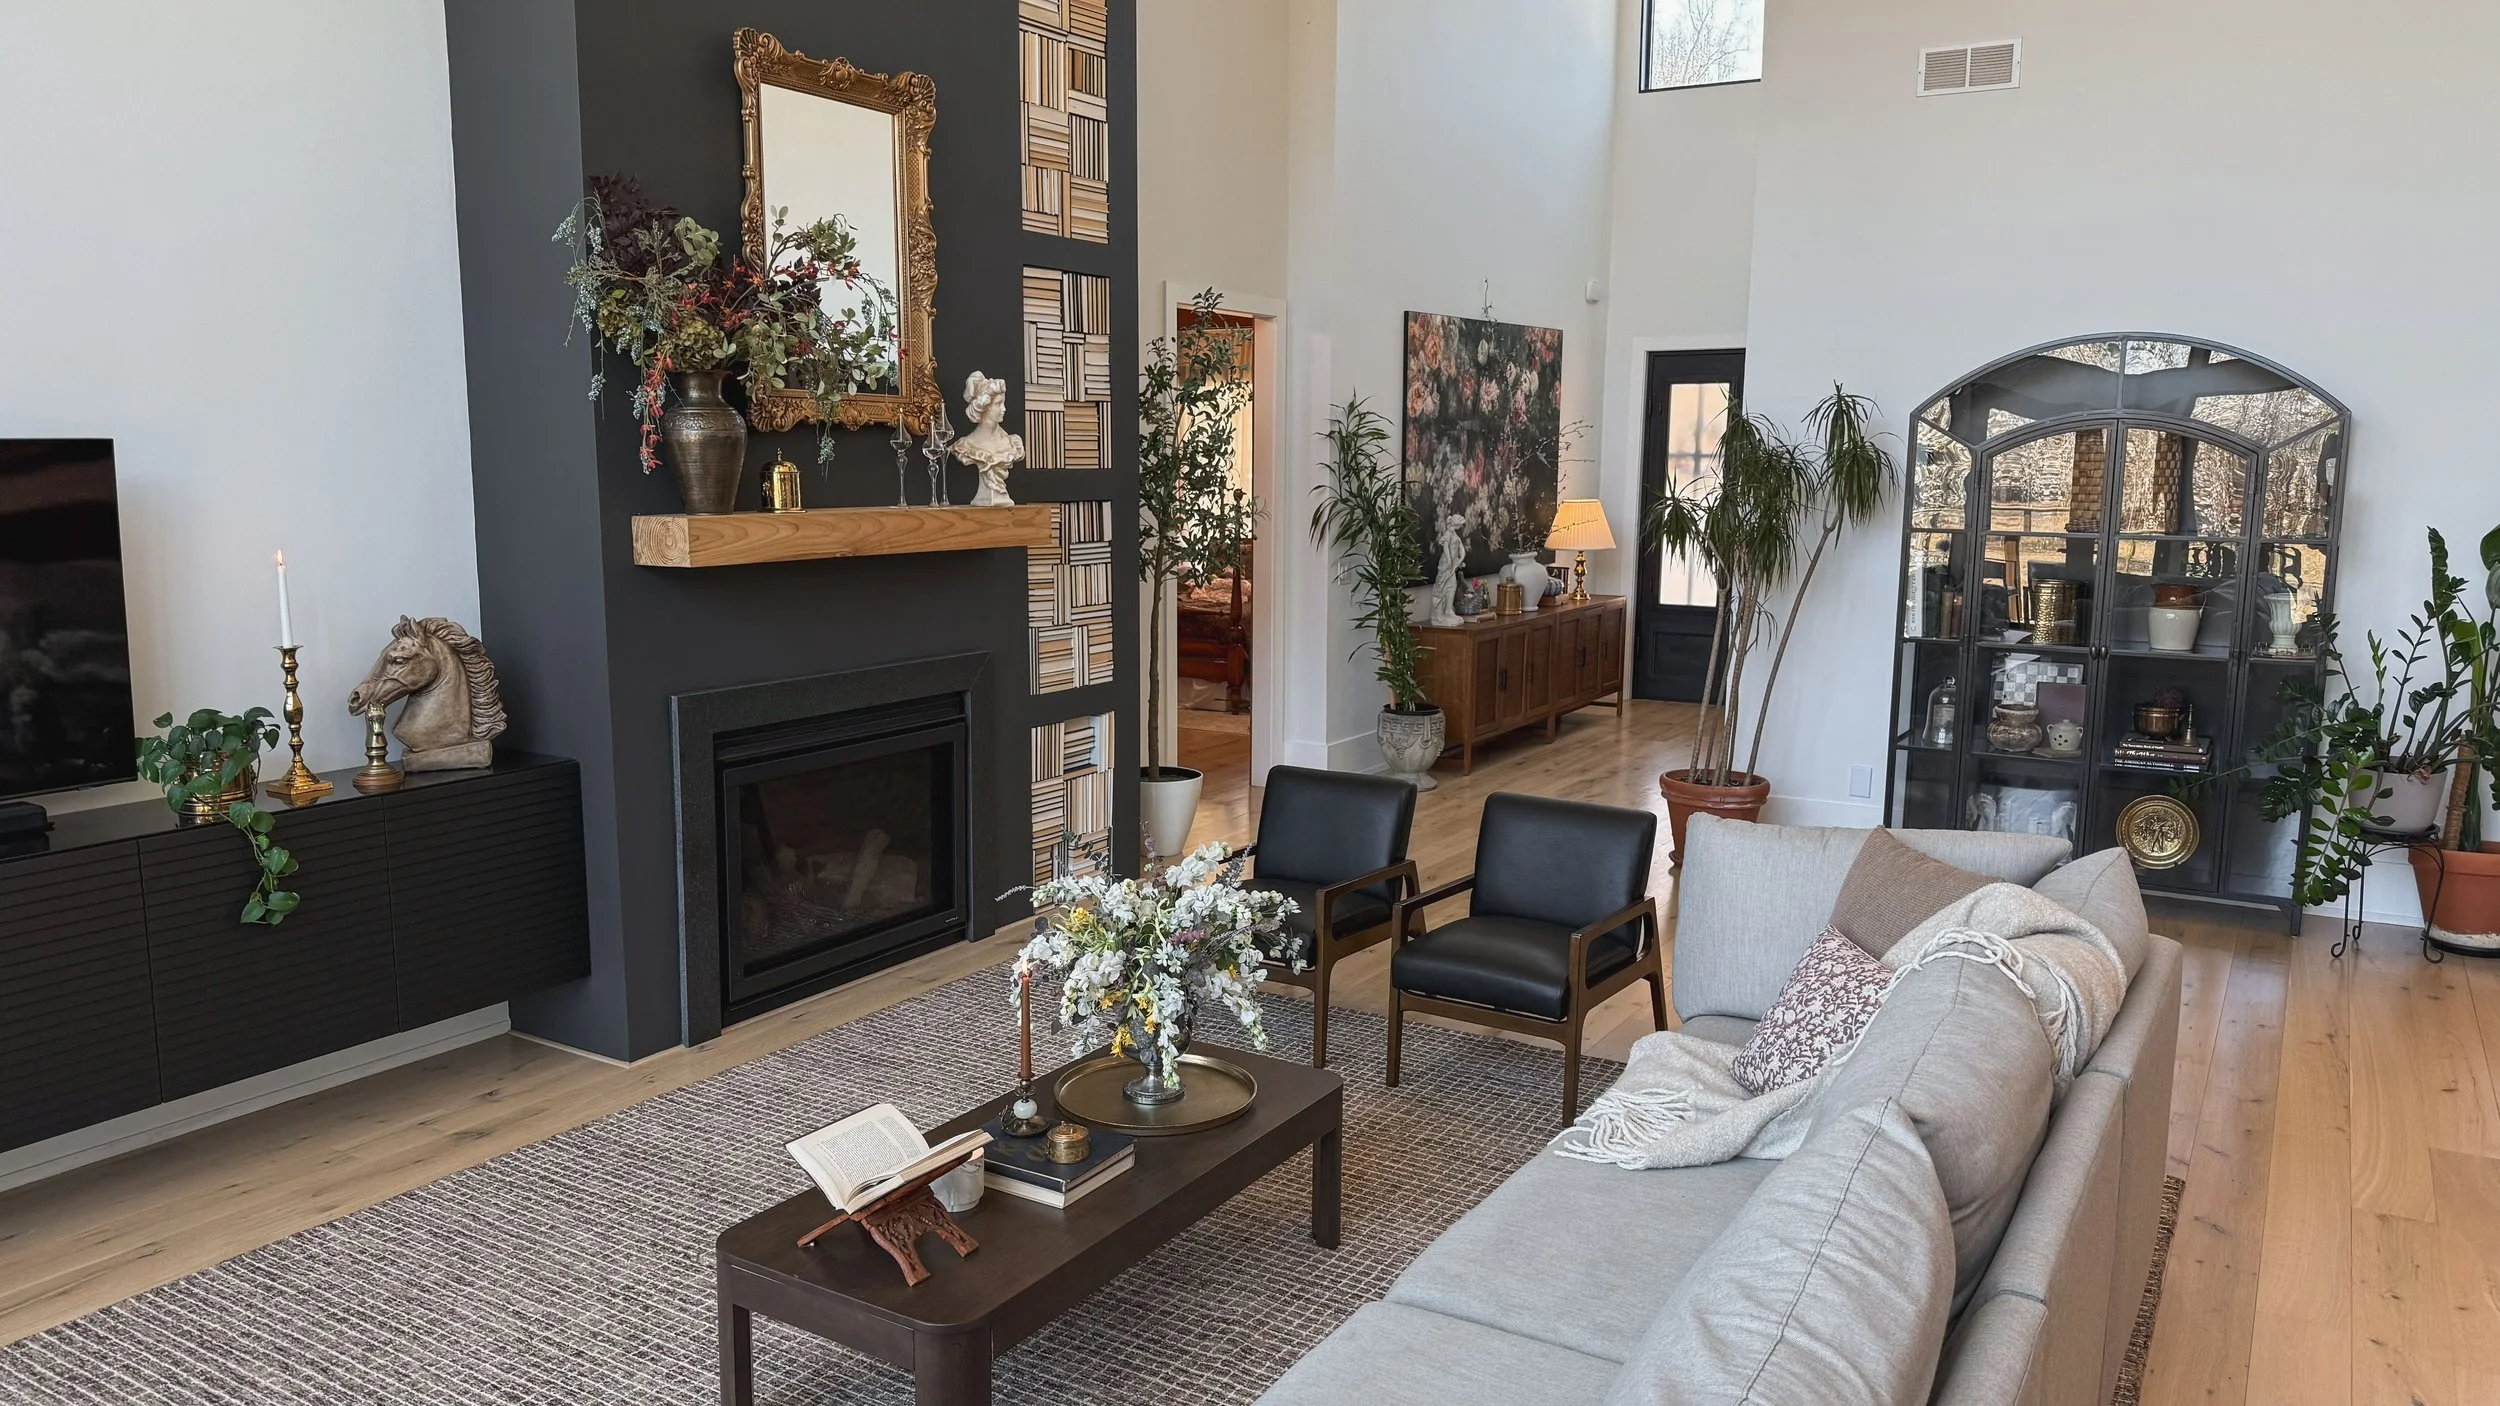
Living room rug linked here.
Office

Office rug linked here.
Guest Bedroom in 2024

Rug linked here.
Guest Room in 2025
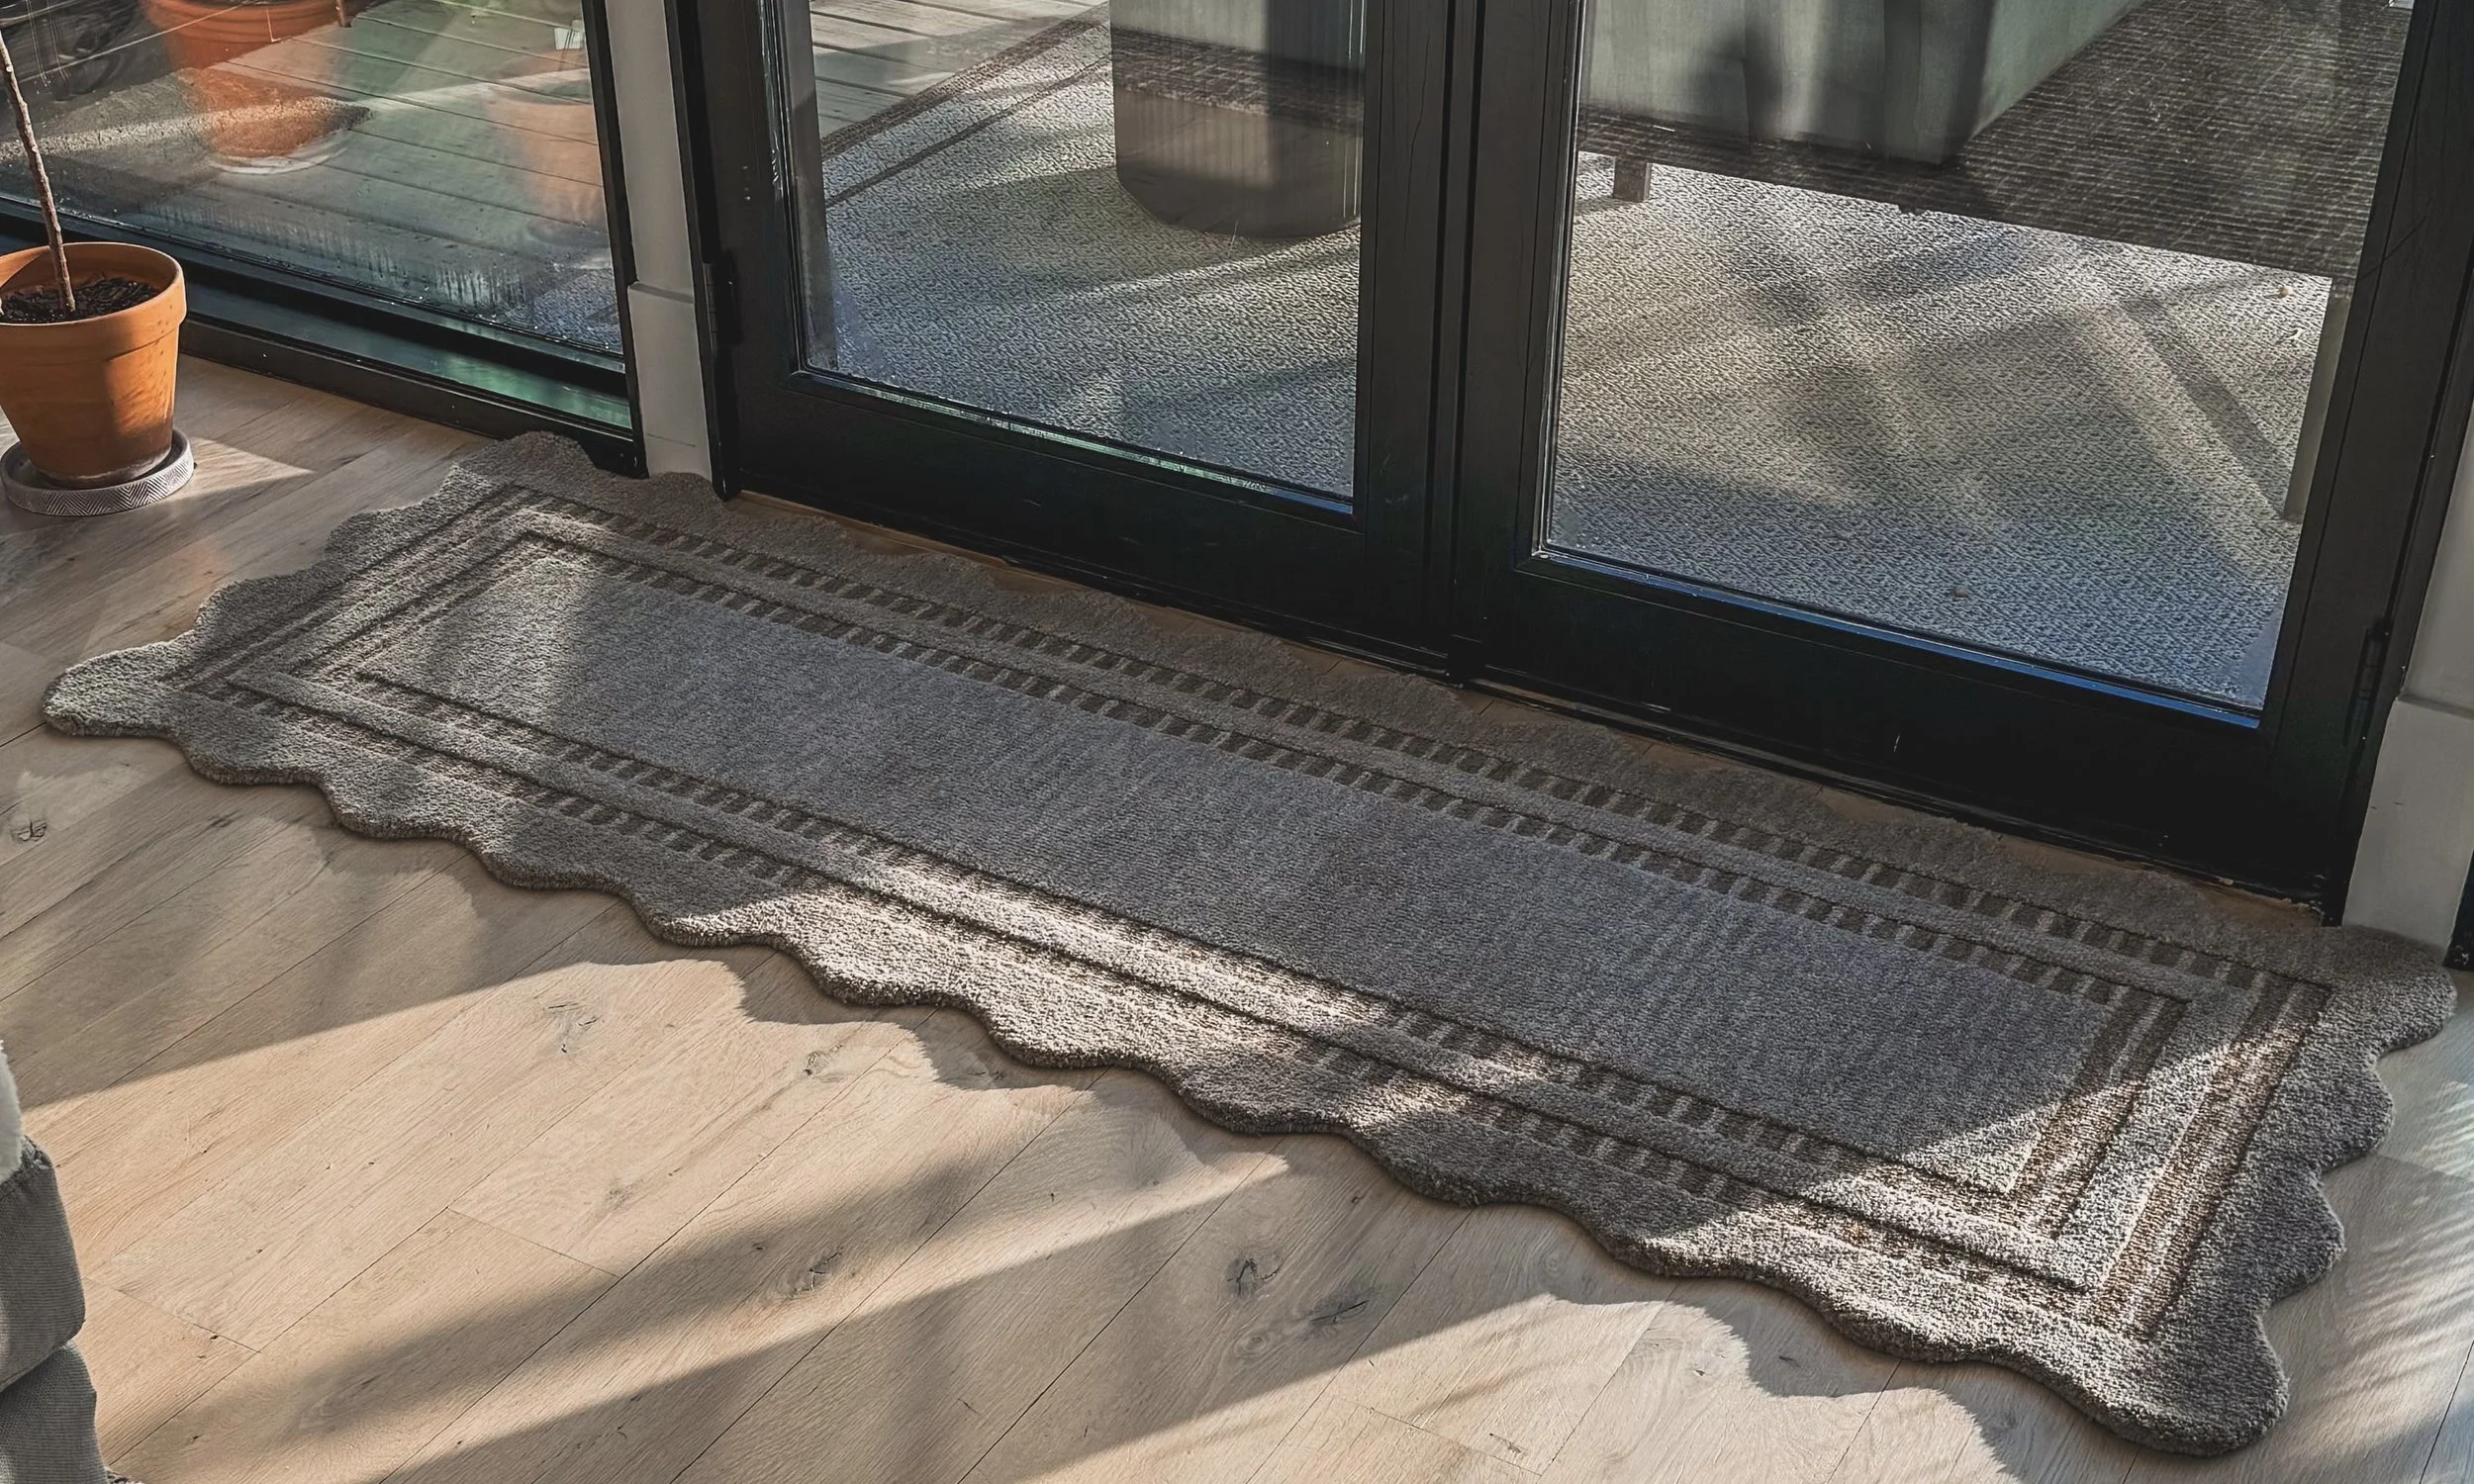
Back door rug linked here (also comes in other sizes).
Entryway

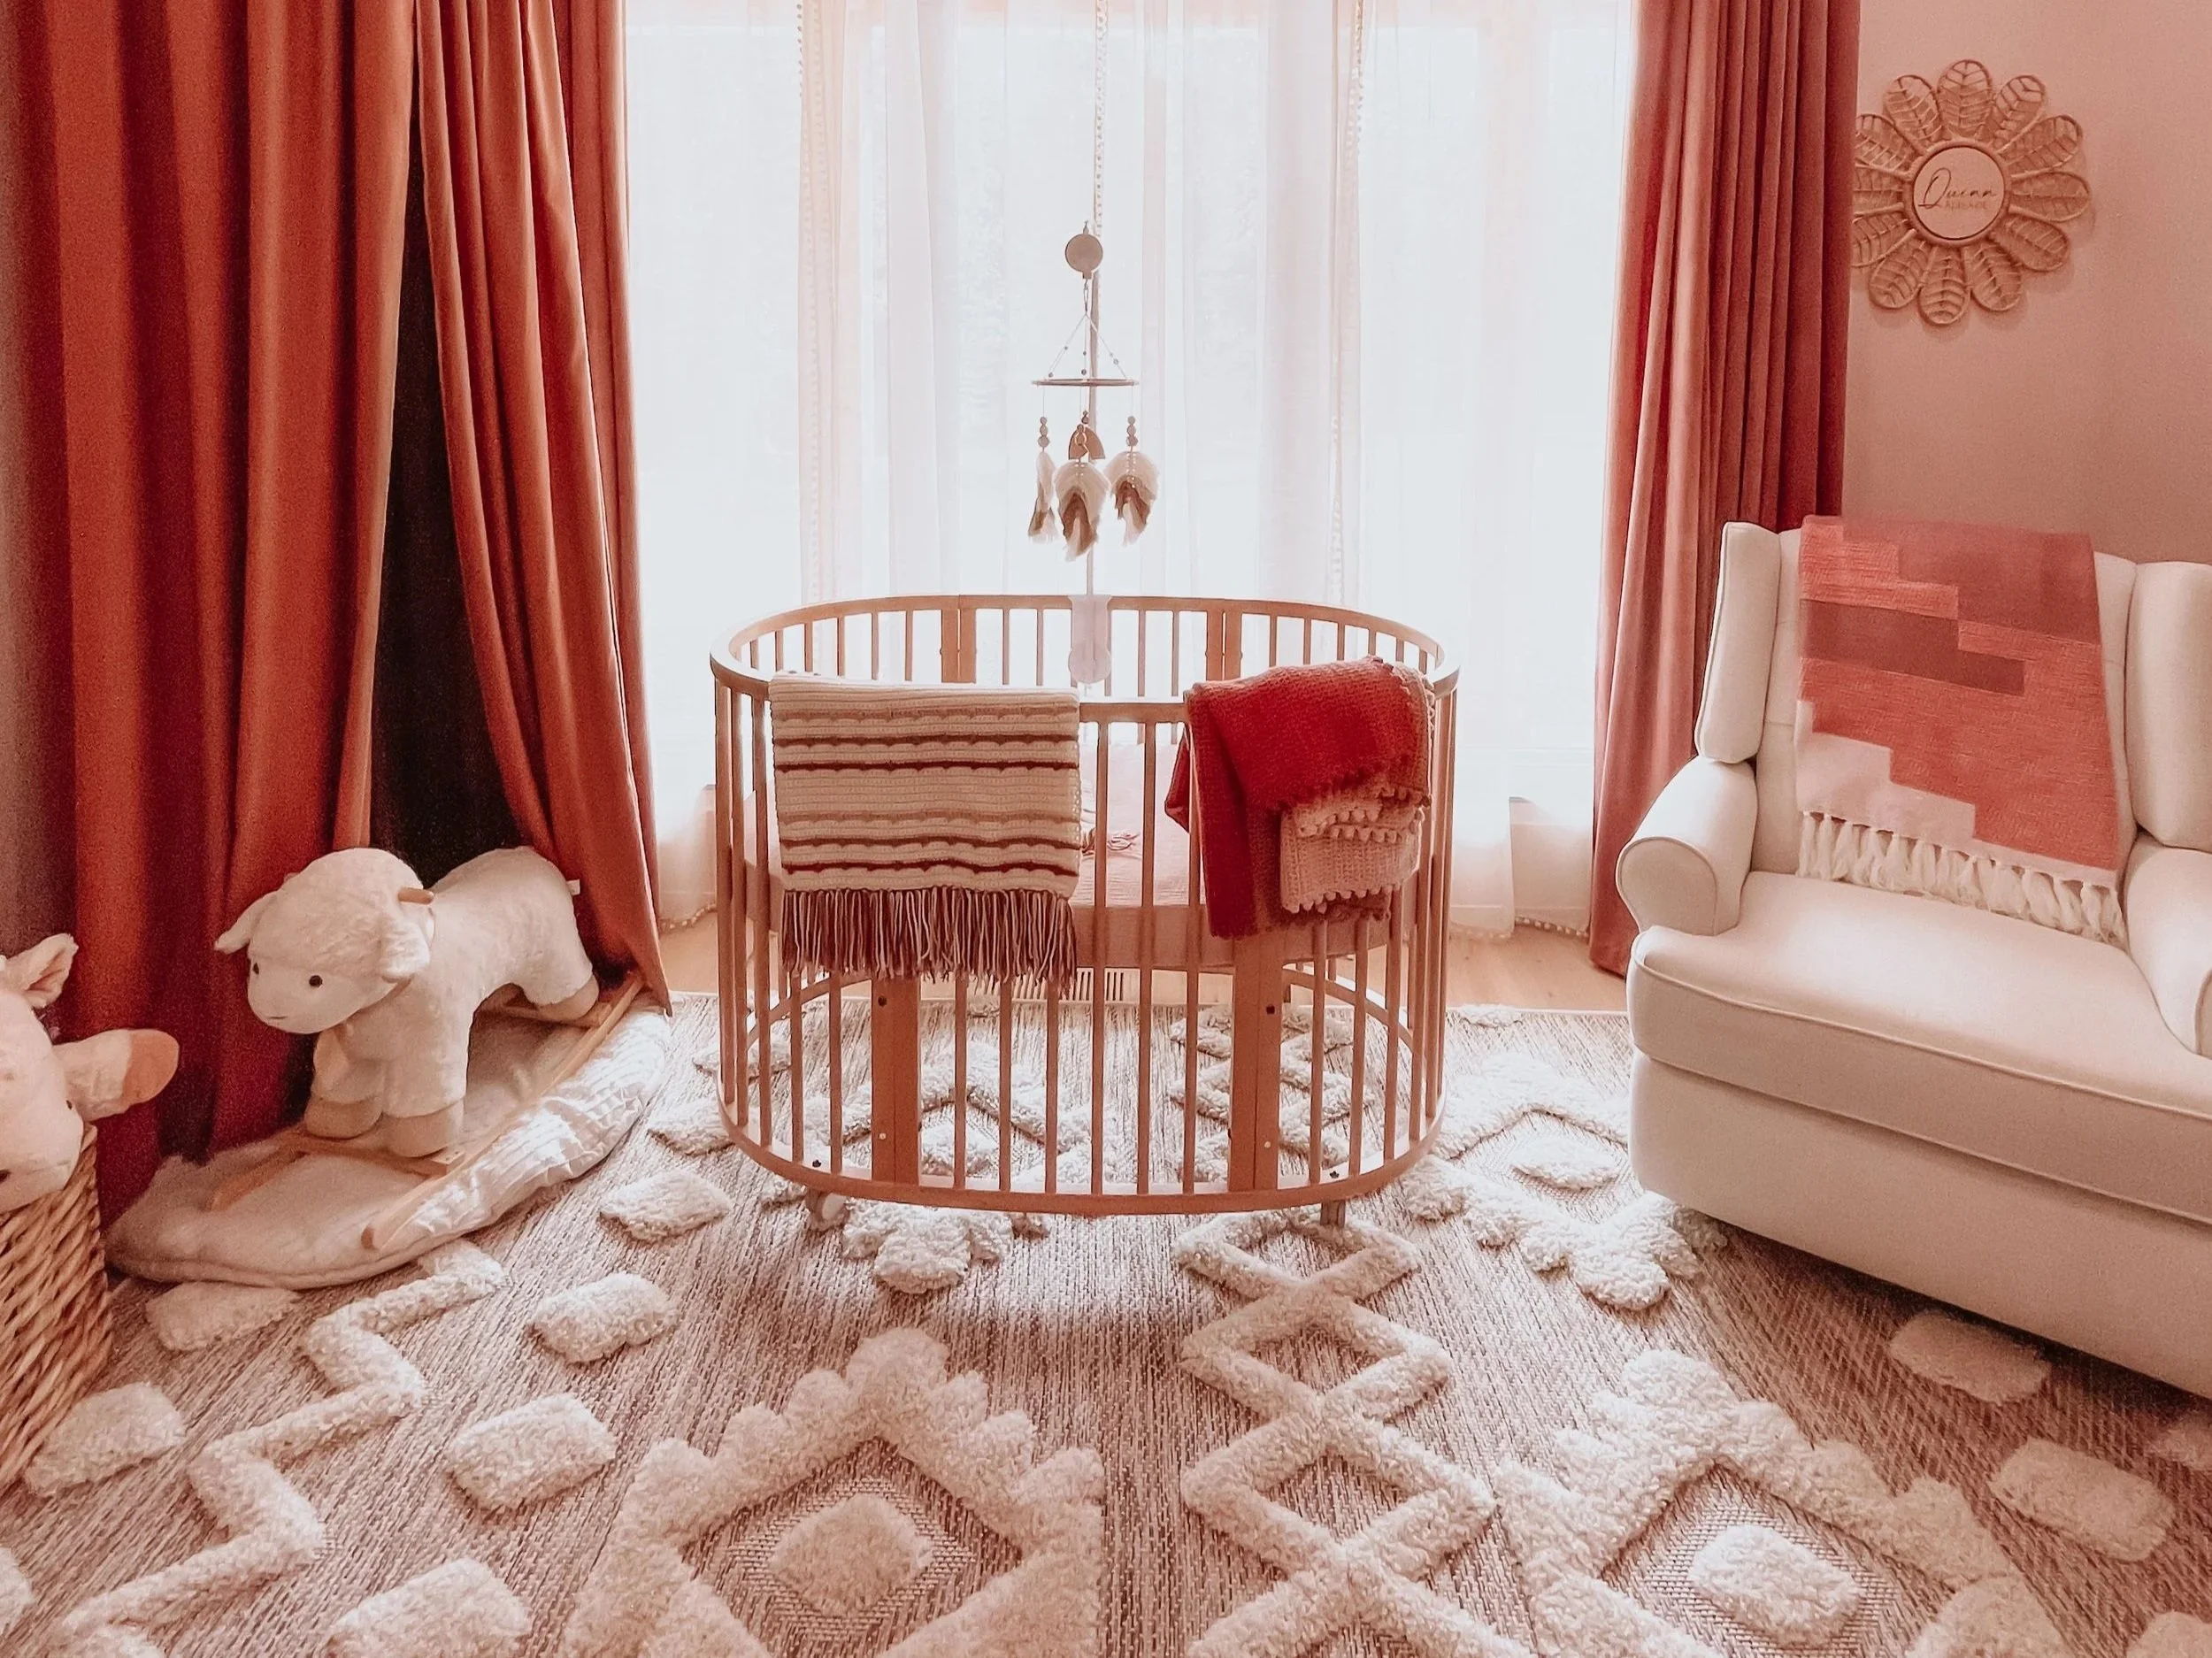
Nursery high-low rug linked here.
Toddler Room

Play mat linked here.
Front Porch

Front porch rug linked here.
Deck

Front porch rug linked here.
If you liked this, you might be interested in the wallpaper in my house!

Mixing Faux & Real Plants indoors
If you’ve ever seem photos of the various rooms in my home and wondered, “Wait… is that real?” the answer is sometimes. I love plants and flowers for the life and texture they bring to a space, but let’s be honest, I can’t keep everything alive. So I’ve found a sweet spot by mixing real and faux greenery throughout my house based on one thing: how likely I am to actually take care of them.
In areas I frequent every day , I go with real plants because I’m much more likely to water them if I see them.
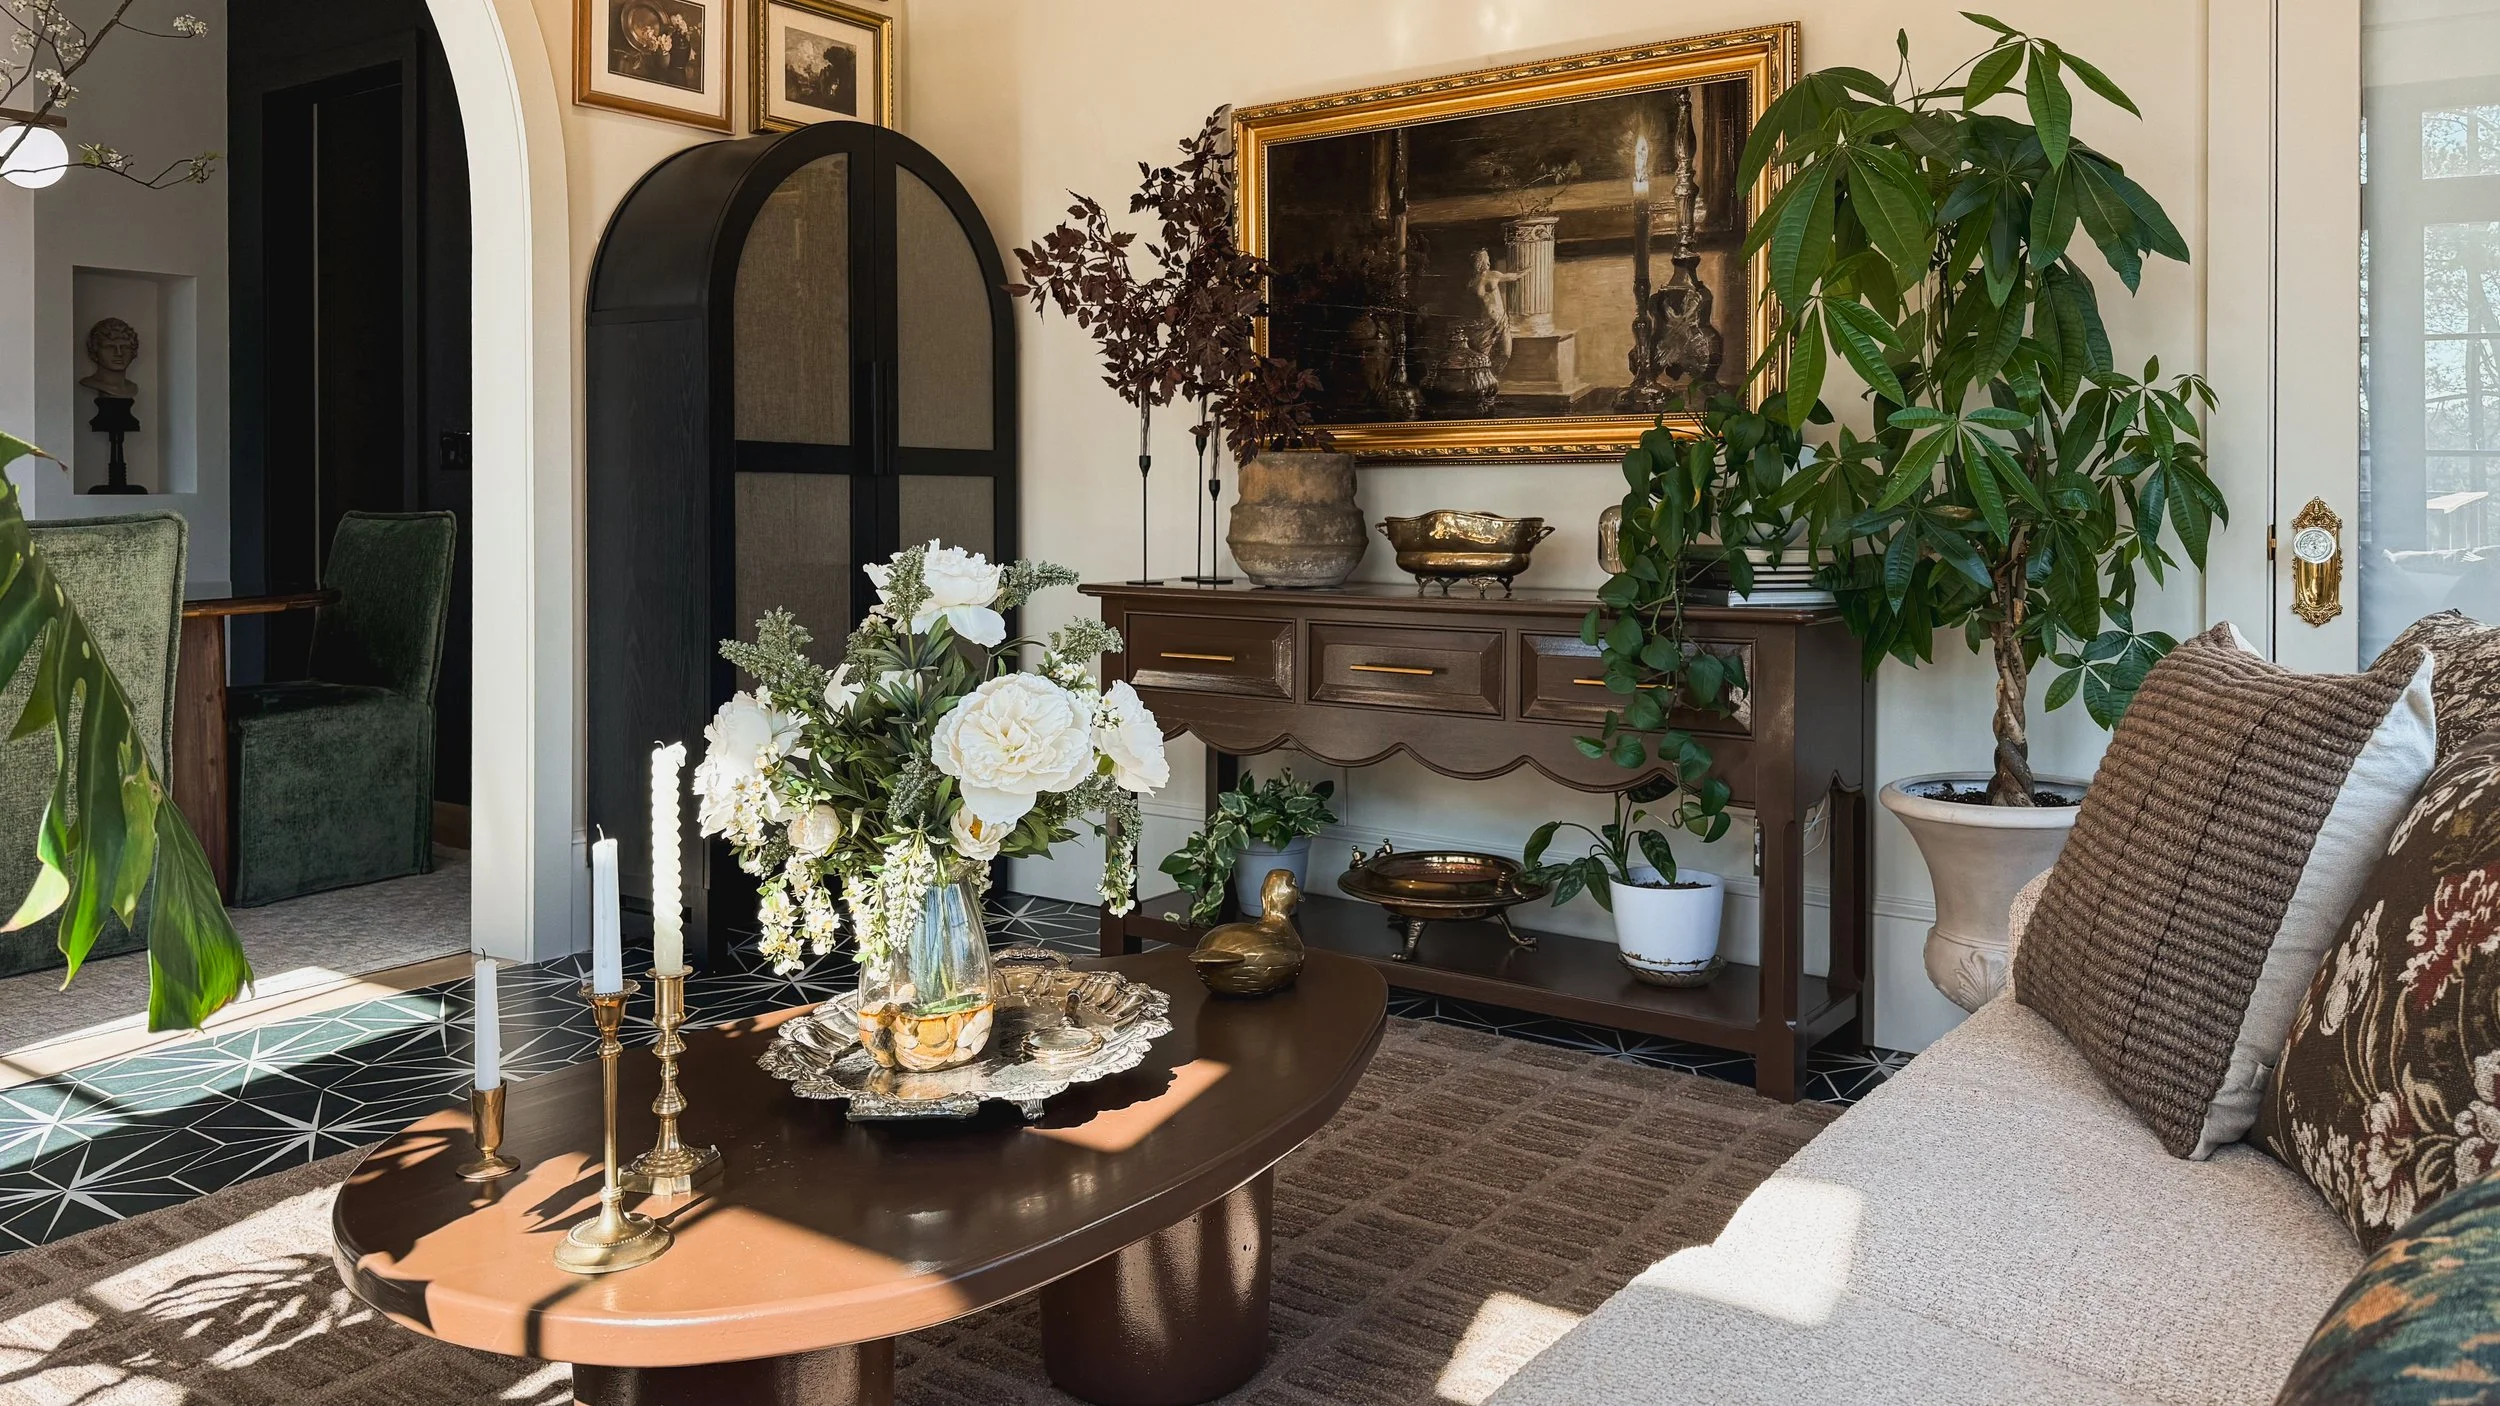
My sunroom is full of happy real plants like my monstera, snake plant, and money tree, and three small real plants under a console table that has a hidden grow light. They’re thriving, and I love seeing that little burst of green when I walk by. However, the white flower arrangement on the coffee table is faux from an estate sale.
The primary bathroom is a little mix of both. There’s a real snake plant soaking up the humidity, but the red leaf stems and hydrangeas are faux.

My primary bedroom is where the blinds are usually drawn, so it’s all faux in there. Most of the pieces came from estate sales and they give color and texture to the room.

The living room is mostly real plants except for the faux palm, because I’ve accepted I can’t keep palms alive no matter how hard I try, and a faux olive tree. Those are finicky and I’m not about that stress. Everything else in there is real and happy because of the massive amount of light this space gets.

My entryway has a sweet little real plant that makes me smile every time I walk in the door, and the office has a stunning faux floral arrangement I scored at an estate sale. It looks so good, it fools just about everyone.
So that’s my not-so-secret formula: real where I see them, faux where I forget them. Mixing the two lets me enjoy the beauty of plants without the guilt, and honestly, some of those faux ones are pulling their weight in a big way.
Shop the Rooms
If you liked this, then you might be interested in my vintage inspired finds from amazon!

Open concept decorating : rugs
In our open concept home, rugs do more than just warm up the floors. They help define each space and bring structure to the layout. Our home starts with an entryway that flows into the living room, which is open to both the kitchen and dining area. From that main space, you can also see directly into the sunroom, which makes the entire layout feel wide open but still cozy.


Each zone has its own rug, including one by the back door, and even the sunroom rug adds to the layered look. None of the rugs match exactly, but they all stay within the same neutral palette of tans and browns. This keeps everything feeling cohesive without being overly coordinated. The varied textures and patterns create interest while the tones tie it all together in a way that feels natural and relaxed.
The only thing I’d eventually swap out are the grey kitchen mats. They’re the last holdout from an older color scheme, but they were pricey and super comfy, so they’ll be sticking around a while longer. For now, they still work in the space and honestly I do not mind the contrast. One day I will find something just as functional that fits the current color palette a bit better, but until then they are staying put.


Family Trip to Gatlinburg and Pigeon Forge: Our Itinerary, Tips, and Recommendations

We just got back from a family trip to Gatlinburg and Pigeon Forge, and it was such a fun mountain getaway. Between Dollywood, hiking in the Smoky Mountains, dinner shows, and exploring downtown, we packed a lot into a long weekend. If you are planning a trip, here is our full itinerary with tips on what to do, where to stay, and what to skip.
Where to Stay in Gatlinburg and Pigeon Forge

We chose to stay in Pigeon Forge at the top of a mountain instead of downtown Gatlinburg, and it was the best decision for our family. Downtown Gatlinburg is very busy with lots of restaurants and attractions, which is perfect if you want a nightlife-focused trip. For a family vacation, we preferred the peace and quiet of the mountains.
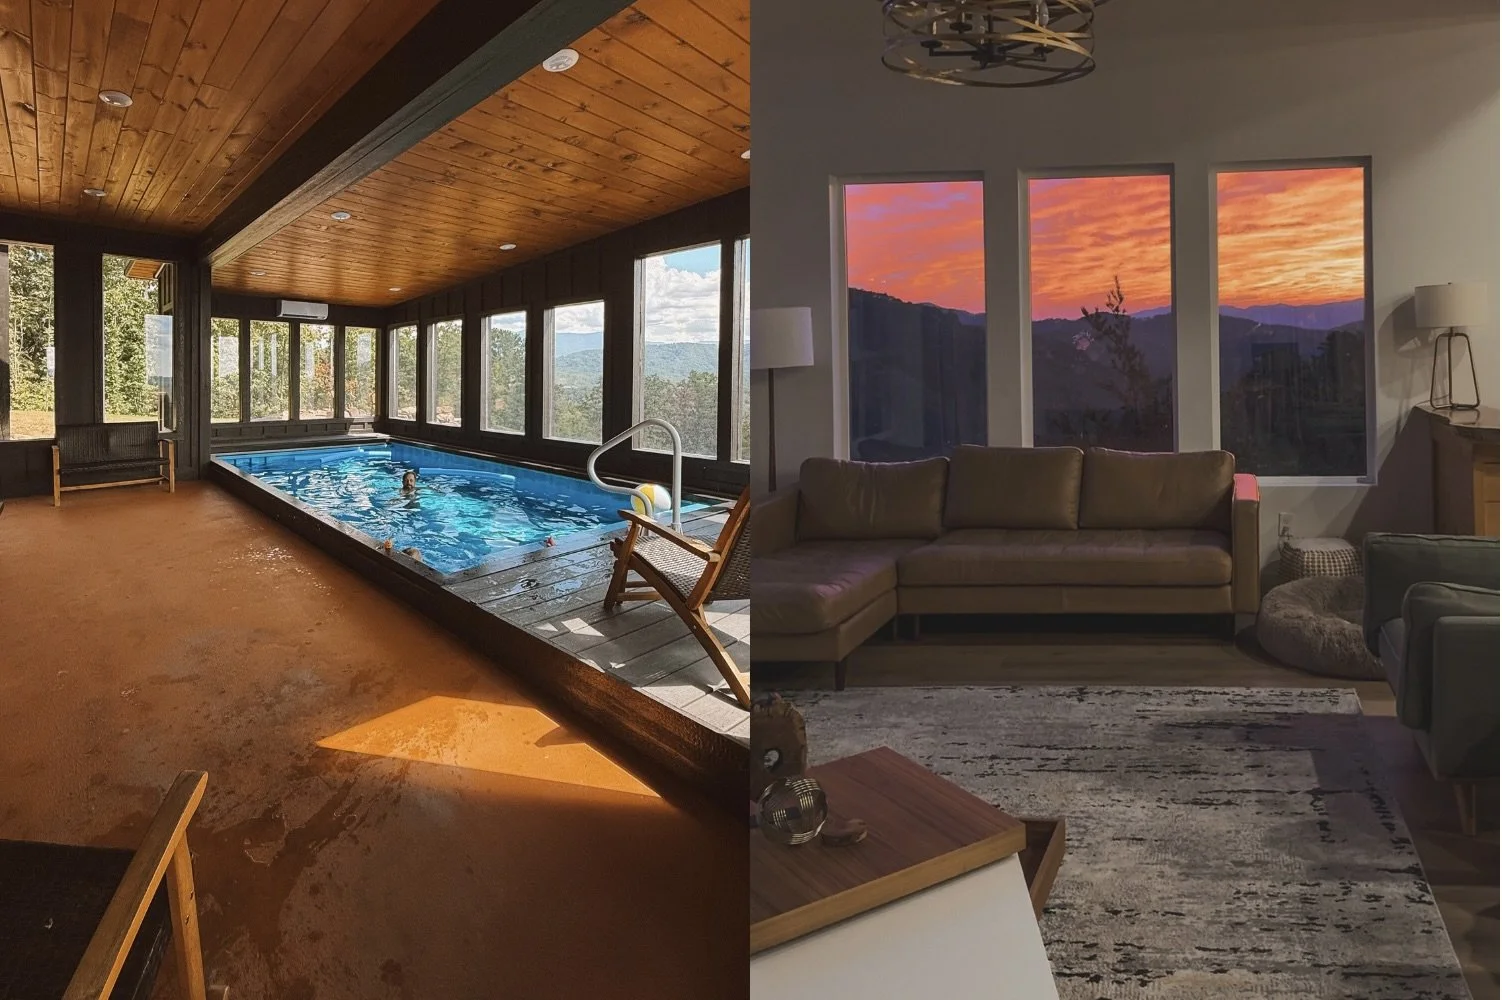
Our Airbnb had everything we could want for a family stay, including an indoor pool, rooftop deck, hot tub, and even a small guest suite. At night we could hear wedding music drifting over from a nearby venue, which made the evenings feel extra fun. The hosts left snacks and wine for us when we arrived, which was such a thoughtful touch. You can check out the exact cabin we stayed in here.

The drive from Pigeon Forge to Gatlinburg took about 20 minutes, so we were able to enjoy both areas during our trip.
Thursday: Arrival Day
We checked into our Airbnb, unpacked, and went for a swim in the indoor pool. After traveling, this was the perfect way to unwind and kick off the trip.
Friday: A Full Day at Dollywood
Dollywood was a highlight of our family trip to Gatlinburg. We opened presents for Zach’s birthday in the morning and then headed straight to the park, where we spent the entire day.

Here are a few Dollywood tips that made our day easier:
Try the cinnamon bread. It really is that good.
Park in Lot F or splurge for priority parking if you want to avoid waiting for the tram.
The Fast Pass is worth it, especially if you are going on a busy day. If not, get there right when the park opens and go straight to the big rides to beat the rush.
Dollywood offers a Parent Swap system for roller coasters. You wait in line together, one parent rides while the other waits with your child, and then you switch without waiting in line again.
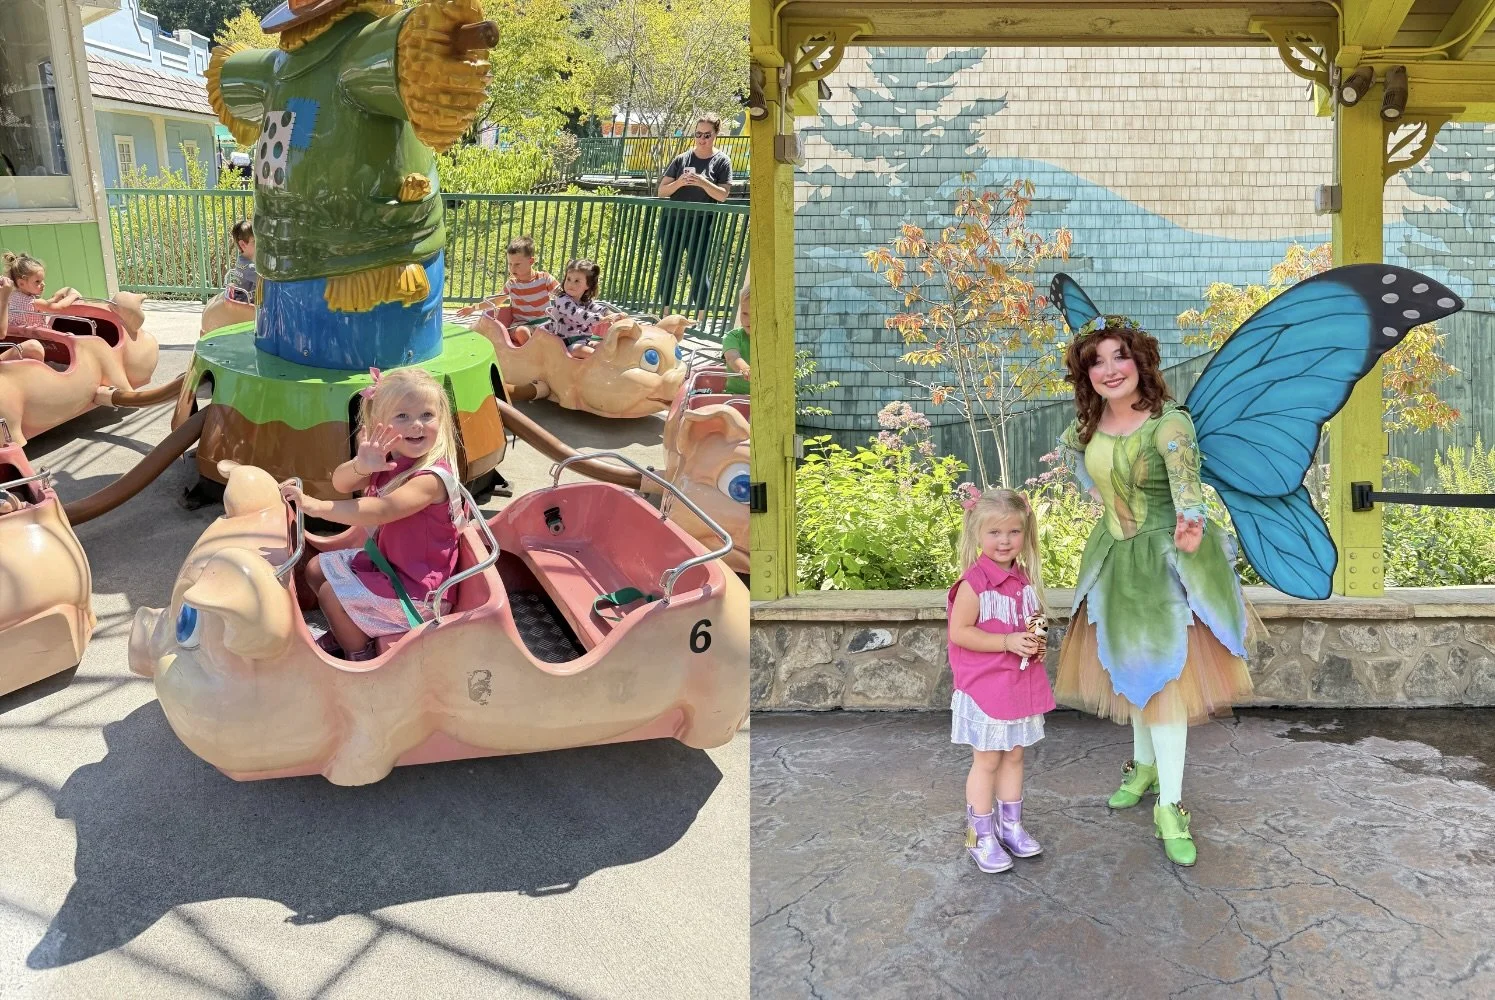
Even though our daughter was only 3, she was just tall enough (39”) to ride some real roller coasters with us, and there were plenty of kiddie rides for her age and younger as well. We spent about 8 to 9 hours riding rides and still did not see everything. Next time, I would love to explore more of the shows, food, and other attractions Dollywood offers. Overall this is a MUST, and I cannot wait to go back.
Saturday: Hiking and a Dinner Show
We started the day at Sugarlands Visitor Center and hiked Cataract Falls. The visitor center had a little museum inside where they had taxidermy animals of all of the native wildlife. My daughter loves Wild Kratts so this was right up her alley. The hike was a 1 mile easy and kid-friendly hike with a 25ft waterfall that you can walk right up to at the halfway point.

For lunch, we ate at No Way Jose’s Mexican Cantina in downtown Gatlinburg. This was a fine choice because they had vegetarian and vegan options for Zach but other than that it was a pretty standard Mexican restaurant that you can eat at anywhere. Downtown Gatlinburg was majorly crowded and parking was $20. If you are traveling with kids, I highly recommend bringing a stroller. Even though we are not normally stroller people, it was a lot of walking. There is no shortage of shops and attractions on the strip if you want to spend a day there. We left after lunch to head back to the cabin, swim in the pool and freshen up before dinner.
After some downtime at the Airbnb, we got ready for the Pirates Voyage Dinner Show in Pigeon Forge. The show itself was incredible and so much fun for both kids and adults.

Photo Credit: Piratesvoyage.com
They offer vegetarian and vegan options, which was a huge plus. The food was average, but the entertainment and service were top notch. You do not need to arrive a full hour early, despite what they say. Thirty minutes is plenty of time unless you want face painting or alcoholic drinks before the show.

Photo Credit: Piratesvoyage.com
Sunday: Anakeesta in Gatlinburg
We finished our trip with a visit to Anakeesta. We bought tickets online that morning and arrived around 9:30 AM. I would not arrive any later than that on the weekend as this place gets BUSY! You get in line at the base of the mountain and then you either take a chair lift (the fastest option), gondola or truck to get to the village at the top. There was basically no wait to get on the lift that early, which was a huge time-saver. By the time we left around 2 PM, people were saying they had already waited over three and a half hours just to get on the lift!! Going early is key.

When we got to the top we went straight to the Treetop Skywalk, which was beautiful. If you are planning a visit, my biggest tip is to go straight to the rail coasters first. The line moves *slowly* and only gets longer as the day goes on. At around 10am the wait for the rail coaster was 30+ minutes and was double that by the time we got off the ride.

Anakeesta is stroller-friendly and I definitely recommend bringing one if you are traveling with young kids because there is a lot of walking. The village has lots to do including zip-lining, mountain coasters, tree canopy walk, several unique playgrounds for kids, food and more. They also have a nighttime event that you need additional tickets for called Astra Lumina but we skipped it since it started well after my daughters bedtime.
Final Thoughts on Our Family Trip to Gatlinburg
This trip was the perfect mix of adventure and relaxation. Staying in Pigeon Forge gave us a peaceful mountain retreat while still being close enough to enjoy the best things to do in Gatlinburg. Dollywood and Anakeesta were our top two experiences, and I would absolutely recommend them to families with kids or adults without kids
Next time, I want to try another dinner show since we loved Pirates Voyage so much (there are several to choose from). Dollywood again is a MUST. I have also heard great things about The Island in Pigeon Forge and, of course, a classic Gatlinburg pancake house breakfast is on my list.
If you are planning a family trip to Gatlinburg or Pigeon Forge, here are my top tips:
Stay in Pigeon Forge or the mountains if you want a quieter setting.
Do Dollywood and Anakeesta, and arrive early to both.
Bring a stroller for kids, even if you do not usually use one.
Try at least one dinner show.
We had the best time and cannot wait to go back.

How It Held Up: Play Kitchen Makeover

A while back, I shared a full tutorial on how to give a basic play kitchen a complete makeover. Since then, one of the most common questions I get is whether the project has held up and if I’d recommend doing it. After a lot of daily play and plenty of pretend meals, I can confidently say: yes, it’s held up beautifully.
What’s Holding Up Well
The overall structure is still solid, and most of the painted surfaces, and hardware look just as good as the day the project was finished. Even after heavy use, the play kitchen is still a standout piece and continues to be one of the most-used toys in our home.

Where I See Wear and Tear
That said, there are a few areas that show their age:
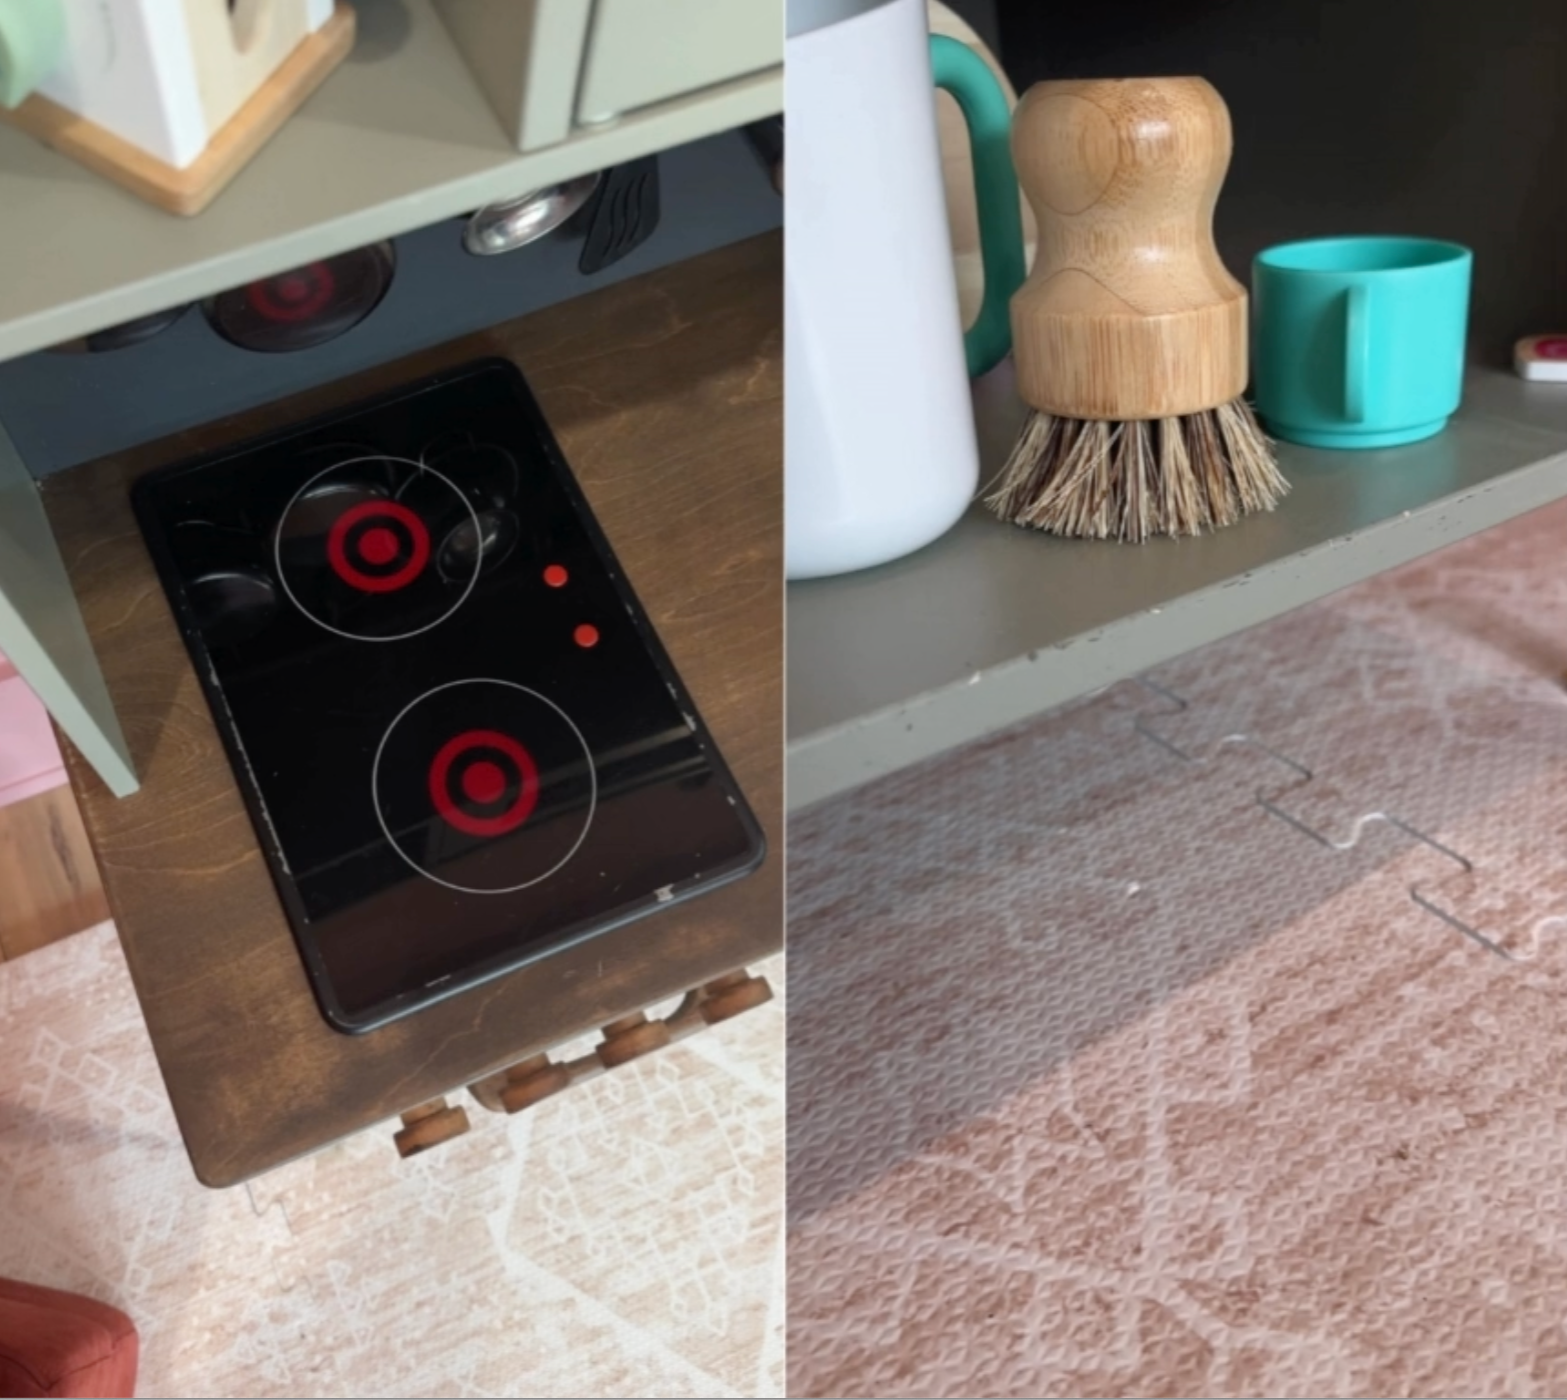
Cabinet shelves – The inside shelves have scratches and scuffs from toys being dragged in and out.
Painted stovetop edges – This is the one part I wouldn’t do again. Painting the edges looked great at first, but the paint chipped quickly. Next time, I’d leave the stovetop edges their original gray.
What I’d Do Differently Next Time
Skip painting the stovetop edges – it just doesn’t hold up.
Add an extra coat of polycrylic – I sealed everything, but a second coat would give extra protection in high-wear spots.
Final Thoughts
Overall, this DIY project has held up incredibly well. With a little extra attention to the stovetop and protective finishes, it could look even fresher for longer. If you’ve been considering this makeover, I’d absolutely recommend it. This is a relatively simple project that makes a huge difference in both looks and play value.
If you’re looking for exactly how I completed this project and what supplies I used, you can read all about it in my original play kitchen makeover blog post!

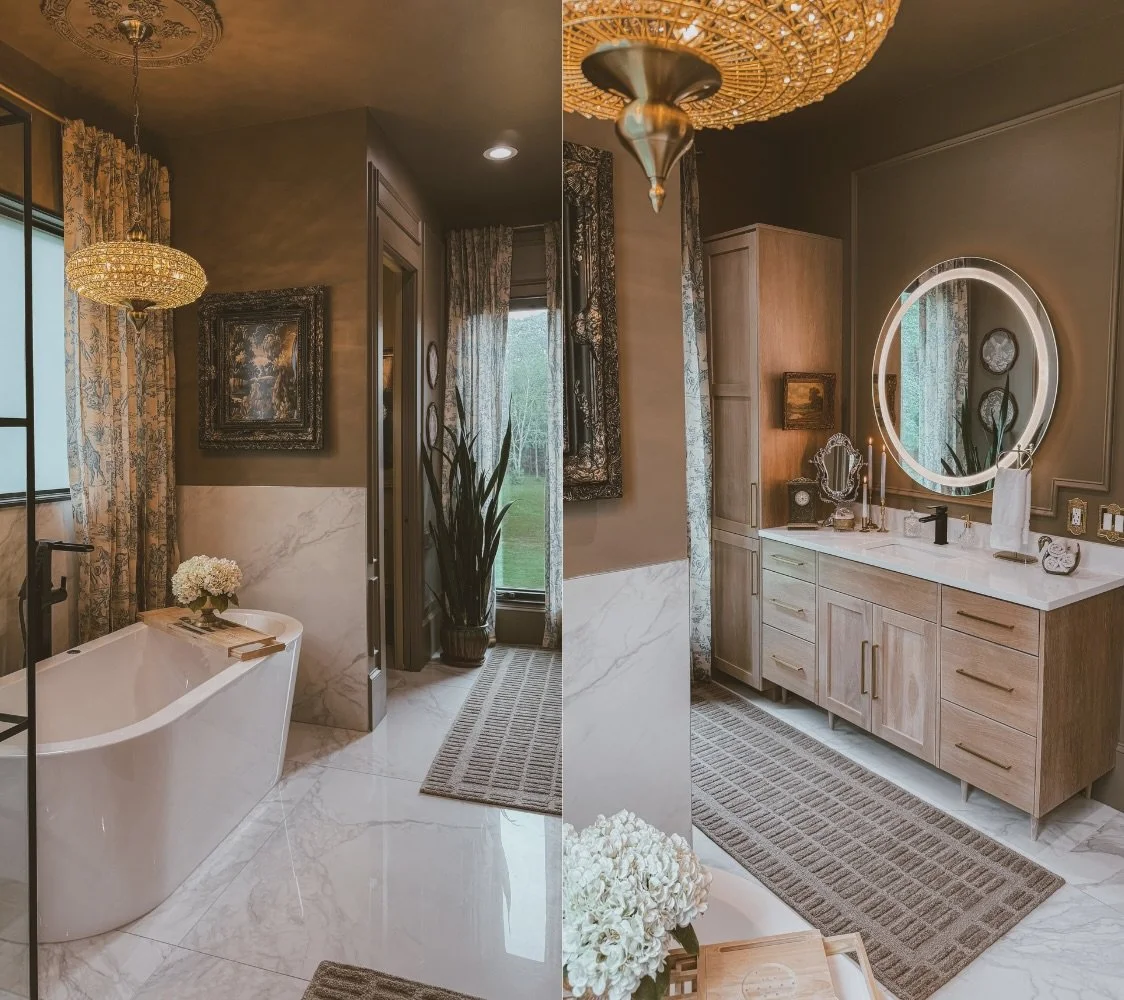
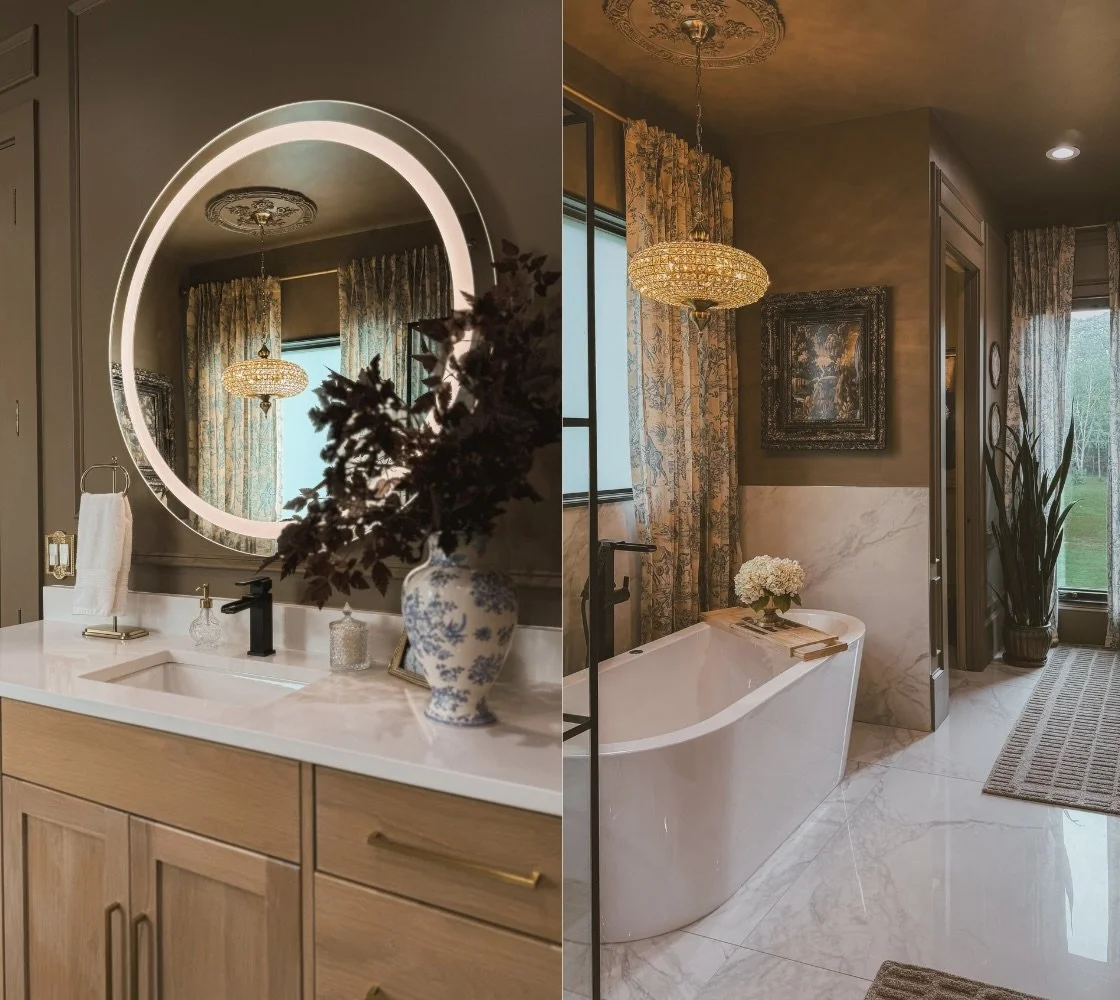
Primary Bathroom Lighting
One of my favorite parts of the bathroom makeover was swapping out the plain can lights and adding two chandeliers. We used a can light converter kit from Amazon (highly recommend) to hang them right where the old can lights were. Interested in a step-by-step tutorial on converting your can lights? Click here!
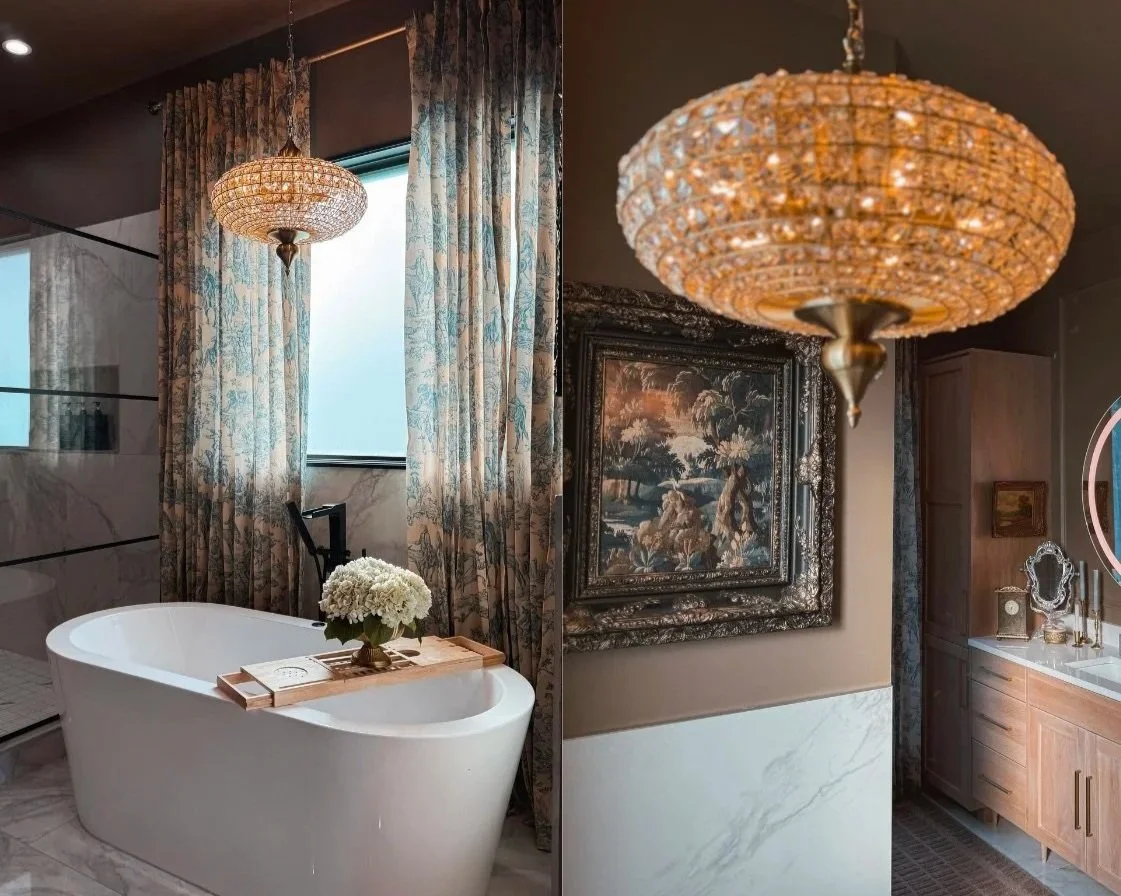
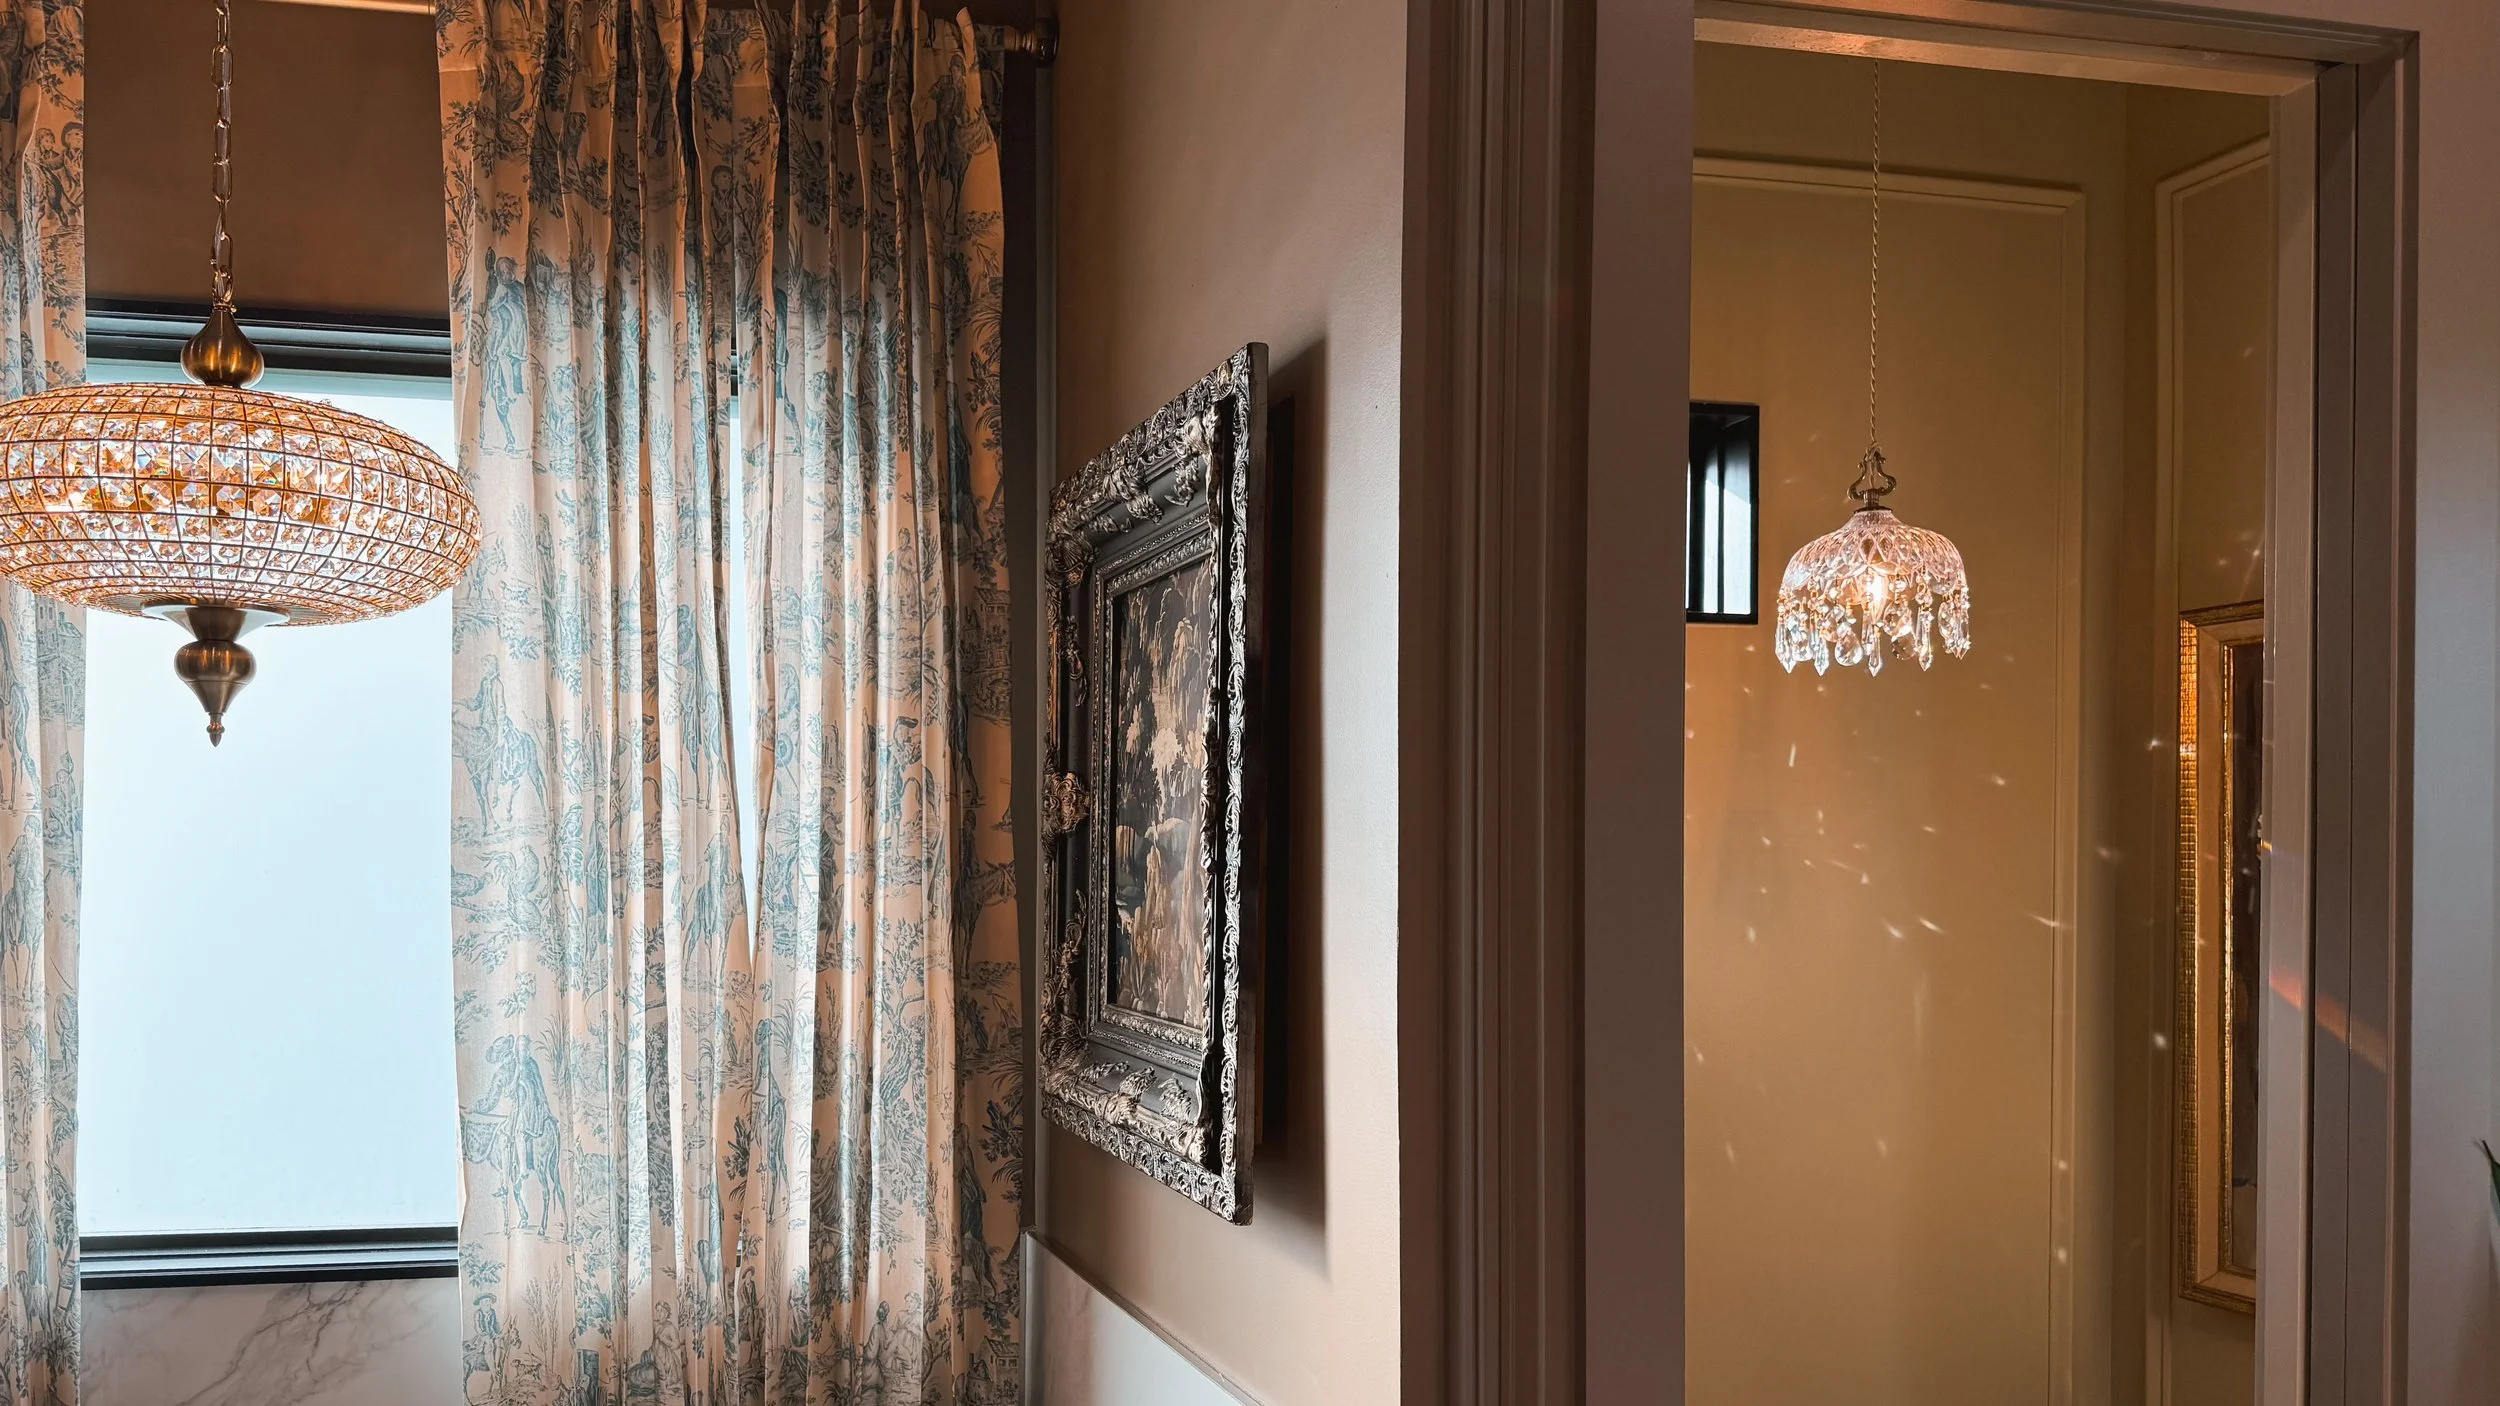
Over the tub, we added a beautiful chandelier paired with a large, ornate ceiling medallion (the same one that’s in the sunroom) that I painted to match the room. It instantly made the whole space feel more finished.

In the water closet, I went with a smaller chandelier that catches the sunset light in the prettiest way. It literally sparkles!! That one has a small ceiling medallion that came with the converter kit, and it worked perfectly. I’ve also used the ceiling medallions that came with the can-light converter kits in the hallway.
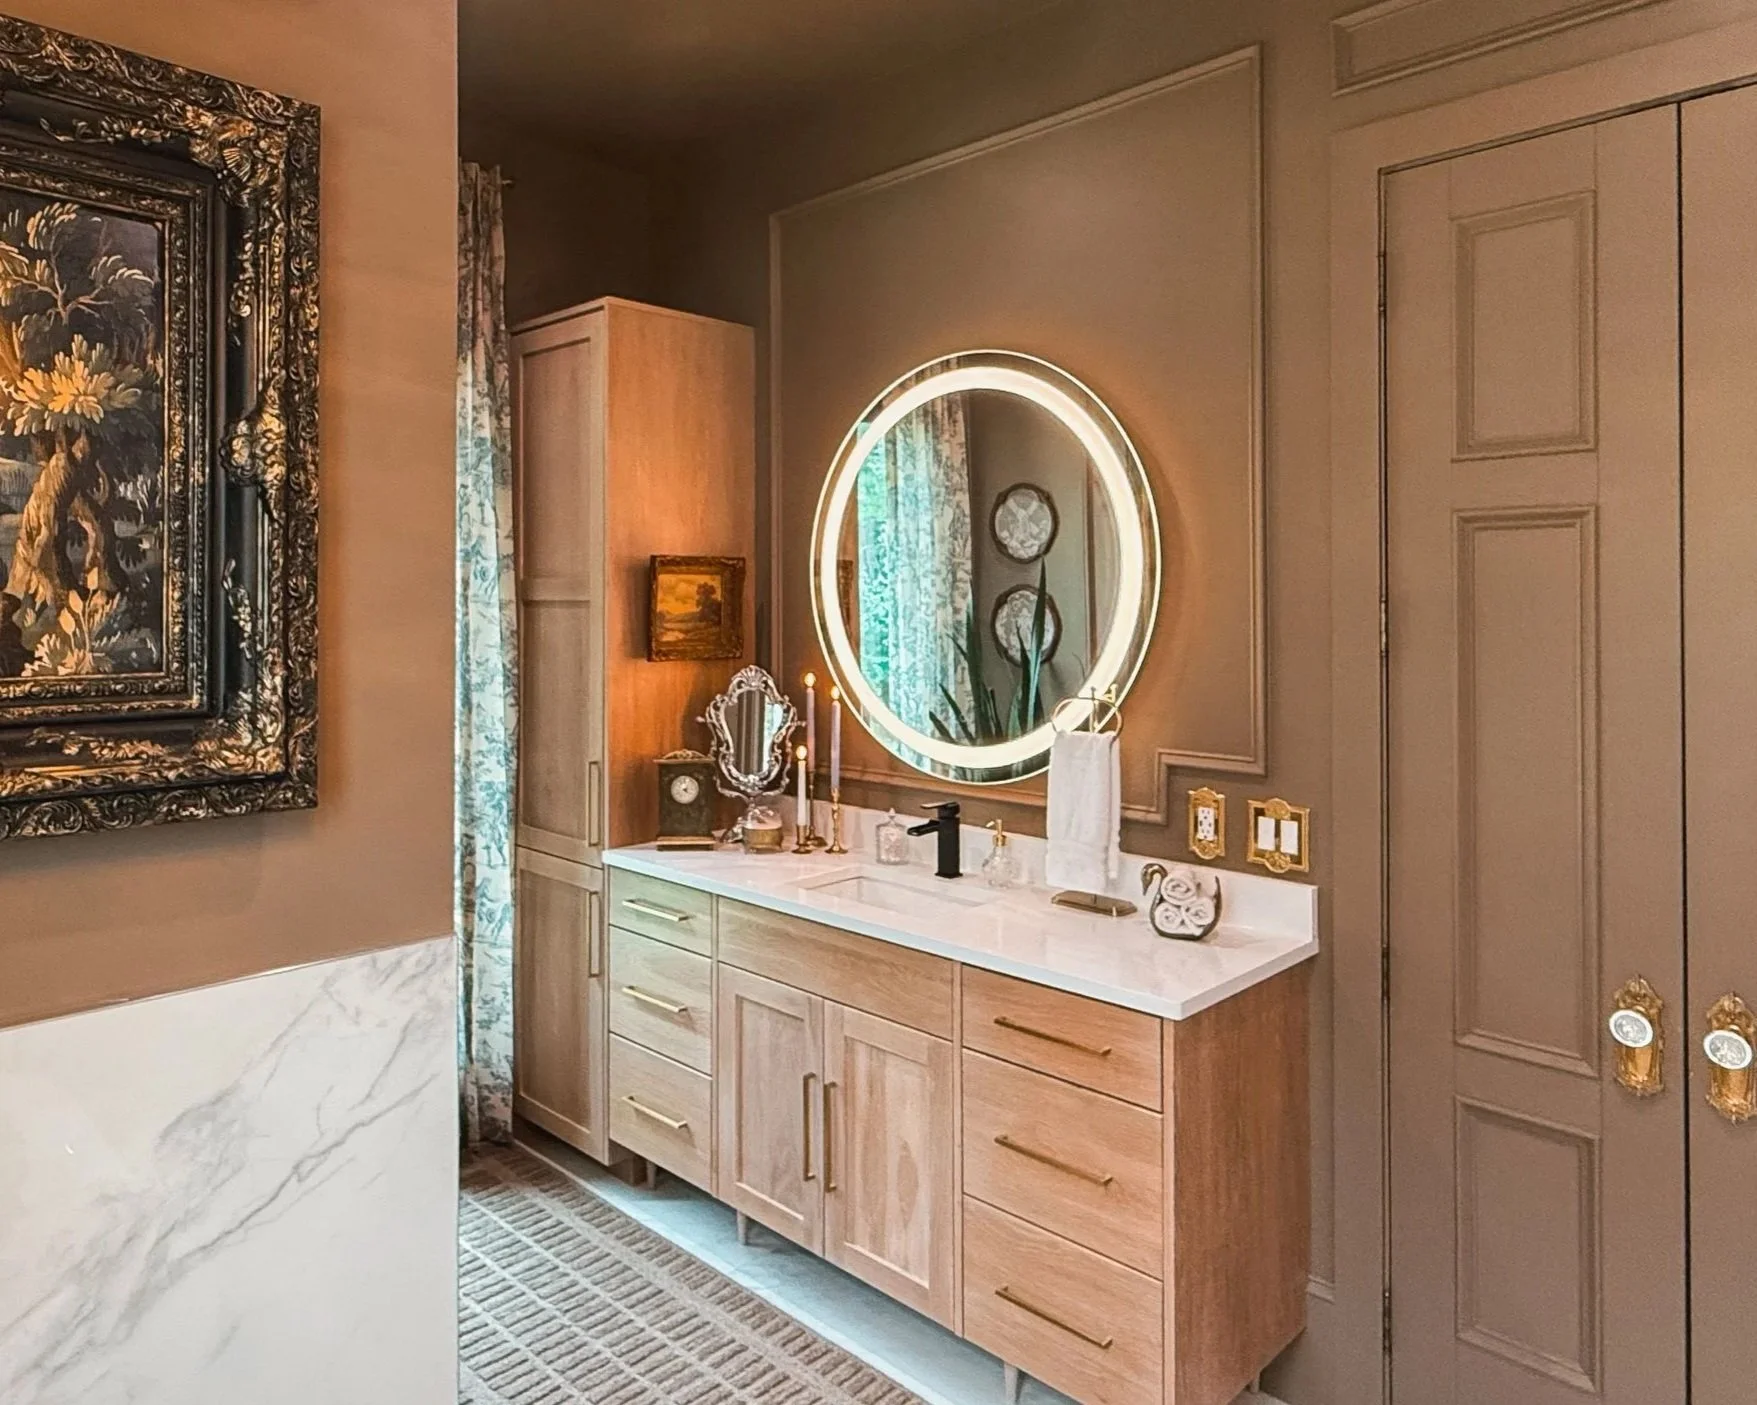
Besides the two chandeliers and the remaining can lights, each sink area also has a large round lit mirror. These are original to the bathroom and are perfect for doing makeup and getting ready.
It’s true what they say, lighting is the jewelry of the room. These lights bring just the right amount of charm and drama.
Links at a Glance